How to Run Real-time Sync with Qiling Disk Master
The Real-The Time Sync function continuously monitors the source directory in real-time, automatically syncing any changes made to files or folders within it. This ensures that your data is immediately backed up and up-to-date.
Here are some common use cases for real-time file synchronization:
- Team collaboration: In a team setting, members can share and edit files, with changes being synchronized in real time, allowing team members to access the latest version of files at any time. This facilitates collaboration and communication.
- Backup and recovery: Real-time file synchronization can be used for data backup and recovery, allowing the backup device to instantly synchronize changes made on the primary device, ensuring real-time backups and facilitating recovery when needed.
- File sharing and access: Real-time file synchronization allows you to share and update files across multiple devices instantly, ensuring that any changes made on one device are automatically synced to others.
- Mobile device synchronization: With real-time file synchronization, you can sync files from desktop computers or servers to mobile devices, allowing on-the-go access, editing, and sharing of files.
- Remote work: Real-time file synchronization allows team members to stay in sync when working with shared files, regardless of their location, by enabling them to view others' changes and synchronize their own changes to other devices in a timely manner.
- Cross-platform synchronization: Real-time file synchronization can be used to sync files between different operating systems, such as syncing files from Windows to Mac or Linux, ensuring file synchronization across platforms.
- Version control: Real-time file synchronization allows team members to collaborate and track the version history of files, recording and synchronizing every file change to enable easy rollback to previous versions.
How to Set up Real-Time Sync with Qiling Disk Master in Windows 10 step by step
Prerequisites for real-time sync
To resolve the issue, download and install the paid file sync software Qiling Disk Master Professional on your computer.
And you need to create a file to sync.
Detailed steps about how to do a real-time sync
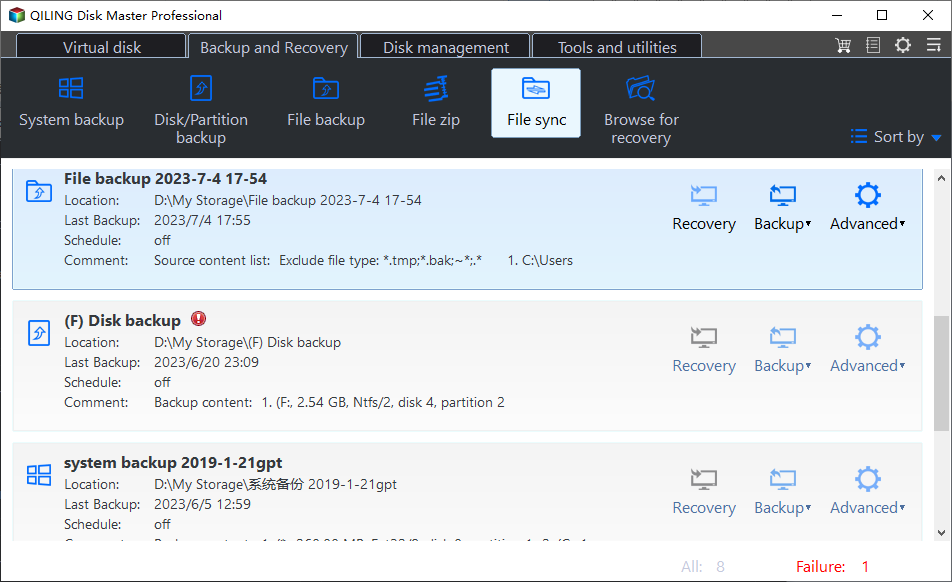
1. To access the backup and recovery feature, click on the "Backup and recovery" tab located on the left side of the interface, and then select the "File Sync" option.
You can name this sync using the Real-Time Sync Task field to distinguish it from other sync tasks. Add the folder you want to sync by clicking "Add Folder", and you can add more folders to sync by clicking the "+" icon.
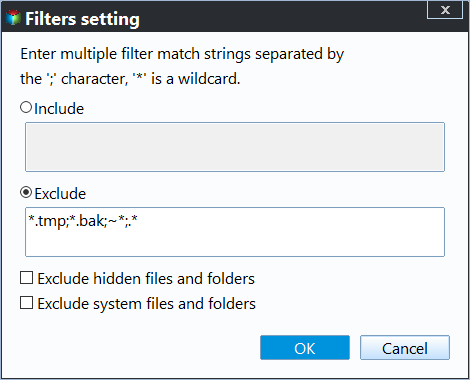
Tips: When adding folders, you can filter files afterwards by clicking the "Filter" button to open the "Filter Settings".
The feature "Filter Settings" can be set after adding source folders, but it's only available in paid versions.
The File Inclusion Mask allows specifying files to sync, supporting wildcards and separating multiple masks with semi-colons, such as "*.doc;*.xls;*.ppt".
With this mask, you can configure syncing to include only files with specific extensions, such as .doc, .xls, .ppt, and others. This means that only files with the same extensions will be synced to the target path.
To sync only .doc files in the selected source folders, configure the mask with "*.doc", separating multiple extensions with semi-colons if needed.
The File Exclusion Mask specifies the files to exclude, using wildcards and semi-colon-separated masks (e.g., *.temp;*.tmp;*.bak;*~*).
This mask allows you to exclude files based on their extensions, such as .temp, .tmp, and .bak, among others. As a result, files with these same extensions will not be synced to the destination location.
To exclude only .temp files in the selected source folders, configure the mask with "*.temp". If you want to include additional extensions, separate them with semi-colons.
The Folder Exclusion Mask allows you to specify folders to exclude, using wildcards and separated by semi-colons (*temp;temp*).
The mask allows you to exclude folders with the same name, preventing them from being synced to the destination location.
You can exclude a specific folder from the selected source folders by configuring its name in the mask, separating multiple folder names with semi-colons. For instance, if you only want to exclude folder "A", you can simply set "A" in the mask. If you want to exclude more folders, you can add their names separated by semi-colons.
After setting the "Filter settings", click "OK".
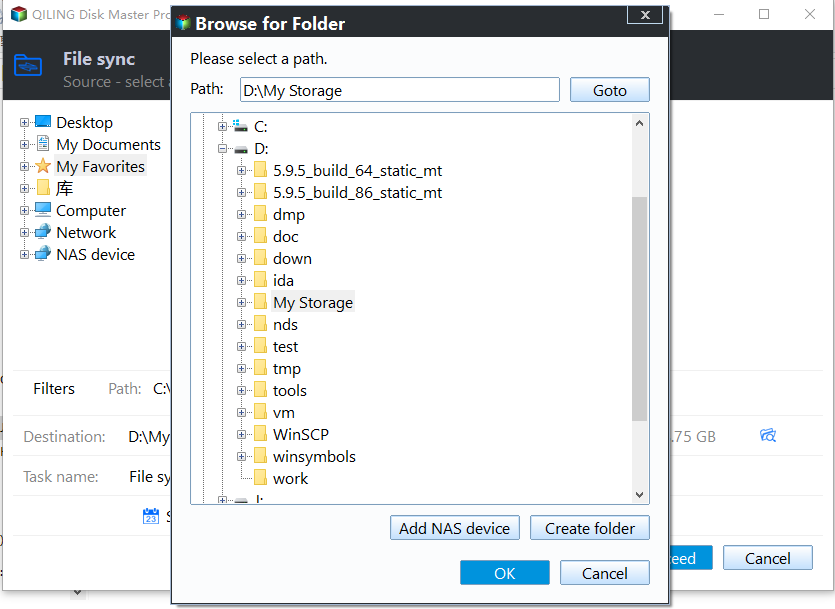
2. To store the folder, select a destination location and click "Proceed" to complete the operation.
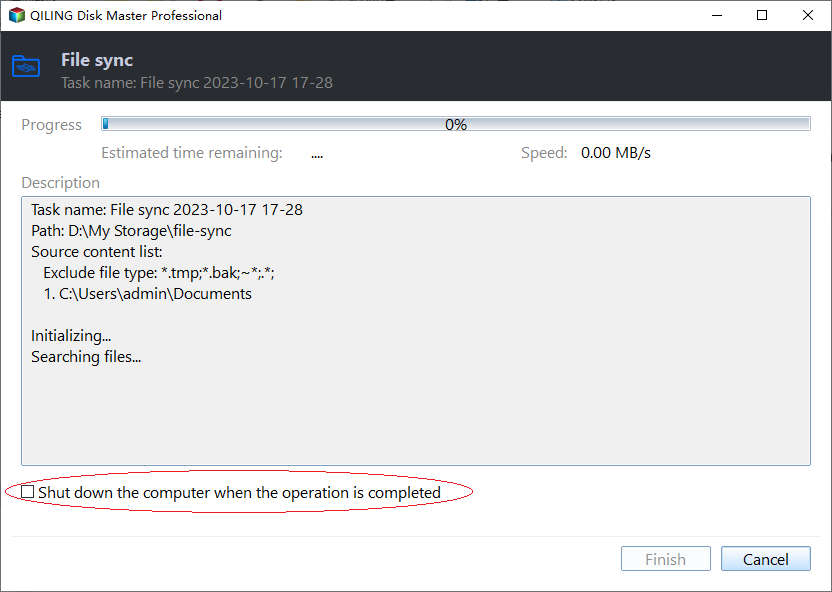
While a sync is running, you can click an icon in the lower-left corner to set your PC to shut down, restart, hibernate or sleep after the sync is complete.
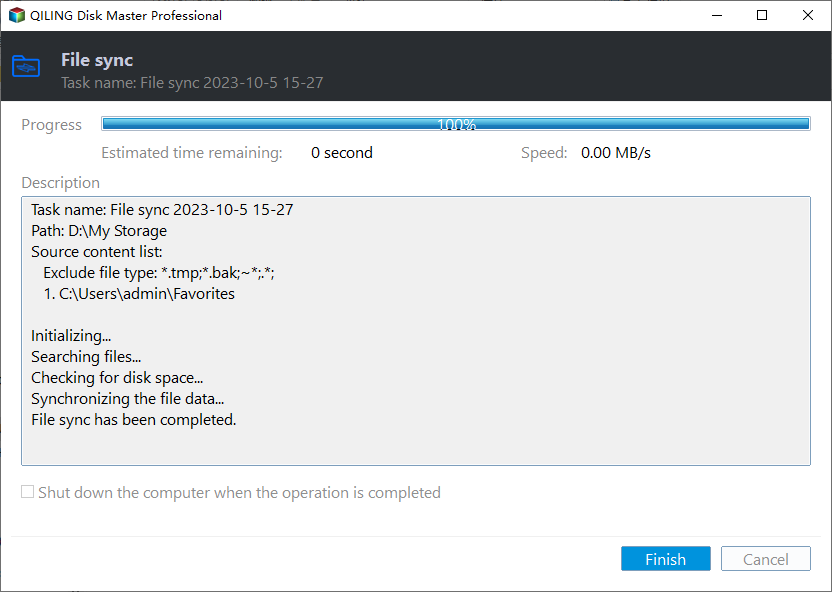
3. When the sync is running, you can click on the underlined sentence to view the sync process in detail.
Wait for the sync process to complete and then click the "Finish" button.
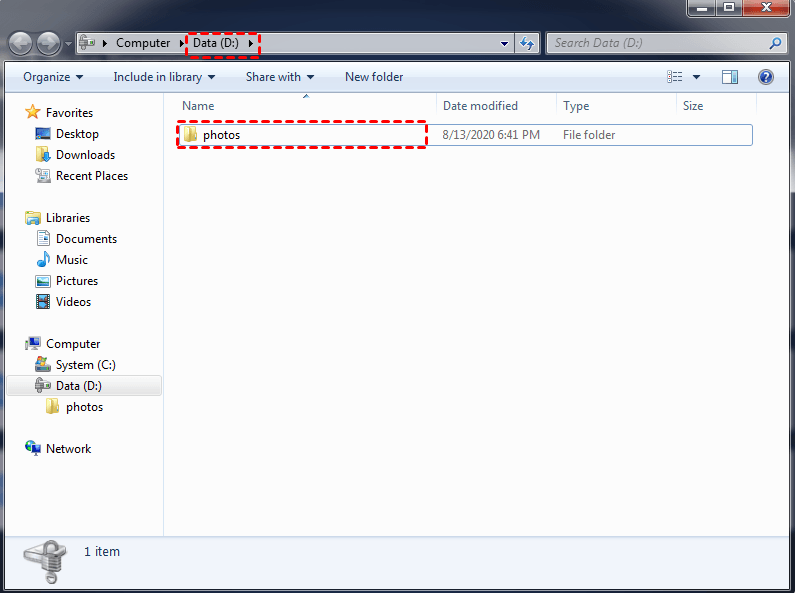
4. You can view the data straightly on the destination location as a result.
When you make changes to files in the source directory, the program will automatically sync those changes to the destination directory in real-time.
Sync Settings
When creating a new Real-To access the Time Sync task, click on the "Options" button in the lower-left corner of the interface.
Click the button and you will show "General" and "Advanced" options.
- Comments: This task is responsible for backing up the system's data and configuration on a daily basis to ensure business continuity and data integrity. It involves running a scheduled script that copies critical system files and databases to a secure offsite location, providing a reliable point of recovery in case of data loss or system failure.
- Sync the deletions in source directory to destination: When files are deleted from the source directory, the same files in the destination directory will also be deleted, which is the default setting.
- Verify the integrity of files in the destination directory during synchronization: If a file in the source directory does not exist in the destination directory, the missing files will be synced to the destination directory to ensure the integrity of files, potentially increasing sync time.
Advanced: If you want a folder with the same name as the Real-Time Sync task in the destination, you need to select the option to automatically create a folder with the same name before creating the task. This option is unticked by default.
Notes:
- For Real-time Sync, Qiling Disk Master does not support Email Notifications.
- For the real-The time sync feature does not support selecting a NAS as the source.
Conclusion
Real-Real-time file synchronization is a game-changer in various scenarios, including team collaboration, backup, mobile device syncing, and remote work. It enables instant updates and synchronization of files through the use of cutting-edge technology, making it an indispensable tool for seamless file sharing and access.
FAQs:
Q: Why does real-time-sync not sync the changed files in time?
A: In real-time sync, changes to files in the source directory may not be reflected in the destination directory. To resolve this, manually run the sync task and verify if the changes are then synchronized to the destination directory.
a) If the change is synchronized to the destination directory after a manual execution, it's likely that ABSync.exe isn't running. Check if ABSync.exe is running in the Windows Task Manager. If not, run it manually as an administrator from the installation directory, and then check again. Also, close any anti-virus programs and add ABSync.exe to their whitelist. If the issue persists, contact support with the log and mmf folders from the installation directory for further assistance.
b) If the change is still not synchronized to the destination directory after a manual execution, the issue is likely due to ABCore.exe not running. To resolve this, manually run ABCore.exe as an administrator and then retry the synchronization.
Q: The issue you're experiencing is likely due to the fact that the network path you're trying to use as a source is not a file system path, but rather a network location. The `open` function in Python doesn't support network locations as sources, which is why you're getting the "not supported" error.
A: Real-time-Sync does not support network paths as a source.
Related Articles
- Safely Move Downloads from C Drive to D Drive
Here's a tutorial about how to move downloads from C drive to D drive to free up to release your D drive. - Best Free QNAP NAS Backup Software (Step-by-Step Guide)
Hunting for free backup software for QNAP NAS to backup data to external drive or local PC drive in Windows 7, 8, 10, 11? Here you got best QNAP backup solution Qiling Disk Master. - Best Free Samsung Auto Backup Software in Windows 11, 10, 8, 7
To create Samsung auto backup in Windows 10, try Samsung auto backup software - Qiling Disk Master if the Samsung Auto Backup is not working in Windows 10. - Seagate NAS Backup Software for Windows 10/8/7
What Seagate NAS backup software can best suit your needs? Given the usage restrictions of tools like Seagate BlackArmor Backup and Backup Manager, you may need a more robust NAS backup software with higher compatibility.
