How to Restore Windows 10 System Image to a New SSD
Quick Navigation:
- Why restore system image to new SSD?
- Backup and restore Windows 10 to new SSD with the snap-in tool
- ▶ Create Windows 10 system image and system repair disc
- ▶ Restore Windows 10 system image to new SSD
- Restore system image to new SSD with Qiling Disk Master🔥
- ▶ Preparations
- ▶ How to restore system image to new SSD
Why restore system image to new SSD?
The traditional storage device, hard disk drive (HDD), was once the primary storage solution for computers. However, as data storage needs grew, HDDs became insufficient, prone to mechanical failure, and had other limitations, leading to the need for newer, more reliable storage technologies.
The emergence of solid state drives (SSDs) has addressed many of the limitations of traditional hard disk drives (HDDs), offering safer storage, faster performance, and reduced noise. As a result, many users are opting to replace their old HDDs with SSDs to enjoy improved performance, and some are making the switch due to hardware failures in their existing devices.
Yes, you can transfer the OS and data from the old storage device to the new SSD using a cloning software. This will allow you to keep all your files, programs, and settings intact on the new SSD, while also upgrading to a faster and more efficient storage device.
Backup and restore Windows 10 to new SSD with the snap-in tool
Windows 10 has a built-in backup and restore tool that allows users to create a system image, which can be used to restore the entire system in case of a disaster or hardware failure. This tool can also backup individual files and folders, and can be configured to run automatically at regular intervals. Additionally, Windows 10 also has a feature called "System Restore" which allows users to restore their system to a previous state in case of a problem.
▶ Create Windows 10 system image and system repair disc
1. Connect a CD/DVD and an external drive to your computer. Type "backup" in the search box of the taskbar and select Backup settings from the result list.
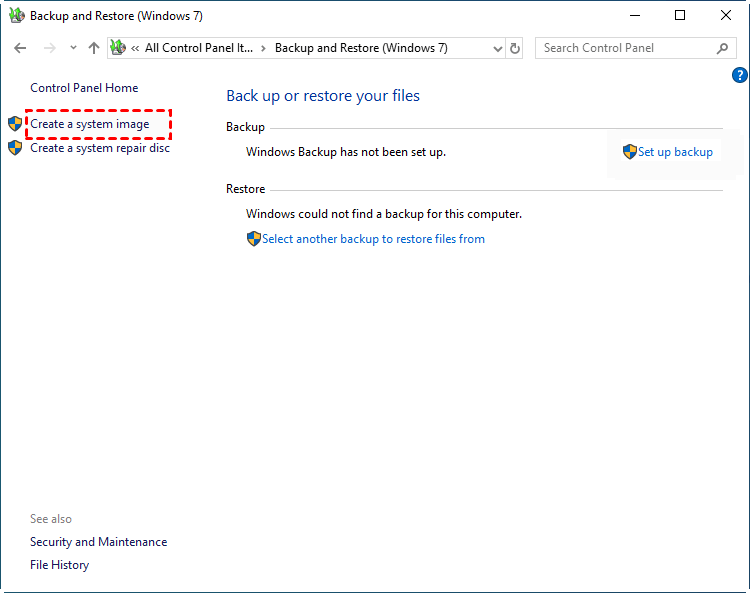
2. In the pop-up window, select Go to Backup and Restore (Windows 7) > Create a system image.
3. Connect an external hard drive to your computer, select it as the location to save your system image, and then click "Next" to proceed with the backup process.
4. The backup will automatically include the drives required for Windows to run. Confirm your settings and click Proceed.
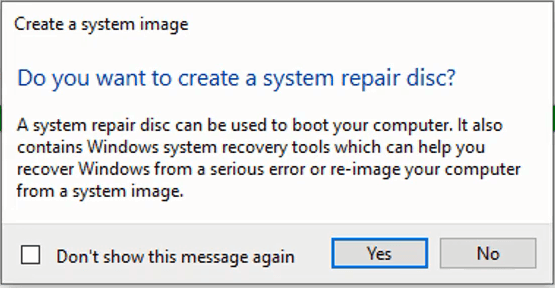
5. To create a system repair disc, click Yes when you are asked to create a system repair disc. This will allow you to create a disc that can be used to repair your system if it becomes corrupted or damaged.
▶ Restore Windows 10 system image to new SSD
1. Shut down your computer, replace the old system drive with the new SSD, and ensure the backup disk and system repair disc are still connected.
2. Boot your computer from the system repair disc. When the Windows Setup window appears, click Next > Repair your computer.
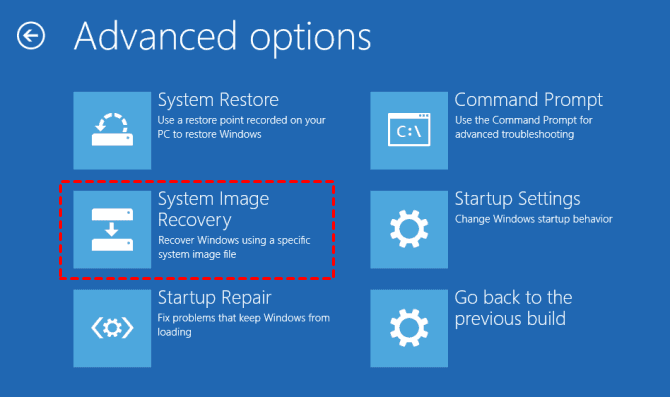
3. To troubleshoot Windows 10, select Troubleshoot, then Advanced options, followed by System Image Recovery.
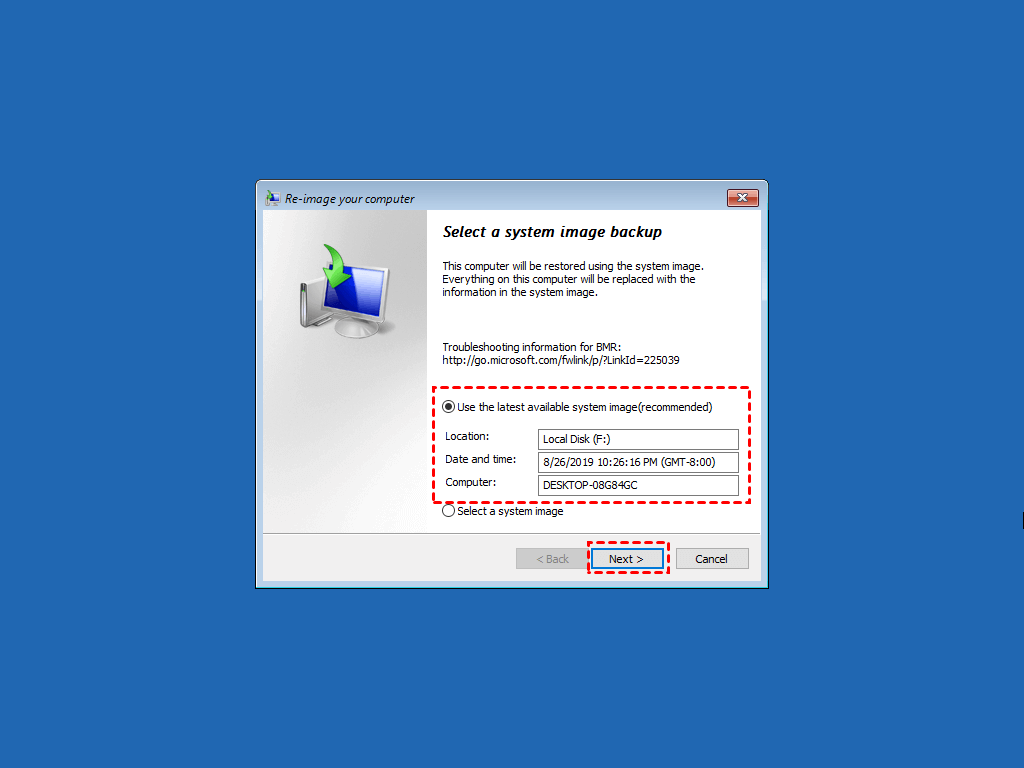
4. In the Re-image your computer window, select the option to use the latest available system image and follow the on-screen instructions to complete the system recovery process.
Although Windows built-You're looking for a tool that can help you transfer your system image to a new SSD, but you're concerned about the space taken up by the system backup image and the complexity of the recovery process. You'd like to find a backup utility that can create a system backup image with less storage space and a simpler restoration process. Is that correct?
Restore system image to new SSD with Qiling Disk Master🔥
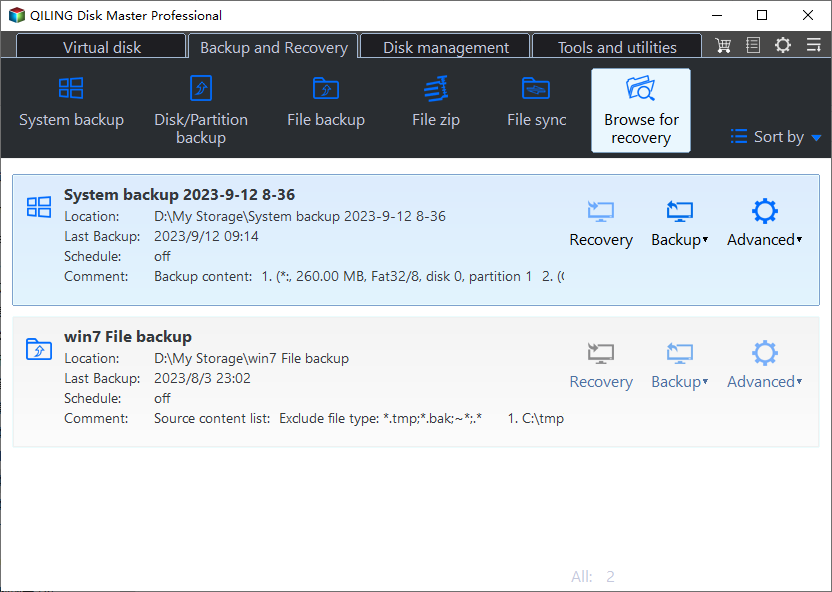
Qiling Disk Master Professional allows users to easily backup and restore their system to a new SSD with just a few clicks, making it a convenient tool for Windows users, including those running Windows 11, 10, 8.1, 8, 7, Vista, and XP.
▶ Preparations
1. Download and install Qiling Disk Master on your computer.
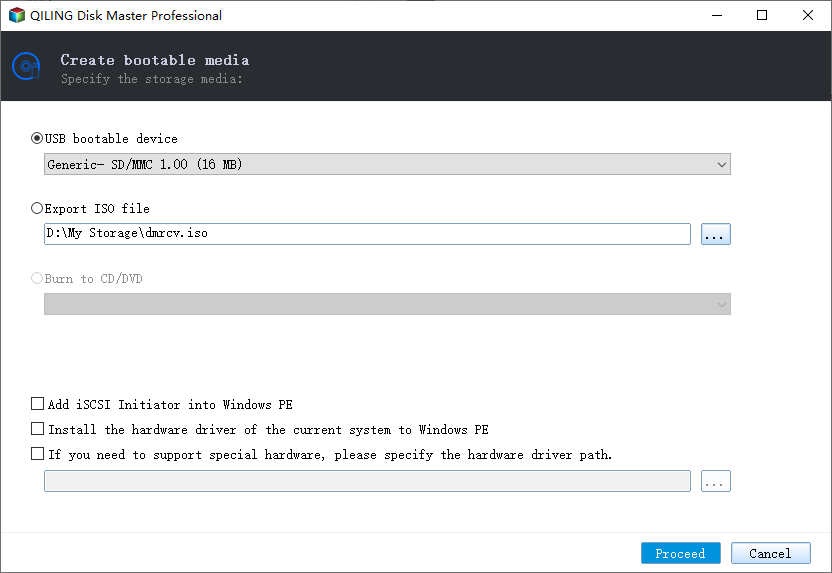
2. Create a bootable media or recovery environment to run backup and restore operations without loading the operating system.
3. You can create a system image using Qiling Disk Master by saving the system image on an external hard drive or network location.
▶ How to restore system image to new SSD
To restore the system image to a new SSD, follow these steps, which are also applicable to moving Windows 10 to a new computer with dissimilar hardware.
Step 1. Connect the bootable USB drive and the backup disk (if you have saved system image to an external drive) to your computer and replace the old HDD with the new SSD.
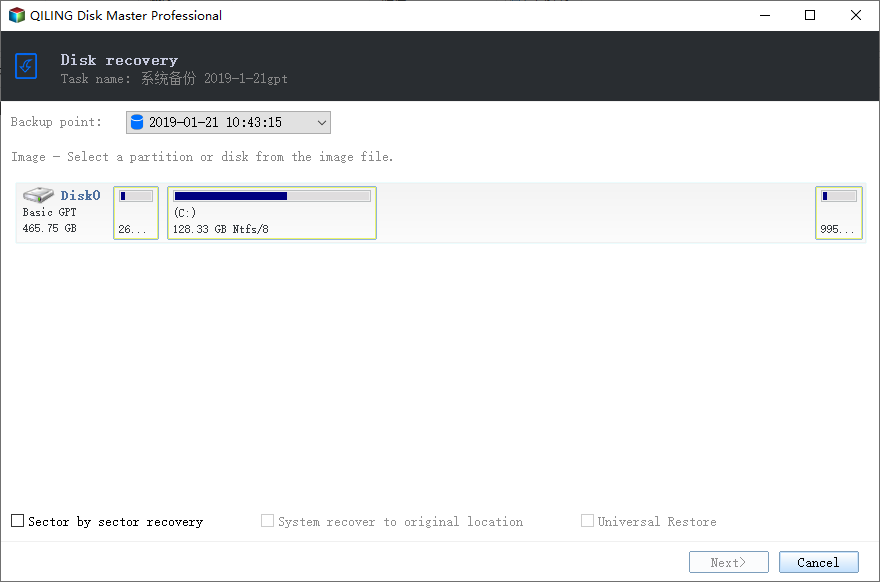
Step 2. Boot your computer from the bootable USB and the Qiling Disk Master's home interface will be shown. Click "Restore" and then "Select Image File" to locate the system image you created earlier.
Step 3. Tick "Restore this system backup" and "Restore system to other location", then tick "Universal Restore" to ensure a bootable system. Click "Next" to proceed.
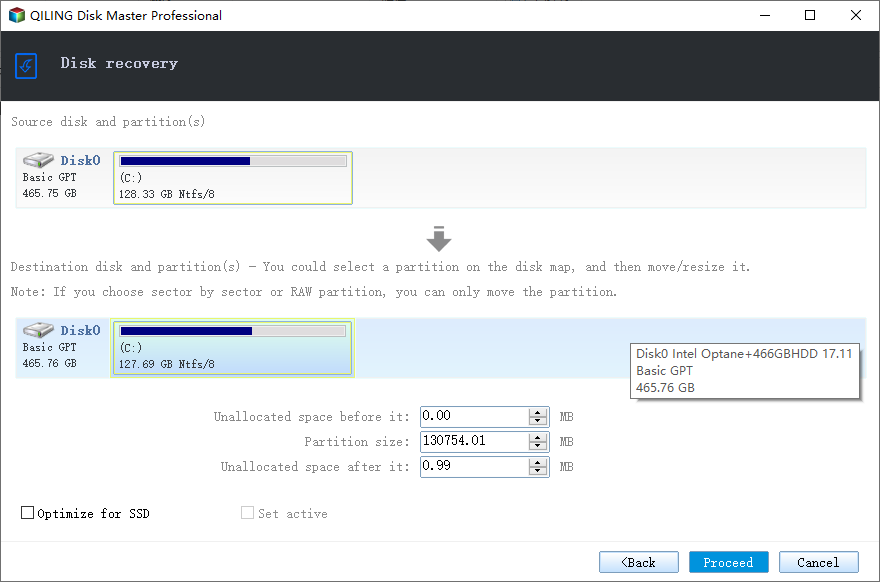
Step 4. To restore your system image to a new SSD, select the new SSD as the target drive and click Next.
Step 5. Here you can see the operating summary. If there is no trouble, click "Proceed".
>> SSD Alignment: This feature is specifically designed for Solid-State Drives (SSD) and can be enabled to enhance their performance.
✐ Easier way to restore system image without booting into Windows:
You can use Qiling OneKey Recovery software to create system image and bootable media simultaneously, eliminating the need to create them one by one. This software adds a boot menu to your computer and assigns a fast key, such as F11 or A, to access it. In the event of a computer failure, you can press the assigned key to access the software from WinPE, and then use the "OneKey System Recovery" option to restore your system image.
Related Articles
- Best Freeware to Clone SSD to New SSD in Windows 10/8/7
- Top 2 Easy Ways to Install Windows 10 on SSD
- Replace Laptop HDD with SSD without Reinstalling (with Video)
- The Best Way for Samsung Data Migration to Clone OS Only
To find the best way for Samsung Data Migration clone OS only, you can read this article carefully and learn the easiest way and the specific tutorial.
