How to Perform SSD Secure Erase and Restore SSD Performance?
What is SSD Secure Erase?
To erase data on an SSD, you cannot use the same methods as for a hard disk drive (HDD), as writing data on an SSD is a different process. Intensive data writing on an SSD can reduce its performance and shorten its lifespan.
Secure Erase is a feature for SSDs that completely cleans all data stored on the device, restoring it to its original performance level.
Secure Erase can be completed in a few seconds, with the exact time varying depending on the connection port used. It performs optimally when connected directly from a SATA port, but may not be possible or could cause issues when performed via a USB port.
3 situations that you need to do Secure Erase
Restore SSD to original performance (factory state)
If you notice your SSD slowing down, you can restore its original performance by backing up data and doing an SSD Secure Erase.
Give SSD a start fresh without hurting it
If you want to start fresh with a clean installation of Windows 10/8/7, you might want to consider a Secure Erase instead of a regular format. This is because regular formatting can't effectively clean an SSD, and in fact, it can even harm your SSD's lifespan.
Protect privacy
When upgrading to a larger SSD, it's essential to completely delete data from your old drive before donating, selling, or disposing of it. Simply formatting the SSD isn't enough, as it only makes data invisible and can be easily recovered. To protect your private and sensitive data, you need to perform a secure erase on the SSD, ensuring that your personal information remains secure and can't be accessed by others.
Choose a powerful SSD erase software
To securely erase an SSD, you'll need a powerful SSD erase utility. Fortunately, many SSD manufacturers offer their own specialized tools, such as Samsung's Magician, Intel's SSD Toolbox, and SanDisk's SSD Toolkit, which can help you securely clear data from your SSD.
If the SSD drive you need to erase is not from Samsung, Kingston, or Crucial, you can use Qiling Disk Master Professional to securely erase many popular SSDs within Windows 7.
How to perform SSD Secure Erase with Qiling Disk Master
To securely erase an SSD and reset it to its factory state, follow these steps: [insert steps here].
Step 1. To use SSD Secure Erase on a Windows 7 computer, connect your SSD to the computer via a SATA port. Then, install and run Qiling Disk Master Professional, which is currently the only software that supports SSD Secure Erase in Windows.
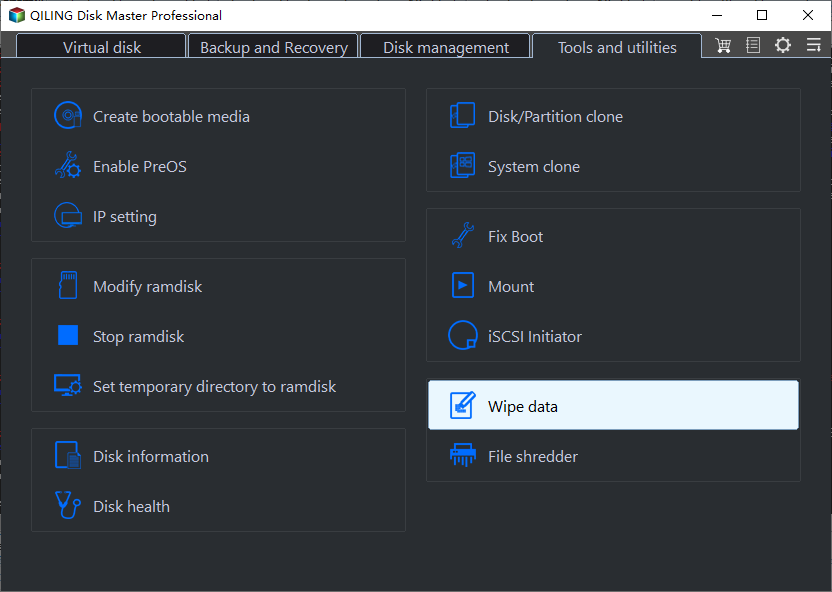
Step 2. To securely erase data on a SSD, go to the top menu of Qiling Disk Master, click on "Tools and utilities" followed by "Wipe data(SSD Secure Erase)" and then click "Next".
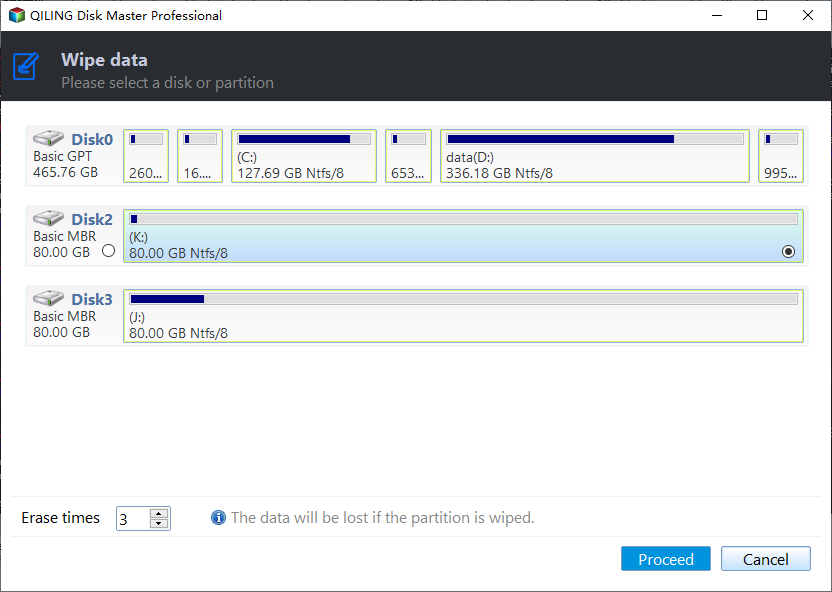
Step 3. Select the SSD you want to securely erase and click "Next".
Step 4. Edit erase times and click Proceed button to continue.
To perform Hot Swap
Secure Erase SSD may require hot-swapping the drive to unlock it from a frozen state, so it's best to follow these steps to avoid unexpected issues.
1. To open your computer case, follow these steps: Open your computer case. If it is a laptop, open the computer's rear cover or drive shell. This will give you access to the internal components.
2. Locate the SSD that needs to be securely erased.
3. Unplug the power cable from the SSD.
4. Disconnect the SATA data cable from the SSD.
5. To reconnect the SATA cable, locate the SATA cable that was previously connected to the SSD and the motherboard. Carefully remove the cable from the motherboard, then from the SSD.
6. To complete the hot-swap, plug the power cable back into the SSD's power connector.
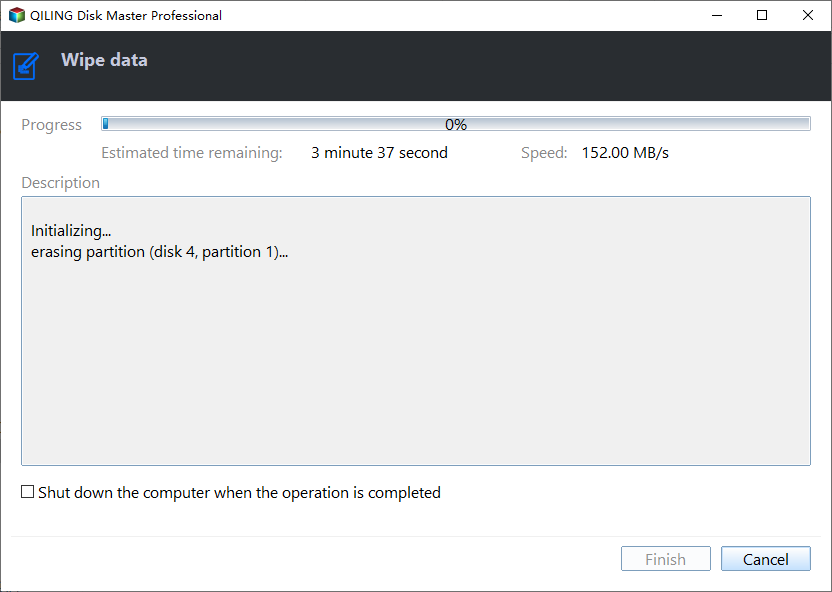
Step 5. To securely erase your SSD, click "Yes" on the warning message that appears, then confirm to start the SSD Secure Erase process.
After completing the Secure Erase process, the SSD will be shown as a block of unallocated space. If you're wiping your current system disk where Windows is installed, you can connect the SSD to another Windows 7 computer and follow the same steps to securely erase the system SSD.
Summary
With Qiling Disk Master's "SSD Secure Erase" feature, you can securely and permanently wipe all data from your SSD, restoring it to its factory peak performance, and also offers an alternative method for HDDs.
Note: If your system is Windows 10, you could contact support for the WinPE ISO, which contains the SSD Secure Erase function.
Related Articles
- What is the Best Way to Wipe A Hard Drive?
Need to find a wiping way to erase all data on a hard drive? Refer to this post, and learn how to perform it with the best way. - Bootable Hard Drive Eraser Freeware Download (Windows PC)
Looking for the bootable hard drive eraser freeware or bootable hard drive format tool? The free Qiling Disk Master Standard is the best choice. - Completely Erase Laptop Hard Drive before Selling | Stepwise Guide
How to completely erase a laptop hard drive before selling in Windows 10, 8, 7 step by step? Read this article and get 3 solutions. - How to Wipe a Hard Drive for Reuse in Windows 10, 8, 7?
How to wipe a hard drive for reuse or selling. This post will give the answer.


