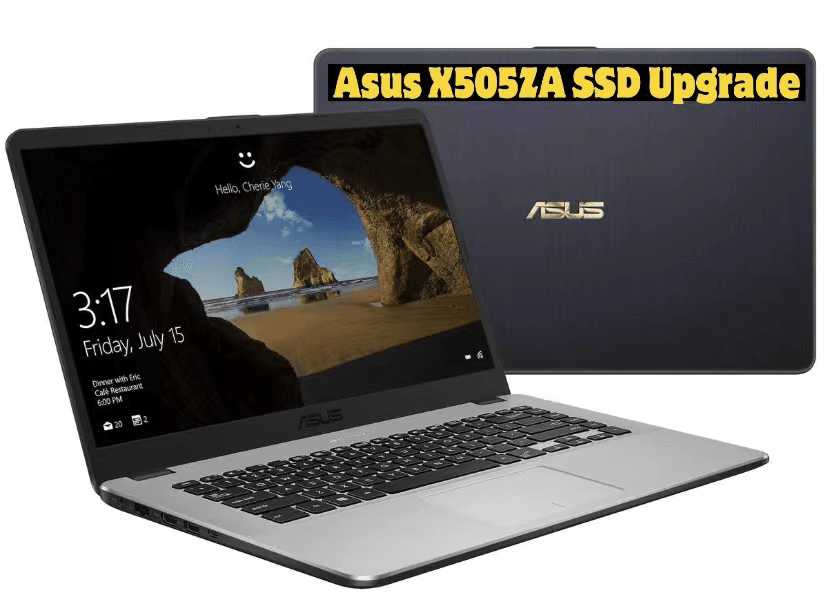
Guide: Asus X505ZA SSD Upgrade-No Data Loss and Boot Issues
Why Need to Upgrade HDD to SDD in Asus X505ZA?
Upgrading from a traditional hard disk drive (HDD) to a solid-state drive (SSD) can improve the performance of your Asus X505ZA without the need for a complete replacement, providing a cost-effective solution to address issues such as slow performance, crashes, overheating, and battery drain.
Upgrading from a Hard Disk Drive (HDD) to a Solid State Drive (SSD) can significantly improve your computer's performance and overall user experience. SSDs have several advantages over traditional HDDs, including faster data access and transfer speeds, lower power consumption, and higher durability.
▶ SSDs boast faster performance than HDDs
With an SSD, you'll experience quicker startup times, faster data retrieval, and improved overall performance, with some SSDs being up to 30 times faster than traditional hard drives.
▶ SSDs are more efficient than HDDs
Installing an SSD can help improve battery life in laptops by reducing the energy required to run the device, making it a convenient option for users who need to stay powered up on the go.
▶ SSDs are lighter, yet more durable than HDDs
The design of SSDs is slim and simple, without moving parts, making them less likely to be damaged by humans. This durability is crucial to ensure the safety of your data, making SSDs a reliable option for storing valuable information.
▶SSDs are more reliable than HDDs
The failure rate of solid-state drives (SSD) is significantly lower than that of traditional hard disk drives (HDD), with an average failure rate of 0.5% for SSD compared to 5% for HDD.
Reliable Disk Cloning Software to Migrate Data and System
Users who want to upgrade their Asus VivoBook X505ZA's storage typically have two scenarios in mind. The first involves replacing the original hard disk drive (HDD) with a solid-state drive (SSD) that fits the laptop's 2.5-inch port. The second scenario involves retaining the original HDD and adding a SATA M.2 SSD to supplement the existing storage capacity.
The Asus VivoBook X505ZA comes with a pre-installed operating system on the original hard drive. To upgrade to a new SSD, you'll need to migrate your data and system to the new drive, which requires a reliable disk cloning software to ensure a smooth transition from HDD to SSD.
Qiling Disk Master Standard Clonezilla is a free disk cloning software that allows you to migrate your data and system without boot issues, making it a user-friendly and efficient tool for all users. It supports all Windows PCs, including Windows 7/8/8.1/10/11/XP/Vista, and offers more powerful functions, such as.
✩ Multiple disk types are supported: HDDs, SATA SSDs, NVMe SSDs, M.2 SSDs, etc.
✩ All brands of SSD are supported: Cloning a hard drive disk (HDD) to a solid-state drive (SSD) from brands like WD Blue, Kingston, or Samsung is a straightforward process. The goal is to transfer the entire contents of the HDD to the SSD, including the operating system, programs, and data.
✩ 2 clone methods are provided: Intelligent Clone This disk clone software can be used to create a sector-by-sector clone of an existing disk, or simply clone the used sectors by default.
Upgrading the hard drive (HDD) to a solid-state drive (SSD) on the ASUS X505ZA laptop can be easily done using the right software. This process allows for a seamless transfer of data and system from the original HDD to the new SSD, making it a straightforward upgrade. I can provide a detailed guide on how to perform this upgrade if you're interested.
How to Perform Asus X505ZA SSD Upgrade Step by Step
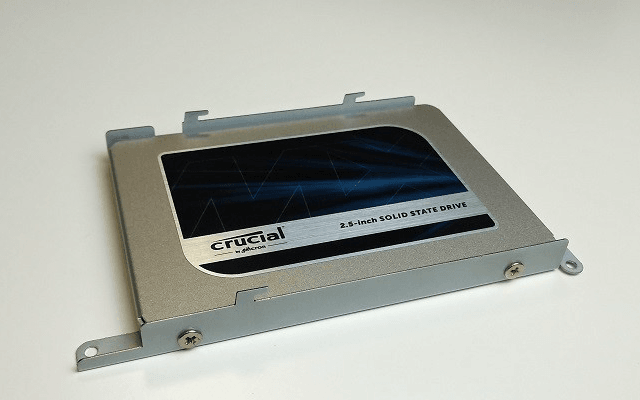
To upgrade the SSD on your Asus X505Z laptop, follow these steps. If you're replacing the original SSD, you'll need to remove the bottom panel of the laptop and disconnect the power cord and any other cables. Then, remove the original SSD and replace it with the new one, making sure to secure it with screws.
Situation 1. Replace the Original HDD with a SATA 2.5" SSD
To replace the original hard drive with a new SSD, use Qiling Bakupper to migrate data and system, then install the new SSD and boot from it. Before migrating, prepare by backing up data, updating system and drivers, and disabling unnecessary services.
Preparations:
✽ Connect the SATA 2.5" SSD to your Asus X505ZA with a SATA-to-USB cable, then proceed with the cloning process, taking care to backup any important data on the SSD beforehand.
Stepwise Guide to Migrate Everything on Original HDD to New SSD
Step 1. Download Qiling Disk Master and install it on your computer.
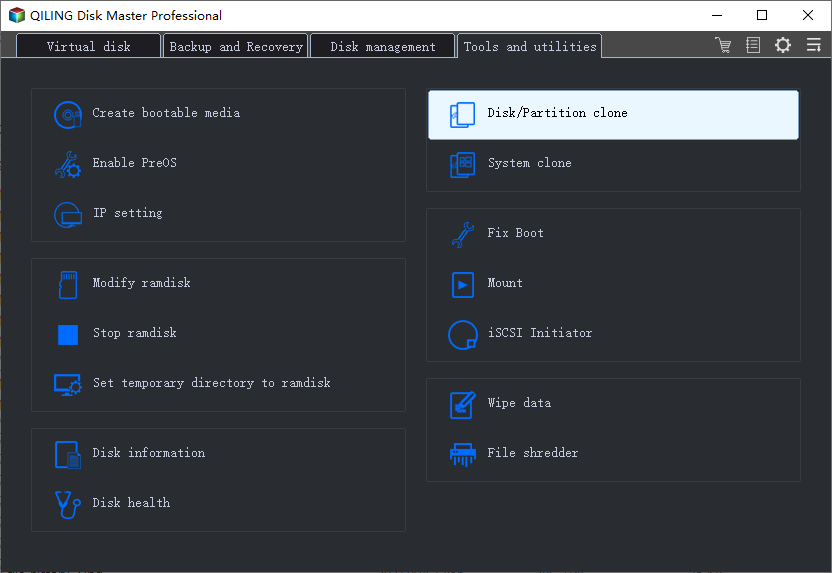
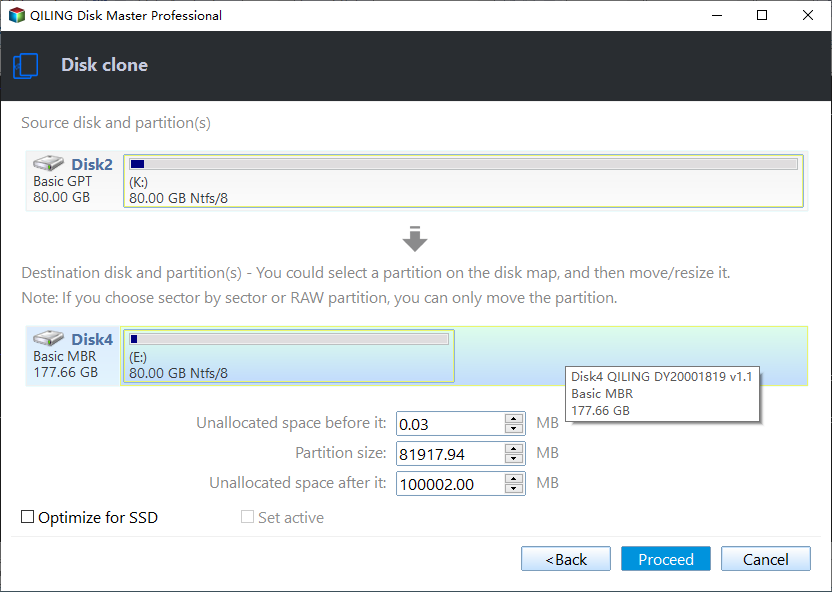
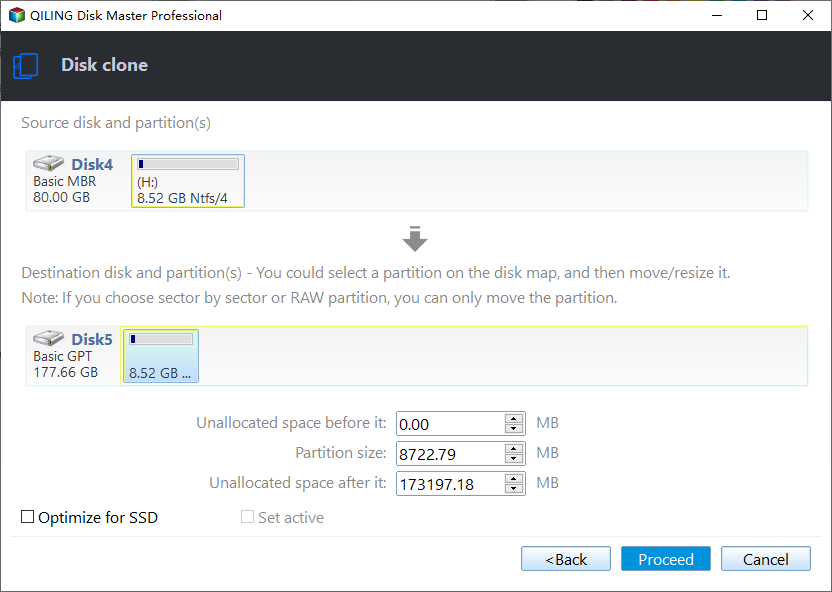
Step 2. Launch this freeware, click Clone on the left menu and select Disk Clone on the left panel.
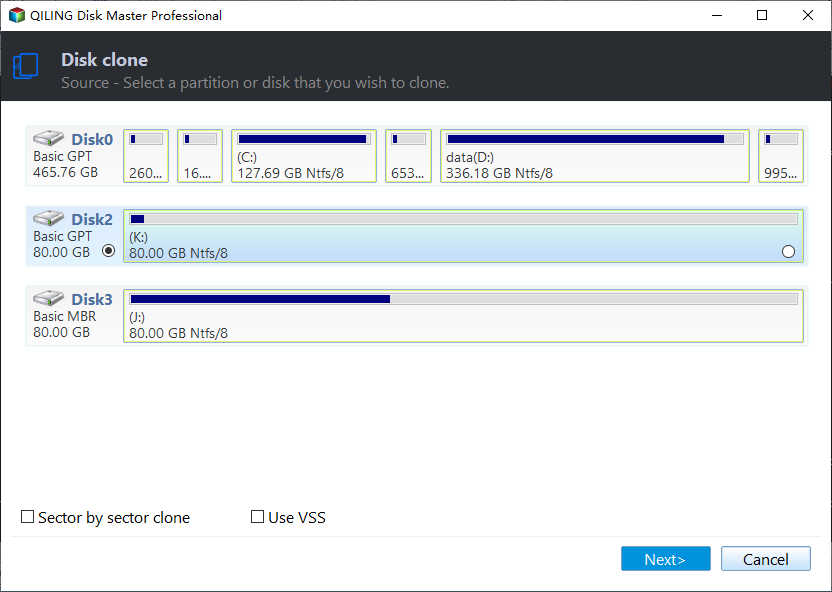
Step 3. Select the original hard drive as the source disk that you want to migrate data from, and then click on "Next".
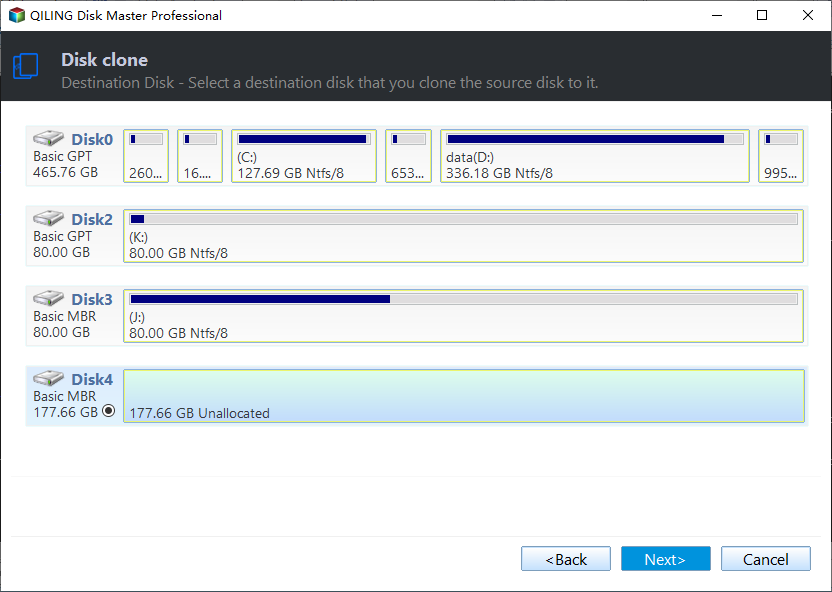
Step 4. Select the new SATA 2.5" SSD as the destination path.
Step 5. To optimize the performance of the SSD, tick the box next to "SSD Alignment" and then click "Proceed".
Tips✍:
✭ The free version of Qiling Disk Master only supports cloning system disk from MBR to MBR, and requires an upgrade to clone MBR to GPT disk, GPT to GPT, or adjust partition size of the destination disk.
Install New SDD to Your Computer
After migrating your data and system to the new SSD, you can proceed with the Asus VvivoBook X505ZA SSD upgrade.
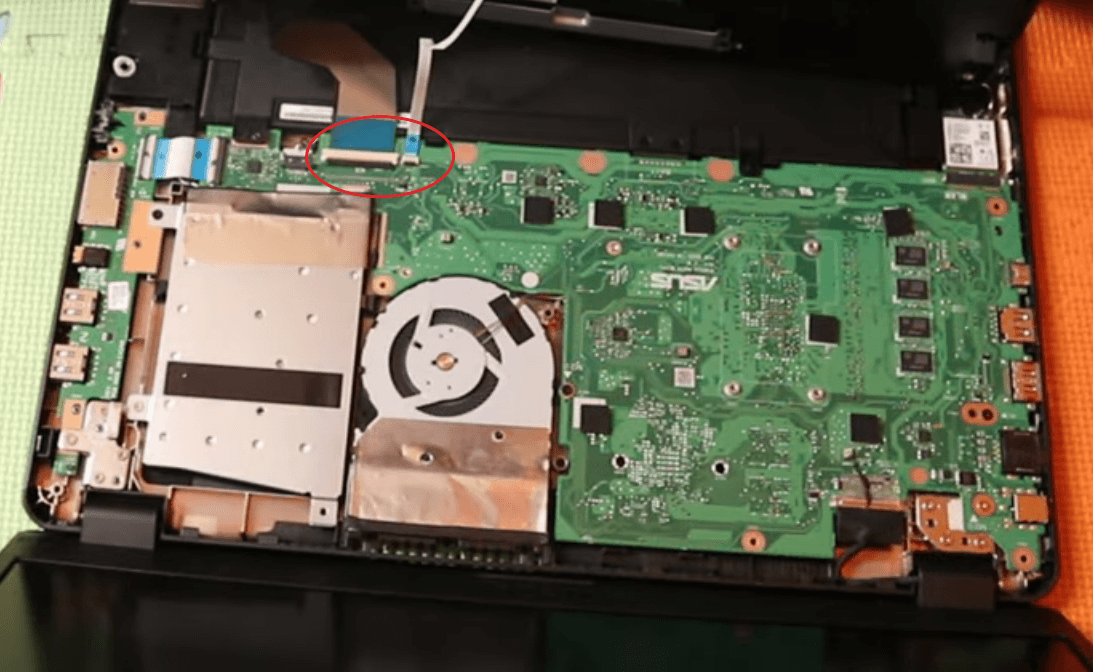
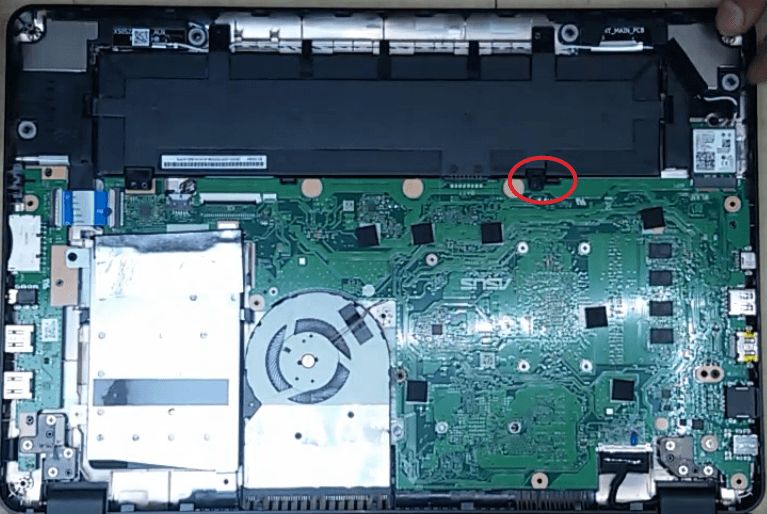
Step 1. Loosen the screws on the back cover of the device, then use a screwdriver to open the cover. Next, disconnect the power cord and the connection cable between the touchpad and keyboard and the motherboard.
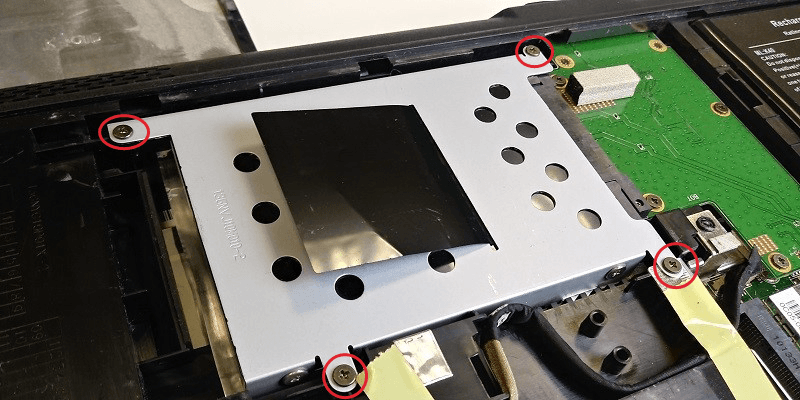
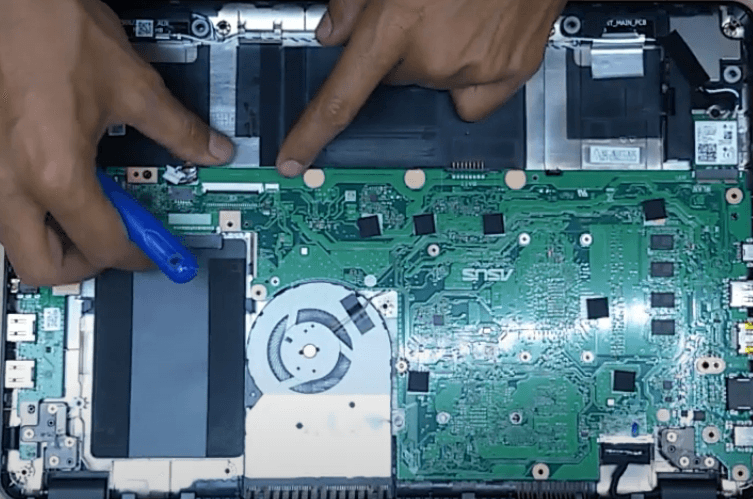
Step 2. The hard drive is located on the top right. Just remove the 4 screws that hold the hard drive.
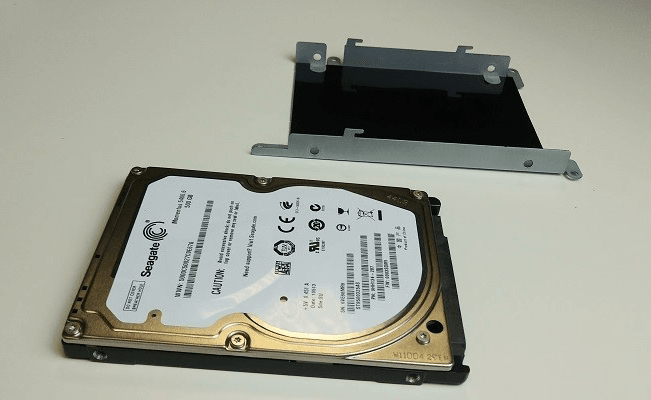
Step 3. After removing the screws, pull the hard drive to unplug it from the SATA connector. This will allow you to take the hard disk out of the rack. You can then remove the hard drive from the rack by pulling it out.
Step 4. Then you have to screw the SSD onto the rack. And retrace your steps to reassemble everything.
Step 5. After the assembly is complete, restart your computer and you can boot from the cloned SSD successfully.
Situation 2. Keep the Original HDD and Add a SATA M.2 SSD
To upgrade the SSD on your Asus X505ZA laptop while keeping the original hard drive, you can add a SATA M.2 SSD. This will allow you to install the new SSD and then transfer your data and system from the HDD to the new SSD.
Add a SATA M.2 SSD on Asus X505ZA
Step 1. Open the cover of your laptop as mentioned above. And then unscrew the battery.
Step 2. 1. Remove the HDD according to the method mentioned in Situation 1. 2. Loosen the motherboard screws to access the M.
Step 3. Insert M.2 SSD on the motherboard and fasten it with a screwdriver. And retrace your steps to reassemble everything.
Migrate Data and System to SATA M.2 SSD
After assembling the computer, restart it, download and install Qiling Disk Master. If you want to use the new M.2 SSD as the boot drive, use the Clone function to migrate your data and system to it, following the same steps as before, but without the need for a SATA-to-USB cable since the SSD is already installed.
Tips✍: If you only want to move the system from the original HDD to the M.2 SSD, consider upgrading to the advanced version to use the System Clone function.
After Cloning
- To enable M.2 in the BIOS of an Asus X505ZA laptop, restart the computer, press the specific key (usually F2, F8, F12, or Del) to enter the BIOS setup, go to the Boot tab, set the new SSD as the first option, save changes, and let Windows boot from the M.2 SSD.
- If the cloned M.2 SSD has been used for a period of time without any problems, you can erase the data on the old disk to reuse it as a storage disk.
Conclusion
The Asus X505ZA SSD upgrade can be performed in two different situations, and in both cases, it's recommended to use reliable disk cloning software to migrate data and system to the new SSD. Whether you want to keep the old hard drive or not, this software can help you transfer your files and operating system to the new solid-state drive.
The disk cloning software mentioned in this article offers a range of benefits beyond just data migration, including backing up, restoring, and synchronizing files. This means you can not only use it to migrate data, but also to sync an external hard drive, among other functions.
Related Articles
- Quick Answer: Replace ASUS Laptop Hard Drive with SSD
- Securely Upgrade Hard Drive or SSD on ASUS Eee PC 901/900/701
- Install Windows 10 on SSD Effortlessly and Securely | 2 Ways
- [Tutorial] Downgrade Windows 11 to Windows 10
You can downgrade from Windows 11 to a previous version of Windows, like Windows 10, if you don't like Windows 11 after you upgrade the OS to it.
