Windows 11: Backup Files to External Hard Drive in 3 Easy Ways
Windows 11 File Backup User Case
“I’m looking for a way to backup some files to an external hard drive. I started using a software to backup most of my hard drive, but I also want to backup selected files to an external hard drive (around 500 GB). Are there any other options I should be looking into? I’m using Windows 11 by the way.”
From this case, it is easy to see the user wants to find a piece of software to run Windows 11 backup to external drive. For this reason, this article will provide three solutions. Users can use the file backup function of the built-in software or the third-party software to solve this problem.
Why Backup Files to External Hard Drive in Windows 11?
Backing up files to an external hard drive is a crucial practice that can help protect your important data from loss, corruption, or damage. Here are some common reasons why you should consider backing up your files to an external hard drive:
- Expand storage space
- Avoid data loss due to system crashes, computer viruses or malware intrusion, etc.
- Prevent important documents from being deleted by mistake
- Access files and data you want anytime and anywhere
Automated Backup to External Drive in Windows 11: Step-by-Step
If you need to backup files to external hard drive free in Windows 11, then you can use any of the 3 methods below to help you. You can choose the built-in tool that comes with Windows or reliable backup software. Then I'll introduce you the three different methods in turn.
- "File History" is a built-in backup tool in Windows 11 that allows you to backup your files to an external hard drive. Here's how to use it:
- "Backup and Restore" is a built-in backup tool in Windows 11 that allows you to backup your files to an external hard drive. Here's how to use it:
- Backing up files to an external hard drive in Windows is a straightforward process that can be completed quickly. Here's a quick way to do it:
1. Backup to External Hard Drive in Windows 11 with “File History”
The first method is to use the built-in software File History for Windows 11 file backup. It regularly backups files in the documents, music, pictures, videos, and desktop folders. Over time, you will have multiple backup copies. If the original files are lost, damaged, or deleted, you can restore them. You can follow the steps below.
Step 1. Connect an external hard drive to your computer first. Next, open the System > Storage > Advanced storage settings > Backup Options. Then click Add a drive option under Back up using File History.
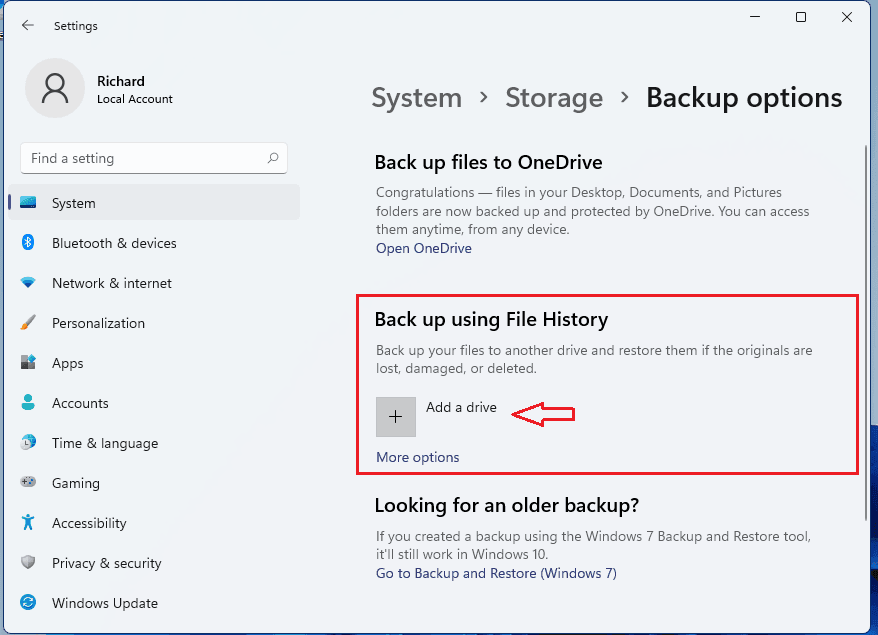
Step 2. Click "on" under the"Automatically back up my files" option.

Step 3. Then you can select "More options" to configure how often File History backs up, how long it keeps those backup copies, and which files it backs up.
▶ Back up my files: By default, File History backs up your files every hour, but you can change this setting. You have the different options of doing it from 10 minutes to 24 hours.
▶ Keep my backups: By default, File History is set to keep backups forever. However, you can change this setting to suit your needs.
▶ Back up these folders: You can view the full list of folders in this window and add more folders you want to backup by selecting "Add Folder". You can also choose a folder here and use the "Delete" button to prevent Windows from backing it up.
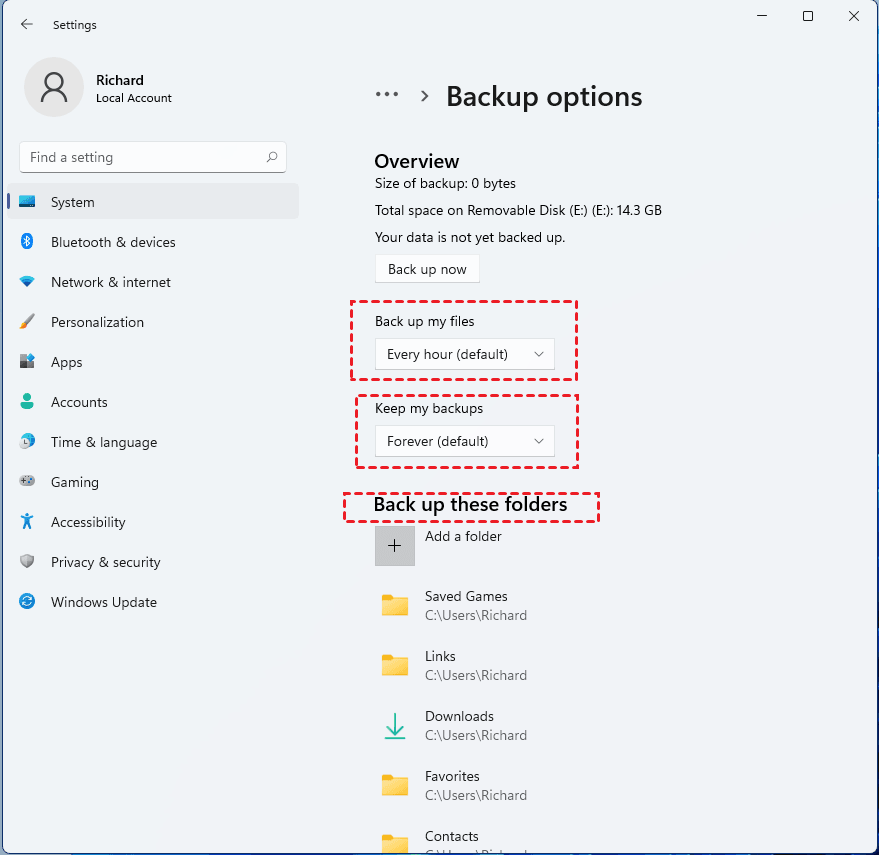
Step 4. When you're done, save and exit. Then click Back up now. Windows 11 will automatically backup your files to the drive when you connect it to your computer.
★ Extra Tip: How to Restore the Backup Using File History
To restore files from your external drive using File History, follow these steps:
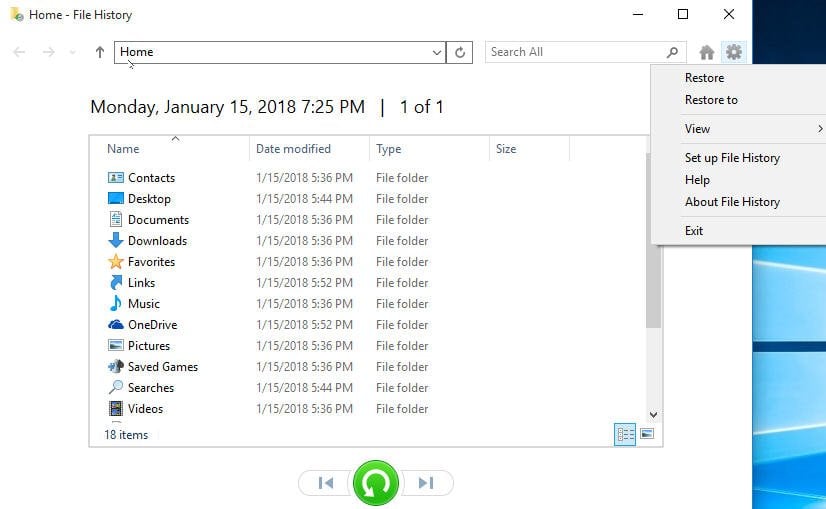
Step 1. Go to Backup options window of File History again and select "Restore files from a current backup" at the bottom.
Step 2. To restore files from your external drive using File History, follow these steps:
Step 3. Click the "Restore button". you can also click the gear icon, and then select "Restore to" .
Tips:
- If you want to restore to the original location, please click the restore button below.
- If you would like to restore to a new location, you can click the gear icon, and then select "Restore to" to do so.
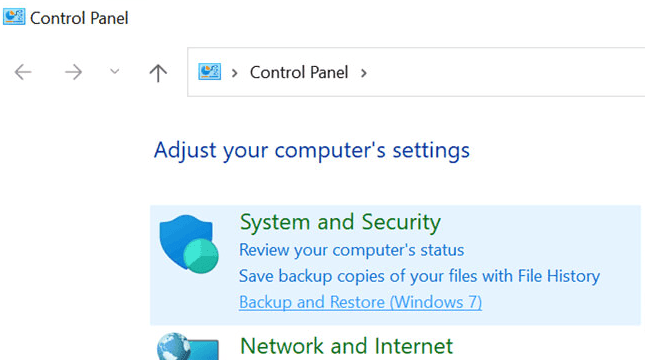
2. Backup Files to External Hard Drive in Windows 11 with “Backup and Restore”
The second method is to use another built-in tool - Windows 11 Backup and Restore for backing up files. It will backup data files saved in libraries, on the desktop, and in default Windows folders. These items will be backed up on a regular schedule. It can also create a backup image of your entire system, including the operating system, applications, and settings. Learn how to backup computer to external hard drive in Windows 11 below.
Step 1. Go to Control Panel > System and Security > Backup and Restore (Windows 7).
Step 2. Select the Setup Backup option under the "Backup" section.
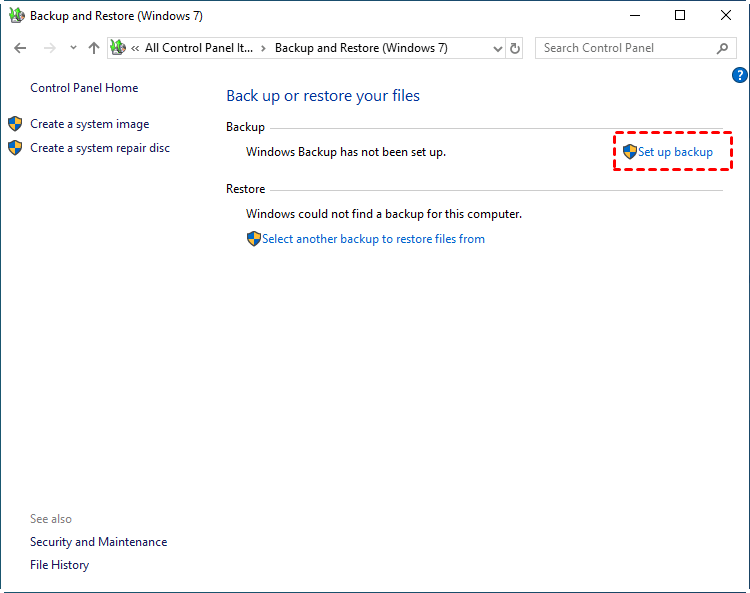
Step 3. If prompted, enter your admin password.
Step 4. Select your Backup Drive and click Next.

Step 5. Select Let Windows Choose option and click Next. It will backup files about users, such as files saved in libraries, on the desktop, and default Windows folders.
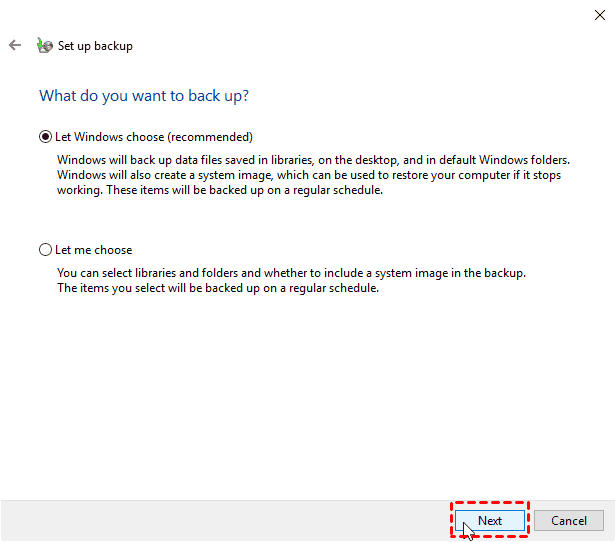
Note: You can choose the second option to select libraries and folders and whether to include a system image in the backup. The items you choose will be backed up on a regular schedule.
Step 6. Click Save settings and run backup button.

Note: By default, it will automatically backup files at every Sunday 7 p.m., but you can change this setting to suit your needs by clicking Change Schedule.
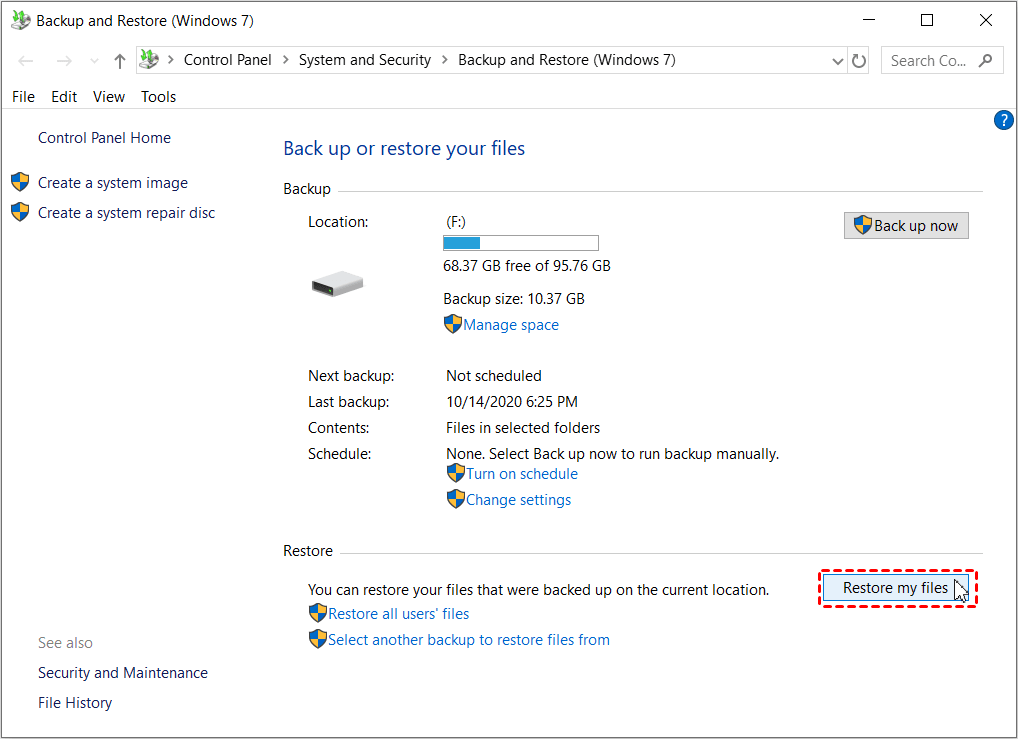
★ Extra Tip: How to Restore the Backup Using Backup and Restore
If you end up losing files, you can restore your files and data by following the steps below.
Step 1. Go to Settings > Update & Security > Backup > Backup and Restore (Windows 7).
Step 2. Click on Restore my files button under"Restore"section.
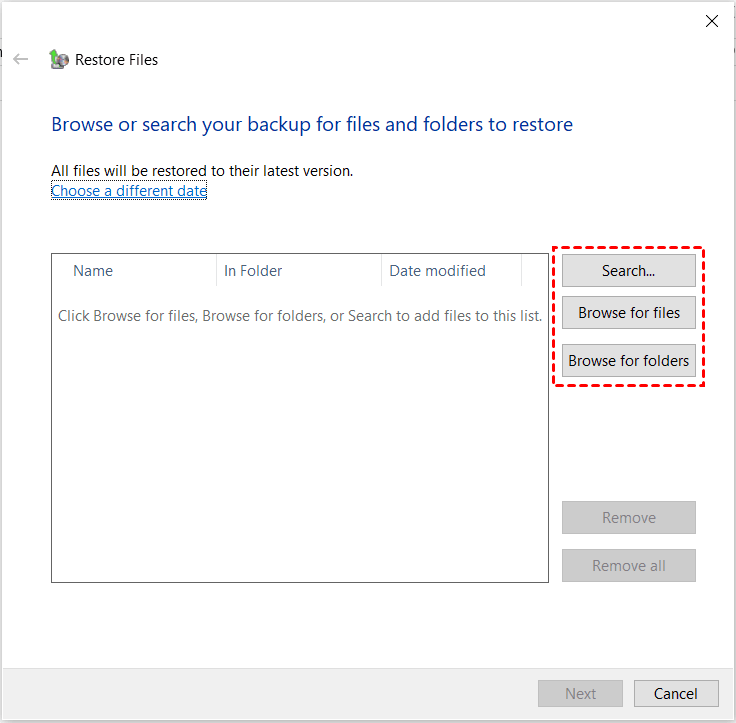
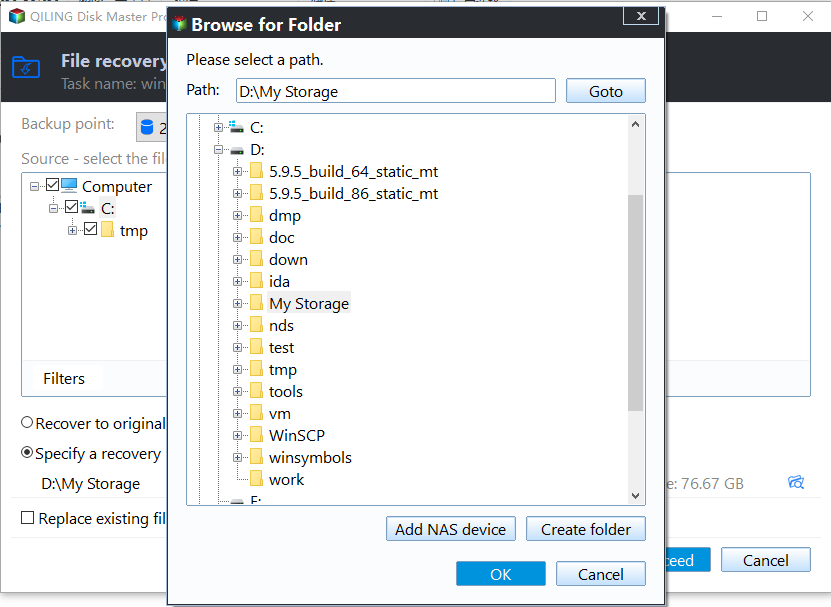
Step 3. Click Browse for folders button to select the Folders from the Backup that you want to restore. After selecting Folders, click Next to start the process of restoring.
- Browse for files: You can select the files that you want to restore and click add files.
- Browse for folders: You can select the folders you want to restore and click add folder.
- Search to add files: You can search directly to find the file or folder you need to restore.
3. Backup Files to External Hard Drive in Windows with A Quick Way
The mentioned built-in tool is convenient, but there are some minor drawbacks that cannot be ignored, such as File History drive disconnected, Windows 11 backup cannot add folder, File History not working, and The system cannot find the file specified so on.
If you're not satisfied with the built-in backup tool in Windows 11, you may want to consider a third-party file backup software. One option is Qiling Disk Master Standard, which offers several advantages over the built-in tool.
- It supports not only file backup, but also partition backup, system backup and disk backup.
- You can write comments to your backups and set up email notification.
- It offers different backup modes (intelligent sector backup or exact backup) and different compression levels (high/normal/low).
- You can backup your files at fixed intervals (daily/weekly/monthly) and choose a way to perform a scheduled backup, both full backup and incremental backup are available.
- It supports various storage devices, such as USB, HDD, SSD, etc.
- It has great compatibility with the operating system (Windows 7, 8, 8.1, 10, 11, XP, Vista, etc.)
Step 1. Download Qiling Disk Master, install and open it. Connect the external disk.
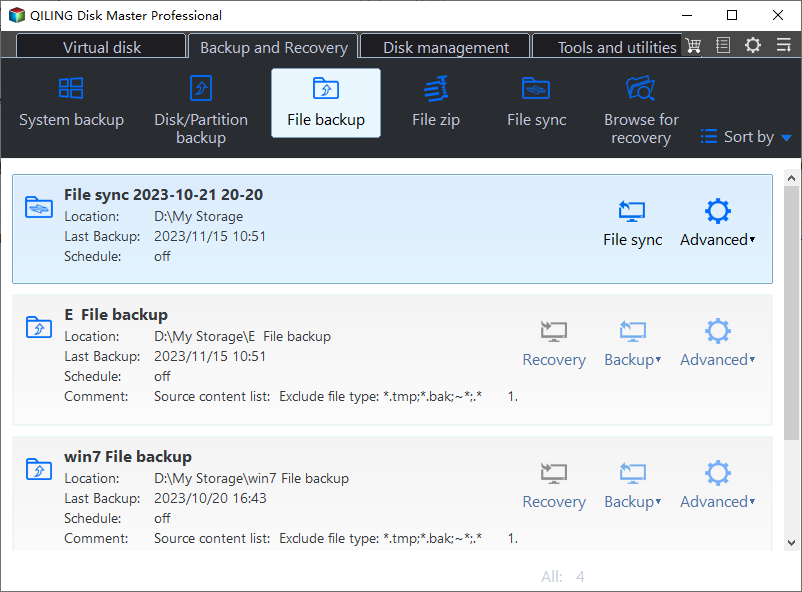
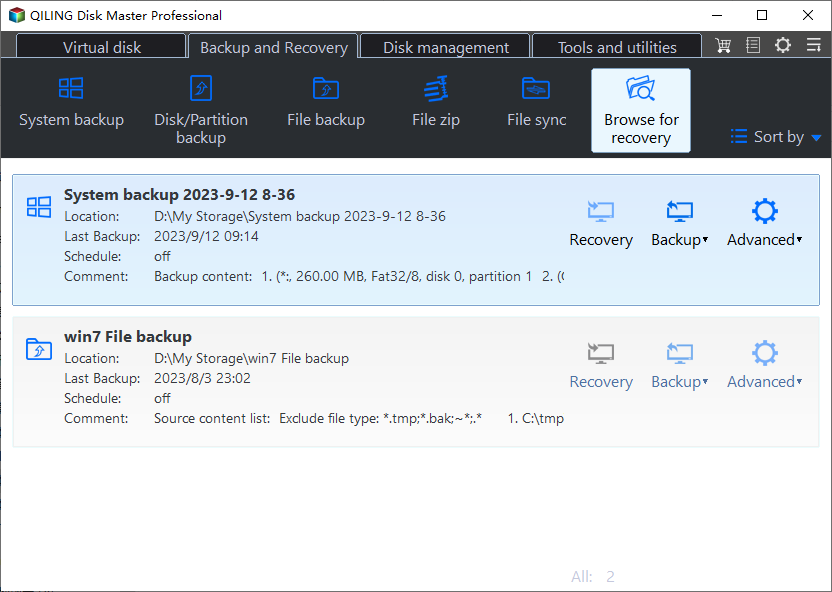
Step 2. Select "Backup" > "File Backup".
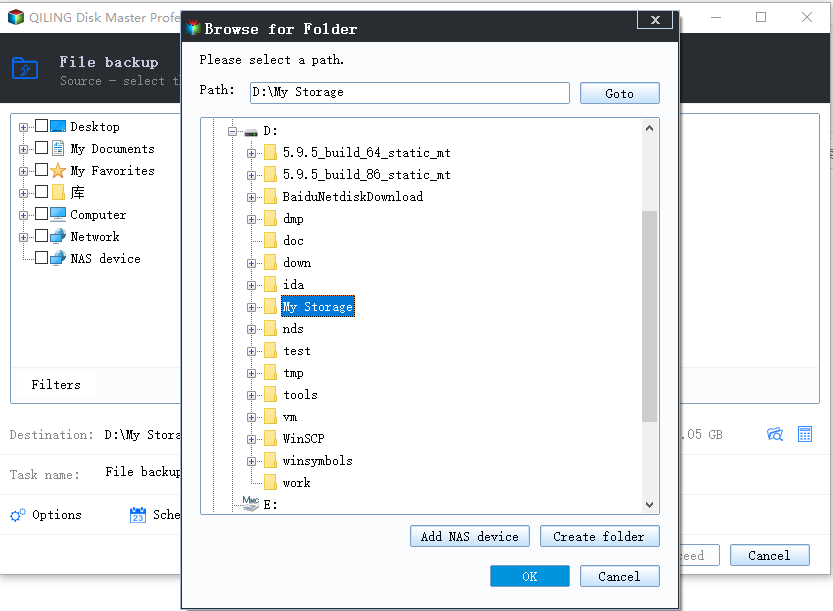
Step 3. Click "Files" or "Folders", then select the files or folders to be backed up.
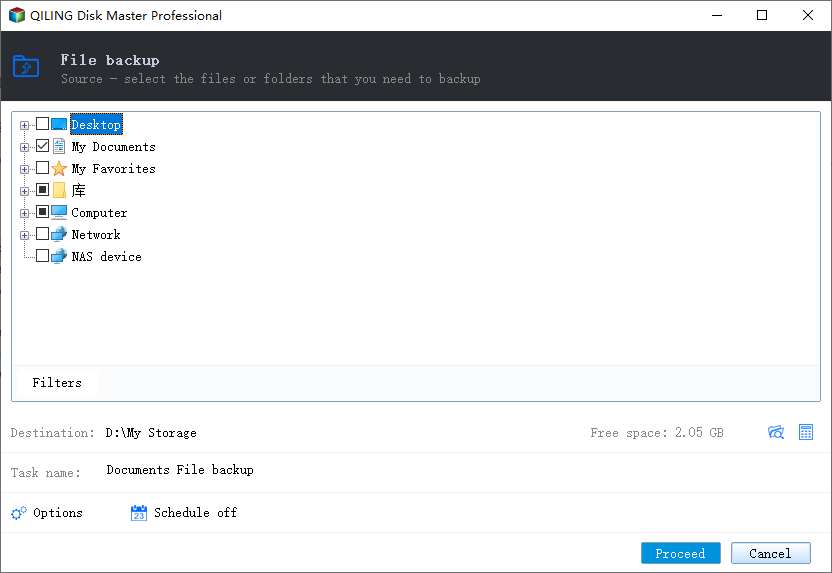
Step 4. Choose the external hard drive as the backup destination.
Tips: When using Qiling Disk Master Standard, you have the flexibility to customize your backup settings to suit your needs. To access these settings, you can click on the "Options", "Schedule Backup", or "Backup Scheme" buttons.
- Options: You can enable email notification, choose the compression level for the backup file and select splitting ways you want, etc.
- Schedule Backup: You can set the file backups to run automatically at fixed intervals as daily, weekly or monthly.
- Backup Scheme: You can choose different backup methods: full/incremental/differential backup. Both of the latter methods can save you storage space on the target disk. But differential backup is only available after upgrading to Qiling Disk Master Professional. You can also delete old backups automatically so that you won't be bothered by insufficient disk space due to multiple backups.
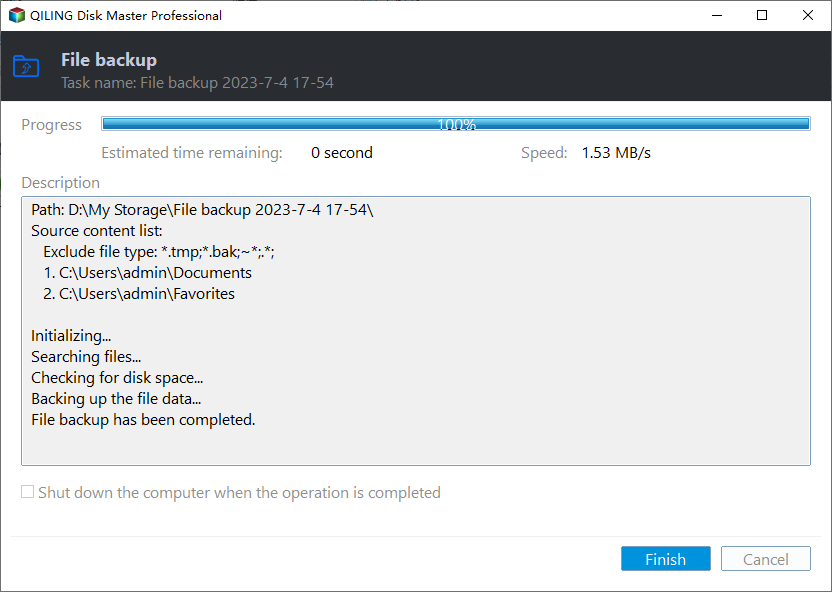
Step 5. Click "Proceed".
Tip: When using Qiling Disk Master, you have the option to try the cloud backup feature if you want to backup a large number of files to a cloud drive. This feature is ideal for users who need to backup a large number of files and want to take advantage of the benefits of cloud storage.
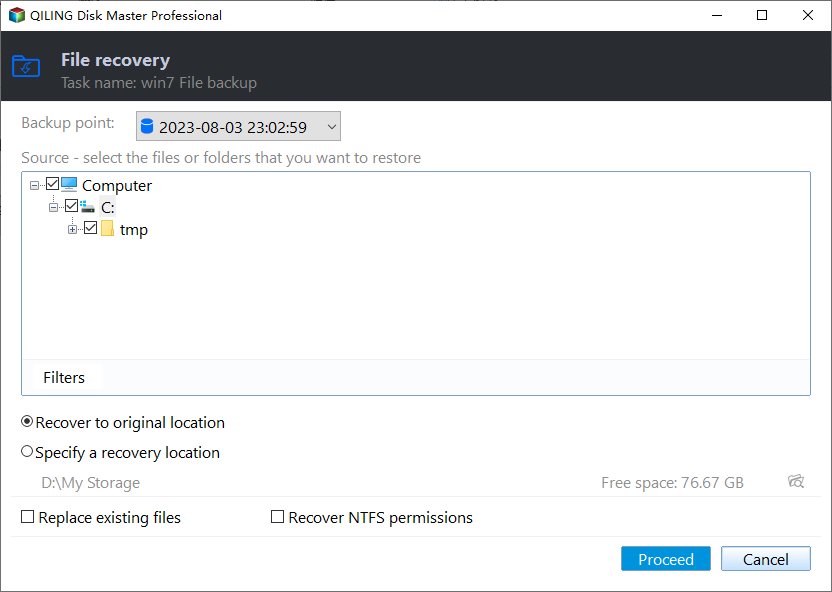
★ Extra Tip: How to Restore the Backup Using Qiling Disk Master
If you have lost your data, you can use the restore function of this software to restore your previously backed up files. Here are the specific steps.
Step 1. If you have lost your data, you can use the restore function of Qiling Disk Master to restore your previously backed up files. Here are the specific steps.
Step 2. Choose the backup which you want to restore in the Backup List, after that click "Next".

Step 3. Select the files or folders you need to recover.
Step 4 If you have lost your data, you can use the restore function of Qiling Disk Master to restore your previously backed up files. Here are the specific steps.
Summary
I believe that you have mastered three ways to backup files to external hard drive in Windows 11 by reading the passage. You can choose the built-in tool “File History” or “Backup and Restore” which comes with Windows system.
You can also choose the reliable and free file backup software Qiling Disk Master as well. To be honest, I prefer to recommend Qiling Disk Master, because it has all the features that the built-in tool has and other advantages.
It can safely backup all kinds of files to external hard drive. For people who like doing schedule backups, it supports daily, weekly and monthly backup. What’s more, it’s able to backup files to different devices (USB, HDD, SSD, Network, Cloud, etc.) in multiple OS (Windows 7, 8, 8.1, 10, 11, XP, Vista, etc.).
In addition to backup files, you can also backup boot disk, specific partitions or the Windows OS. It supports all kinds of storage devices and operating systems. What’s more, it enables differential backups (available in advanced version), which the built-in tool doesn’t support. If you want to enjoy these features, download Qiling Disk Master now!
Related Articles
- Safely Backup Windows 10 OS to External Hard Drive[3 Ways]
- How to Backup Files to External Hard Drive in Windows 10
- Easily Backup Files to External Hard Drive in Windows 10/8/7
- 4 Steps to Perform Disk Backup for Windows 10 [FREE]
- How to Backup External Hard Drive Before Formatting