Safely Backup Hard Drive from Command Prompt | 4 Ways
How do I backup hard drive from command prompt?
“My hard drive showing the low disk space error in my Windows 10 computer, I want to backup the entire hard drive to external one to spare more free space on the hard disk, How do I backup my hard drive from command prompt? Or other backup tools should I know? Please help, thanks in advance.”
In fact, there are two understandings of backup hard drive: copy hard drive with all the data included to another location, without compression, or backup entire hard disk to an image file with compression level.
>> To keep its original structure, try XCopy or Wbadmin. Xcopy is file-level backup for all Windows systems, DOS, etc and Wbadmin is used in Windows Vista, 7, 8, 10, 11 and Server 2008 (R2), Server 2012, Server 2016, 2019, 2022.
>> To avoid any unwanted access and keep your data safely, try DiskMasterUI.exe. It supports backing up system, disk, file or partition in Windows XP, Vista, 7, 8, 10, 11. And you still can backup hard drive with GUI-version of this software if you want a simple way.
Backup hard drive files via Xcopy command
According to Microsoft website, the syntax of Xcopy is:
Xcopy [source] [destination] [/w] [/p] [/c] [/v] [/q] [/f] [/l] [/g] [/d [:MM-DD-YYYY]] [/u] [/i] [/s [/e]] [/t] [/k] [/r] [/h] [{/a | /m}] [/n] [/o] [/x] [/exclude:FileName1[+[FileName2]][+[FileName3]] [{/y | /-y}] [/z] [/b] [/j]
To copy all files and directories(including hidden or system files) from drive D to drive E, input the command:
xcopy d: e: /s /e /h
- /s: Copy directories and subdirectories, unless they are empty.
- /e: Copy all subdirectories, even if they are empty.
- /h: Copy hidden or system files.

Besides, you could use the parameter:
- /r: overwrite read-only files in destination if need be.
- /d [:MM-DD-YYYY]: Copy source files changed on or after the specified date only. If not specify a MM-DD-YYYY value, and it copies all Source files to the destination.
- /c: Ignore errors.
- /y: Suppress prompting to confirm that you want to overwrite an existing destination file./li>
If the source and destination disk own the different format, use Xcopy command line instead of diskcopy (only support the same format disks).
Backup hard drive with WBadmin command prompt
It’s easy for you to create a full backup that includes all the drives connected to your PC via Wbadmin command. Follow the steps below to backup hard drive from Wbadmin command prompt:
1. Open an elevated command prompt: You can type CMD in the search box, and in the listed results, right-click Command Prompt and choose Run as administrator.
2. Then run the following command: (backup disk to an image file).
wbadmin Proceed -backupTarget:F: -include:C:, D:,E: -allCritical -quiet

This command will create a backup including your C, D, and E drive to F drive. When you write command to backup your hard drive, you need to change the drive letters based on your situation.
- The switch: -quiet means to run the backup without prompting for extra input. Therefore, the backup will start right away after input this command.
- If one of the partition that needs backing up does not have a drive letter, you can include this partition using volume GUID, which can be revealed by running “mountvol” command.
For example:
wbadmin Proceed -backuptarget:\\192.168.0.221\Public\backup -allCritical -include:C:,D:,E:,\\?\Volume{95b895b8-0000-0000-0036-223470000000}\

As you can see from the screen, WBadmin also allows you to backup to a network shared folder. If the shared folder is encrypted, you will need to use switch -user:username and -password:userPassword to input your user name and password. If you need to let WBadmin restore backup from command line, run wbadmin start recovery command prompt.
Backup hard drive with DiskMasterUI.exe command
You could use the third-party disk backup software - Qiling Disk Master Professional, which provides you the command prompt named DiskMasterUI.exe to create hard drive backup easily with a simpler command. It provides specified command to backup hard drive, partition, and system.
To backup hard drive from command prompt to an image file using DiskMasterUI.exe, please download Qiling Disk Master Professional first and have it a go. For server users, try Qiling Backuppe Server.
1. Execute the comprehensive disk backup software - Qiling Disk Master Professional.
2. Open an elevated command prompt and type the path of the installation directory of Qiling Disk Master and press Enter.
For example: cd C:\Program Files (x86) \Qiling Disk Master

Tip: After installing, right-click the Qiling Disk Master icon on the desktop, select Open file location to get the installation directory.
3. Write a command referring to the following to backup an entire hard disk:
DiskMasterUI.exe /b new /t disk /s [source disk number] /d “[target location path]” /n “[task name]”
For example, the disk backup command prompt line is:
DiskMasterUI.exe /b new /t disk /s 0 /d “E:\disk backup” /n “Disk Backup”
This command will create a new backup task named “Disk Backup” include the whole disk 0 to E:\disk backup folder.
- /b: specify the type of backup, it could be new, inc(incremental backup), dif(differential backup) or full.
- /t: specify the type of source, it could be system, disk, or part.
- /s: specify the source for the backup.
- /d: specify the destination path for the backup.
- /n: assign a name for the backup.

Once you run the backup task, and Qiling Scheduler will open immediately at the lower right corner of the desktop, and the disk backup task will run backgrounds. See more details, please open Qiling Disk Master GUI to check.
Besides, you could use clone hard drive command prompt to clone the entire disk easily, just input the command: (copy all data, no compression).
DiskMasterUI /c /t Disk /s 0 /d 1 /a
This command will clone disk 0 to disk 1 and using partition alignment to optimize for SSD.
- /c: specify a clone task.
- /a: specify to use partition alignment to optimize for SSD.

Input yes after executing the cloning to delete all data on the destination disk, or input no to backup critical data first, then run the above command line prompt.
Backup hard drive with GUI version of DiskMasterUI.exe (Easier)
If the command line prompt is still complex for you, you could run the DiskMasterUI.exe GUI - Qiling Disk Master. With which, you can easily backup hard drive, system, partition or files based on your needs. And you can set schedule backup, backup method, and backup retention in simple steps, without learning any parameter of the command prompt.
1. Open Qiling Disk Master GUI, select Backup -> Disk Backup.

2. Choose the hard drive you would like to backup as source disk by clicking Add Disk, hit Next.

3. Tap another hard drive as a destination path to save data from source disk, hit Next. Afterward, press Proceed to backup hard drive without command prompt in Windows 7/8/10/11.

Wait until the process complete, you will have an exact copy of your disk. It only backs up items when you run this task, not including changes made later.
If you don't want to lose any data after this backup, you need to set Schedule Backup and backup disk in daily, weekly, monthly. Also, you can try Event trigger, or USB plug in on Qiling Disk Master Professional.

By default this software will create one full backup and 6 incremental backup if you set a scheduled backup task. This may result in backup disk full issue in the long run, thus it's suggested to enable Backup Scheme and delete backup file automatically. You have 3 options, By quantity, By time, By daily/weekly/monthly. You need to upgrade now (5% off for one computer) before using it.

Besides, you still can enable email notification during the backup process. Comment, split, compress the backup image, or select a backup mode, etc.

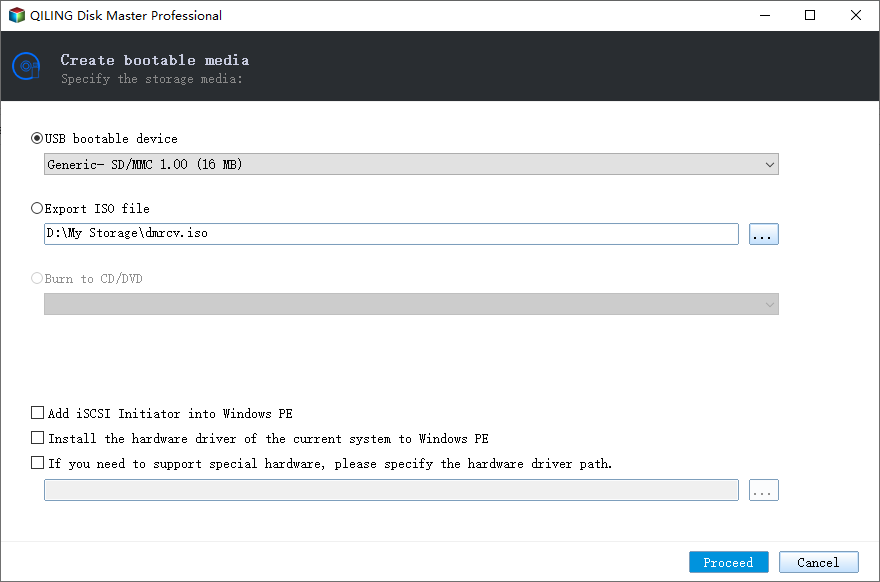
Sometimes, you may meet the unbootable issues when the Windows computer fails to boot, and intend to backup hard drive without Windows using bootable media created before.
Also, if you made a recovery environment in advance, you just need to restart your computer and then you will see an option like Enter into Qiling Disk Master. Select it and you will see the main page Qiling Disk Master Standard just as in Step 1.
In the End
It’s easy to backup hard drive from command prompt if you are an IT profesional. But if you are not familiar with command prompt, try GUI version of Qiling Disk Master to backup hard drive afely and easily.
And you can set multiple backup settings in the Schedule Backup, Backup Scheme, Options to simplify this task. For example, backup hard drive automatically without human intervention.
Also, you can create bootable media to boot up your computer and backup hard drive without booting into Windows. And it's especially useful when Windows 11/10/8/7 failed to boot and you can perform offline restore or dissimilar hardware restore.
Related Articles
- Two Ways to Create Data Backup Using CMD in Windows 10/8/7
- How to Clone Hard Drive via Command Prompt in Windows 10/8/7 Simply?
- 4 Ways to Backup Files from Command Prompt in Windows 10
- Use Windows 7 Backup Command Line to Securely Back Up