How to Backup NAS to External Hard Drive (2 Ways)
Is it necessary to backup NAS to external hard drive?
Network-Attached Storage (NAS) is a file-level computer data storage server connected to a computer network providing data access to a heterogeneous group of clients. It is widely used in business and home group to share their data and information simultaneously by accessing remote NAS devices.
However, like any other hardware, a NAS or its hard drives are subject to problems such as power failure, hardware failure and physical damage. That’s why it is important to always perform NAS backup. Nowadays, it is not rare to do NAS to NAS backup, but once the similar problems appeared, hardware failure for instance, you may not be able to access any of NAS devices.
Therefore, backing up NAS to external drive can be part of your 3-2-1 backup strategy to keep an intact copy out of the device, and protect your data from various of risks.
How to backup NAS to external hard drive
Microsoft provides Windows Backup and Restore along with the operating system as data protection tool. However, it does not support selecting the network path as the source path. If you want to use it to backup NAS, then you need to map NAS as network drive first.
☛ In Windows 7 and Windows 8:
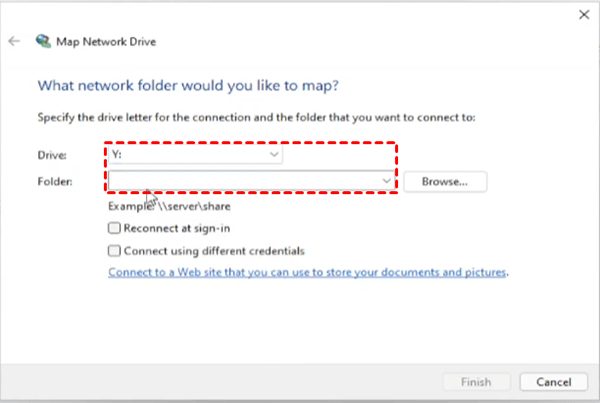
Click Start -> Computer -> Map network drive.
☛ In Windows 10 and Windows 11:
Click Start -> File Explore -> right-click This PC -> Map network drive.
Then give a letter for the NAS drive and navigate to the NAS device location. The sign of mapping successfully is your NAS router will show up as a letter drive under Network location and then you can perform backup with either backup software or Windows internal backup utility.
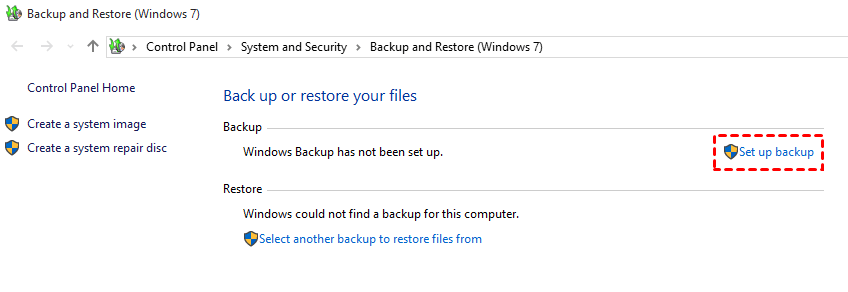
Then you can search for "backup settings" in Windows, and select "Go to Backup and Restore (Windows 7)". Then in the pop-up interface, click "Set up backup" to get started.
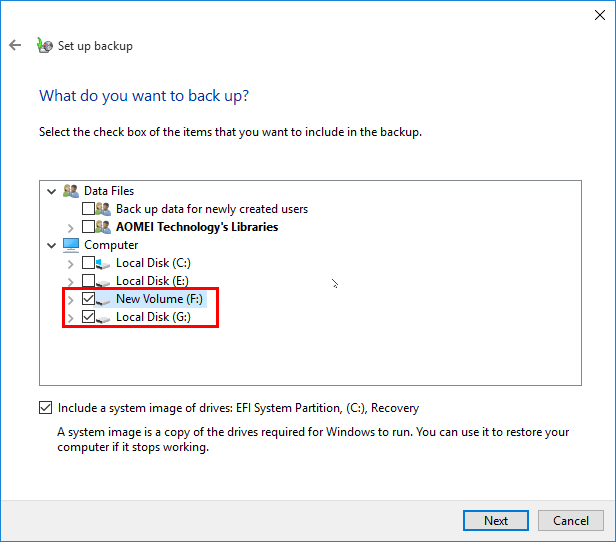
First you will need to select a destination. External drive is the recommended option.

Next is the source data. You can select "Let me choose" and then select the mapped network drive (NAS).
You will also be given options to set up a backup schedule, but the functions are limited. If you don’t want to map network drive to local computer or if you require more advanced backup features like Incremental Backup, you need to turn to reliable third party backup software to complete backing up.
Tips: Some NAS brands provides add-ons to help you perform backup to external drive. For example, Hyper Backup for Synology NAS, you can check details in backup Synology NAS to external drive.
Easily backup NAS to external drive with free NAS backup software
Qiling Disk Master Standard is a professional and free backup software with user-friendly interface. It works with Windows 11, 10, 8.1, 8, 7, XP, Vista, and storage devices including internal/external drive, USB flash drive, NAS, share folder, cloud, etc.
In a word, it helps to backup most brands of NAS devices, including Synology NAS, QNAP NAS, etc. to external hard drive within several clicks.
To customize the backup, you can set up a backup schedule on basis of daily, weekly, monthly; choose backup method to run NAS incremental backup or differential backup; create multiple backup tasks to better implement data protection strategy.
Download Qiling Disk Master Standard and install it to have a try:
☛ If you upgrade to Professional edition, you can also create a rention policy to auto delete old backups, perform event-trigger or usb plug-in backup, or sync files between 2 NAS in real time.
Step-by-step to backup NAS to external drive easily
With this software, you don’t need to map the NAS device to your computer. Just launch it and follow the steps below:
1. Select Backup -> File Backup. *If you want to create an intact copy of selected data for direct use, you can go to Sync tab and choose File Sync.

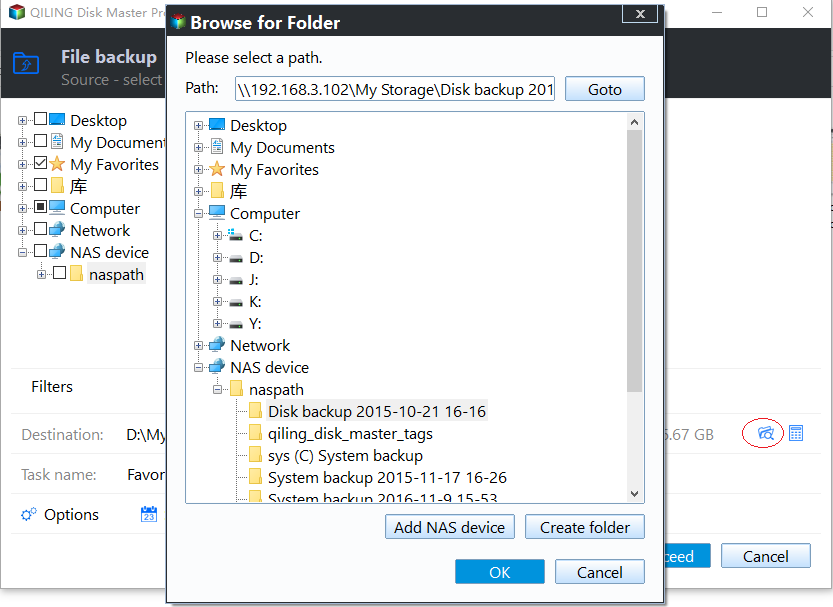
2. Click Files or Folders according to your needs. Click Share/NAS on the popping out window.

3. Then click Add Share or NAS Devices on the left-bottom corner. Type the required info of your NAS and click OK. Then you can select the specific folders you want to backup.
4. Next, choose the connected external hard drive as destination path and click Proceed.

Click the 3 buttons on the bottom to customize your backup (some options are available in advanced edtions):
Options: Comment on the backup, change compression level, encrypt backup, split backup image, etc.
Schedule Backup: Automate the backup to make it autorun daily, weekly, monthly, when event triggers (log in/out, startup/shutdown) or USB plug in.
Backup Scheme: Choose your backup method as full, incremental or differential backup. Here you can aslo enable the automatic backup cleanup and set up a retention policy you prefer.
Verdict
Qiling Disk Master is comprehensive backup software which embedded with many powerful utilities. For example, you can clone boot drive to SSD for better performance with this program. Also, you can restore your system to another computer with dissimilar hardware using dissimilar hardware restore.
Moreover, Qiling Disk Master centralized backup management can help you backup all machines within LAN on your server computer. Qiling Disk Master is one handy backup software that you don’t want to miss.
Related Articles
- How to Backup QNAP NAS to An External Hard Drive?
Learn how to full backup QNAP NAS to external storage device, like external hard disk drive (HDD), USB flash drive and other devices with freeware Qiling Disk Master. - Free Backup Software to Backup External Hard Drive
Learn how to automatically backup Seagate, Samsung, Western Digital etc. external/portable hard drive using best free backup utility Qiling Disk Master in Windows 7/8/10/11. - How to Easily Backup Buffalo NAS to External Hard Drive?
You will learn how to backup Buffalo NAS to external hard drive to protect your data with best free Buffalo backup software. - 3 Ways to Backup Files on My Cloud Home to External Drive
Here are 3 ways to backup files on WD My cloud home to external drive, and one of which is automatic. Try it if you don't want to run it manually every time.