Automatically Backup Data to Network Drive for Free
Why Backup Data to Network Drive?
A network drive is a storage device on a local area network, typically located on a server or NAS device, providing shared storage for a business or home network.
To prevent data loss, it's a good idea to backup your data to a network drive, which can be a shared folder or drive that doesn't require storage space on your computer and is easily accessible via the network. This can be done in multiple ways, and we'll show you how.
Automatically Backup Files to a Network Drive
Yes, Windows can backup to a network drive. To do this, you can use the built-in Windows Backup and Restore tool in Windows 7, 8, or 10, and follow a simple guide to set up the backup to a network drive.
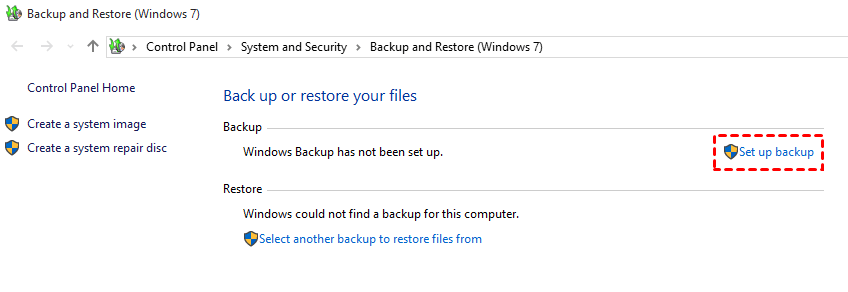
1. To access the Backup and Restore feature in Windows, start by clicking the Start button and typing "Backup and Restore" in the search box, then click on "Backup and Restore" and press enter.
2. If you've never backed up your data or if your previous backup was stored on a local drive rather than a network drive, you should either set up a backup or change the settings to backup to a network drive.
Tips:
☛If you're running Windows 7 Home Basic, you won't be able to save backups to a network location. This is because network backup capabilities are only available on Windows 7 Professional, Ultimate, or Enterprise versions.
☛If you create a system image backup to a network location, Windows will only keep the latest version of the system image, overwriting any previous versions. This means that if you want to restore to a previous version, you'll need to manually delete the latest version to make space for the previous one.
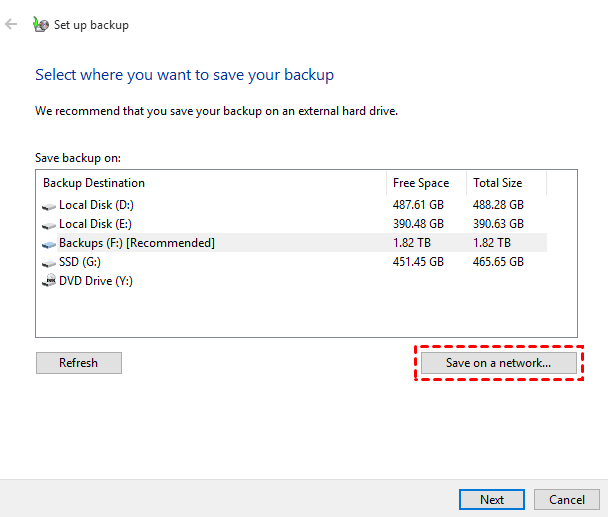
3. Press Save on network... button.
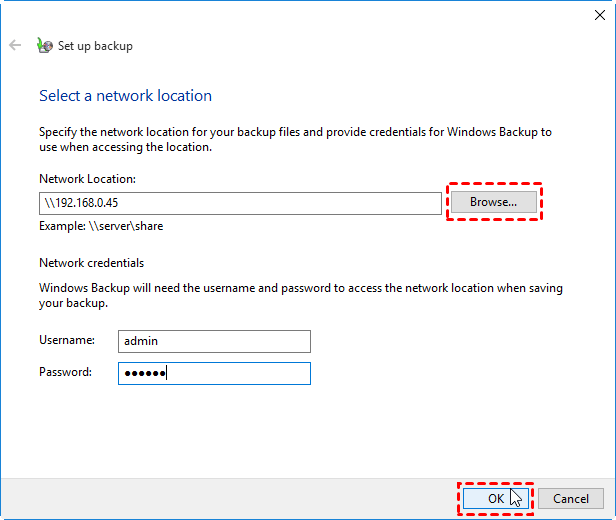
4. To save backups to a network location, click "Browse" to select the network location, input the network credentials, and click "OK". Then, click "Next".
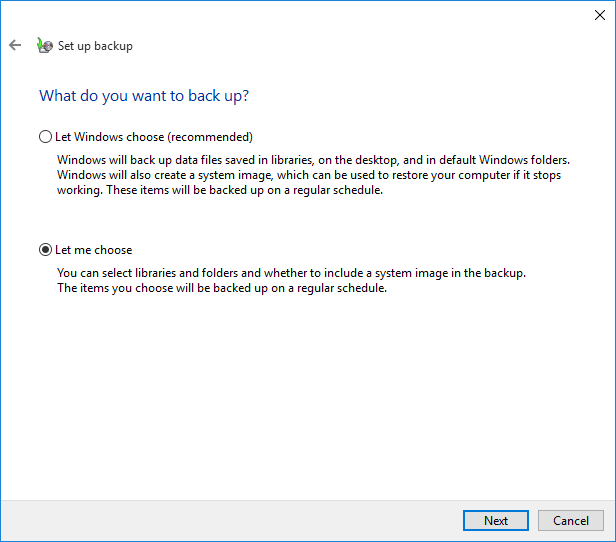
5. Opt Let me choose, and click Next.
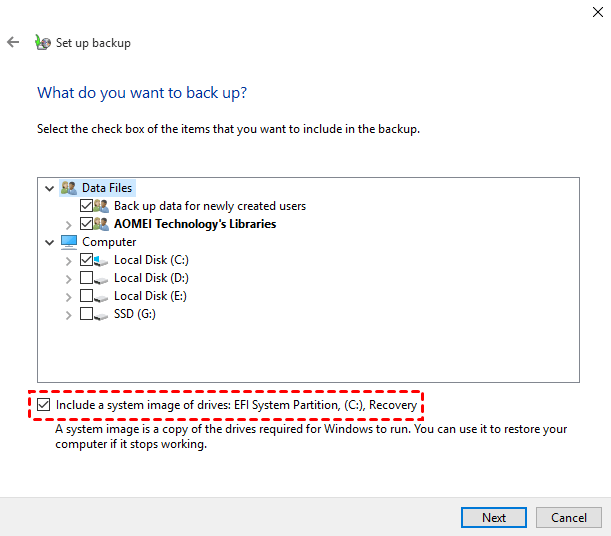
6. Check the files or folders, even the system image to backup. And click Next.
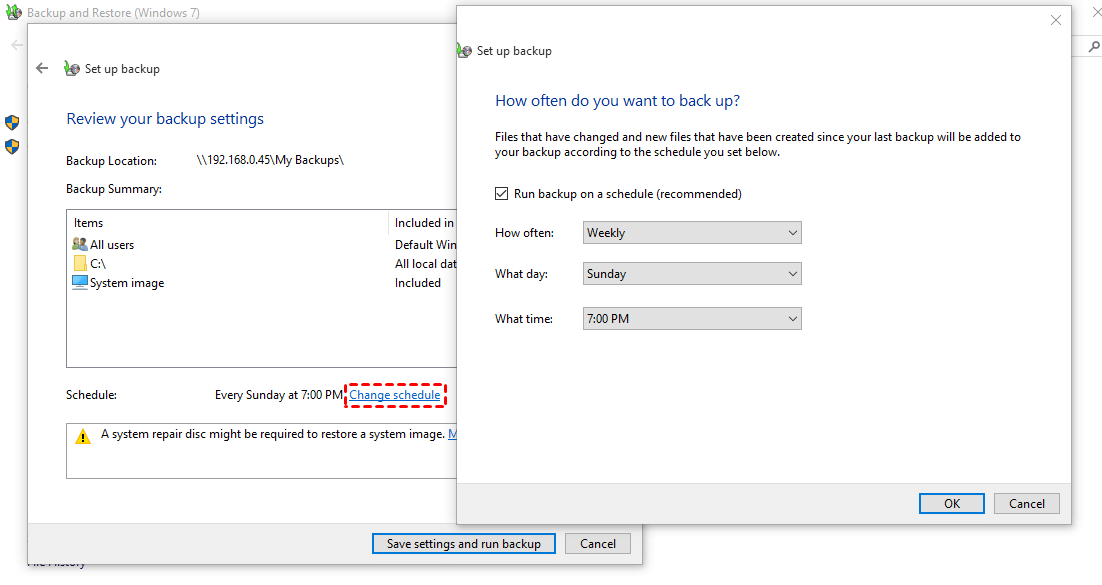
7. To automatically backup to a network drive, change the schedule to set up a regular backup time.
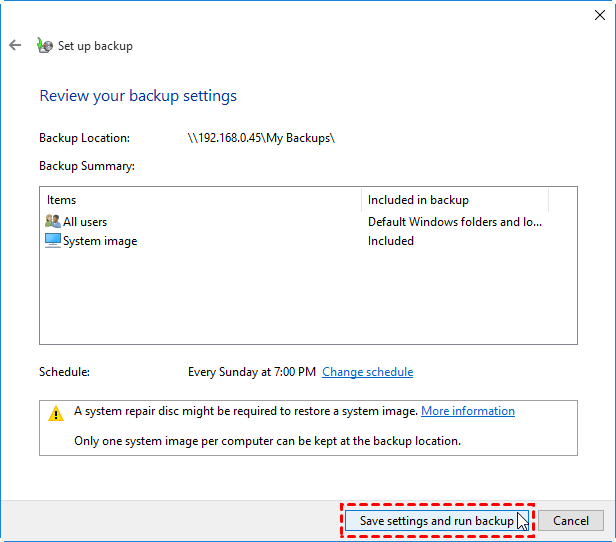
8. Click Save settings and run the backup.
If you're experiencing issues with Windows 10 backup to a network drive, try mapping the network drive first, then initiate the backup process.
Easier Way to Backup Data to Network Drive
Qiling Disk Master Standard is a user-friendly Windows backup software that can easily backup data to various storage devices, including network drives, external hard drives, and clouds. It supports Windows operating systems from XP to 10. To automatically backup Windows 10 to a network drive using Qiling Disk Master, simply download the software and follow the steps to get started.
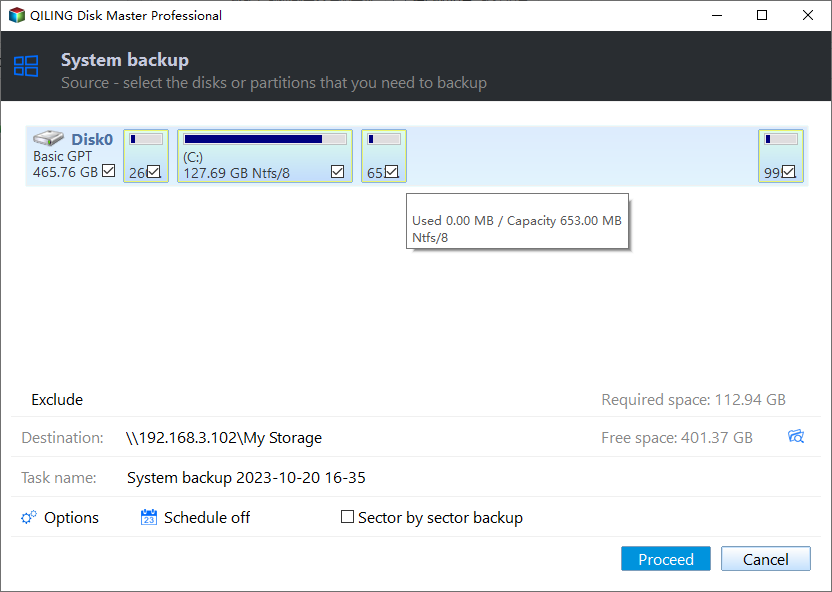
1. After installing Launch Qiling Disk Master Standard, click on Backup, then select System Backup.
Step 2: To add a network drive or NAS as a target partition, click on "Select a network location" and then "Add Network Location". Enter the display name and network path to add the network drive or NAS.
Step 3: Click Schedule to automatically backup Windows 10 to network drive on the specified time.
Step 4: Press Proceed button to backup Windows to network drive.
You can create a Windows 10 backup image file, with a .fvd suffix, in a network drive, and automatically backup files to an external hard drive in Windows 7/8/10.
Qiling Disk Master Standard allows cloning HDD to SSD, syncing files, and restoring images to the original location, with the option to upgrade to a professional version for additional features, including real-time file sync and migrating Windows 7/8/10 to SSD without reinstalling Windows. It also offers a server version for Windows Server backup software.
Final Words
Qiling Disk Master offers two powerful methods for backing up data to a network drive, making it essential to perform backups regularly to protect data. Compared to Windows Backup and Restore, Qiling Disk Master provides greater flexibility and more backup options to cater to different needs, as well as more features to manage backup images.
Related Articles
- How to Back up Data to Network Attached Storage (NAS) or Cloud Clients?
Wanna use Network Attached Storage (NAS) for data backup? Learn how to backup files/folders to NAS or cloud clients with free Qiling Disk Master here. - Easy and Free Network Backup Software for Windows
- Top 5 Best External Backup Drive Windows 10 of 1-4 TB Capacity
Searching for the best external backup drive for Windows 10? Here is a review list of the most popular hard drive selections used for backup purposes.
