Restore Windows 11, 10, 8, 7 Computer to Earlier Date | 5 Ways
- Why restore your computer to earlier date?
- How to restore computer to an earlier date with system restore
- Method 1: How to restore PC to a previous date when your computer is bootable
- Method 2: How to reset computer to earlier date in safe mode
- Method 3: How to restore computer to earlier date from start up
- Method 4: How to restore computer to earlier date using command prompt
- What if system restore failed?
- Secure way to restore computer to earlier state easily
- ◉ Preparations before performing system restore
- ◉ How to restore Windows 11/10/8/7 to a previous date
- Wrapping things up
Why restore your computer to earlier date?
When using a computer in daily life and work, you may encounter various problems such as error loading operating system, "Your PC ran into a problem and needs to restart" loop, computer stuck on restarting screen, etc.
Sometimes you can fix them by conventional means, but in many cases system failures can cause the computer not to function properly or even not to boot up, which makes it difficult to troubleshoot.
In this case, restoring computer to an earlier date could be the last resort to bring it back to a normal state. And to do this, you need to perform system restore correctly.
- How to restore computer to an earlier date with system restore (4 Methods)
- What if system restore failed?
- Secure way to restore computer to earlier state easily
How to restore computer to an earlier date with system restore
Restoring Dell/HP/Lenovo computer to earlier date is a good idea to make your computer go back to the correct state. Well then, how to restore computer system to an earlier time point?
To restore computer to a previous date, you must create a system backup image or system restore point before. Then, you can directly use it when needed. In Windows 11/10/8/7/XP/Vista, there is a snap-in tool called System Restore which can create a restore point for system recovery.
If you don’t enable system restore in Windows, you still can use a third-party tool like Qiling Disk Master. Similar to System Restore, it’s a free backup and restore software, which can help you restore your computer to an earlier date. Keep reading to learn the detailed steps.
Method 1: How to restore PC to a previous date when your computer is bootable
Step 1. Type "create a restore point" in the search box and select it from the result list. When the System Properties window opens, click the System Restore button.
Step 2. Click Next on the first screen of the System Restore window.

Step 3. Select the restore point on the following box and click Next.

Tip: If you do not want to suffer a big trouble reinstalling the programs you recently installed, you can click Scan for affected programs to find the programs that will be uninstalled during the process and then backup whatever you need.
Step 4. Confirm you’ve selected the right restore point and click Finish to restore computer settings to previous date.

Method 2: How to reset computer to earlier date in safe mode
This method is suitable for users whose computer is unbootable. You can consider restoring Windows 7/8/10/11 in safe mode first.
Step 1. Go to safe mode.
👉 In Windows 7
Start your computer, and then press F8 repeatedly until the Windows logo appears.

👉 In Windows 8/8.1/10/11
- Boot your computer and interrupt the boot by holding the power button for 3 times.
- Click Advanced options > Troubleshoot > Advanced options > Startup Settings > Restart to boot into safe mode.

Step 2. Repeat the steps of system restore in normal state.
Method 3: How to restore computer to earlier date from start up
If the system restore from safe mode does not work, you still can create a recovery drive or use an installation disc to restore your computer to earlier date from boot.
Step 1. Insert a recovery drive or installation disc into your computer.
Step 2. Boot your computer into BIOS and set the bootable drive as the first boot option. Then press F10 to save the changes and restart your computer.
Step 3. Click Next until you see Repair your computer in the lower left corner.

Step 4. Click Repair your computer, and then choose Windows 10 > Troubleshoot > Advanced options > System Restore.

Step 5. Then, the System Restore window will appear. Just click Next to move on.
Step 6. Repeat the steps in the normal state.
Method 4: How to restore computer to earlier date using command prompt
You can also use command prompt to restore computer to earlier date in Windows 10. This approach is similar to the previous one. You need to restore computer settings to earlier date with an installation disc or a recovery drive. The only difference is the recovery tool you are using.
Step 1. Boot from recovery drive or installation disc. Then, go to Repair your computer, and click Windows 10 > Troubleshoot > Advanced options.
Step 2. Click Command Prompt in the Advanced options interface.

Step 3. Type "rstrui.exe" in the command prompt window and hit Enter.

Step 4. Then, you will see the GUI screen of System Restore. Just click Next to go on and repeat the steps until the last step.
What if system restore failed?
When you try to restore system from a restore point, you may find that system restore points have gone owing to many reasons like Windows Update, corrupted files, etc. Even if there is a system restore point, you may receive errors during the restoration, such as System Restore did not complete successfully, 0x80070002, System Restore failed to extract the file, volume shadow copy service component encountered an unexpected error, etc.
To get rid of these troubles, you can also adopt another system backup & restore mechanism - using specialist and reliable software like Qiling Disk Master.
Secure way to restore computer to earlier state easily
Windows System Restore can indeed restore computer to an earlier state, but sometimes you may find there's no restore point or the restore simply fails. To do it more simply and securely, you can use Qiling Disk Master Standard.
|
💻 Supported OS |
It’s a complete and powerful backup and restore software supporting Windows 11/10/8.1/8/7/XP/Vista. |
|
🧲 Various Restore Types |
Not only operating system, it can also be used to restore partition, disk, or individual files & folders. |
|
📀 Bootable Media |
If you are worried your PC might not boot up due to a malfunction, you can also create a bootable media to restore system in WinPE. |
|
✅ Easy Operation |
Compared with Windows System Restore, it is much easier to operate and less error-prone. |
Download the freeware Qiling Disk Master Standard to have a try:
◉ Preparations before performing system restore
- Go to Backup tab and choose System Backup to create a system image for recovery needs.
- Go to Tools tab and use Create Bootable Media tool to make a recovery media in case the computer fails to boot.
- If the system has crashed without any backup or bootable media, you can also create them on another working PC and restore to the problematic one with the Universal Restore (supported by Professional edition) feature.
◉ How to restore Windows 11/10/8/7 to a previous date
1. Launch this freeware. Click Restore at the left side. Then, click Select Task or Select Image File to find the image.

2. (Optional) If you click Select Task, select the system backup task in the following window and then click Next.

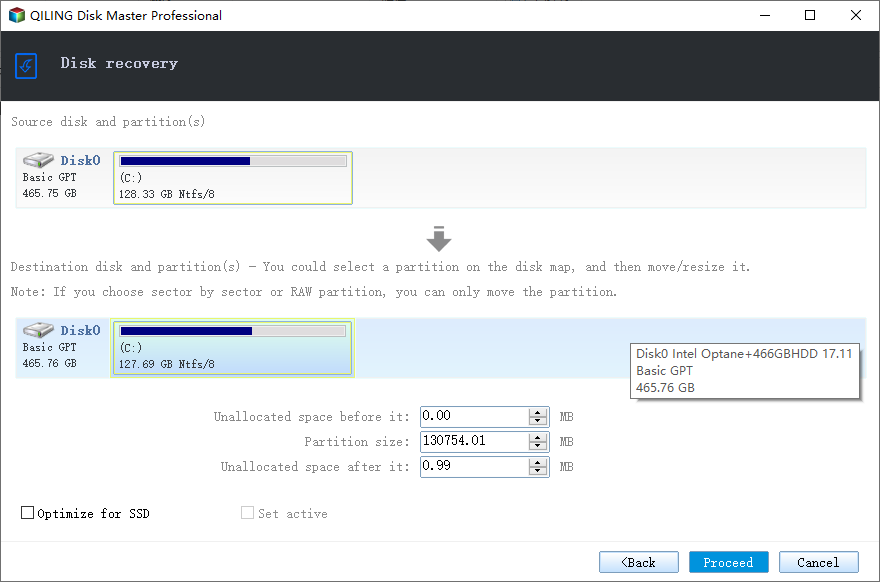
3. Then, select to restore the entire backup or a part and click Next.

4. Then, click Proceed to execute the progress. When the progress reached 100%, click Finish to exit.
Wrapping things up
System Restore is a good way to restore computer to an earlier date in Windows 11/10/8/7, but sometimes it does not work properly.
Thus, finding a better backup and restore software to protect your computer is imperative. Don’t hesitate. Qiling Disk Master can be your prior choice, because it’s free and easy to use. And it’s suitable for all kinds of users, from beginners to technicians. It offers different users different versions: the standard and pro versions for home users; the workstation, server and technician versions for business users.
If you want to use the powerful backup & restore features on multiple computers, you could pick Technician or Technician Plus edition, and create a portable version of Qiling Disk Master on removable device.
Related Articles
- Why and How to Restore Windows Server 2008 R2 to Previous Date
How to restore Windows Server 2008 R2 to previous date? If you are looking for a way to do it, pleas continue to see below and this article will introduce you to 3 effective methods. - (Fixed) System Restore Not Working in Windows 10
System restore not working Windows 10, why is it and how to fix it? Learn more below and fix it with 9 given solutions. Also, you can backup system with true backup software Qiling Disk Master. - There Was a Problem Resetting Your PC [7 Quick Ways]
How do I fix there was a problem resetting your PC in Windows 11/10/8/7? Here are 7 quick solutions. Please remember to backup system in case of data loss. - How to Run System Restore via Command Prompt in Windows 10?
This article will introduce how to launch System Restore from command prompt and run system restore in Windows 10/11 to repair your computer.