Easiest Way to Backup Buffalo LinkStation NAS to another NAS
About Buffalo NAS
Buffalo Network-Buffalo's NAS series caters to different user groups, including business users with TeraStationTM, home users with LinkStationTM, and those with surveillance needs, such as TeraStationTM 5200 NVR and LinkStationTM 420 NVR.
Buffalo NAS offers various solutions for different needs, with business-focused models featuring RAID, hot spare, and real-time replication for effective value and reliability, while home-focused models prioritize capacity, data protection, and entertainment features. Additionally, a turnkey surveillance solution is available for small businesses and home users. Regardless of the chosen model, backing up data to a PC or another NAS is a good idea.
Why perform Buffalo NAS to NAS backup?
Most PC users want to backup Buffalo NAS to another Buffalo NAS for two main reasons: data security and file transfer. Storing crucial and confidential data on NAS is inevitable, and backing it up ensures safety in case of unexpected disasters. However, if the disaster occurs on the NAS itself, having a backup is even more crucial. Therefore, it's essential to backup the Buffalo NAS to another one, just like backing up QNAP NAS to another QNAP NAS, for added security.
Making a Buffalo NAS backup to another NAS allows for data transferring, enabling regular file sharing without user interaction between the two NAS users. This can be scheduled to occur automatically. Beyond these primary reasons, there may be additional motivations for performing NAS to NAS backups. The next step is to identify and address these reasons.
How to perform Buffalo LinkStation NAS to NAS backup in Windows?
To backup a NAS, you need a professional backup utility that can connect both NASes, and Qiling Disk Master Professional is a reliable option among many available solutions.
This software enables backing up NAS/network share to another NAS/network share on Windows operating systems, including Windows 11, 10, 8.1, 8, 7, XP, and Vista. It also offers features such as password protection, compression, image splitting, and the ability to backup only used space, which can speed up the backup process.
You can set scheduled backup tasks with various options, including Daily, Weekly, Monthly, and Event-trigger modes in Schedule, allowing for flexibility in backup timing. Additionally, you can manage backup storage by automatically deleting old backups in Scheme, helping to maintain a clean and organized backup system.
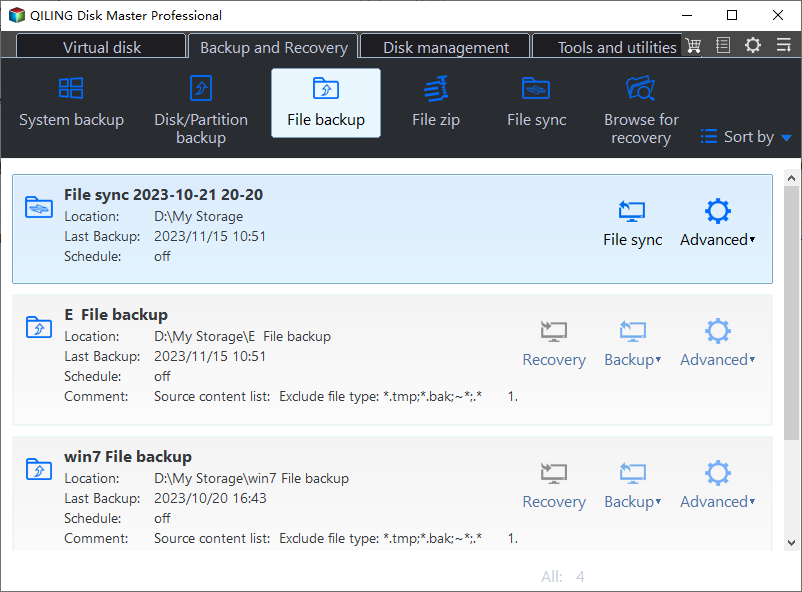
Step 1. To download, install, and start Qiling Disk Master on your PC, go to Backup > File Backup.
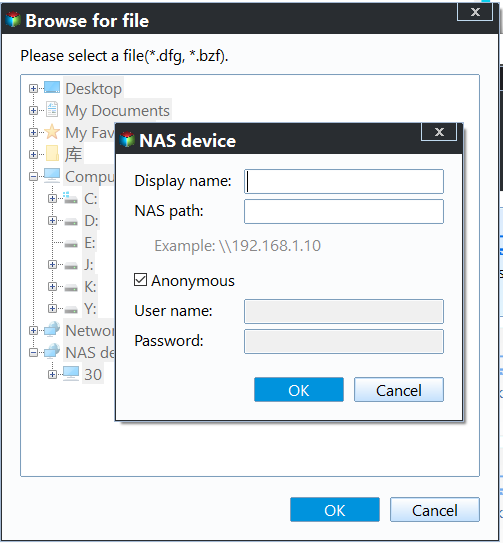
Step 2. Go Folder > Share/NAS.
Step 3. To add a network location, click on "Add Network Location" and enter the path to the Buffalo NAS. If you have previously set up a username and password, you may be prompted to enter them again.
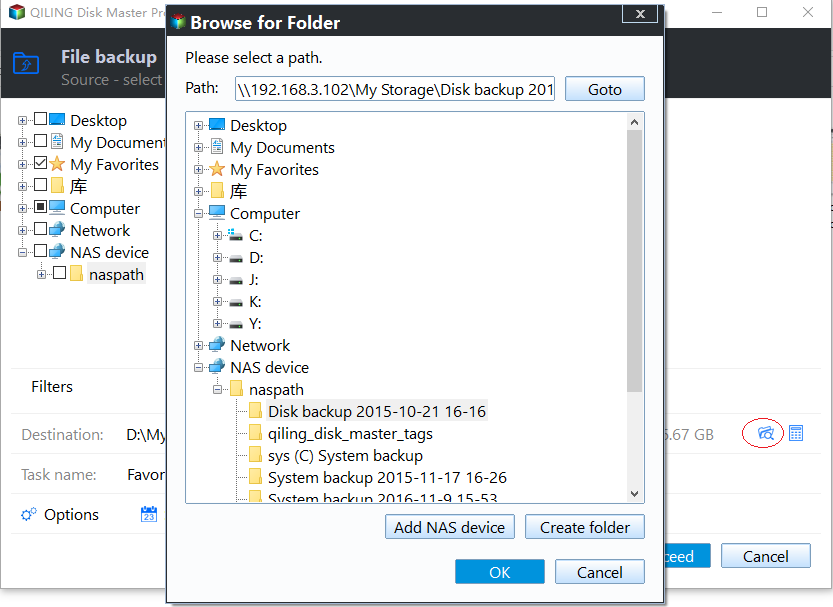
Step 4. To add another NAS location, click the box to select the destination path, then click the box to add the other NAS location, repeating the process of selecting the destination path and adding the NAS location.
Step 5. You can configure more customized settings in options like Options, Schedule, Scheme. Click Proceed when you're done.
The process of backing up Buffalo NAS to another NAS is relatively straightforward. This allows for easy data recovery in case of any issues. Additionally, Qiling Disk Master can also be used to backup Buffalo NAS to an external drive, providing an extra layer of protection.
Tips: Qiling Technology has released Qiling Disk Master Network, allowing for the backup of multiple computers over a network from a single central management console.
Related Articles
- Best Free Way to Backup WD My Cloud to Amazon Drive
You need to create multiple backups, not only backup WD My Cloud to Amazon Drive, but also to other clouds like OneDrive, Google Drive, Dropbox etc, so your data is always safe even if the Amazon Drive is deprecated. - How to Easily Perform Continuous File Sync on Windows
This article tells you how to perform continuous file sync on your PC, including 2 possible ways. Choose the one that suits you best. - Move Users Folder to Another Drive in Windows Server 2012
Want to move Users folder to another drive in Windows Server 2012 (R2)/2016/2019/2022? The best Windows Server backup software – Qiling Disk Master Server and a Windows built-in feature can give you a hand. - Windows Copy Large Files Over Network in Windows 10/7 (Best Way)
You will learn the fastest way of Windows copy large files over network. And it also works for large amount of files.


