Solved | Can't Backup System to Removable USB Drive in Windows 11, 10, 8, 7
Case: can’t backup system to USB
I'm using built-To resolve the issue, try using the "Backup this PC" option instead of "Create a system image" in Backup and Restore. This will allow you to create a backup to your USB stick. If that doesn't work, you can also try using the built-in Windows Backup tool or a third-party backup software. Ensure that your USB stick is properly formatted and has enough free space to accommodate the backup. If you're still facing issues, you can try formatting the USB stick and then attempting to create a system image again.
When trying to backup a system to a USB drive, it's common for the drive to fail to be identified or recognized as a valid backup location, resulting in errors like those related to the Volume Shadow Copy Service or the drive not being NTFS formatted.
The purpose of this article is to identify and address common situations where system backups to removable USB drives are not possible, providing effective solutions to overcome these obstacles.
- Common ways to backup system to USB drive
- You're unable to backup your system to a USB drive because the USB drive isn't recognized as a bootable device by your system. To fix this, you'll need to create a bootable USB drive using a tool like Rufus or the Windows 10 Media Creation Tool. This will allow you to boot from the USB drive and perform the backup.
- Easier way to backup system to USB drive successfully
Common ways to backup system to USB drive
Backing up your system to a removable USB drive can help prevent Windows failures by allowing you to restore your system from the backup in case of a problem. This can save your computer.
Compared to other devices, a USB drive is a cost-effective and convenient option for installing a system, as long as it has sufficient space. Two built-in Windows utilities can be used for this purpose, or a third-party tool can be employed for better compatibility.
- Create a system image to USB drive:
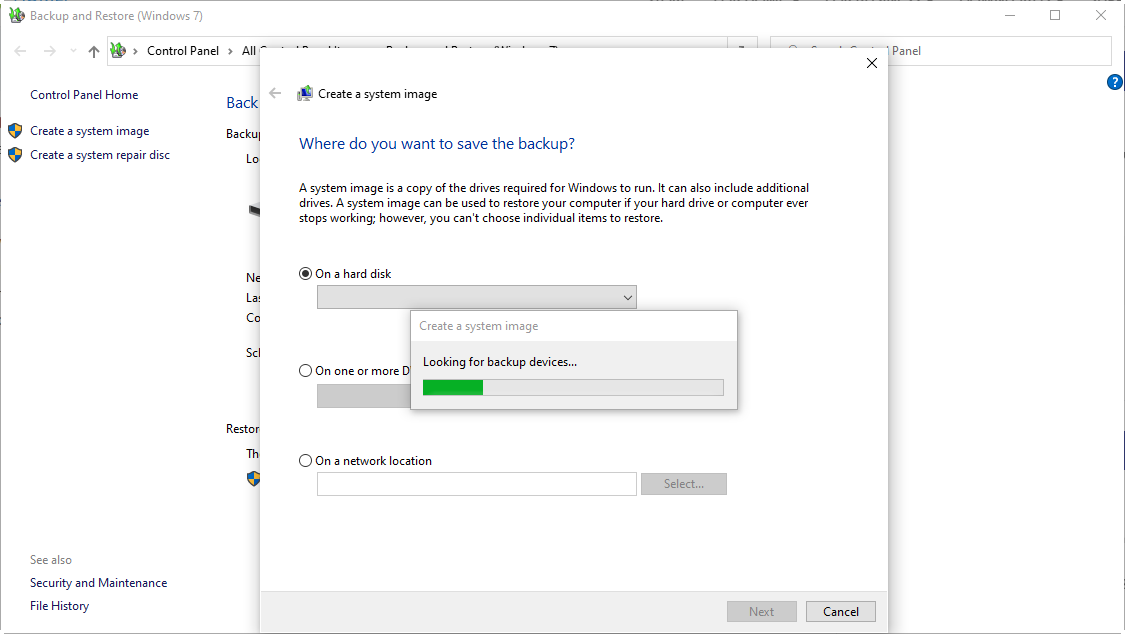
In Windows Backup and Restore, there's an option to create a system image.
To choose the Windows 10 installation location, follow the wizard to select "On a hard disk" and choose the connected USB drive as the destination.
The system image contains all required drives for Windows to run, taking up more space, but allowing for restoration to an earlier date using System Image Recovery in the Windows recovery environment.
- Create a recovery USB:
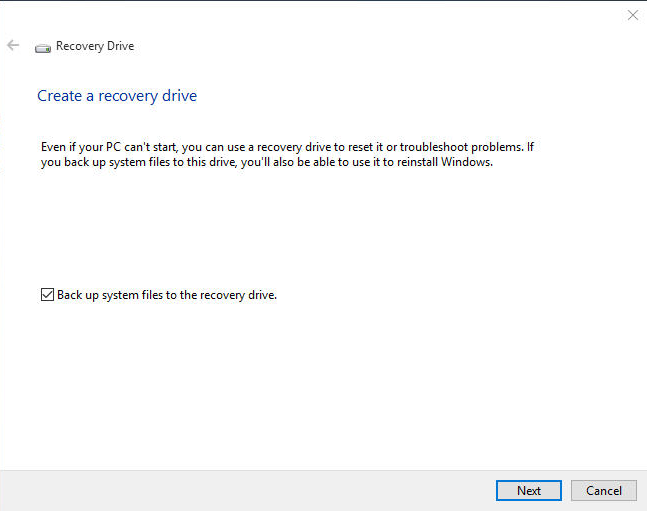
In Windows 8 and above, search for "Create a recovery drive", tick "Back up system files" and select the USB flash drive as the recovery media.
A recovery USB allows you to reinstall Windows from the WinRE drive, but it will erase all files and apps.
If you're running Windows 7, you can use the first method or try creating a Windows 7 recovery USB using the second method. To create a Windows 7 recovery USB, you'll need a 4GB or larger USB drive, a computer with Windows 7 installed, and a blank USB drive.
- Create bootable drive with handy backup tool:
Whether you want to backup your system to a removable drive for data security or create a bootable drive to start your computer when it fails to boot properly, a professional backup tool like Qiling Disk Master Standard is a more solid and widely available option.
It supports various Windows versions, including Windows 11, 10, 8.1, 8, 7, XP, and Vista, and enables the creation of bootable USB or CD/DVD drives with reduced errors.
Why can’t I backup system to USB drive and how to fix it
If you're having trouble creating a system image on a USB drive or a recovery USB, don't worry! There are several potential issues and errors that might be causing the problem. Some common culprits include issues with the USB drive itself, problems with the Windows installation, or conflicts with other software.
- Case 1 - USB can't be recognized
- Case 2 - Volume Shadow Copy Service error
- Case 3 - This drive is not formatted with NTFS
- Case 4 - The drive is not a valid backup location
- Case 5 - We can't create the recovery drive
- Easy alternative to backup system to USB drive
Case 1 - USB can’t be recognized
Possible causes:
1. USB driver is physically damaged or not installed properly.
2. The USB drive is not being recognized by the computer because the drive letter assigned to it is already being used by another drive. This is causing a conflict and preventing the USB drive from being accessible.
3. A USB drive is disabled in the CMOS (Complementary Metal-Oxide-Semiconductor) settings to prevent unauthorized access to the computer's data in a public place, ensuring the safety of the computer.
4. The newly installed USB device uses an unconventional flash memory chip and technology in its manufacture.
Coping solutions:
☛ If your USB drive is not working on your computer, try plugging it into a different working PC to see if it can be recognized. If not, try using a different USB or switching to a different type of external storage like an external hard drive.
☛ 2. You can reassign the drive letter if necessary.
☛ 3. Enter the CMOS settings, locate the USB device settings on the motherboard, and change its state to enabled.
☛ 4. Go to the official website of the USB manufacturer to download the latest driver package or find the original CD driver.
Case 2 - Volume Shadow Copy Service error
Possible cause:
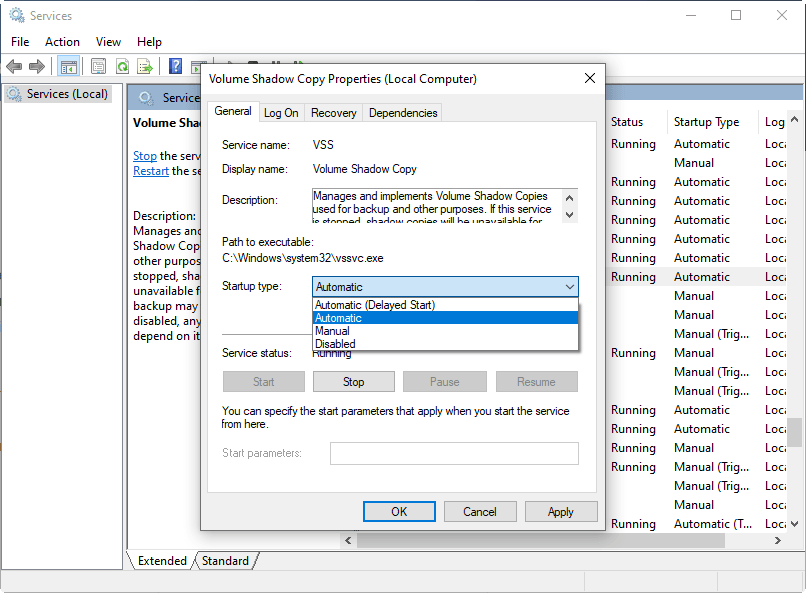
The Volume Shadow Copy Service (VSS) is a built-in Windows technology that enables volume backups. If you encounter errors during backup, it's likely because the VSS service has been stopped without your knowledge.
Coping solution:
To check the status of the Volume Shadow Copy service, you can press the Win + R keys to open the Run dialog box, type services.msc, and click OK. Then, in the Services window, find the Volume Shadow Copy service from the list and verify its status.
If it's disabled, double-To fix the Volume Shadow Copy Service Component error, click on the status type to set it to Automatic, and then click Start to enable it. For detailed steps, you can refer to a troubleshoot post that includes screenshots.
Case 3 - This drive is not formatted with NTFS
Possible cause:
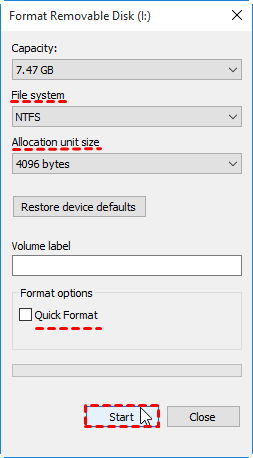
Windows Backup and Restore cannot backup system to FAT32 drive, so you should format the USB drive from FAT32 to NTFS first.
Coping solution:
To format a USB drive, connect it to your PC, right-click it in Windows Explorer, and select "Format". Change the file system to NTFS and click "Start", but be aware that this process will erase all data on the drive. It's recommended to backup any important files on the USB drive before formatting.
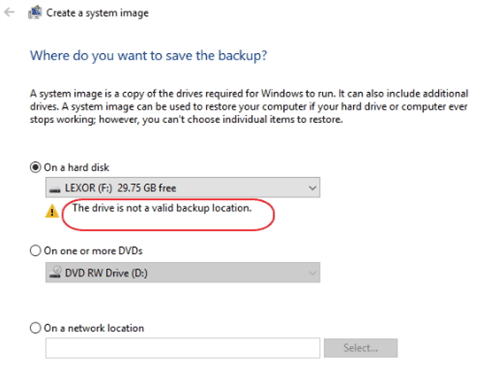
Case 4 - The drive is not a valid backup location
The Backup and Restore feature won't allow you to create a system image on a USB drive because earlier USB drives didn't have enough space and weren't supported as a storage location.
Possible causes:
1. The system version or USB driver is too old.
2. The USB has insufficient space.
3. The USB drive hasn't been converted to NTFS.
Coping solutions:
☛ 1. 1. Update the system and USB drive driver to ensure compatibility with the changed policy.
☛ 2. Use a larger USB with at least 64 GB space.
☛ 3. To format the USB drive in NTFS, follow the same steps as in Case 3. This will ensure that the USB drive is formatted with the NTFS file system, which is compatible with Windows operating systems.
If none of the above methods work, try creating a subfolder on the USB drive, right-clicking it, and selecting Properties > Sharing > Share.
1. Select or add your own username. 2. Hit the Share button.
After sharing the folder, you can select "On a network location" when creating a system image, and enter your computer's login credentials to access it. This allows you to also back up your system to a USB drive.
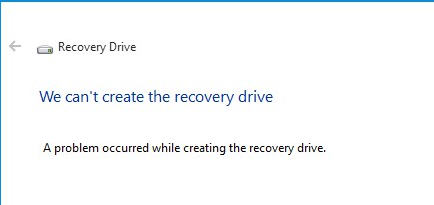
Case 5 - We can’t create the recovery drive
The error message may appear when trying to create a recovery USB, and it can be caused by various factors such as insufficient space or an unformatted USB drive. The solutions to these issues are the same as those mentioned earlier and can be found in more detail with screenshots in the provided post.
Secure way to backup system to USB drive in Windows 11/10/8/7
While Windows has a built-in utility to back up the system to a removable USB drive, it has limitations and may fail for various reasons. Instead of trying to troubleshoot these issues, a free alternative can be used to achieve the same result.
Qiling Disk Master Standard is a program that supports Windows 11/10/8.1/8/7/Vista/XP, both 32 bit and 64 bit, and allows for complete backup options to backup the operating system, files, partitions, or entire disk to various destinations.
For system backup to a USB drive, the restrictions are fewer than Windows Backup and Restore, with a simpler operation. This allows for scheduling automatic backups or performing incremental backups, which only backup changed files.
You can create a bootable USB to start a faulty computer and restore the system using WinPE.
How to backup system image to USB drive with free alternative:
1. Launch the tool, connect your USB, go to the Backup tab, and select System Backup.
There are other backup modes available, including file backup, partition backup, and disk backup, which can be chosen based on specific needs.
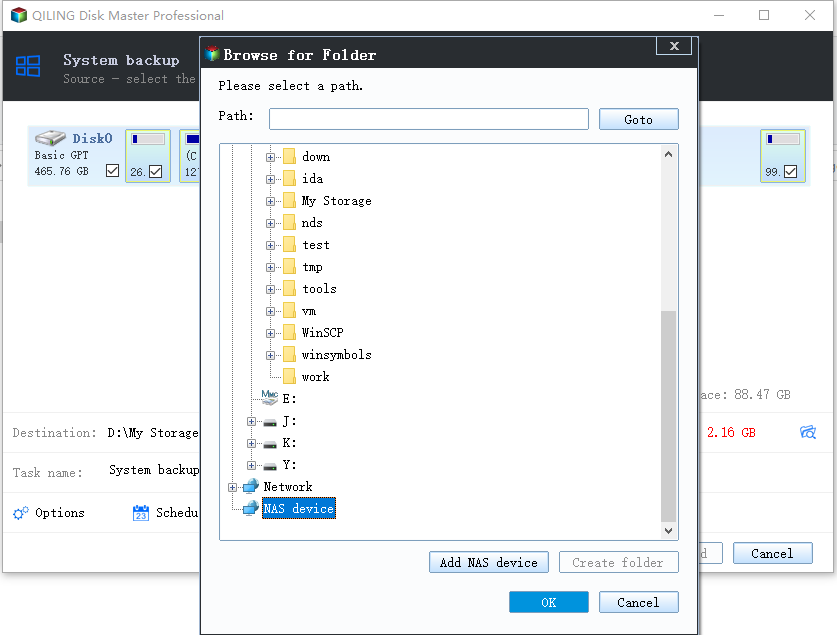
2. The system partition will automatically be selected as the source, and you just need to choose the USB drive as the destination.
You can also backup system to an external hard drive, cloud drive, network location, NAS, etc.
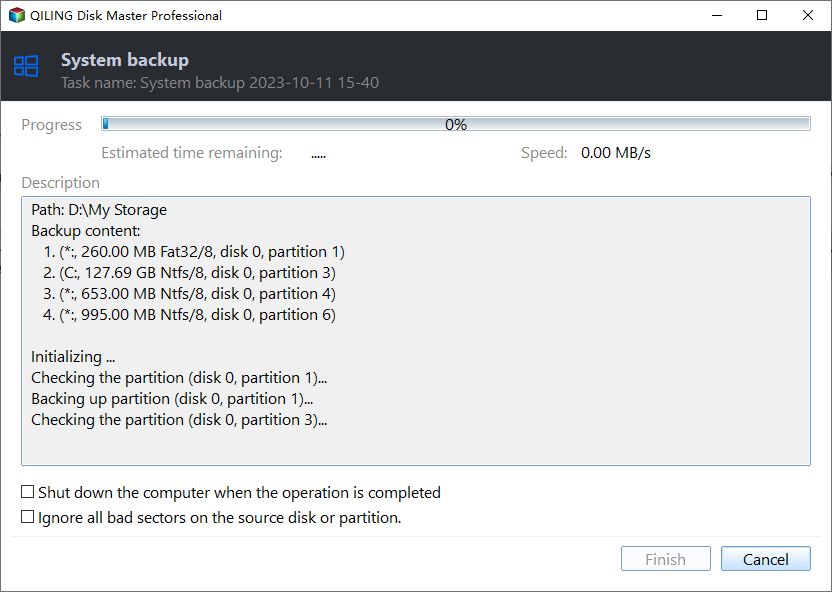
3. To personalize the backup, add buttons at the bottom. Click the Proceed button to initiate the backup process, which will save the system to a USB drive.
Options: Manage backup mode, comments, email notification, compression, splitting, and encryption are all features that can be configured to enhance the backup process.
Schedule Backup: Set up automatic backup. There are multiple options including Daily, Weekly, Monthly, Event triggers and USB plug in. The last two are available in advanced editions. If you want to auto backup data to USB once it's connected, you can upgrade to Professional edition to choose USB plug in.
�ackup Scheme: You can choose from full, incremental, and differential backup options, or create a rule to automatically delete older backups to save storage space.Backup Scheme: You can choose from full, incremental, and differential backup options, or create a rule to automatically delete older backups to save storage space.
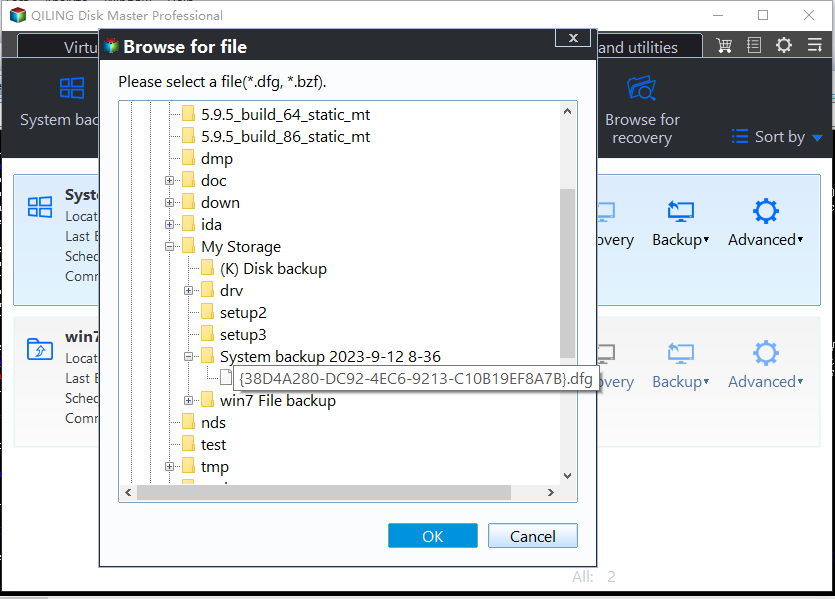
After the backup process is complete, you can restore your system by connecting the removable USB drive, then clicking the backup task in the Home page or navigating to the Restore tab.
To restore a system to a different computer with dissimilar hardware, select the "Universal Restore" option, available in the Pro edition, during the system restore process.
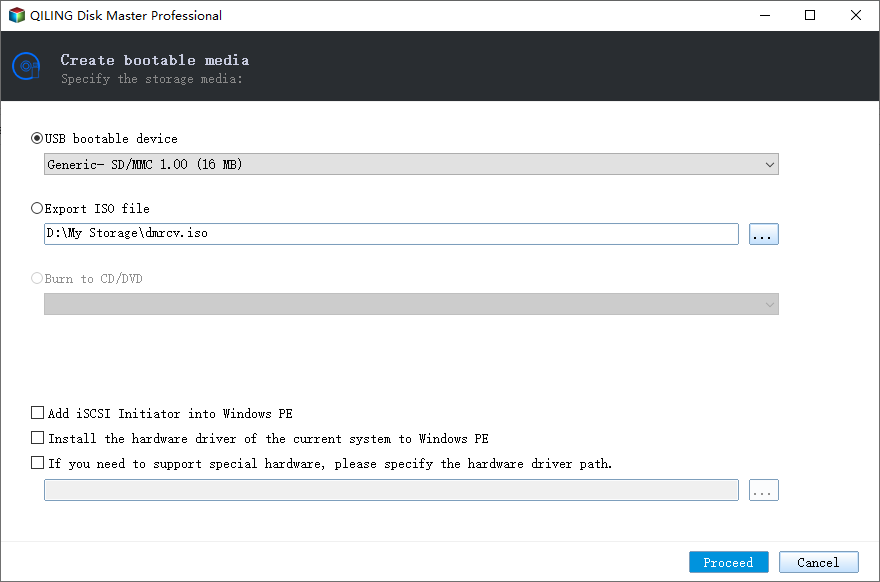
If your computer fails to boot or you are worried about this, you can create a bootable USB or CD/DVD with this software, or use the Recovery Environment feature (available in Pro edition) to add a boot menu on the current computer, which doesn't require any device.
★ Easier way to backup system for protection:
You can also use Qiling Disk Master to backup your system, which is a simpler process. This software not only backs up your system but also creates a bootable media that allows you to boot your computer. It comes with a boot menu that lets you quickly access recovery options using a specific key, which can be very helpful when your computer is not functioning properly.
Conclusion
It's a feasible way to backup system to removable USB drive as long as it has sufficient space, but some unexpected problems may occur during the process, requiring troubleshooting to identify and resolve the causes.
If you find it troublesome to use the current method, you might consider using a simpler alternative like Qiling Disk Master. This tool allows you to backup your operating system to a USB drive or other locations such as external hard drives, cloud drives, NAS, and more. In addition to backup and restore, Qiling Disk Master also enables you to migrate your OS from a hard drive to an SSD, copy everything from one hard drive to another, or even �XE boot multiple computers via network.PXE boot multiple computers via network.
Related Articles
- Quick Guide to Create Windows 10/8/7 System Image on a USB Drive
- 2 Free Methods to Backup Entire Computer to USB Flash Drive
- Restore Windows 10 from Recovery USB (4 Ways included)
- Fixed: Unable to Create Recovery Drive in Windows 10 [3 Ways]
