Create a Schedule to Backup User Files (2 Ways)
Why should you schedule backup user files?
The main reason for schedule backup Users files is to ensure data security. Why do I say this? By default, there are many installed or built-in applications that will save files to the Windows Users folder. And any wrong operation will result in data loss.
Besides, Users folder is located in system partition, which can be easily affected by computer failure. If your computer has some problems because of virus attack or malware and needs to reinstall Windows, the Users folder and installed Apps on the system drive will be deleted.
All in all, it's important to backup user files if you don't want to lose them due to any reason. If change it from time to time or very frequently, you need to create a schedule to backup User files to keep changes between this period.
Does Windows 10 have automatic backup?
In fact, Microsoft provides you with two built-in backup software to automatic backup user files, including Backup and Restore, File History. The first is only available on Windows 7 or Windows 10/11. The second one is supported by Windows 8 and later version. However, there are some differences between them, you can check details in the following chart:
| Backup and Restore | File History | |
| Backup Items | Backup user files, as well as partition, system or entire disk. | Backup user files only. And it allows you to add any files you want in Windows 10 and 11. |
| Schedule Settings | Support daily, weekly, monthly backup, every Sunday at 7:00 PM by default. | From every 10 minutes to daily, and the default option is hourly. |
| Backup Methods | Backup files and changes since last backup. | Backup only changes at the specified time point. |
| Backup Retention | Retain only the most recent backups at a time point or delete all of them. | Keep from 1 month to 2 years, or use Untill space is needed or forever by default. |
| Backup Destination | support internal/external hard drives, and network location. cloud drives are not supported as well. | Support external hard drive, home network, NOT internal drives and cloud drives. |
Well then, which one should you choose? It depends on items you want to backup, backup and retetion frequency, or the backup drive you have. You may still find it difficult to choose due to one of the factors in it, whether there is an all-in-one backup software that can compensate for the drawbacks involved.
The answer is Yes, you could consider using third-party backup software - Qiling Disk Master to create a schedule to backup user files in Windows 7, 8, 10, 11 or previous systems. And all the operations are based on intuitive interface, so users can easily understand it and use as a professional.
How to create a schedule to backup user files in Windows 10
Here I'll introduce you to two ways to schedule backup user files in Windows 10 and the complete way takes precedence. As for built-in tools, I'll only show you how to use schedule automatic backup software - Backup and Restore (Windows 7), since its backup frequencies are more reasonable.
Method 1: Automatic backup user files with Qiling Disk Master Standard
Before you start to automatically backup user files in Windows 10, you need to download Qiling Disk Master Standard and install it on your computer.
(PS: This software applies to Windows 11/10/8/7/XP/Vista. For server users, try Qiling Disk Master Server.)
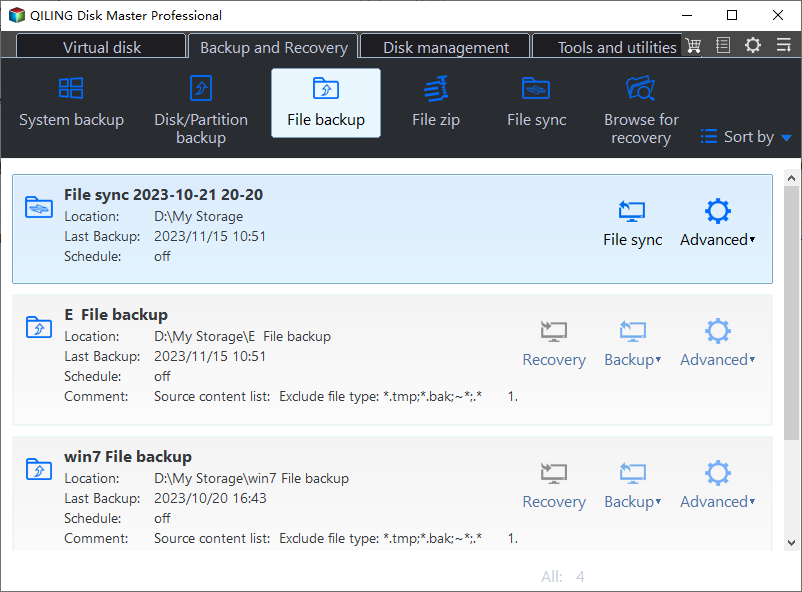
1. Run this free backup software, click "Backup" and select "File Backup".
Note: You can also backup user files to Qiling Cloud with its Cloud Backup feature. And it still offers Qiling users 1TB of free cloud storage in 15 days after registration.
2. Click "Files" or "Folders "to include the user files or folders into the backup.
3. Select a location path to save the image backup. You can backup files to USB, external hard drive, network drive, etc.
4. To schedule backup user files, enable Schedule Backup and set a specific time of a day, a week, a month. Then, click "Proceed" to run the backup task.
Also, you can use Event trigger and USB Plug in on the professional version.
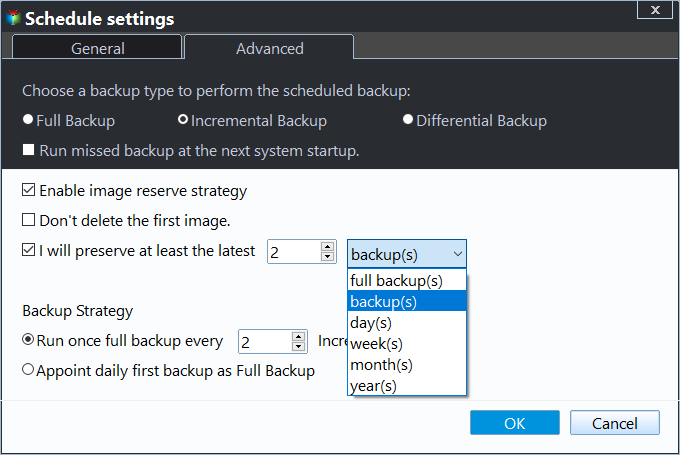
By default, this software will perform scheduled task with incremental backup. It backs up only changed files and saves much backup time and disk space. However, in the long run, your backup task will be fulfilled sooner or later unless you delete backup files manually or automatically.
If you delete it manually, you may encounter another issue - system restore failed due to missing one or more incremental backups. Thus, it's suggested to enable Backup Scheme and delete backup file automatically. You have 3 options, By quantity, By time, By daily/weekly/monthly. You need to upgrade now (5% off for one computer) before using it.
Also, you can choose to use a safer backup method - Differential Backup. It is relatively easy for recovery. For differences between them, learn my previous article: Incremental or Differential Backup.
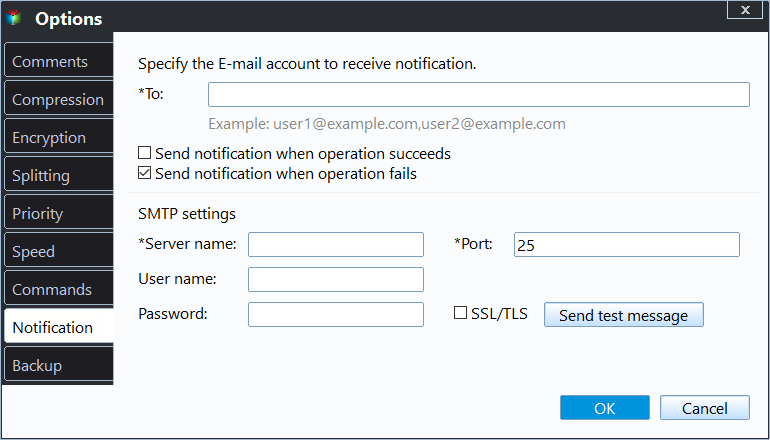
Besides, you still can enable email notification after the task finished. Comment, split, compress the backup image, or select a backup mode, etc.
Method 2: Schedule backup user files with Backup and Restore
Here you will use Backup and Restore to schedule backup user files in Windows 10. And the steps are applicable to other systems, such as, Windows 7 and Windows 11.
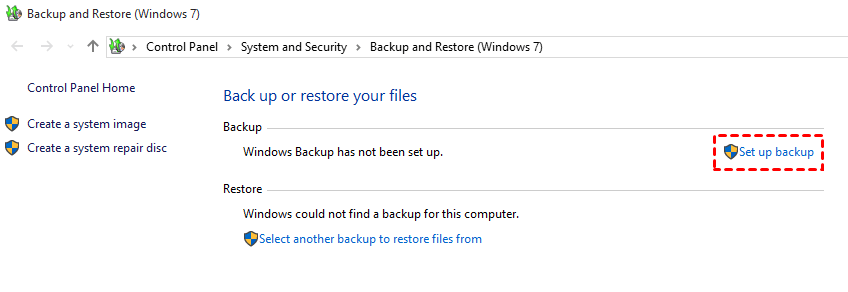
1. Open Backup and Restore, you have two ways in the following. Then, click "Set up backup" on the right panel.
# 1: Use backup settings:
In Windows 10, type backup settings and select it, scroll down to Looking for an older backup and click Go to Backup and Restore (Windows 7).
In Windows 7, you can directly search Backup and Restore in the search box.
In Windows 11, go to Settings -> System -> Storage -> Advanced Storage options > Backup options, then scroll down to Looking for an older backup and select Go to Backup and Restore (Windows 7).
# 2: Through Control Panel: Go to Control Panel and select Backup and Restore (Windows 7 ) under System and Security tab.
2. Select the drive where you want to save the Windows backup files and click "Next" to continue.
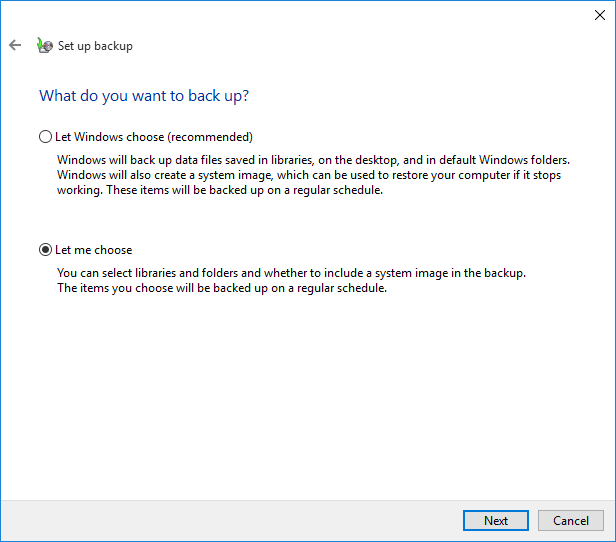
3. It will bring you the What do you want to back up screen. Select "Let me choose" and click "Next".
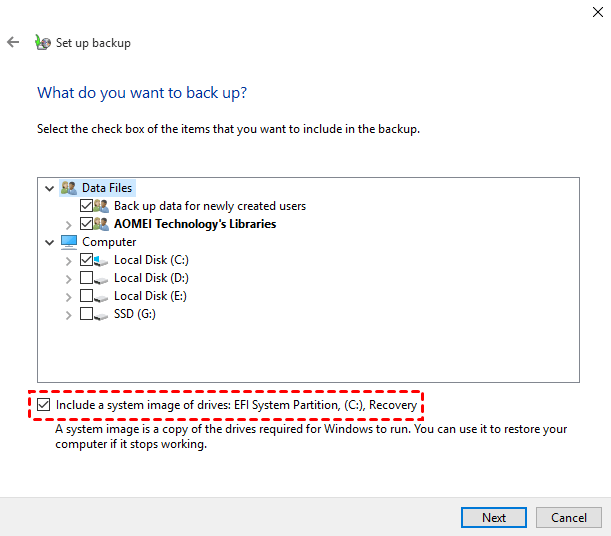
4. Select the Users folder under the Dta Files and click "Next". By default, the option "Include a system image of drives ..." will be checked. If you don't want to backup system, uncheck it.
5. Review the backup settings and click "Save settings and run backup" to run the backup. The schedule setting is Every Sunday at 7:00 PM by default and you click Change schedule to switch to another time.
Important: Backup and Restore is not maintaining in Windows and it will be removed completely in the future. So, if you are using Windows 7 or Windows 10/11, you'd better use free backup software like Qiling Disk Master Standard.
For Windows 8/8.1 users, you could backup files to external hard drive with File History. And you can backup specific folders. For more flexible way to create automatic backup for user files, free backup software is a greater choice.
Wrapping things up
You can easily create a schedule to backup user files with the help of schedule automatic backup software - Qiling Disk Master Standard and built-in tools. The previous is recommended due to its more compatible and flexible. It not only schedule backup users files, but also system, disk and partitions. Its Incremental Backup only backup changed files.
In the advanced edition, you can enjoy advanced backup method - Differential Backup and flexible automatic backup cleanup methods to delete backup files regularly to store new backups. To deploy image to multiple computers, try image deploy tool in the Qiling Disk Master Technician or TechPlus edtion. For differences, check the edition comparison page.
Related Articles
- Best Way to Do Schedule Automatic Backup in Windows 7
Running a scheduled backup in Windows 7 can help you automatically protect Windows 7 data and files daily, weekly, or monthly. - How to Automatically Backup File Using Task Scheduler
Task Scheduler is a built-in Windows features with multiple options to trigger a task. Learn 3 ways to backup file using Task Scheduler. - Create a Schedule to Backup User Files in Windows 10/8/7
This article will show you how to create a schedule to backup User files in Windows 7/8/10/11 and provides you with 2 helpful ways. - Best Automatic Backup Freeware for USB Drive
This tutorial will introduce a USB automatic backup freeware. You can auto backup USB stick with free software to duplicate data you care most on the flash drive. Please keep reading.
