Create Hard Disk Partitions Before Installing Windows 11/10/8/7
Why create partition before installing Windows 11/10/8/7?
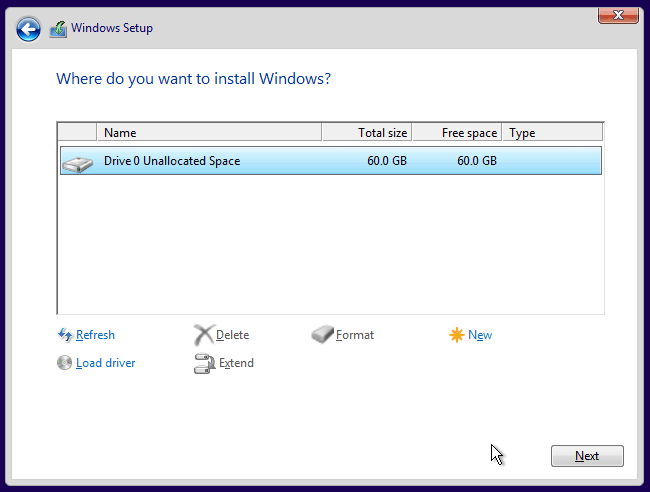
Windows will automatically create a system reserved partition or recovery partition, and a C: drive, when installing the operating system on an unallocated space, but only one or more small partitions are allowed on a GPT disk, whereas a MBR disk is limited to four primary partitions.
If your computer supports UEFI boot mode, you can convert a MBR disk to GPT for Windows 11 installation without data loss. However, if you want to install multiple operating systems on one MBR drive, converting to GPT may not be ideal as it would limit the number of primary partitions available. In this case, it's better to partition the hard drive before installing Windows to prevent it from creating additional system partitions.
Partition a hard drive during Windows setup
Windows build-To partition a hard drive, you can use Disk Management or Diskpart.exe, either of which can be used to create a new partition. Disk Management is only accessible once the OS is loaded, making it suitable for creating a new partition for another OS on a hard drive that already has Windows installed. If the hard drive is unpartitioned, you can use a Windows installation disc to run Diskpart.exe, which allows you to create a partition without the need for a pre-installed OS.
1. Insert the installation disc, and boot your computer from it.
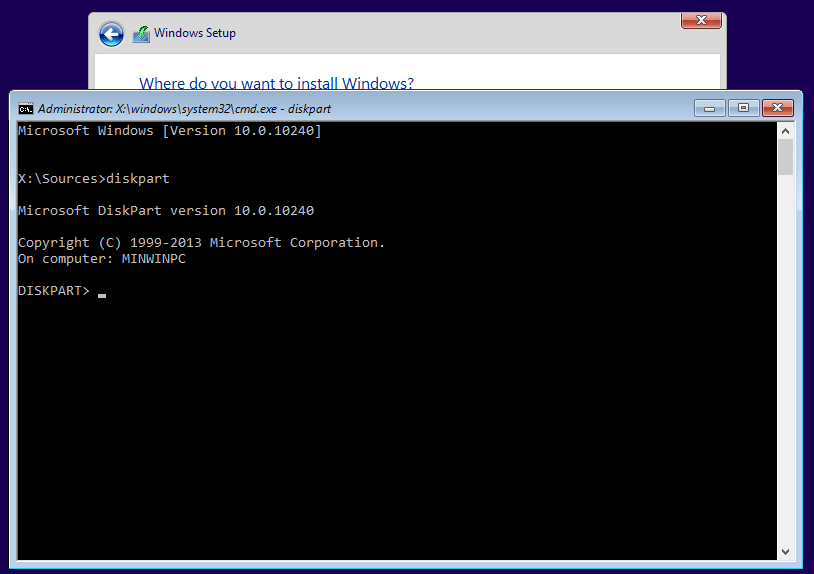
2. To access the command line prompt during Windows Setup, press Shift+F10 simultaneously at the Windows Setup screen. This allows you to create partitions using the New button, which will automatically generate a system partition for MBR disks, rather than requiring manual partitioning.
3. Type "diskpart" and press Enter.
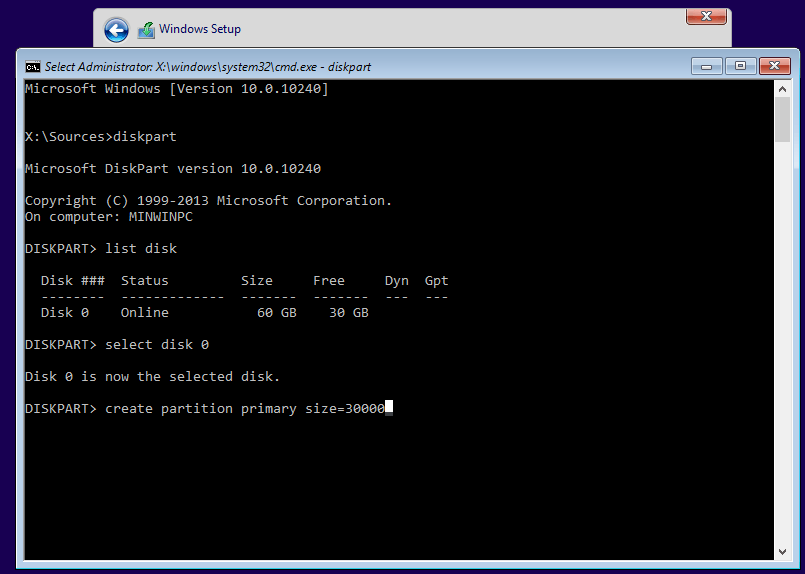
4. To create a new partition at the Diskpart prompt, type the following commands: `list disk` to list all available disks, `select disk X` where X is the number of the disk where you want to create the partition, `clean` to erase all data on the disk, `convert gpt` to convert the disk to GPT partition style, `create partition primary size=1024` to create a new primary partition with a size of 1024 MB, and `format fs=ntfs label="New Partition"` to format the partition with a label of "New Partition".
◆ List disk
◆ Select disk [disk number]
◆ Create partition primary [size=n]
The command to create a 30000 MB primary partition on disk 0 is:
◆ List disk
◆ Select disk 0
◆ Create primary partition size=30000
5. You can use the command `mkfs.ext4 /dev/sdb1` to create a file system on the partition you just created, and then `mount /dev/sdb1 /mnt` to mount it. You can also use `fdisk` or `cfdisk` to create more partitions or exit the partitioning process.
If your hard drive has enough space, it's recommended to allocate more than 100GB to the system drive to accommodate Windows updates, installed programs, and other system files. If you don't have a Windows installation disc, you can use free partition manager software to create a partition without an operating system.
Create partitions without OS pre-installed with free partition manager
Qiling Disk Master Standard is a freeware that allows users to manage disks and partitions, including creating bootable media, partitioning hard drives with or without an operating system pre-installed, all without losing data, even when Windows is installed on the hard drive.
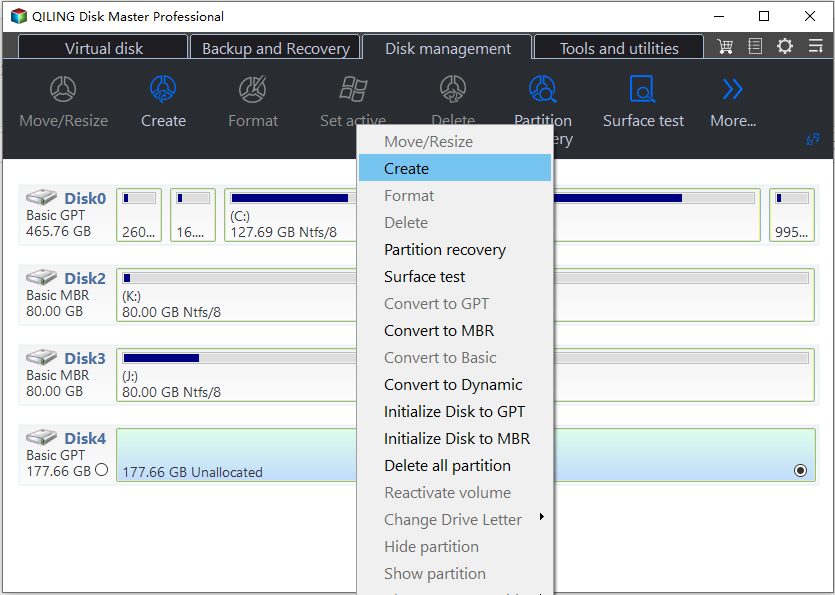
1. To start using Qiling Disk Master, you need to boot your computer from the Qiling bootable media you created. This will take you to the main interface of the program.
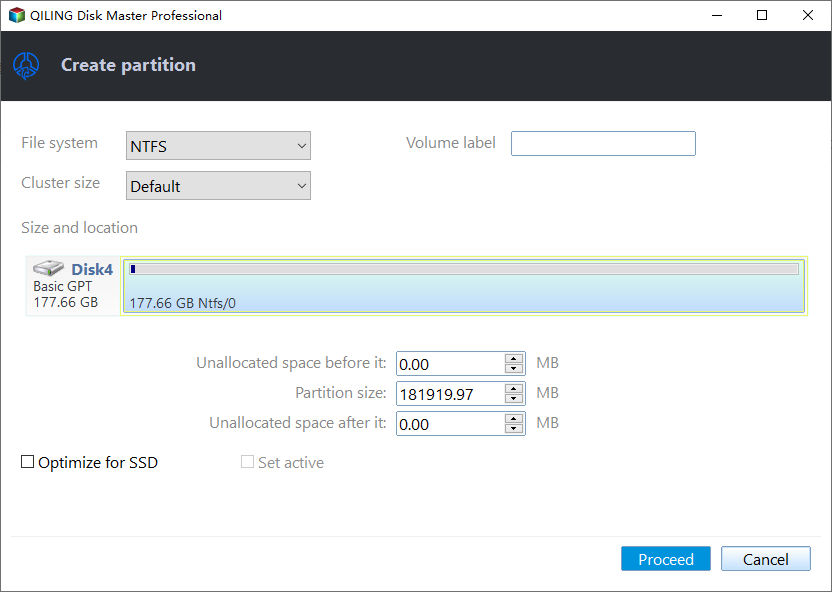
2. To create a new partition, select the unallocated space or a partition that is large enough to hold the new partition, and then click the "Create Partition" button.
3. At the next screen, specify the partition size by either dragging the slider or entering the desired amount of space.
4. The program lets you preview the partition layout without affecting your hard drive. If everything looks good, you can proceed with the operations.
Creating a partition before installing another OS on your hard drive is a good idea. Qiling Disk Master supports various file systems, including NTFS, FAT32, FAT16, FAT12, exFAT, ReFS, and Ext2/Ext3/Ext4. The paid edition offers advanced features like migrating OS to GPT disk and converting dynamic disk into basic.
