2 Easy Methods for Creating System Image in Windows 11
- User Case: How to Create Windows System Image
- Reasons for Creating System Image in Windows 11
- How to Easily Create System Image in Windows 11 Step by Step
- Create System Image in Windows 11 by Built-in Tool
- Restore System Image in Windows 11 by Built-in Tool
- Create System Image in Windows 11 by Qiling Disk Master
- Restore System Image in Windows 11 with Qiling Disk Master
- Summary
User Case: How to Create Windows System Image
Creating a system image is a crucial step in protecting your data and ensuring that your system can be restored to a previous state in case of a disaster. In this article, we will guide you through the process of creating a system image using both the Windows built-in tool and free backup software.
I believe the question "how to create system image in Windows 11" also bothers other users. Next, this article will share two methods to solve the problem.
Reasons for Creating System Image in Windows 11
As we all know, if your computer suddenly encounters problems such as system crash, computer blue screen, virus infection, etc., they may cause data loss, even make your computer fail to boot. However, it will be very troublesome to reinstall the system directly. All the software needs to be reinstalled.
Therefore, you need an easy way to prevent these situations from happening and protect your data, that is, you can create a system image on your existing system. When your system goes wrong you can do the system image recovery directly, which can save a lot of time and effort.
How to Easily Create System Image in Windows 11 Step by Step
Creating a system image can save a copy of the system, as well as easily restore it. In other words, users don’t need to reinstall the OS and APPs for obtaining the same system. So here are two simple and easy ways to create a system image in Windows 11. One is Windows built-in tool “Backup and Restore”, the other is a free backup software “Qiling Disk Master Standard”.
Create System Image in Windows 11 by Built-in Tool
The first method is to use the Windows 11 Backup and Restore to create the system backup. You need to prepare a storage device to store the created system. Take the external disk as an example, and the following is a detailed graphic tutorial. Please follow it and learn how to create system image on hard drive.
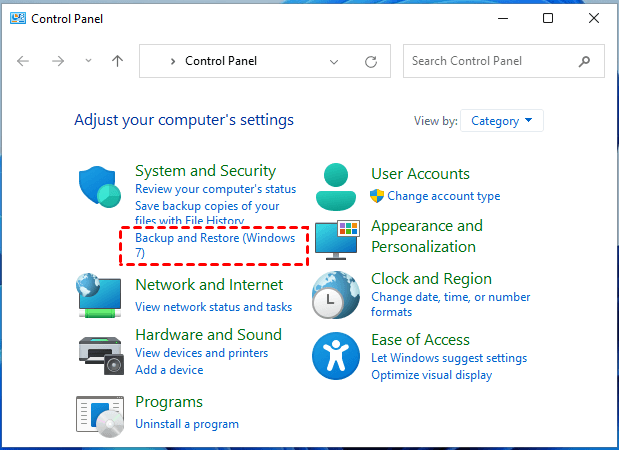
Step 1. Go to Control Panel > System and Security. Then click on Go to Backup and Restore (Windows 7) link.
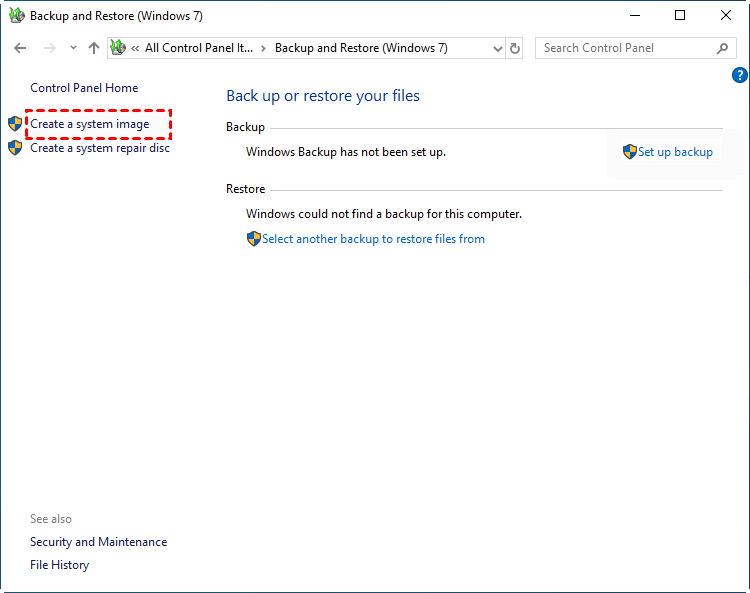
Step 2. On the next screen, click on Create a System Image option.
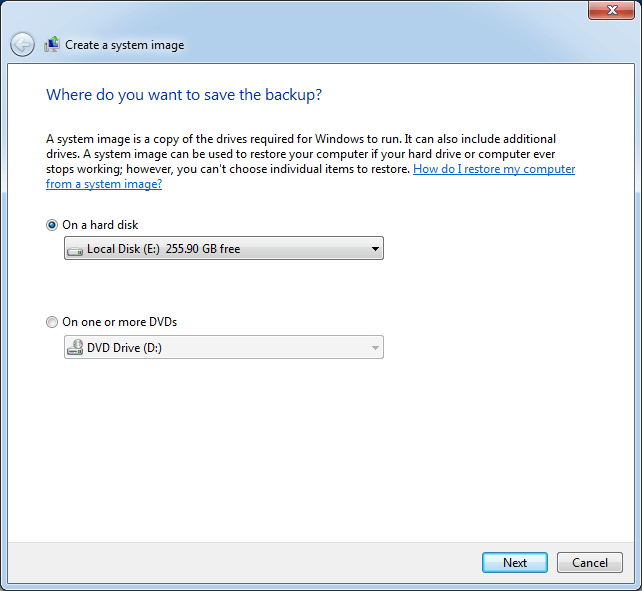
Step 3. Select the external disk where you want to store the System Image Backup and click on Next.
Step 4. Wait for your computer to complete the process of Creating System Image Backup.
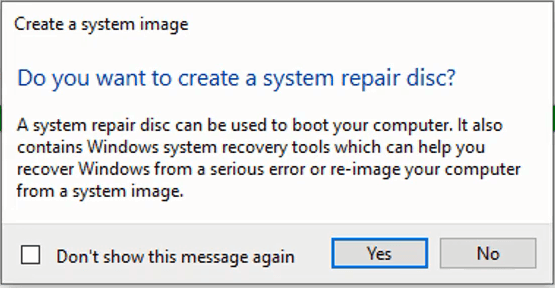
After it is completed, you will generally be prompted to do a system repair disc. It requires CD/DVD as a storage device.
If you don't have a CD/DVD, you could create a bootable USB with built-in tool Recovery Drive or third-party media creator. Since you need to use the bootable disk to boot the computer if cannot boot.
Restore System Image in Windows 11 by Built-in Tool
After you complete the system backup, if your computer run into any issues, you can restore system image backup to new hard drive to get your computer back easily and quickly. Please follow the steps below to complete the restoration.
Step 1. Connect the External Hard Drive containing the System Image Backup to your computer.
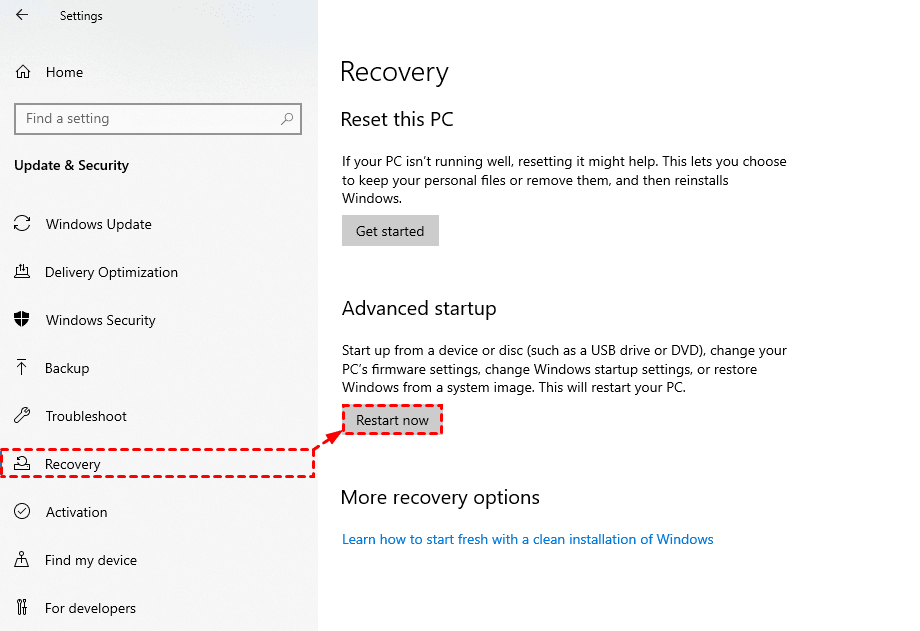
Step 2. Go to Settings > Update & Security and click on Recovery on the left. On the right side, scroll down and click on Restart Now button located under"Advanced Startup"section.
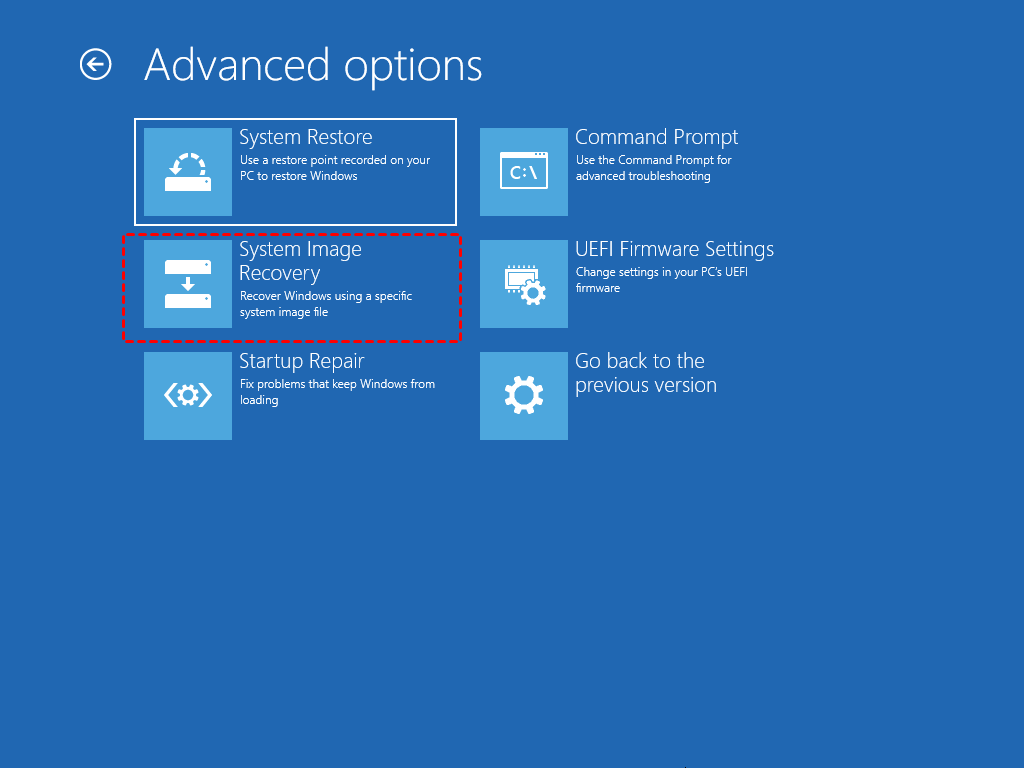
Step 3. Once the computer Restarts to Windows recovery environment mode, click on Troubleshoot > Advanced options > System Image Recovery.
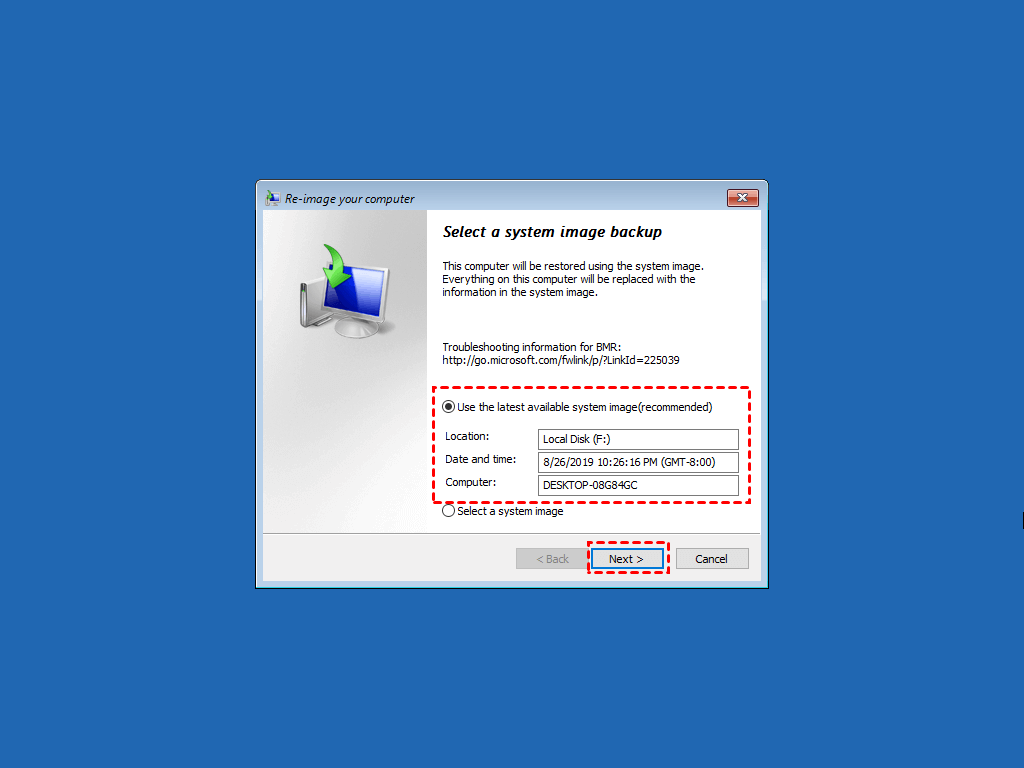
Step 4. In the re-image your computer window, choose Use the latest available system image and then click Next.
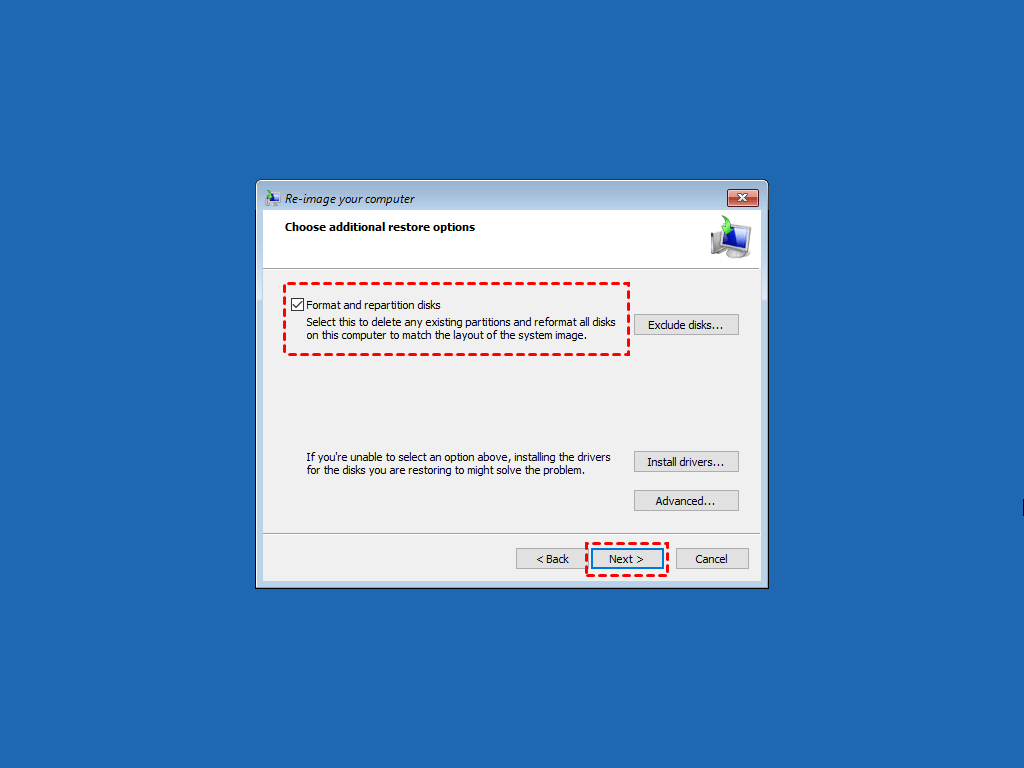
Step 5. Choose Format and repartition disks option, then click Next > Finish > Yes to start the restoration.
Create System Image in Windows 11 by Qiling Disk Master
Although the built-in tool is convenient, it also has some shortcomings.
- It doesn’t support differential backup.
- It only allows you to restore the entire system, you cannot restore a single file from the image.
- You can’t restore an image created on a larger hard disk to a smaller SSD.
So, users need to find more reliable backup software to improve the security of data. I’d like to recommend Qiling Disk Master Standard to you. Below are some obvious advantages of it:
- 4 backup solutions: It supports 4 backup solutions, namely, file backup, system backup, disk backup, and partition backup. Thus, you can backup any items you want.
- Schedule backup: It supports scheduled backup at a fixed interval, including Daily, Weekly, and Monthly.
- Incremental backup and Differential backup: Qiling Disk Master supports backing up only changed files with incremental or differential backup methods, which can greatly save your backup time and disk space, especially when you create a schedule backup for your computer.
- Multiple operating systems: It has great compatibility in the operating system (Windows 7, 8, 8.1, 10, 11, XP, Vista, etc.) and storage device (USB, HDD, SSD, NAS, cloud service, etc).
The following is a step-by-step tutorial on how to use this software to create a system image in Windows 11 and restore it:
Step 1. Download Qiling Disk Master Standard Edition and launch the software. You can click "Backup" on the left side of the main page of the software, and then select "System Backup".
Step 2. Select a destination like a local disk, external hard drive, USB, cloud drive, NAS, etc.
Step 3. Click "Proceed" to backup Windows 11 operating system.
- Notes:✎...
- Options: You can enable email notification, choose the compression level for the system backup and select splitting ways you want, etc.
- Schedule: You can set your system backup to Daily, Weekly, Monthly, Event trigger and USB plug in. The last two are available in the professional version. If your system becomes corrupted and unusable, you are able to restore the backup and make your computer boot normally.
- Scheme: You can choose different backup methods. If you upgrade now to the Pro version ( 5% off for one computer), you can enable automatic backup cleanup feature, which can help you save disk space by deleting older backups.
Restore System Image in Windows 11 with Qiling Disk Master
System image backup is very useful to get your computer back when there is a problem with it. Now let's fast forward to this situation. You can restore the system to a usable state according to the following step.
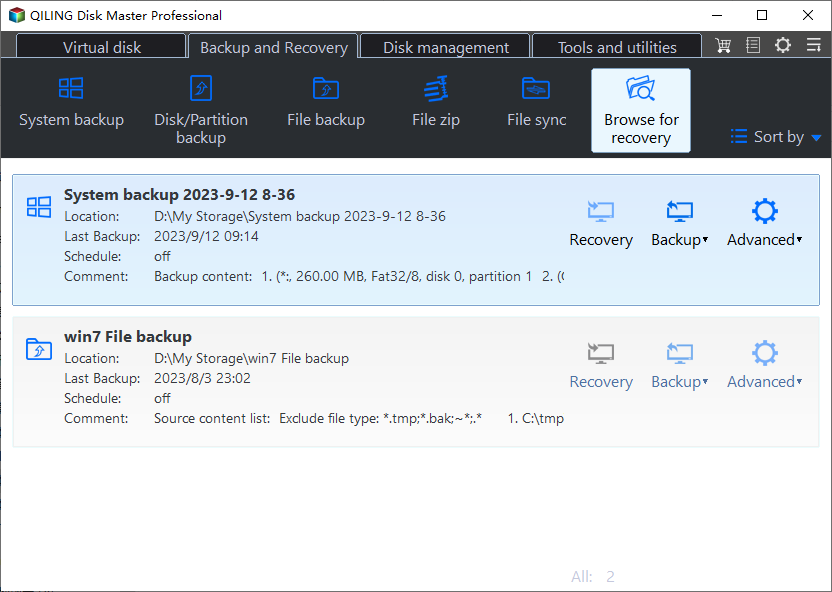
Step 1. Connect the disk containing the system backup to your computer. Click "Restore", and then click "Select Image File".
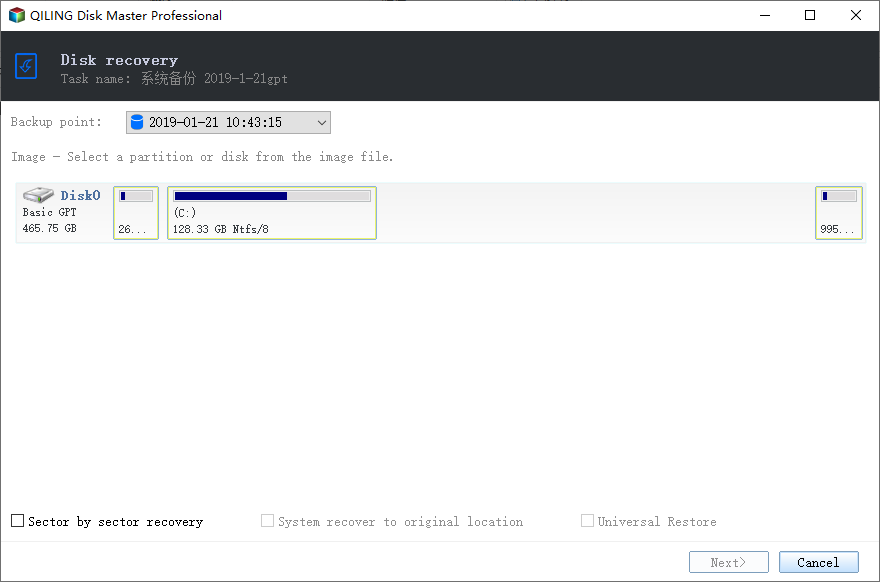
Step 2. Find the system image backup on the backup drive at first. choose it and click Open. It will switch to the Image Information page.
Step 3. Choose Restore this system backup, then click Next.
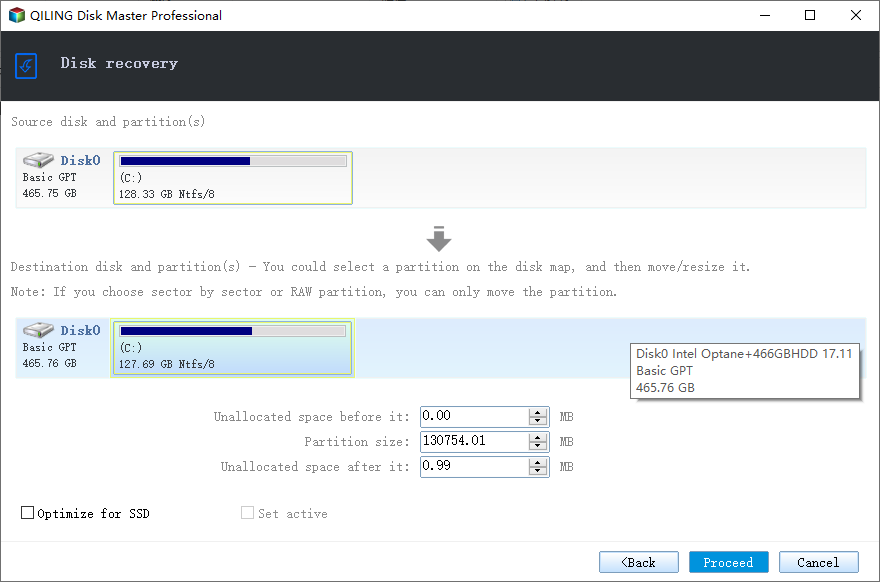
Step 4. Select a destination partition to restore the image and click Next.
Step 5. Confirm the operation and click Proceed for system recovery.
- Notes:✎...
- SSD Alignment: If the target disk you want to restore is an SSD, then remember to tick the SSD Alignment option. It can improve its read and write speed and lifespan.
- Universal Restore: If you want to restore the backed-up system to another computer, you can tick the option Universal Restore, which can help you solve the compatibility problem between different computers.
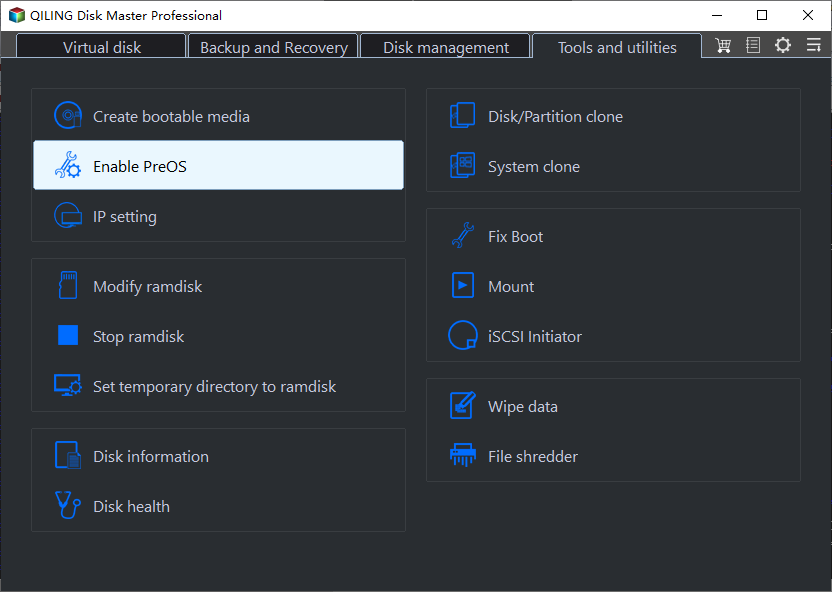
If your Windows computer won't boot, you need to boot your computer with the bootable disk you created earlier. If you don't have a bootable USB/CD/DVD etc, don't worry, you can create a recovery environment on your computer in advance. It will help you to boot your computer successfully without device and enter the software interface. You can upgrade to the Professional version to enjoy this feature.
Summary
Through this article, I believe you have understood how to create system image in Windows 11 in two easy ways. Both built-in tool and third-party software- Qiling Disk Master are available. I truly recommend the second way, because it is not only backup and restore your system easily, but also backup files, partitions, etc. You can choose more functions according to your needs as well such as scheduled backup, different backup schemes (advanced version), etc.
In addition, if you prefer a more convenient solution to copy your system, you can choose the “Clone” feature. It allows you to clone the system partition and then directly boot from it without restoring the image first. To enjoy them, please download the software and try it yourself now!
Related Articles
- Create Windows 10 System Image Backup with 2 Free Ways
- How to Create a System Image in Windows 10/8/7 Easily
- How to Create and Use Windows 10 Recovery Image Backup
- Best Qiling Disk Master Free Alternative for File, App, and Account Setting Transfer in 2022
Are you looking for a reliable Qiling Disk Master Free alternative tool that helps you migrate files, transfer apps, and even user account settings from PC to PC? This page will explain Qiling Disk Master Free, its Pros and Cons, and the best alternative tools you can rely upon.
