Create eMachines Recovery Disk in Windows 7, 8, 10, 11 [2 Ways]
eMachines & eMachines Recovery Management
eMachines was a computer brand acquired by Gateway in 2004, and later Gateway was acquired by Acer in 2007, with the eMachines brand being discontinued in 2013.
If your eMachines system is experiencing problems that lead to boot failure, you can use the Acer eRecovery Management software (formerly eMachines Recovery Management) to restore your PC to its factory settings. This software allows you to perform various tasks, including restoring your PC to its original configuration.
- Create factory default disc.
- Create drivers and applications disc.
- To completely restore your eMachines system to its factory defaults, you can perform a system recovery without a disk. This process will erase all personal data and settings, returning the system to its original state.
- Restore operating system and retain user data.
- Reinstall drivers and applications.
To create eMachines recovery disk, go to Start > All Programs > eMachines > Recovery Management, and select the option to create a recovery disk. This will guide you through the process of creating the disk. Note that this process may vary slightly depending on your specific eMachines computer model. The recovery disk will be used to restore your system to its original state in case of any issues or problems.
- How to Create eMachines Recovery Disk in Windows XP/7/8?
- eMachines Recovery Management Limitations
- Create Recovery Disk for eMachines or Acer computers Easily
- Wrapping Things Up
How to Create eMachines Recovery Disk in Windows XP/7/8?
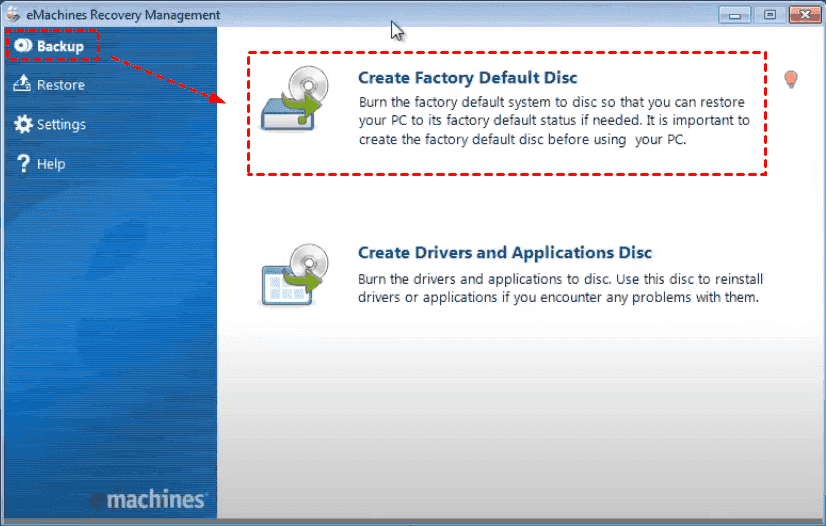
1. To perform eMachines Recovery Management, go to the Backup tab and click on Create Factory Default Disc.
2. Insert blank CD or DVD, and click Start.
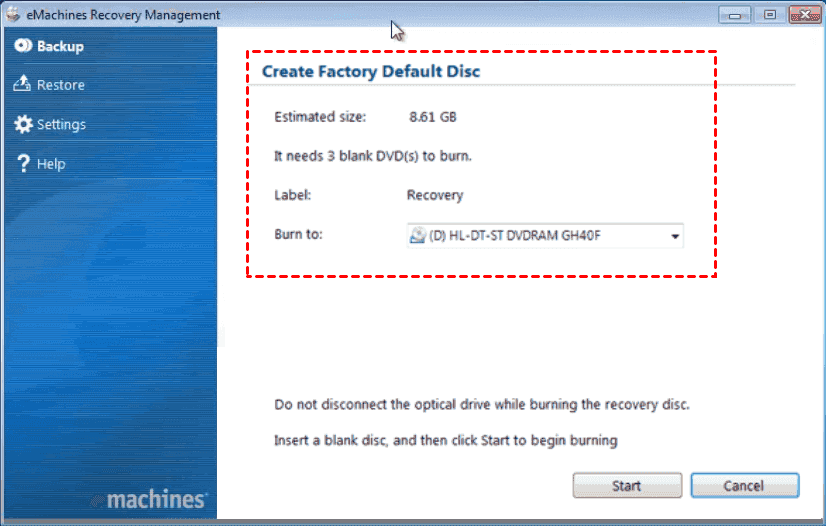
3. Once the first CD or DVD is finished, it will eject, allowing you to insert another disc to continue the process. This step is repeated until the recovery disk is fully completed.
If you can boot into your Windows XP/7/8, use the eMachines Recovery Management to restore your system. To do this, simply boot into Windows, open the eMachines Recovery Management, and follow the on-screen instructions to restore your system to its original settings using the eMachines recovery disc.
1. To perform eMachines Recovery Management, go to the main console and select the "Restore" option, then choose "Completely Restore System to Factory Default".
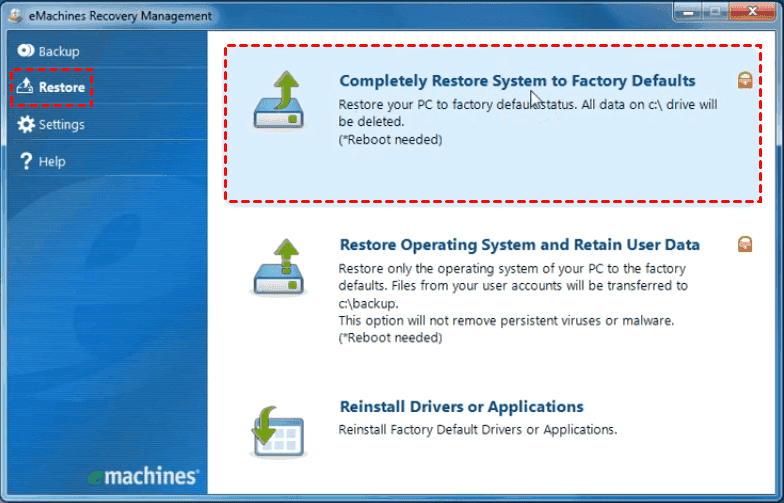
2. Then click OK, and then follow the on-screen instructions to restore.
To restore your Windows OS using the eMachines Recovery Center, click Start, then All Programs, and select eMachines Recovery Center. From there, press Recovery, then Next, and the system will be restored.
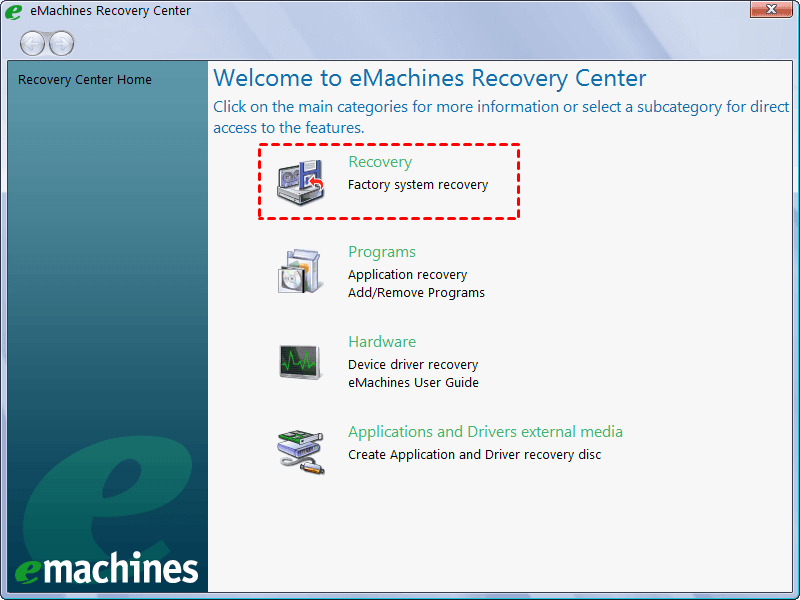
If you can't boot up your Windows eMachines computer, press Alt + F10 during startup to enter eMachines Recovery Management, where you can follow the prompts to restore your computer.
If you're using an Acer computer, you can try using the Acer eRecovery Management tool to restore the Windows OS.
eMachines Recovery Management Limitations
However, you might meet the following issues:
- eMachines recovery management not working.
- eMachines Recovery Management stuck at restore process.
- The Restore option just greyed out.
- The Machines Recovery Management feature is no longer available in Windows 10 as it has been discontinued.
The frustration of using system restore or creating eMachines recovery disks in Windows XP/7/8/10 is real. A more reliable and professional option is Qiling Disk Master Standard, a Windows backup and restore software that can help.
Create Recovery Disk for eMachines or Acer computers Easily
Qiling Disk Master is more flexible and easier to operate than eMachines Recovery Management software, allowing you to create recovery disks not only on eMachines computers but also on other brands like Dell, HP, Acer, Asus, and Lenovo. It supports a wide range of Windows operating systems, including XP, Vista, 7, 8, 8.1, 10, and 11 (both 32-bit and 64-bit).
Millions of users highly recommend this app due to its intuitive interface and outstanding performance, making it easy to use even for those without IT expertise.
To create a recovery disk for your eMachines computer, download the Qiling Disk Master Standard alternative to the eMachines Recovery Management. Prepare a USB flash drive or CD/DVD to create a bootable media, and use it to backup your system and critical data to a safe location. For example, you can follow these steps to create a free eMachines Windows 7 recovery disk.
Create bootable media
To restore your Windows 7 computer easily if the system boot failure, create a bootable media first. This will allow you to boot up your Windows computer and access the recovery options.
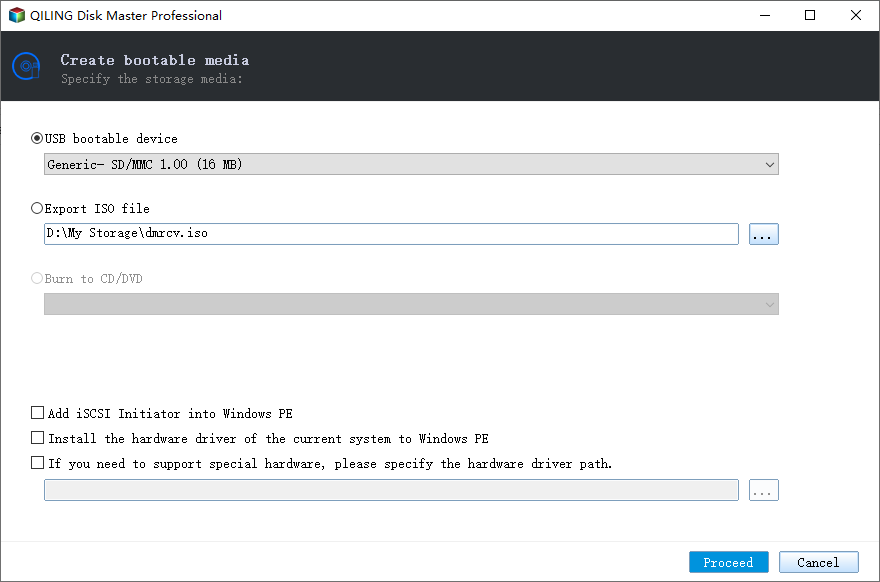
1. To create a bootable USB drive for your eMachines Windows 7 computer, insert your USB drive into the computer and launch Qiling Disk Master. From the main console, select the "Tools" menu and choose "Create Bootable Media" to begin the process.
★Tip: You could tick Download WinPE creating environment from internet option.
2. To create an eMachines recovery disk in Windows 7, select the USB Boot Device option and click Next.
★Tip: Make sure your USB drive has been backed up because the operation will erase all the data on the USB drive.
Backup your system or other important data
To create a backup of your system, you may need an external hard drive or SSD to save the backup file. This will allow you to restore your system in case of a failure or corruption.
1. To create a backup of your eMachines system, go to the main console and select 'Backup' followed by 'System Backup'. Alternatively, you can create a disk backup for hard drive recovery.
2. Save a system backup copy to an external hard drive or SSD by entering the task name and selecting the destination disk.
3. To create a system image for your Windows 7 eMachines computer, click the "Proceed" button. This will start the system image creation process, which may take some time to complete, depending on the size of your hard drive and the speed of your computer.
★Tips:
✍Options: AOMEI Backupper Professional allows you to customize the backup image file, including splitting, compressing, encrypting, adding comments, and enabling email notifications to receive alerts when the backup is complete, among other features.
✍Schedule: Ticking this option allows for automatic data backup on a regular schedule, such as daily, weekly, or monthly, as well as event triggers, USB plug-ins, and real-time syncing. The latter three features are premium and require an upgrade to Qiling Disk Master Professional to access.
✍This program automatically deletes backup images when the number of backups exceeds the specified retention number, ensuring that only the most recent backups are kept.
An eMachines recovery disk has been created successfully, allowing you to restore your eMachine computer in case of unbootable situations.
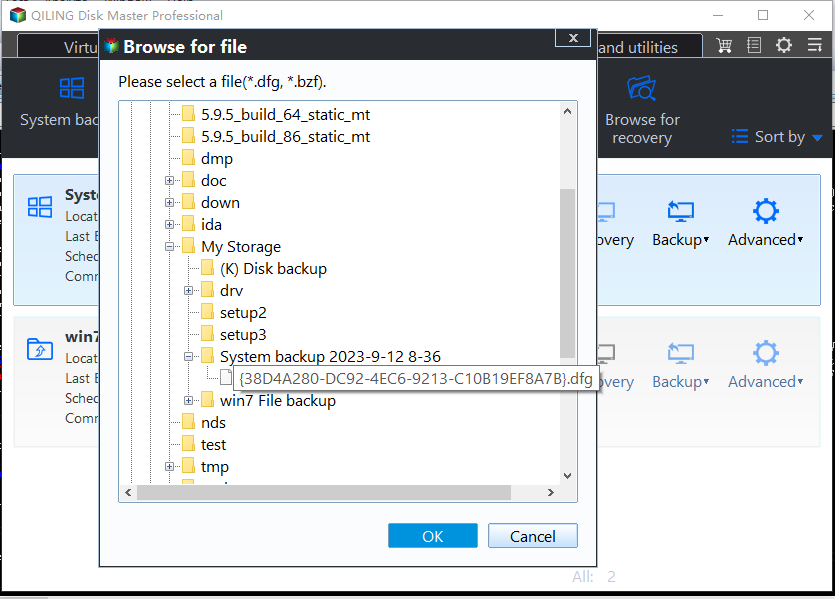
To restore your eMachines computer, boot from a bootable USB drive, which will automatically run Qiling Disk Master. Then, connect an external device containing a system backup copy to your PC, and use Qiling Disk Master to restore the Windows operating system.
Wrapping Things Up
If you still own a eMachines computer and want to create a free eMachines recovery disk, you can't use the eMachines Recovery management anymore. Instead, you can use Qiling Disk Master Standard, a free alternative, to create a recovery disk for your eMachines computer with just a few clicks.
Qiling Disk Master can be used to fix Acer Alt + F10 not working issue during recovery, and also offers features like upgrading HDD to SSD for Acer laptops, disk cloning, and more. Upgrading to Qiling Disk Master Professional adds capabilities such as system cloning, merging backup images, and restoring to dissimilar hardware, among others.
Related Articles
- Acer Erecovery Management Stuck Solutions - Qiling Disk Master
You will learn how to fix Acer eRecovery Management stuck problem in common situations and easily factory reset Acer without losing data. - Acer eRecovery Management Restore Failed Solutions
This essay will gather several common situations with acer erecovery management restore failed problem and give some solutions. - How to Make a Factory Recovery Partition to Protect Windows System?
Read this article to learn how to make a Windows 11/10/8/7 recovery partition, which is an important procedure to restore the computer to its factory settings once your main Windows partition suffers from disasters. Create recovery partition easily and safely. - Top 2 Ways to Create Windows 10 Recovery Disk or USB Drive
How to create Windows 10/11 recovery disk or USB to reset computer or reinstall your Windows 10/11? Try the top 3 ways to create Windows 10/11 recovery media in simple steps.

