How to Allocate Unallocated Disk Space to C Drive in Windows 7, 8, 10?
When need to allocate unallocated space in Windows 7?
Unallocated space on a hard drive refers to unused storage space that hasn't been assigned to a partition or drive letter, often appearing at the end of the drive and behind existing partitions. This free space can be wasteful and should be utilized, with various situations leading to its creation, such as disk formatting or partition deletion. You can check for unallocated space in the Disk Management tool by typing "diskmgmt.msc" in the Run box.
Cloning a small hard drive to a larger one using the sector-by-sector method can result in unallocated space due to an exact duplication of the previous partition state, leaving redundant disk space unallocated. Additionally, if you have a storage device with a capacity of over 2 TB on an MBR disk, you'll encounter limitations and won't be able to assign unallocated space to a partition in Windows without converting the MBR disk to GPT. Furthermore, deleted data partitions automatically become unallocated space, and in all cases, you'll need to figure out how to allocate unallocated space in Windows 7, 8, or 10.
How to allocate unallocated disk space in Windows 7?
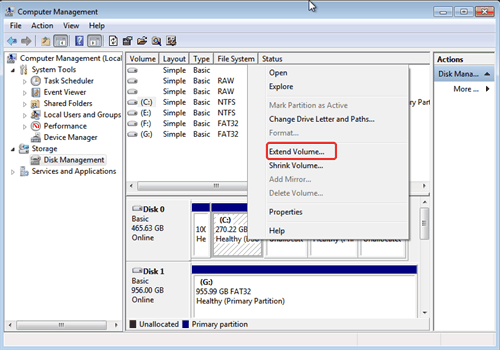
To allocate unallocated disk space in Windows 7, use the built-in Disk Management utility. Start Disk Management, right-click the partition next to the unallocated space, and select "Extend Volume" to enlarge the partition. This practical solution allows you to utilize the available space.
The process of resizing a partition is relatively straightforward, but it requires specific conditions to work, such as the unallocated space being adjacent to the target partition. If the unallocated space is not contiguous, the "Extend Volume" option will be grayed out. In cases where unallocated space is scattered among multiple partitions, it can be challenging to assign it to a single partition, such as C drive. In such situations, a powerful third-party software like Qiling Disk Master Professional can be a useful solution.
Qiling Disk Master is a reliable partitioning software that helps assign unallocated space to partitions in Windows operating systems, with a user-friendly interface and easy-to-use wizards. It allows allocating all unallocated disk space to a partition at once, and a demo version is available for download.
How to allocate unallocated hard drive space in Windows 7 via Qiling Disk Master Professional
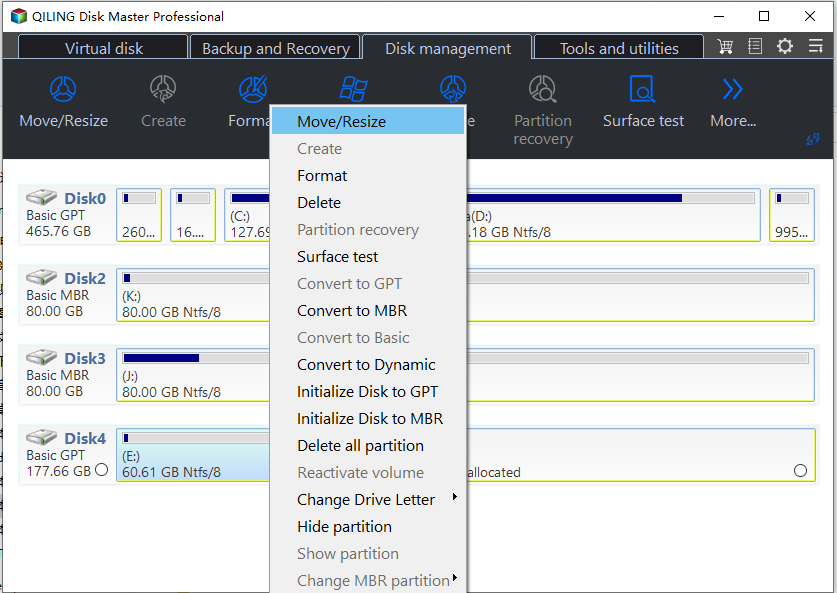
1. To add unallocated space to a partition, install and launch Qiling Disk Master, then right-click the partition you want to modify and select "Move/resize Partitions". As an example, to allocate unallocated space to the C drive, follow this process.
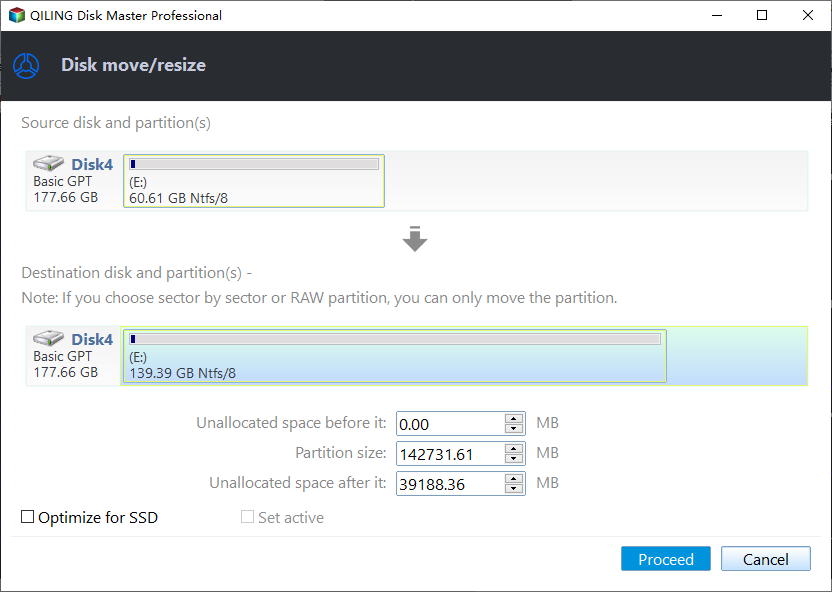
2. Select all unallocated space you want to merge from.
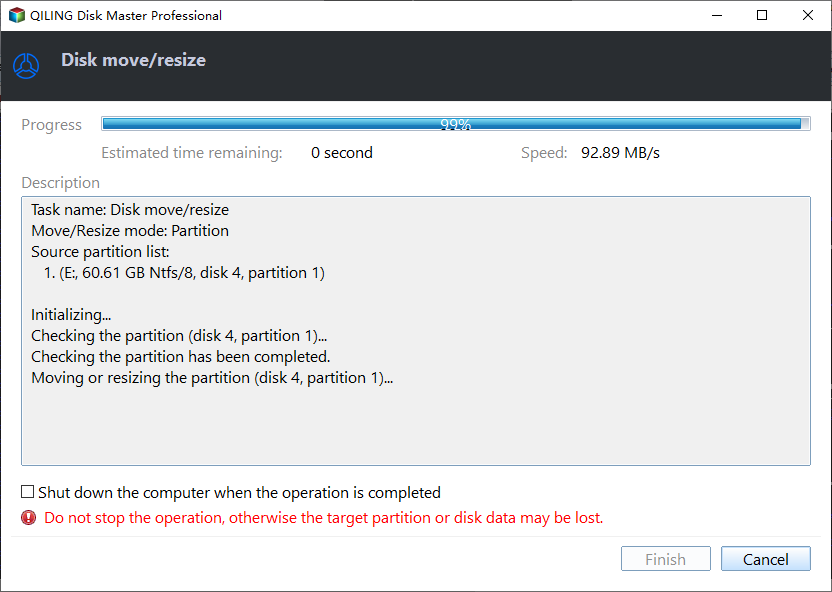
3. What shows up in front of you now is the virtual result of the above operations. Click "Proceed" to make it real.
Solving the puzzle of allocating unallocated space in Windows 7 and other OS versions is simple, thanks to Qiling Disk Master. This software offers many helpful features beyond just allocating unallocated space, such as merging two partitions to maximize disk space, installing Windows 10 to an external hard drive, and even assisting with moving the OS to an SSD when upgrading a hard drive.
Related Articles
- How to Add Unallocated Space into Partition in Windows 10 Safely?
This post explains how to add unallocated space in Windows 10 via Disk Management. Besides, we also share a great tool just in case that you can't add unallocated space as expected. - 4 Easy Methods for Hard Disk Unallocated Repair in Windows 10, 8, 7
When the external hard disk becomes unallocated space, you can use the 5 easy methods for hard disk unallocated repair in Windows 11, 10, 8, 7 on your own. You will know the causes and how to fix unallocated hard drive without losing data in this passage.


