How to Create Unallocated Space on Windows 7, 8, 10, 11
What’s unallocated space for?
After some time, your computer may slow down or freeze, or even crash with a blue screen, all due to a common issue: running out of space on the C drive.
To address the issue of low drive space on the system partition (usually C:), it can be resolved by extending the C drive with unallocated space. However, creating unallocated space requires deleting or resizing existing partitions, which can be risky. A safer approach is to extend the C drive by allocating space from an adjacent partition, if possible. If not, consider expanding the disk or using a larger drive.
Create unallocated space with Disk Management
Windows 11/10 has a built-in feature called Disk Management that allows you to create unallocated space in two ways: by shrinking a partition or deleting a partition. This feature enables you to free up space on your disk for use by other partitions or for other purposes.
▶ Option 1. Shrink Partition
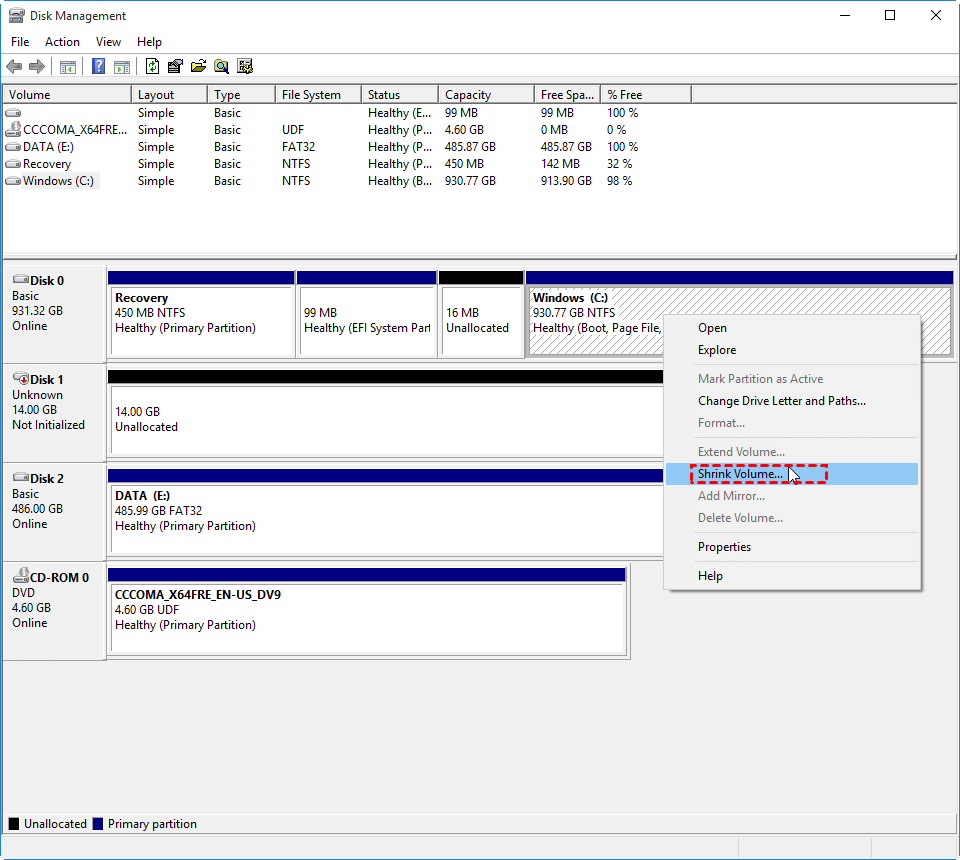
1. To shrink a partition, right-click it and select "Shrink Volume" from the context menu.
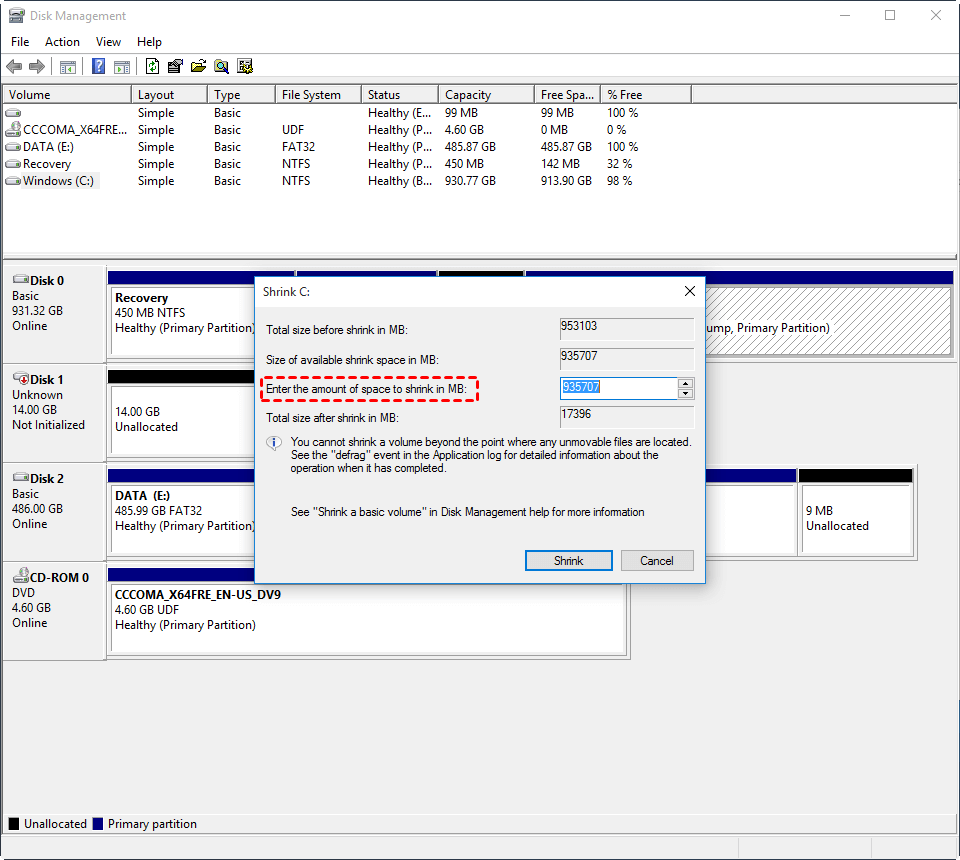
2. Type the number of sizes you want to get as unallocated space.
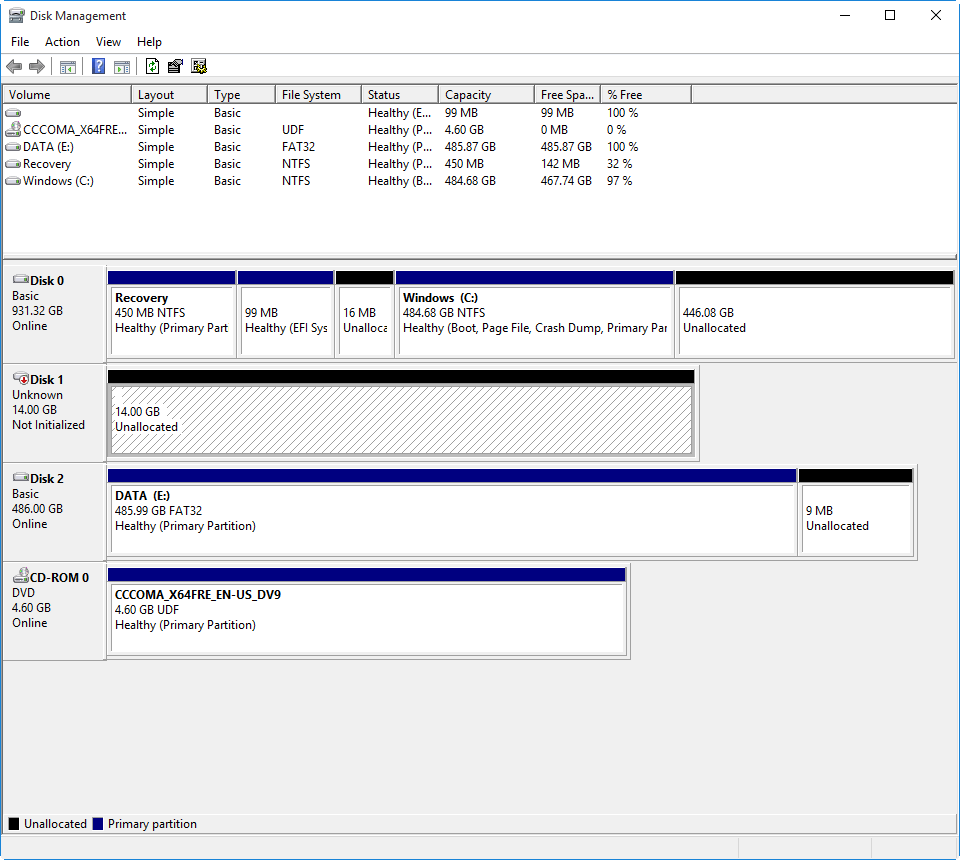
3. Now you get the unallocated space.
You cannot shrink a volume using Disk Management in these cases:
1. If there are unmovable files at the very end of the partition you want to shrink, the Shrink Volume option will be unavailable.
2. If there's some virtual memory on the partition, the Shrink Volume option might still be greyed out.
3. If the disk file system is not NTFS or RAW, it's not possible to shrink the volume, but you can convert the file system from FAT to NTFS.
4. When the unallocated space is not located to the right of the C drive, the Extend Volume option will be greyed out.
▶ Option 2. Delete Partition
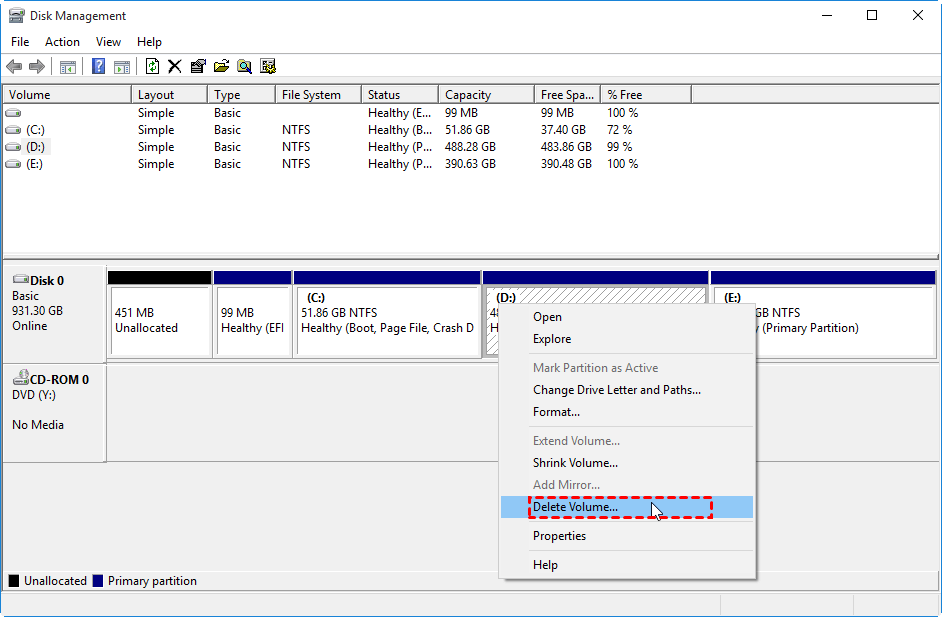
1. To delete the D: drive, right-click on it and select "Delete Volume" from the context menu, which will remove all content on the partition. Please ensure you have backed up any important files before proceeding.
2. Now that you have created the unallocated space, you can use Disk Management to extend the C: drive with it.
To extend the C drive without unallocated space, you can use Qiling Disk Master to allocate free space from another partition to the C drive, making it easier and safer than deleting the partition. This approach avoids the risk of losing data associated with deleting a partition.
Additional: Better way to extend the C drive
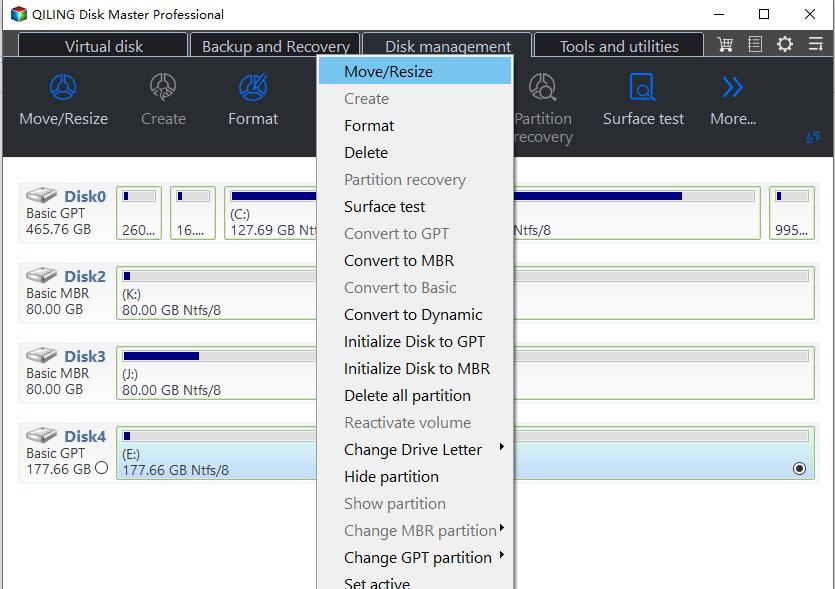
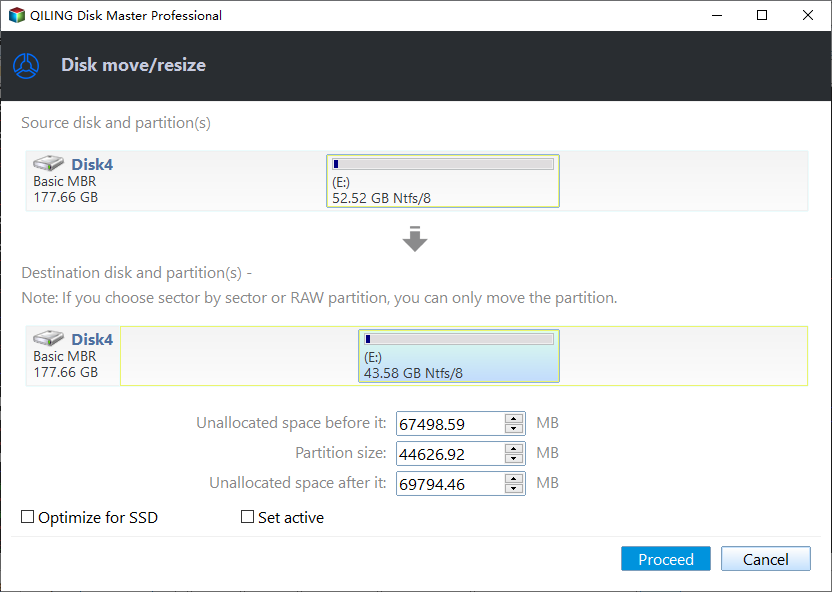
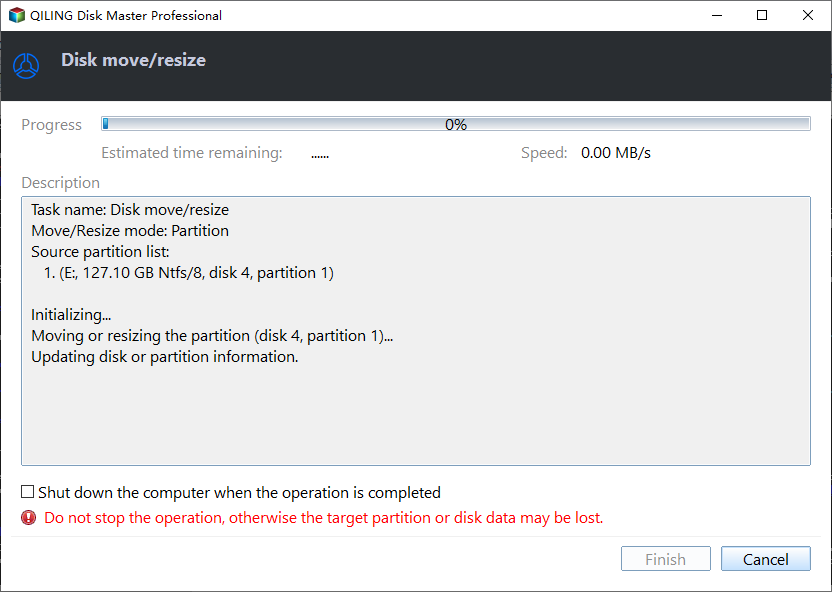
Qiling Disk Master Professional is a professional partition manager that offers a wide range of features, including resize/move, merge, split, copy, create, delete, format, and delete partitions, as well as advanced capabilities like making bootable media, cloning a smaller disk to a larger one, migrating an OS to an SSD, and allocating free space. I can guide you through the process of allocating free space from the D: drive to the C: drive.
Step 1. Install and launch Qiling Disk Master Professional Edition.
Step 2. Right-click D drive, and select "Allocate Free Space".
Step 3. Allocate free space to a destination partition by specifying the free space to be allocated and the destination partition in the pop-out window.
Step 4. The maximum of the two numbers is the larger number, and the minimum is the smaller number. To find the maximum of 5 and 8, we compare the two numbers and choose the larger one.
You can use Qiling Disk Master to allocate free space to extend a partition, making it easier to manage and utilize unallocated space. This approach allows you to visualize and manipulate disk space, making it an ideal solution for extending a partition using unallocated space.
If you need to allocate free space on Windows Server 2022, 2019, 2016, 2012, 2008, 2003, you can turn to Qiling Disk Master Server, which is designed for Windows Server users.
Related Articles
- How to Create a (New) Partition in Windows 8? [QuickStart]
How to create a partition in Windows 8? If you do not know, you are coming to the right place. This article will describe the reasons for creating a partition and share two partitioning software in Windows 8 to help you manage drives. - How To Check Storage on PC [Step-by-Step Guide]
Storage is an important value for monitoring the status of the computer. This article aims to teach users how to check storage on PC. - Mark Partition as Active in 4 Ways [Step-by-Step Guide]🔥
Have you ever heard about active partition? Do you know how to mark partition as active? This informative article will give you a comprehensive answer to the question and detailed steps to set a partition as active. - How to Fix Selected File Is Not a Proper BIOS [4 Ways]
Learn 4 effective methods with our expert troubleshooting guide to resolve the selected file is not a proper BIOS issue easily to get your system running smoothly again.

