How to Migrate OS to HDD or SSD in Windows 11/10/8/7?
When Need to Migrate OS to HDD or SSD?
If your computer's primary partition, where the operating system is stored, is running low on disk space, you have two options. You can either extend the current boot partition if there's unallocated or unused space on the disk, or migrate the OS to a larger hard drive or solid-state drive (SSD) to increase the size of the boot disk.
Upgrading your OS from a mechanical hard disk drive (HDD) to a faster solid-state drive (SSD) can improve performance, especially if your current OS runs slowly. Instead of reinstalling the OS from scratch, consider using a specialized OS migration tool to directly migrate your OS from the HDD to the SSD, saving time and effort. Regardless of the situation, learning how to migrate your OS to a new drive is essential.
2 Ways to Transfer OS from HDD to SSD
Here, we would like to share you with two useful ways to migrate OS to HDD or SSD. Check out the detailed tutorial and choose one based on your requirements and situation.
- 1. Migrate OS via Windows built-in tool (Backup and Restore)
- 2. Migrate OS via powerful third-party software (Recommended)
1. Migrate OS via Windows built-in tool (Backup and Restore)
To create a full backup of your system, you can make a backup of the entire computer, including the installation, settings, apps, and files. This can then be restored to another Solid-State Drive (SSD) or Hard Disk Drive (HDD) by following the steps outlined below. First, create a full backup of the system, and then restore the system image to the destination HDD/SSD.
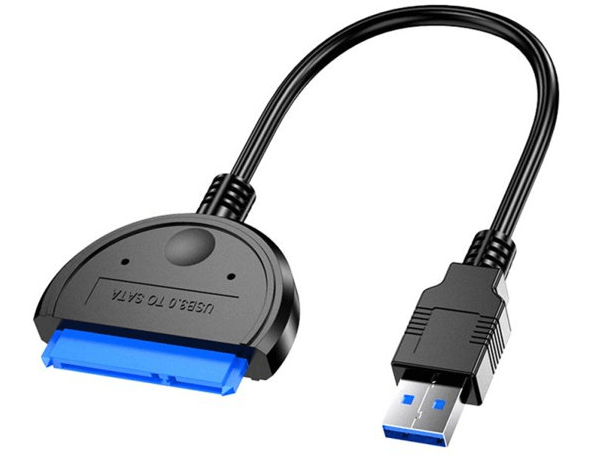
Step 1.Connect Connect an external drive (used to contain the backup image) to your computer. If you're using a laptop without an extra drive bay, you can connect it via a SATA to USB adapter and cable.
Step 2. You can shrink the OS partiiton to fit the new HDD/SSD that may be smaller than the current one.
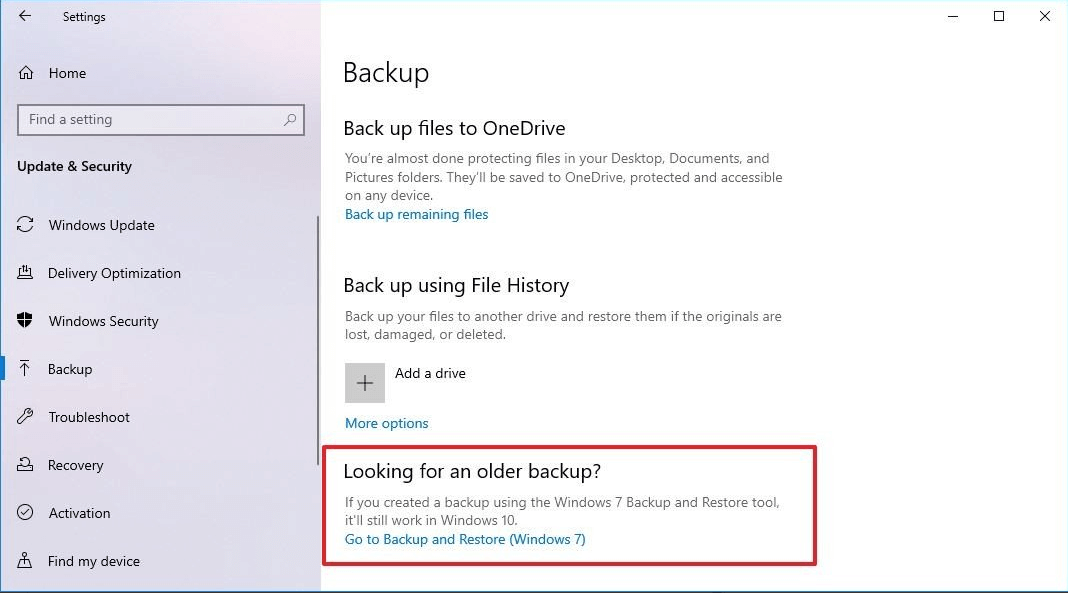
Step 3. To access the backup settings in Windows 10, go to "Settings", then click on "Update & Security", followed by "Backup". Under the "Looking for an older backup?" section, select the "Go to Backup and Restore (Windows 7)" option.
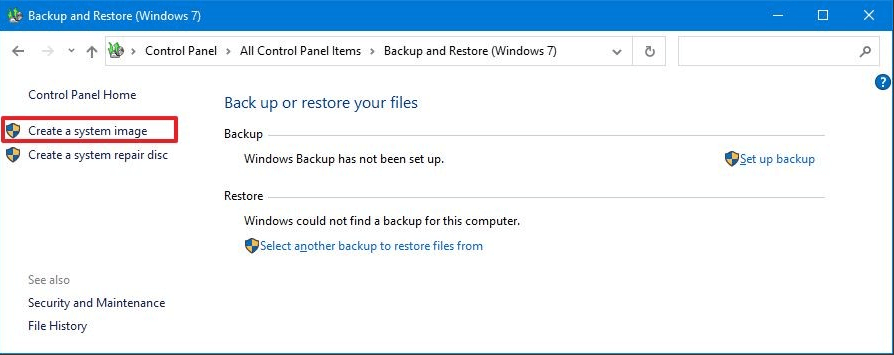
Step 4. Click the "Create a system image" option from the left pane.
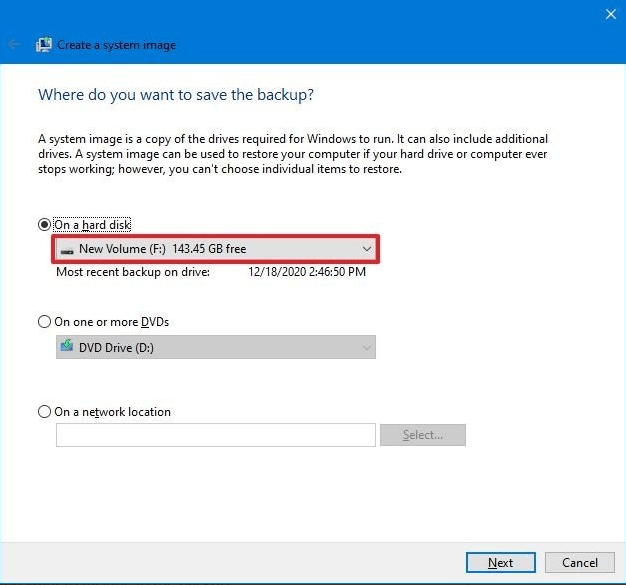
Step 5. Select the "On a hard disk" option and choose a location to export the Windows full backup, or select "On a network location" to back up Windows to a network location.
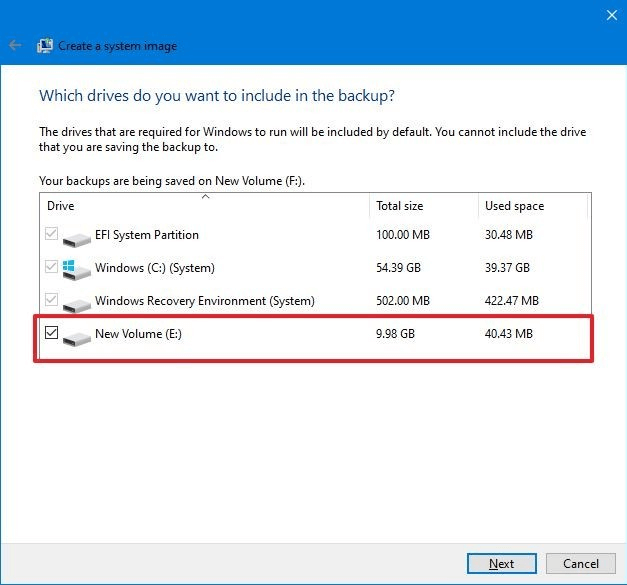
Step 6. Here, you can select other additional drives to include them in the backup if you want. And click on "Next".
Step 7. Confirm everything is right and you can click on "Start Backup".
Once the progress is finished, the tool will create an image of the entire system, including everything on the primary hard drive and any other drives selected, and then allow you to restore the image to the destination HDD or SSD.
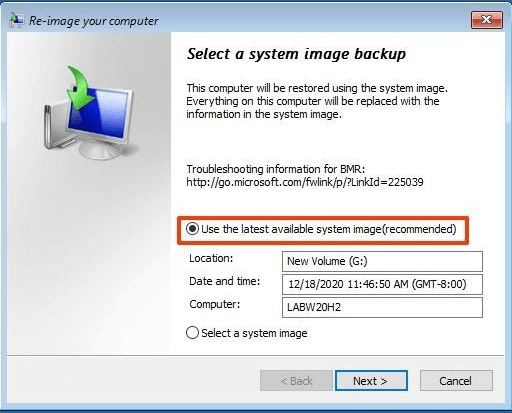
Step 8. Disconnect the original system hard drive and connect the new one. Boot up the system, then insert the repair disc or Windows Install disc into the optical drive. The computer should boot from the optical disc, and at the first screen, select "Repair your computer" followed by "Restore your computer using a system image that you created earlier". From there, click "Next" and use the latest available system image (recommended).
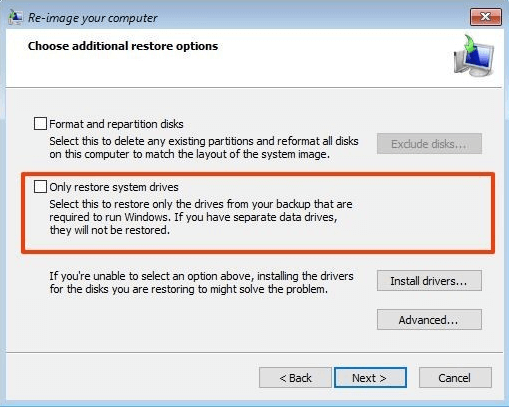
Step 9. Select the "Format and repartition disk" option to restore the backup on a new drive, or choose "Only restore system drives" to restore the OS only, being careful to select the correct option before restoring the backup.
Step 10. Click on "Next" and then "Finish".
To initiate system recovery, the process will begin on the computer. Please refrain from interrupting it, as this may cause the backup and restore to fail, resulting in an unbootable SSD or HDD. If migrating the OS to a HDD or SSD on a laptop, ensure the laptop is plugged into a power source.
2. Migrate OS via powerful third-party software (Recommended)
Using the first method can be prone to errors due to its complexity and multiple steps, making it not ideal for improper operations. Therefore, it is recommended to use a professional OS migration tool like Qiling Disk Master Professional, which features a "Migrate OS to SSD Wizard" that simplifies the process of transferring the OS drive from HDD to SSD, HDD to HDD, or SSD to HDD with just a few clicks.
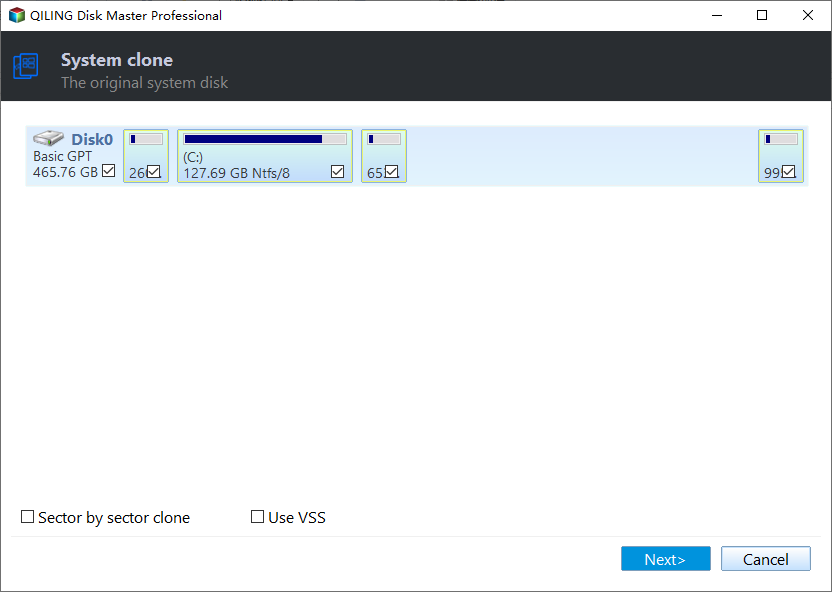
Step 1. Download, install and launch the Qiling Disk Master Professional. Click "Tools" tab page, and select "System Clone" from the page.
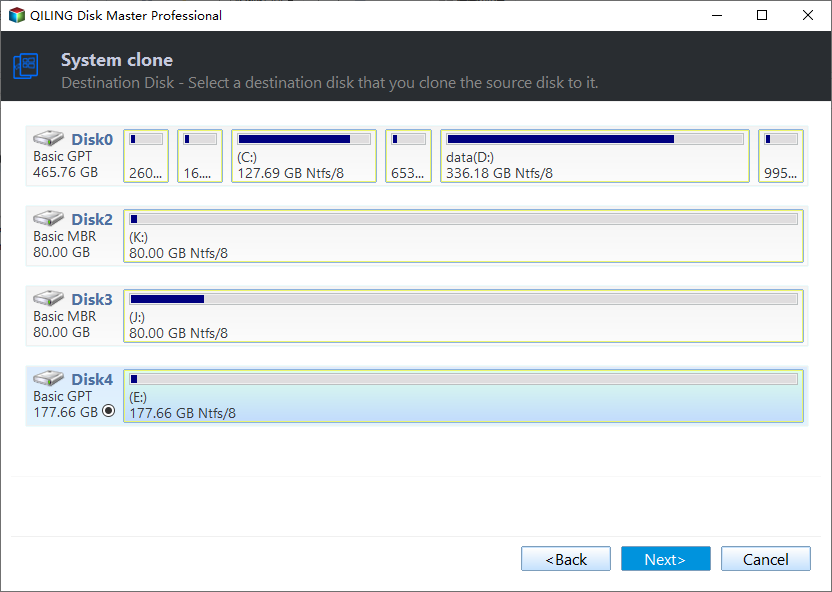
Step 2. Select the destination HDD or SSD for OS migration. If the destination disk has partitions, check the box to delete all partitions on the disk to migrate the system to it. This allows the "Next" button to become clickable to proceed.
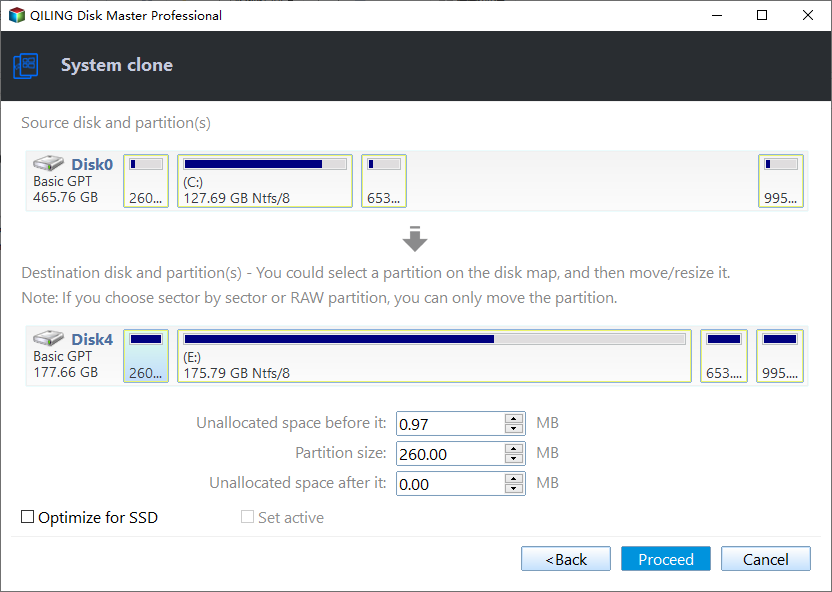
Step 3. Now, you can resize the system partition and change the drive letter on the new SSD or HDD.
Step 4. A note on how to boot computer from the destination disk will appear. Read it carefully and click on "OK".
Step 5. Click "Proceed" to commit the pending operation.
Notes:
☞Since it involves system partition, the operation will be completed under the PreOS Mode.
☞If you want to migrate your entire system hard disk to another HDD or SSD, you can use the "Disk Clone Wizard" to make the process easier.
Summary
To migrate an OS to a new HDD or SSD, you have two options. The second method, which is more versatile, can not only transfer the operating system but also convert MBR and GPT without deleting partitions, wipe the hard drive, and create bootable media.
Related Articles
- How to Clone SSD to HDD in Windows 10,8,7 with Secure Boot?
Are you looking for a way to clone SSD to HDD in Windows 11/10/8/7? You will find a powerful and free disk cloning software in this article. - Best Strategy of Using SSD for OS and HDD for Storage in Windows 10, 8, 7
Do you know how to use SSD for OS and HDD for storage on Windows? You can find a way here to set SSD as boot drive and HDD as storage with Qiling Disk Master. - 3 Ways to Extend C Drive in Windows 10 Easily
When your C drive is almost full and computer runs slower, you can extend C drive in Windows 10 or 11 via Disk Management, DiskPart, and a third-party free partition manager. Each one can help you increase C drive space easily. - How to Disable OneDrive, Here are 5 Ways!
This article describes how to disable OneDrive in 5 ways as well as alternative solution to prevent data loss after disabling OneDrive. Please read on.
