How to Reformat a Hard Drive in Windows 11, 10, 8, 7
When do you need to reformat disk?
Many users need to format their hard drive for various reasons, such as selling their PC to others. Even after deleting personal and sensitive data, there may still be concerns about whether the drive is completely clean. In such cases, reformatting the hard drive is a necessary step to ensure a fresh start.
To clean the hard drive for a fresh Windows installation without a spare hard drive, you can utilize both the current hard drive and an external hard drive. First, wipe the hard drive to prepare it for the new installation. If the external hard drive was previously partitioned, reformat it to ensure it's clean. Before proceeding, backup any important data on the hard drive to prevent loss. This approach allows you to make the most of your available storage while ensuring a clean start for your new Windows installation.
Reformatting a hard drive is a crucial step, regardless of the motivation behind it. Whether you're upgrading your computer, removing malware, or preparing for a fresh start, understanding how to reformat a hard drive is essential.
Reformatting hard drive issue
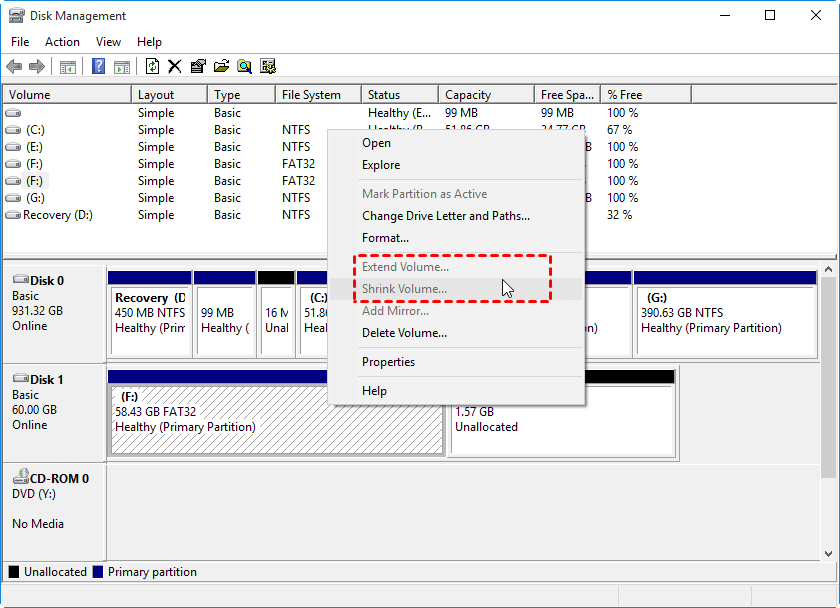
You can use Disk Management in Windows 7 or 10 to format a data partition, but not a system partition, by right-clicking the partition and selecting "Format".
You have some options for disk operations, but in certain situations, the Disk Management options may be greyed out. In such cases, you might need to use third-party software or other formatting tools to manage your disks.
Reformat a hard drive in two ways:
Reformat a hard drive with Qiling Disk Master
Qiling Disk Master Standard is a comprehensive and powerful freeware that can completely format a hard drive in one time, supporting both MBR and GPT disk types. It also allows users to check for disk errors before formatting to ensure a successful process.
Situation 1. Reformat a hard drive without OS on
Install and launch it. Right-To reformat a hard drive, click on the drive you want to reformat and select the option to delete the partition.
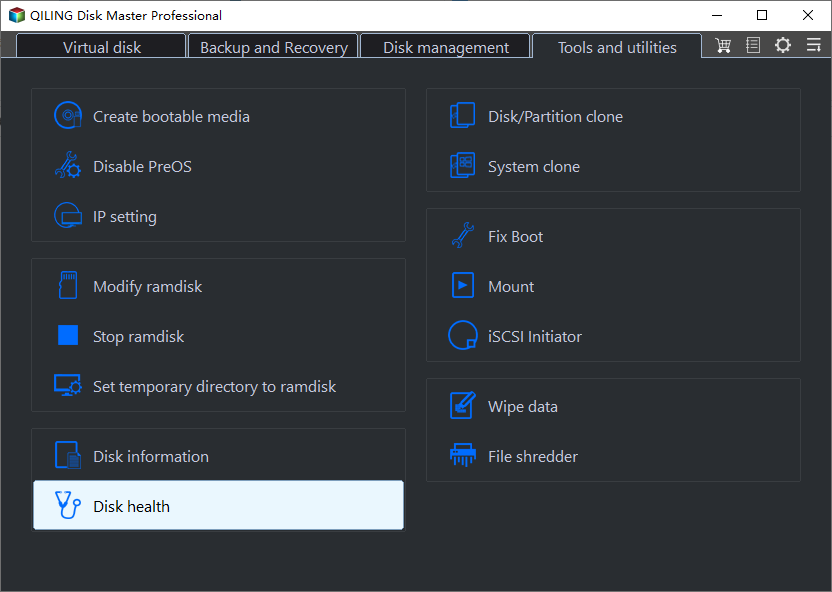
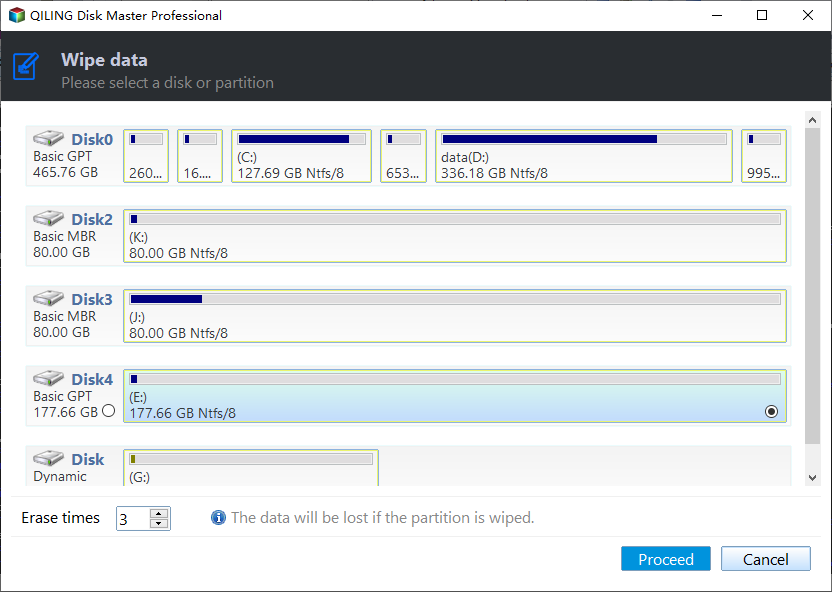
Step 1. To completely erase a hard drive, right-click on it and select "Wipe Hard Drive" from the context menu. This will completely delete all data on the drive.
Step 2. Here, we choose the "Fill sectors with zeros" method. This option is available in the free version, and the other three methods can be accessed by upgrading to the Professional Edition.
Step 3. Click Proceed to execute the operation.
Situation 2. Reformat a hard drive with OS on
You need to upgrade to Qiling Disk Master Professional and run it.
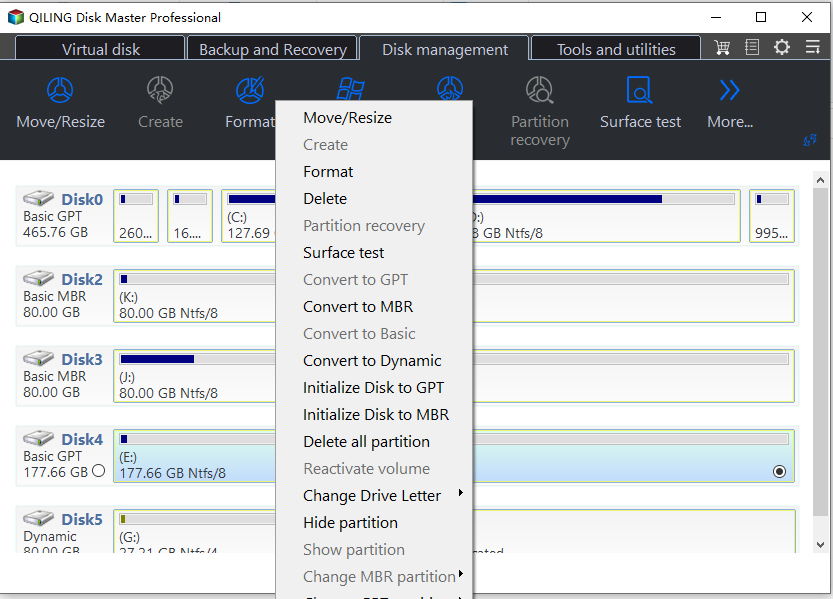
Step 1. Right-click the system disk, and select Delete Partition.
Step 2. Waiting for delete the choose disk.
Note:
▶ This operation will be completed in Windows PE mode. If you want to boot your PC again, you might as well create a bootable media with Qiling Disk Master in advance. Additionally, a Quick Partition may be required when partitioning the hard drive.
▶ Reformatting a hard drive is now a complete solution, thanks to Qiling Disk Master. With this software, you can easily reformat to FAT32 or NTFS file system, among other features. Qiling Disk Master offers even more powerful capabilities, including migrating an OS to an SSD, resizing or moving partitions, and using command line partitioning. It supports all popular Windows operating systems.
Reformat hard drive using Command Prompt
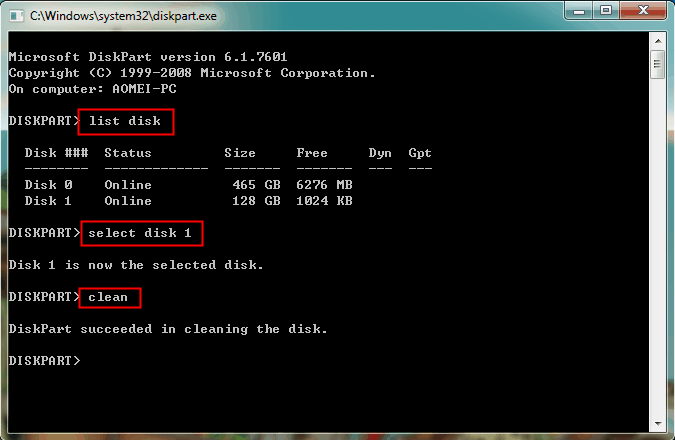
To reformat a hard disk using Command Prompt, go to Start, type "cmd" in the search bar, right-click on the result and select "Run as administrator." Then, type "diskpart" and press Enter. In the Diskpart window, type "list disk" and press Enter to list all the disks connected to your computer. Note the number of the disk you want to reformat. Type "select disk X" (where X is the number of the disk you want to reformat) and press Enter. Type "clean" and press Enter to clean the disk.
1. Connect the external disk to your computer and ensure it is detected by Windows.
2. To start the diskpart utility, press the Windows key + R to open the Run dialog box, type "diskpart" and press Enter. If prompted, select "Run as administrator".
3. In Command Prompt, type below commands in order and press Enter to execute after each input.
● list disk
● select disk n (n is the number of the external drive you want to format)
● clean
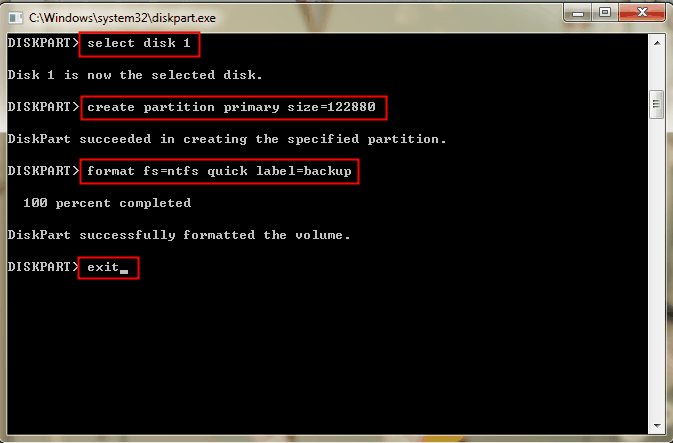
To completely erase and format an external hard drive, all data will be deleted, and the disk will appear as unallocated space in Disk Management. To proceed with the formatting, you can type the following commands.
● select disk n (the same external drive)
● create partition primary size=122880 (it's MB)
● format fs=ntfs quick label=backup
● exit
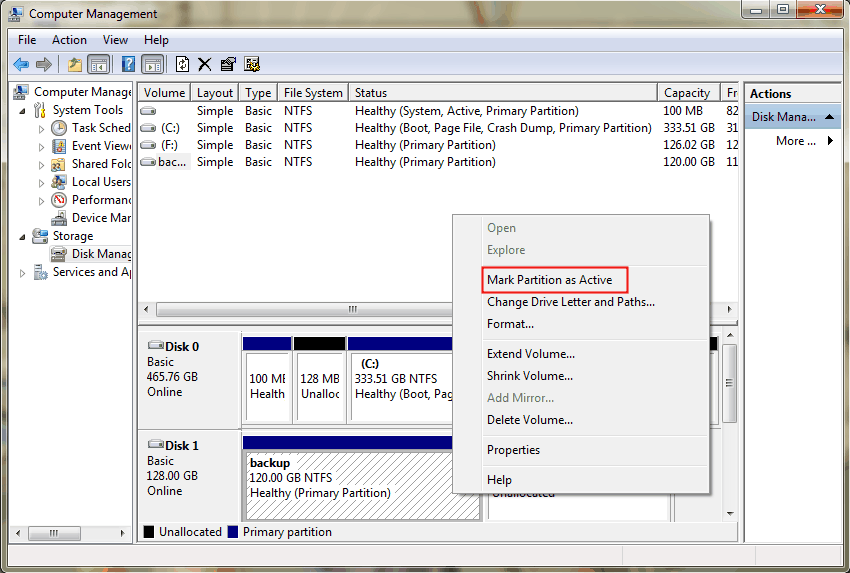
NTFS is the file system and can be changed to fat32. The "backup" is the partition label, which can also be edited. After doing this, the external hard drive will have a partition formatted with NTFS and named "backup" in Disk Management. If you want to use it as a boot drive, mark it as active by right-clicking on the partition.
Diskpart is a useful partition tool that can be used to create a bootable USB drive, among other tasks, if you're familiar with its functionality.
To create and format a new partition on a disk, you can use Disk Management, which allows you to right-click the unallocated space and select "New Simple Volume". If the disk is not initialized, you can right-click it and select "Initialize Disk", choosing the disk type, which should be GPT for disks over 2TB and MBR for smaller ones.
Related Articles
- Top 2 Ways for Samsung SSD Secure Erase – Unrecoverable
This page presents 2 easy ways to perform Samsung SSD secure erase. Once the SSD has been wiped, it can never be recovered by anyone else. - 4 Solutions to SanDisk SSD Slow in Windows 11, 10, 8, 7
SanDisk SSD slow down? Here we share several easy solutions to tackling with the solid-state drive running slow problem in Windows PC. - SSD Reports Wrong Size in Windows? Why and How to Fix it Easily!
Have no idea on why SSD reports wrong size in Windows 7,8,10,11 and how to fix it accordingly? This article clears all your doubts. - What Does a Disk Defrag do and Why Do I Need it?
What does a disk defrag do? Do I need it? This post will explain how does defragment work and show how to run it.

