Easiest | Transfer Files from SSD to HDD in Windows 10, 11
Quick navigation:
- Why transfer files from SSD to HDD?
- How to transfer files from SSD to HDD in Windows 11/10/8/7
- How to move user stuff from SSD to HDD
- How to move program files from SSD to HDD
- Wrapping things up
Why transfer files from SSD to HDD?
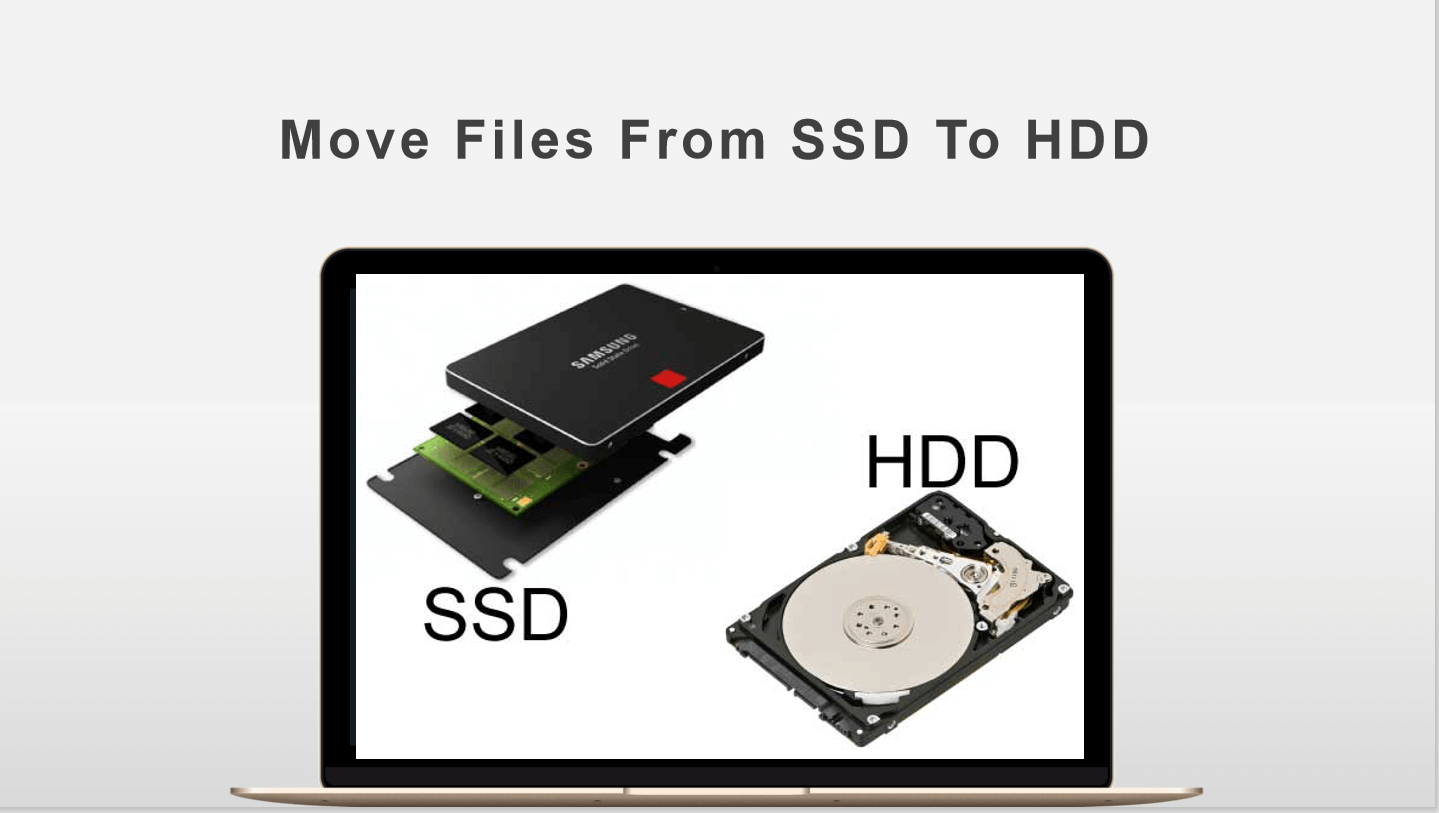
Adding a Solid State Drive (SSD) to a PC can significantly boost its performance, but due to its high price, many users opt for smaller capacities, such as 128GB, 256GB, or 512GB. This can lead to reduced disk space, potentially exceeding expectations if many programs or files are installed.
You can uninstall favorite programs from the SSD and reinstall them on another hard drive to free up space, or simply transfer files from the SSD to the HDD, or store data on the HDD and free up disk space on the SSD.
I'm using an Acer Swift 3 laptop with Windows 10, which has both SSD and HDD storage. Currently, files I download or transfer from pen drives are saved on the SSD, but I'd like to save them on the HDD instead, as it has more storage space. Can you help me figure out how to transfer files from SSD to HDD and set the HDD as my default storage location?
How to transfer files from SSD to HDD in Windows 11/10/8/7
To move files from an SSD to an HDD, you can take two approaches. The first method is straightforward, but it has limitations on what can be transferred and data security. If you need to transfer a large number of files safely or want to schedule regular data migrations, the second method is a better option.
Method 1: Move files from SSD to HDD with "Copy and Paste"
Users may think of using the built-in tool to transfer data from an SSD to an HDD in Windows, but it's a normal wanting feature that Windows has already offered, allowing them to transfer files from one drive to another, such as from C drive to D drive.
To transfer files, right-click on the files you'd like to transfer, select "Copy", then right-click on a blank space and select "Paste". Alternatively, you can use the keyboard shortcuts Ctrl + C to copy and Ctrl + V to paste.
Copy and Paste is best used for small numbers of files and is easier when all files are in the same directory, making it convenient to move files in specific folders like My Documents, Videos, Music, and Pictures.
You can use a script to transfer a large number of files located in different directories, which will save you time and resolve the permission issue during the data migration process.
Method 2: Transfer files from SSD to HDD with Qiling Disk Master
This method enables swift movement of files or folders to different locations, useful for file backup or syncing, and is also beneficial when moving large quantities of files to a new hard drive. It offers various practical features, including those provided by Qiling Disk Master Standard.
- You can schedule the task to get timely track of changes through daily, weekly, or monthly intervals, among others.
- Full, incremental and differential backup are all supported, with differential backup available in higher editions.
- This software has excellent compatibility with Windows systems and various storage devices, supporting Windows 11/10/8.1/8/7/XP/Vista, as well as local disks, external hard drives, USB flash drives, NAS, and network shared folders.
To move files from your SSD to HDD in Windows 10/11, you can use the File Sync feature, which is a more straightforward approach than extracting data from a backup image. Download Qiling Disk Master Standard and follow the steps below to complete the process.
Before moving files with Qiling Disk Master Standard, there are a few things you should know.
• File Sync may be affected if the directory path of files is too long.
• Making any changes to the target files or folders, such as deleting, renaming, or modifying their contents, can lead to inconsistencies between the source and target files/folders.
• Qiling File Sync can synchronize files and folders only if the Volume Shadow Copy Service is enabled on your PC.
• Some system files or program files with special security attributes, such as those found in the C:\boot\bcd or C:\Windows\CSC directories, will not be synchronized.
• Large files over 4GB cannot be synced to FAT/FAT32 partitions due to partition size limitations.
How to transfer data from SSD to HDD with freeware:
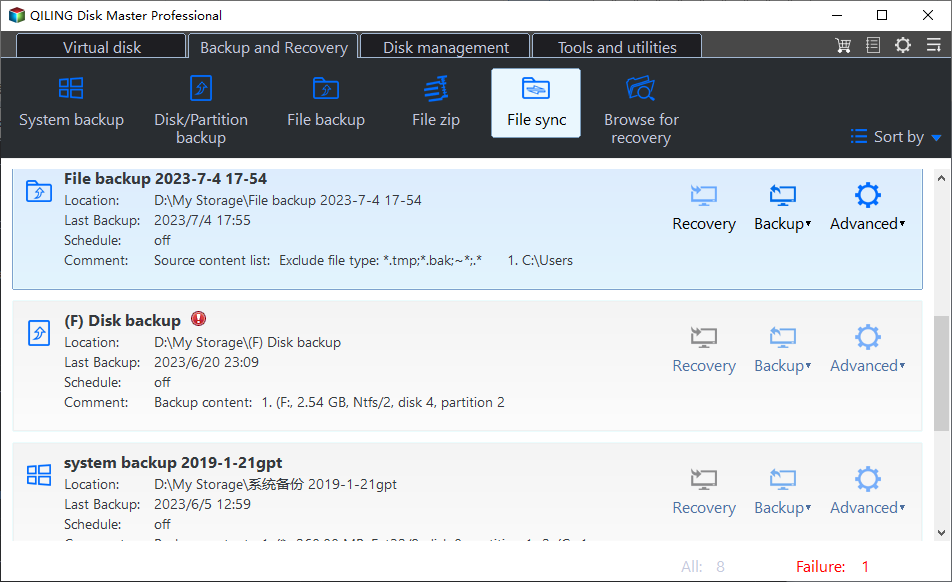
Step 1. Install and launch Qiling Disk Master Standard. Click Backup and recovery, and then select File Sync.
Step 2. Click Folder to add the files and folders you want to transfer from SSD to HDD.
Step 3. Click the folder shaped button and then choose the new HDD as destination path to store your files.
Step 4. To automatically sync files, click Schedule Sync and select Daily/Weekly/Monthly, then click Proceed. To add a note or enable email notifications, click Options.
The advanced features of Qiling Disk Master Professional include.
• File Sync: This feature ensures that the destination directory has the same files or folders as the source directory, deleting or overwriting any newly added or modified files in the destination path.
• Two-way sync: This feature will synchronize files and their updates between the source and destination directories, and vice versa.
• File Sync: This feature allows for real-time monitoring of files, with changes being synchronized instantly upon detection, making it ideal for users or teams who need to stay up-to-date on all changes.
How to move user stuff from SSD to HDD
Windows automatically selects one disk as default storage if there are both, which can lead to insufficient disk space for smaller SSDs.
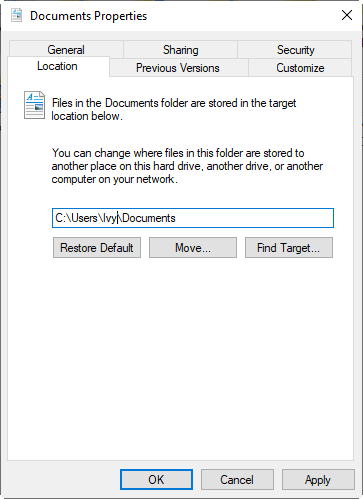
To change the location of default user files, open the Run box, type %userprofile%, and open a user folder. Right-click on a folder like Documents, select Properties, click the Location tab, change the path from C:\Users to D:, click Apply and OK to confirm. For example, change C:\Users\Ivy\Documents to D:\Users\Ivy\Documents.
How to move program files from SSD to HDD
To move program files from an SSD to an HDD, you can use symbolic links to create a shortcut on the desktop that redirects to the new location. This allows Windows and other programs to access the files as if they were still on the SSD.
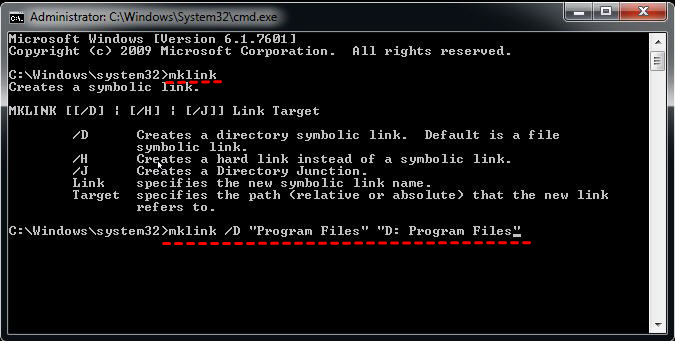
To change the location of the "C:\Program Files" folder on the SSD to "D:\Program Files" on the new HDD, you need to move the entire "C:\Program Files" folder to the new HDD first, then run the Command Prompt as an administrator and type the command: `mklink /J "C:\Program Files" "D:\Program Files"`. This command creates a junction point that points the old location to the new location, effectively redirecting all files and folders to the new HDD.
mklink /D "Program Files" "D: Program Files"
-
The "Program Files" folder is a symbolic link to the actual location of your programs, allowing you to access them from a single, unified directory.
-
The "D: Program Files" is the path to a directory on your computer where programs are installed.
To move program files from an SSD to an HDD, you can use the built-in Windows feature called "Move" in Disk Management, or use a third-party tool like EaseUS Todo PCTrans or PC Decrapifier, or manually move files one by one. You can also use the "Add a new page file" feature in Windows to move some program files to the HDD.
Wrapping things up
To transfer files from SSD to HDD or another SSD in Windows 11/10/8/7, you can use the built-in "File Explorer" to copy and paste files, or use third-party software like EaseUS Todo PCTrans or Acronis True Image to migrate data. Alternatively, you can also use the "Robocopy" command in Command Prompt to transfer files. Additionally, if you're looking to transfer the entire operating system and applications, you can use the "EaseUS Todo PCTrans" software to clone the disk. Just choose the method that suits your needs.
For personal data, You could consider using Qiling Disk Master Standard, which is a great program that's easy to handle. It works backstage to transfer files, eliminating the need to interact with the process interface on your desktop.
You can also use it to move an operating system from a solid state drive to a hard drive using System Backup & Restore or System Clone, clone a solid state drive to a larger solid state drive with Disk Clone, and back up or sync changes with Incremental Backup, among other features.
For user files, You can use the Properties feature to move files from the SSD to the HDD, or use the mklink command line to relocate program files. Choose the method that suits your needs and start transferring files.
Related Articles
- Three Ways to Transfer Files from C Drive to D Drive in Windows 10/8/7
Want to transfer files from C drive to D drive to free up space, but don't know what files can be moved and how? Scroll for details and steps. - Top 2 Ways to Copy/Transfer Data from One Hard Drive to Another
In need of transferring files, OS and programs from one hard drive to another? Read this article patiently to get the top two ways to achieve your goal. - How to Clone SSD to HDD in Windows 10 with Freeware
Looking for a way to copy SSD to HDD in Windows 10/11? This page shows a simple way to migrate data from SSD to HDD. - How to do QNAP NAS to NAS Incremental Backup? - Qiling Disk Master
There are several ways to do QNAP NAS to NAS incremental backup, most of which are complicated in operation. So I'd like to introduce you a free and easy solution.


