Microsoft Surface Data Eraser - Free Tool to Wipe Data
What Is Microsoft Surface Data Eraser?
Microsoft Surface Data Eraser (MSDE) is a free tool that allows users to securely wipe data from compatible Surface devices, such as Surface Laptop and Surface Pro, using a USB drive, thereby protecting sensitive information like passwords and bank details.
In situations where you need to erase your data, such as when you're selling or giving away a device, or when you're no longer using a service or app, you can erase your data to free up storage space and protect your privacy.
- Securely erase all data on a Surface device before sending it for repair.
- Retire Surface devices from use in a company or organization.
- Wipe a Surface device before giving it away.
- Delete sensitive data on a Surface device.
How to Use Microsoft Surface Data Eraser
If you're in a situation where you need to erase data on a Microsoft Surface, such as selling or trading it in, you'll need to create a Microsoft Surface data eraser USB stick. To do this, prepare a USB 3.0 stick with at least 4GB of space. This will allow you to securely erase the device's data, protecting your personal information.
Create Microsoft Surface Data Eraser USB Stick
Step 1. To erase data from a USB drive, go to the Microsoft Download Center, download and run the DataEraserSetup.msi installation file, click Build to start and then Continue to confirm you're preparing a USB 3.0 drive.

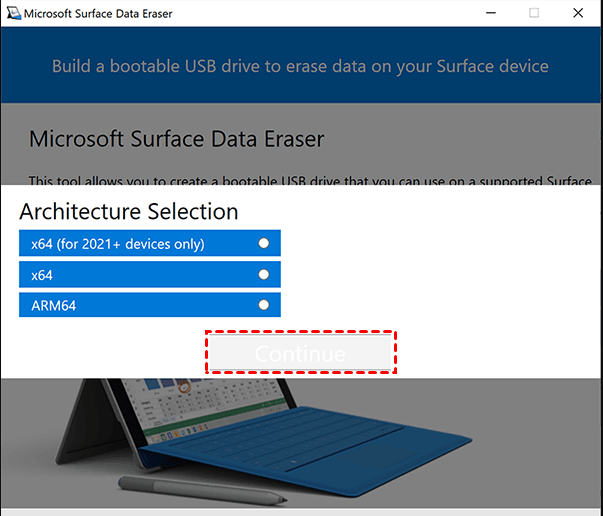
Step 2. Here you will see 3 architectural selections. Select one based on your device and click Continue.
- X64(for 2021+ devices only) is for 2021 or newer devices
- X64 for 2020 or older devices
- ARM64 for Surface Pro X
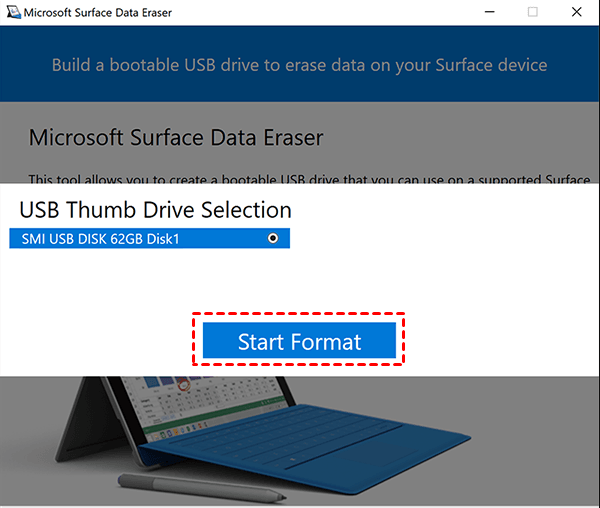
Step 3. Select the prepared USB drive and click Start to create a Microsoft Surface Data Eraser USB stick. Wait until the creation completes, select Success and Complete.
Securely wipe data with Microsoft Surface Data Eraser
Step 1. Insert the MSDE USB stick and turn off your Surface device. Press and hold the Volume Down button, then the Power button, and release the Volume Down button.
Notes:
- The Surface Studio and Surface Studio 2 can take up to 6 minutes to boot into WinPE.
- If your Surface device isn't booting, you'll need to turn on the Enable Alternate Boot Sequence option in Surface UEFI to resolve the issue.
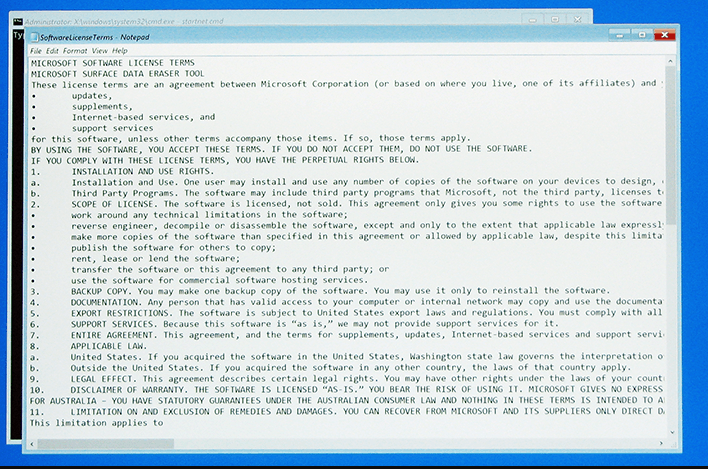
Step 2. When the Surface device boots, you'll see a SoftwareLicenseTerms text file. Read the license terms and close it, then click Accept to continue.
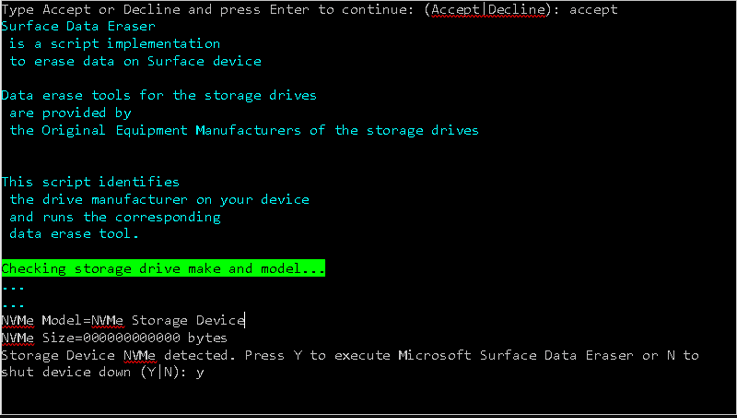
Step 3. This is a warning message from Microsoft Surface Data Eraser, prompting the user to confirm the deletion of all data from the device. The user is asked to select "Yes" to proceed with the data-erasing process.
Microsoft Surface Data Eraser Failed
You've been trying to install the Microsoft Drive Eraser tool on two computers, but it consistently fails at 5% on three different USB thumb drives. This has resulted in wasted time and frustration, with no helpful error messages or online resources available to troubleshoot the issue. You're now unable to format your Surface Go before sending it in for repair.
The issue of Microsoft Surface Data Eraser failing to resolve is still an open question, and a more powerful data eraser may be a better option if you're experiencing this problem.
One More Powerful Microsoft Surface Data Eraser
Qiling Disk Master Professional is a tool that securely erases data on Microsoft Surface devices, supporting Windows 11, 10, 8, 7, XP, and Vista operating systems.
- This utility allows you to completely erase a Surface device's system disk, partition(s), or unallocated space, resulting in the deletion of the operating system and all system files required to start the device.
- It offers 4 disk wipe methods -Fill sectors with zero, file sectors with random data, follow DoD 5220.22-M, or use the Gutmann method. The erase level ranges from low to high.
To securely erase a Microsoft Surface device, download Qiling Disk Master Professional software and follow the steps. For server users, Qiling Disk Master Server is recommended.
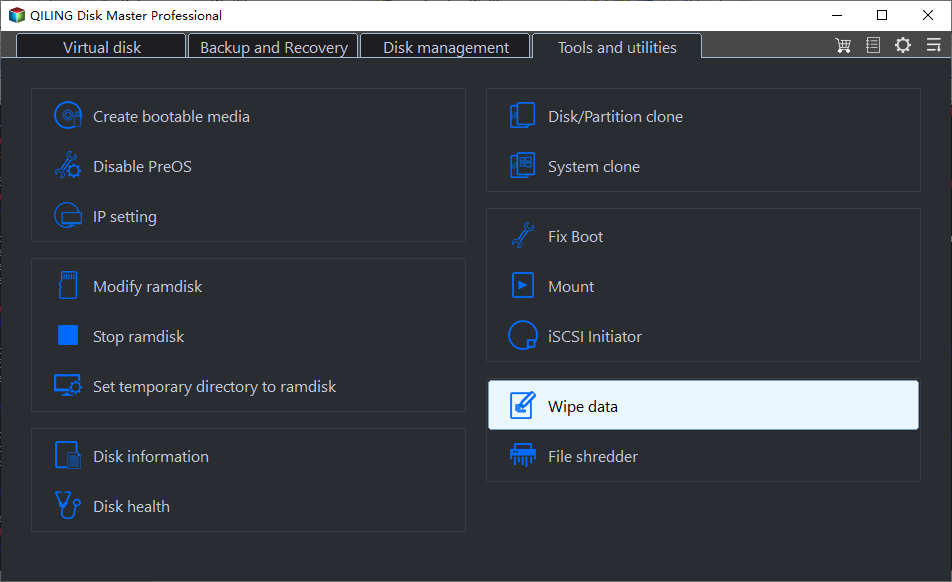
Step 1. Install and open Qiling Disk Master Professional. Go to the Tools tab and select Disk Wipe.
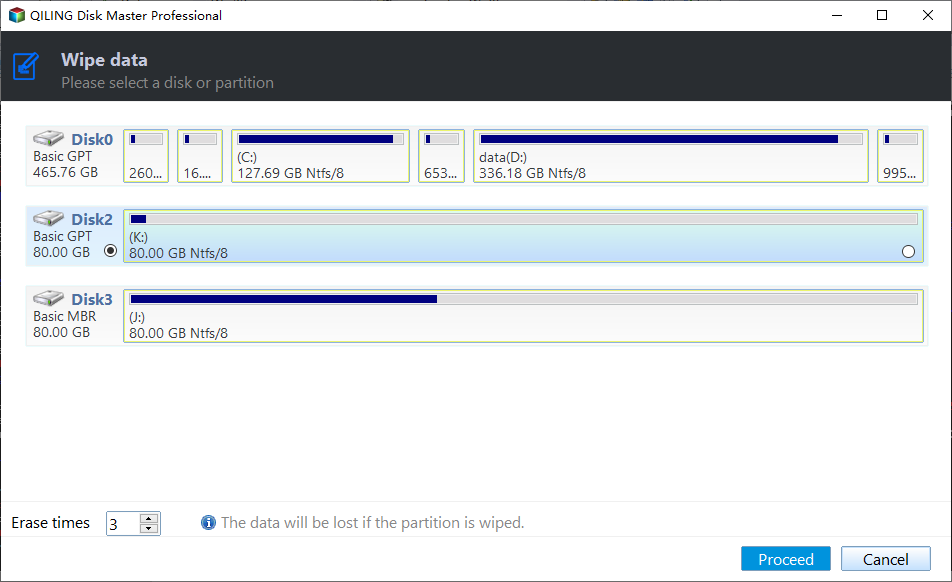
Step 2. Select the hard drive in your Surface device and click Next.
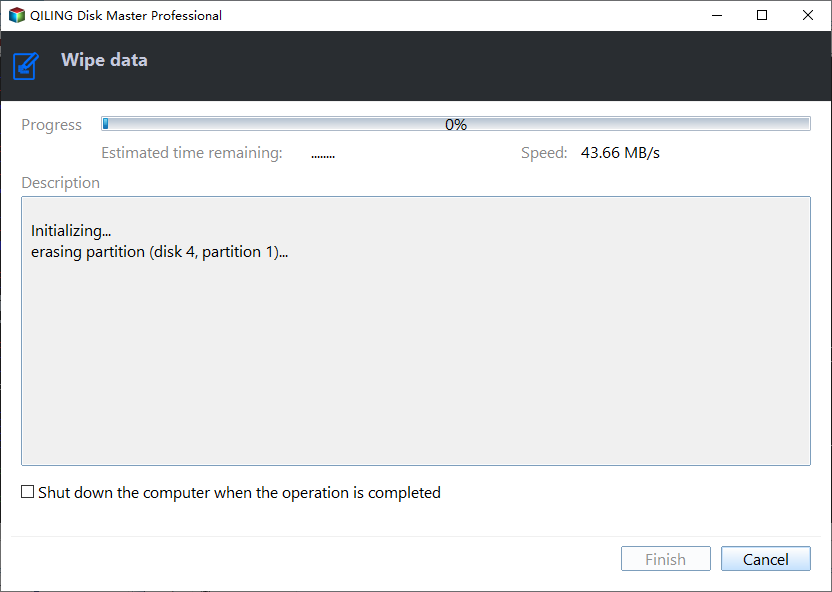
Step 3. The Wiping Method window allows you to select a method and start the process to wipe data on a Surface device, which will then reboot and not boot into Windows after disk wiping.
Notes:
- Safer wiping methods involve multiple passes and slower wiping speeds. For a complete Surface device erase, consider using the DoD 5220.22-M or Gutmann methods.
- To erase data on a Microsoft Surface without booting into Windows, create a bootable USB with Qiling Disk Master.
- This feature doesn't support dynamic disks wiping currently.
Summary
If you're new to Microsoft Surface Data Eraser, this article is for you - it explains how to use it to completely erase all data on a Surface device. However, if you encounter any issues with the Microsoft tool, don't worry, we have an alternative solution - Qiling Disk Master Professional, a powerful data eraser that can help you achieve the same result.
Ait provides 4 disk wiping methods with varying erase levels, with safer methods involving more passes and lower speeds. The DoD 5220.22-M, also known as the "seven passes secure erase", allows for erasing a disk from 3 to 7 passes, while Gutmann method is recommended for more passes.
Related Articles
- Wipe Hard Drive for Clean Install Windows 11 Safely and Easily (3 Ways)
You will learn 3 easy ways to wipe hard drive for clean install windows 11. You can choose to use the built-in tool, installation media or free third-party tool based on your own needs. - How to Wipe C Drive Securely in Windows 10 | 3 Methods
Read this detailed post to learn a step-by-step tutorial to know how to wipe C drive in Windows 10. If you cannot format system drive directly, check out 3 secure methods to wipe C drive. One command prompt way is also provided to format C drive.