Full Guide: Migrate Windows/Mac OS from Slow HDD to Fast SSD Drives
Necessary to migrate OS from HDD to SSD
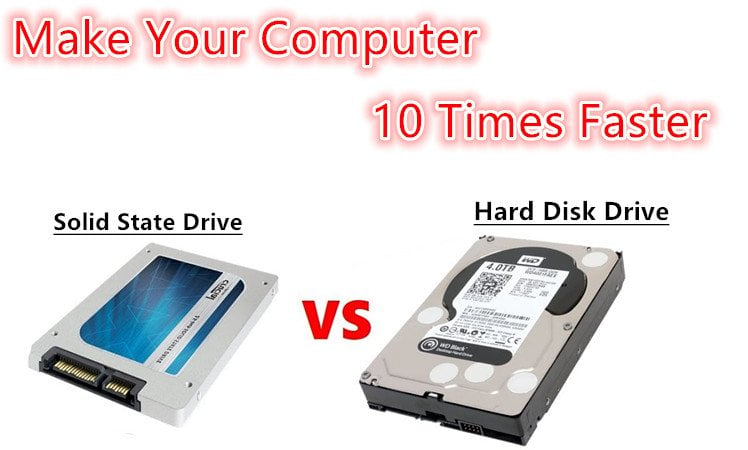
In today's era, traditional Hard Disk Drives (HDD) are becoming outdated and slow, especially with the increasing number of applications, programs, and files being downloaded and stored. This can significantly affect a computer's running and responding speed, making it a challenge to multitask and complete tasks efficiently.
Upgrading RAM won't make a significant difference in a slow computer, as it's often the hard drive (HDD) with a slow spindle speed that's the main culprit behind the slowness.
Upgrading to a new and extremely fast Solid State Drive (SSD) is the most recommended way to speed up an old computer, providing a significant boost in performance and speed.
How to Move OS to SSD drive?
Migrating your operating system to a new SSD drive or another HDD can be done in two ways. A clean reinstallation requires an operating system installation disc and erases all data on the original system drive, forcing you to set up the OS and reinstall programs. Alternatively, you can directly migrate the OS from the HDD to the SSD, transferring all data, including the original OS, programs, and applications, to the new drive. This second method is a better choice as it saves time and effort.
To migrate an operating system from a traditional hard disk drive (HDD) to a solid-state drive (SSD), you can follow a straightforward process. First, ensure your system can boot from the SSD, which may require enabling the SSD as the primary boot device in your BIOS settings. Next, back up your existing HDD to an external drive or cloud storage to preserve your data.
Part 1. Getting everything prepared
To prepare for the OS migration, you will need to prepare and save your data, update your software, and have a plan for any potential issues that may arise. This will ensure a smooth transition to the new operating system.
> A good-You should have a condition SSD drive with enough free space to store all data from your original system drive. If not, you can delete unnecessary files from your current SSD drive to free up more space.
Before starting the migration, make a full backup of your important data to avoid any potential data loss. This will ensure that your files and information are safely stored and can be easily restored if anything goes wrong during the process.
When it comes to migrating operating systems, there are various tools available. For Windows users, Qiling Disk Master is a good option for moving the operating system. On the other hand, Mac users can consider SuperDuper for transferring their operating system.
Part 2. Start the process
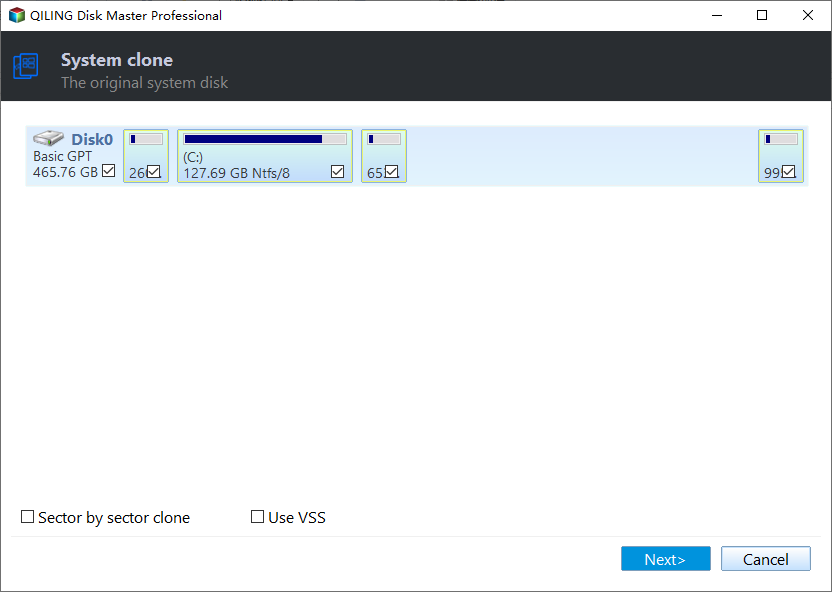
To migrate Windows OS from a HDD to an SSD drive, you can use Qiling Disk Master. This tool allows you to transfer your operating system and all its data to a solid-state drive, effectively upgrading your computer's storage.
Step 1. To use Qiling Disk Master, double-click on its icon to open it. The main interface displays all disk and partition information. Click on "System clone" under the "Tools and utilities" tab.
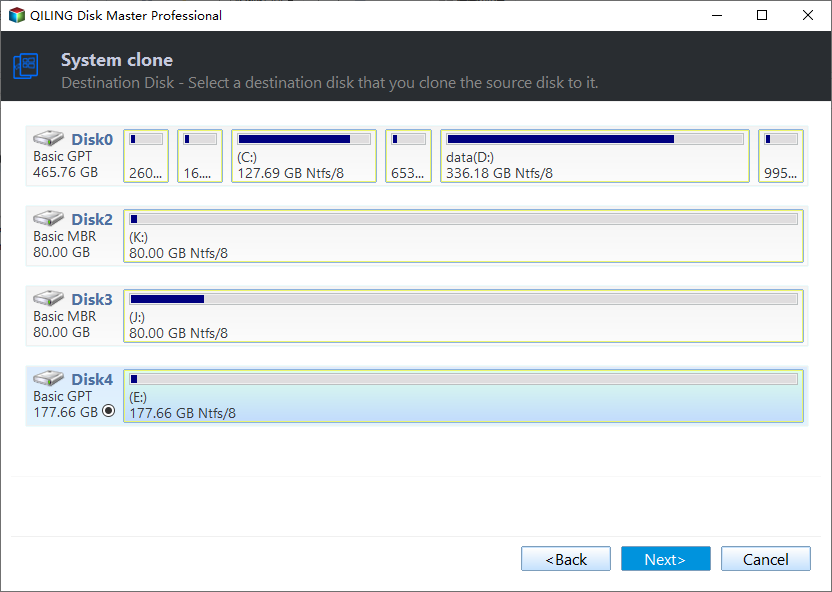
Step 2. In this window, you need to choose an unallocated space on Solid State Drive or HDD. Only when the unallocated space is selected, the "Next" button will be clickable, otherwise it will be greyed out. If there's no unallocated space, you'll need to create one first.
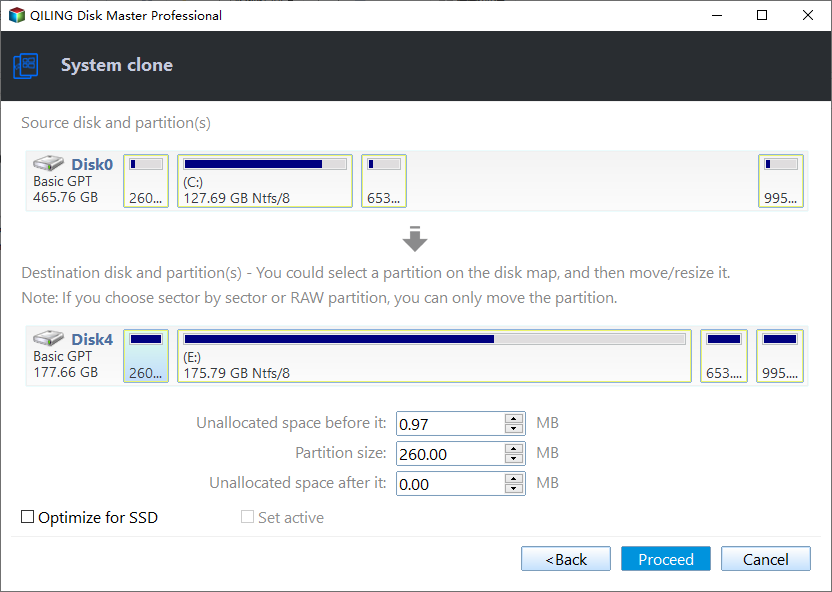
Step 3. Here, you can resize partition and decide the location of this (system) partition being created. Then hit on "Next".
Step 4. Then, a brief note will appear, teaching you how to deal with possible Windows failing to boot problem after migration.
Step 5. Now, you will return to the main window now, click "Proceed" to make this OS migration operation to take effect.
To move Windows Server, try its Server edition.
To migrate Mac OS to an SSD, connect your SSD drive to your Mac, then restart your computer in Recovery Mode. From there, select your SSD drive as the startup disk and follow the on-screen instructions to complete the migration.
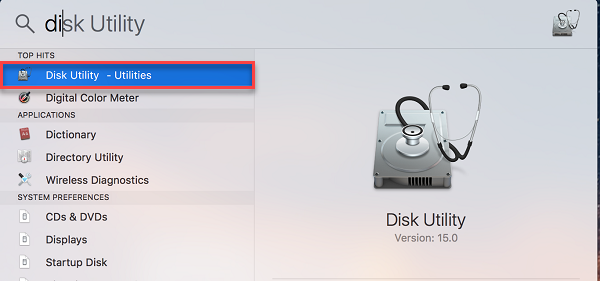
Step 1. To access "Disk Utility" on a Mac computer, go to the Spotlight icon on the menu bar, type "Disk Utility" in the search field, and then double-click on "Disk Utility – Utilities" to open it.
Step 2. To erase a connected SSD, select it from the sidebar under "External" and click the "Erase" option.
Step 3. Go to https://www.shirt-pocket.com/SuperDuper/SuperDuperDescription.html, click "Download" on the right side to download SuperDuper onto your Mac.
Step 4. To get started with SuperDuper, install and launch the software. It should open automatically once the installation is complete, but if not, you can find it in the "Applications" folder in the Finder and open it manually.
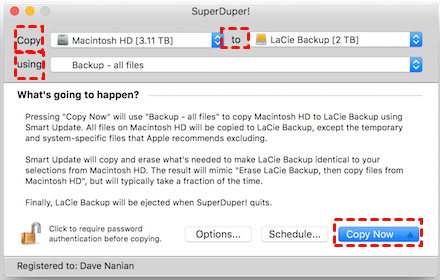
Step 5. To back up your Mac's current operating system to a target SSD drive, select the current hard drive under the "Copy" column, select the target SSD drive under the "To" column, and choose "Back up-all files" in the "using" column. Then, click "Copy Now" to initiate the backup process.
Step 6. Then, you will need to type your user password to allow the disk copying.
Step 7. To clone the Mac hard drive to an SSD, click "Copy" to confirm the process, and once it's completed, click "OK".
Part 3. You’re almost finished…
To make Windows operating system boot from a new SSD drive, you'll need to follow these steps. First, connect the SSD drive to your computer and ensure it's properly recognized by the system.
Step 1. Restart your computer and enter "BIOS" setup.
Step 2. Use the arrow keys to go to the BOOT tab. System devices appear in order of priority.
Step 3. To prioritize an SSD drive's boot sequence over a hard drive, move the SSD device to the top of the boot sequence list.
Step 4. Save and exit the BIOS setup utility.
1. Connect your SSD drive to your Mac and make sure it's properly recognized by your computer.
Step 1. Keep both old and new SSD drives connected to your Mac computer;
Step 2. Go to "System Preference" > Click on "Startup Disk" > Select new SSD drive as the new boot drive;
Step 3. Right-click on the old SSD drive in "Finder", select "Eject Only Macintosh HD" to remove it from the system, then replace it with the new SSD drive.
Step 4. Shut down the Mac computer, install new SSD drive to it, and then reboot computer again.
Now that you've successfully migrated your OS to an SSD drive, you can enjoy a faster boot time and apps loading time. I hope this guide has been helpful in making the process smooth and successful.
Related Articles
- Easy Way to Clone System Disk to SSD with Secure Boot
By cloning system disk to SSD, you can avoid the reinstallation of Windows and other apps if you need to replace your current system hard drive. - How to Clone Toshiba Hard Drive to SSD with Secure Boot
To clone Toshiba hard drive to SSD, you can find a right software to easily achieve. Here, we recommend you Qiling Disk Master, which helps to clone Toshiba hard drive within four simple steps. - How to Clone Windows 10 to Smaller SSD And Boot Successfully
How to clone Windows 10 to smaller SSD? Download the safe and easy cloning software, which can clone Windows OS without reinstalling. - Cloning 1TB HDD to 500GB SSD Samsung and Making It Bootable
This article illustrates one more powerful SSD cloning software and the steps of cloning 1TB HDD to 500GB SSD Samsung without boot issues. Get them now!
