Mount System Image Backup to Extract Single File in Windows 11, 10, 8, 7
Why Mount Backup Image?
Creating a Windows system backup image is the best way to keep your computer safe, as it allows you to restore your entire system and repair failures on hard drives. However, if you need to restore a single file from a system backup image, the direct way is to mount the Windows backup image and extract the individual file from it.
To restore individual files from a system image backup, you can't use Windows Backup and Restore. Instead, consider using third-party backup software that allows for file-level restoration. This approach can provide a more flexible and efficient solution for recovering specific files from a system image backup.
Best Windows Image Mount Tool - Qiling Disk Master Professional
Qiling Disk Master Professional allows you to mount a Windows backup image to a virtual partition, making it easy to extract individual files. The mounted drive is read-only, ensuring your data remains safe, and you can only copy files out of it.
Qiling Disk Master can only mount backups created by itself, offering four backup types: System Backup, Disk Backup, Partition Backup, and File Backup. Mounting is available for the first three types, while File Backup mounts as an image, prompting a destination for extraction.
To proceed, download a professional Windows image mounting software and install it on your PC.
How to Create a Windows 10 System Image Backup
Qiling Disk Master Professional is a user-friendly tool designed for home users, making it easy to create a system backup image with minimal effort. To get started, simply follow the steps to create a system backup image with ease.
1. Run Qiling Disk Master. Click Backup > System Backup.
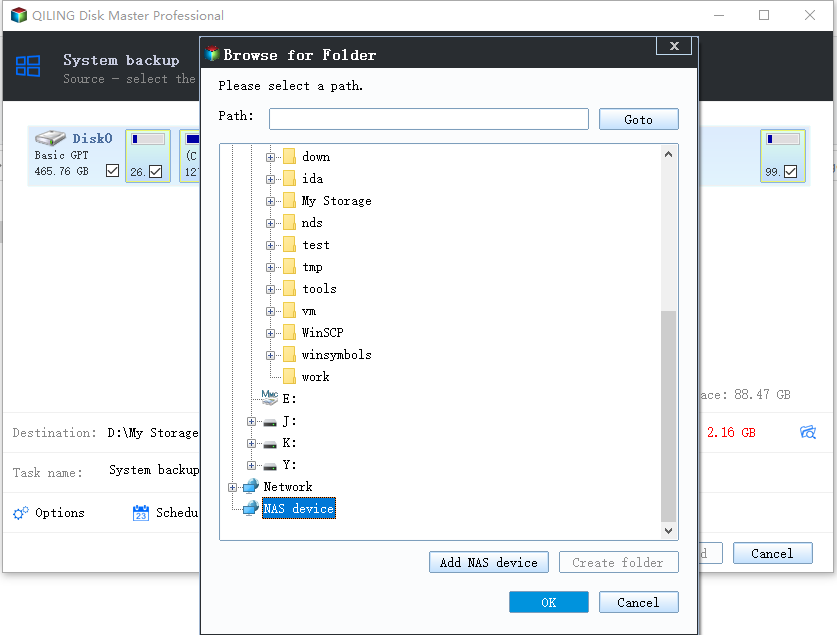
2. The system and boot partitions are selected by default as the source data. Select a destination for your Windows 10 system image file.
3. To set up automatic backups, enable the Schedule Backup option and choose a schedule that suits your needs, such as daily, weekly, or monthly. Alternatively, you can select event triggers or USB plug-in to copy files automatically when the USB is connected. This is a convenient option if you want to back up files to a USB drive when it's connected.
★Tips:
💛 To prevent the backup disk from filling up at the beginning, you can enable a backup scheme, allowing you to set incremental or differential backups, or automatic cleanup by quantity, time, or space.
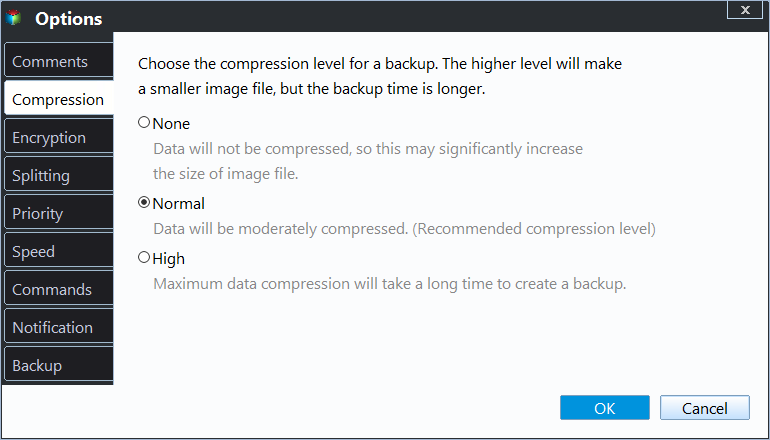
💛 In addition to setting the image file compression, you can also set email notification and other options in the Options section.
4. Press Proceed to create a Windows 10 system image backup automatically.
To save disk space, create a Windows 10 system image backup using the built-in tool, which will only store the first full backup and subsequent incremental backups that occupy the least space.
How to Mount Windows 10 System Image Backup
To mount a Windows image backup and copy individual files, first, you need to open the Control Panel and select the "File History" option. Then, click on "Restore files from a current backup" and select the backup you want to mount. Once the backup is mounted, you can browse through the files and folders as if they were on your local drive.
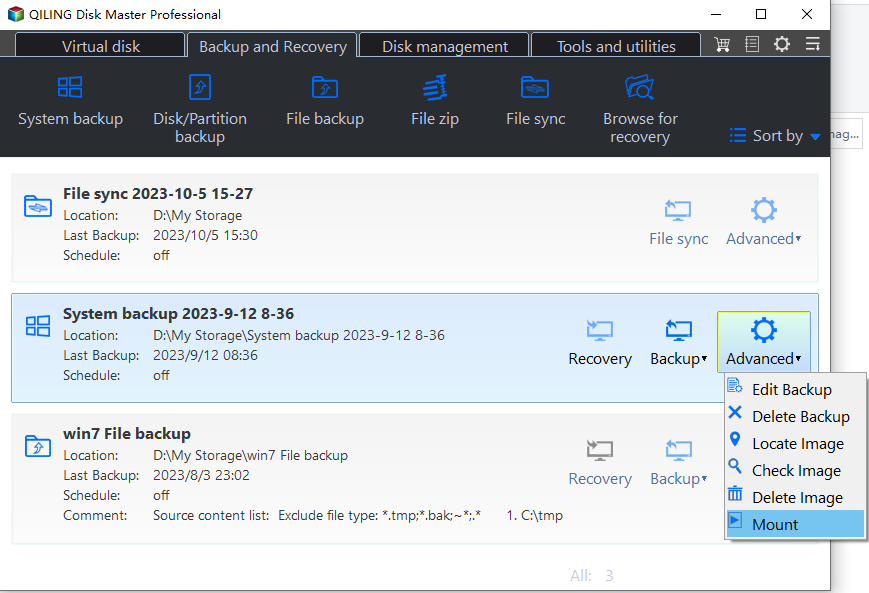
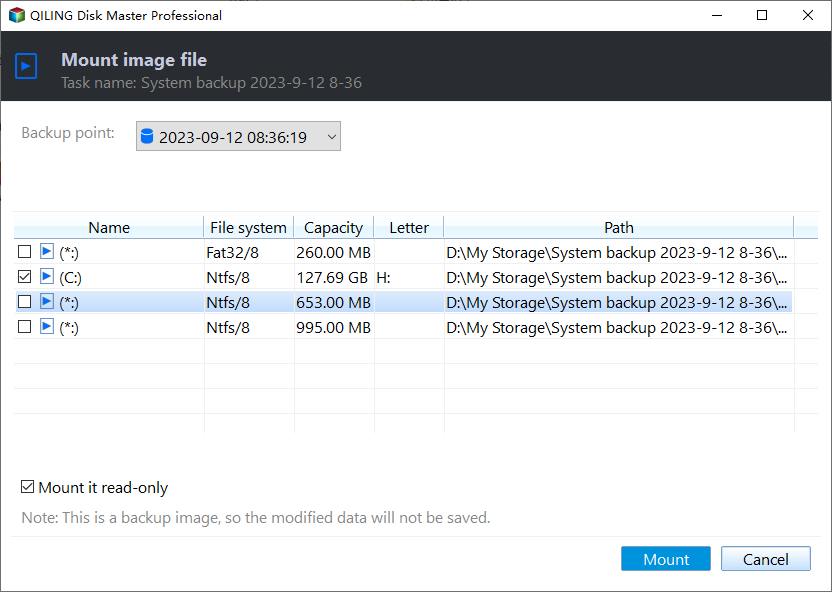
Step 1. To mount a Windows 10 system backup image, select the image from the list, click the Advanced button, and then choose the Mount option. This will allow you to access the files contained within the backup image.
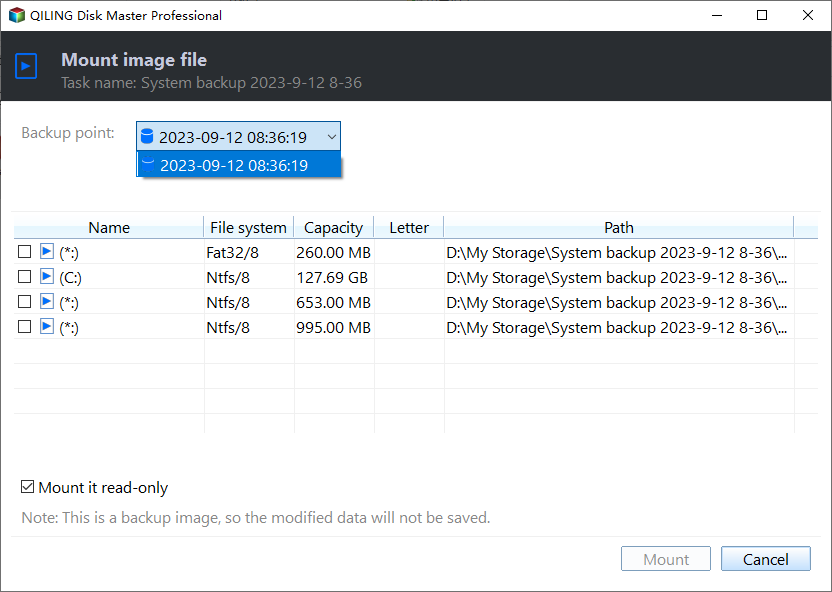
Step 2. Select a backup time point To explore and copy data, choose a suitable time point, taking into account whether it includes a full backup, incremental backup, or differential backup.
Step 3. Tick the checkbox First, select the system partition that contains the files you want to extract. Then, choose a drive letter to assign to the extracted files. Finally, click "Proceed" to initiate the extraction process.
Step 4. You can assign a drive letter to a partition, then view all the files and folders in the virtual drive, and copy the files you need to another place.
★Notes:
◉ If the selected files are encrypted, you'll need to enter the password you previously set to proceed with the process.
◉ If you don't detach the virtual drive after copying needed files, it will automatically be detached at the next computer startup.
Conclusion
Mounting a backup image to extract individual files is straightforward with Qiling Disk Master, but Windows Backup and Restore does not support this functionality.
Qiling Disk Master is a Windows backup software and disk cloning software that allows you to clone hard drive to SSD, replace old smaller HDD with new larger one, and migrate Windows 10 to M.2 SSD, among other tasks.
For server users, please try Qiling Disk Master Server; for IT Technicians, please try Qiling Disk Master Technician Plus.
Related Articles
- How to Mount a Windows 10/8/7 System Image Backup as a VHD?
4 ways provided in this article to mount or unmount Windows image backup VHD or VHDX file in Windows 10/8/7 and Servers, just refer to the step-by-step guide to mount VHD/VHDX. Please read on. - 3 Methods to Fix The Mounted Backup Volume Is Inaccessible
Encountered "the mounted backup volume is inaccessible"? You can refer to this article and find solutions here. - Unable to Mount Clonezilla Image to Restore Single File
How to mount and explore Clonezilla image to solve unable to mount Clonezilla image to restore single files in Windows? Get the 3 solutions below. - P2V Windows 10 | The Simplest Way to Convert Physical to Virtual
P2V Windows 10 has plenty of benefits. But if you're not computer savvy, the process may seem complicated and confusing. Therefore, I'd like to provide a very easy solution to convert physical machine to virtual machine.

