Move C Drive to Larger Disk Without Reinstalling Windows
- Scenario
- Why move C drive to larger disk?
- Best software to transfer C drive to a larger hard disk
- Easy steps to move C drive to a larger HDD or SSD
- Further study on getting a bigger C drive
- Summary
Scenario
You can move your current OS drive to the larger SSD without reinstalling the OS. To do this, you can use the built-in Windows feature called "Clone" or a third-party cloning software. This will transfer your entire system, including the OS, programs, and data, to the larger SSD. You can then disconnect the original 250GB HDD and use the SSD as your primary drive. It's a relatively straightforward process, and most cloning software will guide you through it. Alternatively, you can also use the Windows built-in feature called "Disk Management" to resize the system drive on the SSD and then move the OS to the larger SSD. This method is a bit more involved but still doesn't require reinstalling the OS.
Why move C drive to larger disk?
The C drive, where the operating system is usually installed, tends to fill up quickly due to the constant writing of various files, including Windows updates, services, and cache, which can take up a significant amount of space.
When the C drive is almost full, Windows displays a warning message, suggesting enabling Storage Sense to free up space. However, this can cause system slowdowns, crashes, and unexpected reboots. As a result, users often seek to move the C drive to a larger hard disk to resolve the issue promptly.
Best software to transfer C drive to a larger hard disk
To move the C drive to a larger hard disk, the best approach is to use a professional OS migration tool, which simplifies the process of transferring the operating system and programs installed on the C drive, eliminating the need for a Windows reinstall. This can be followed by using a partition manager like Qiling Disk Master Professional.
This software includes a feature called the "Migrate OS to SSD Wizard" that allows users to transfer their operating system and related partitions to a new hard disk, such as an SSD, and boot from the destination disk without any issues.
Easy steps to move C drive to a larger HDD or SSD
You can download the OS migration software to transfer your Windows 10, 8, 7 drive to a larger hard disk by following the steps provided.
Important:
✔Ensure there's enough unallocated space on the destination hard disk. If not, back up important data, delete or shrink another partition to free up space.
✔Connect the larger disk to your computer and ensure it is recognized by the system.
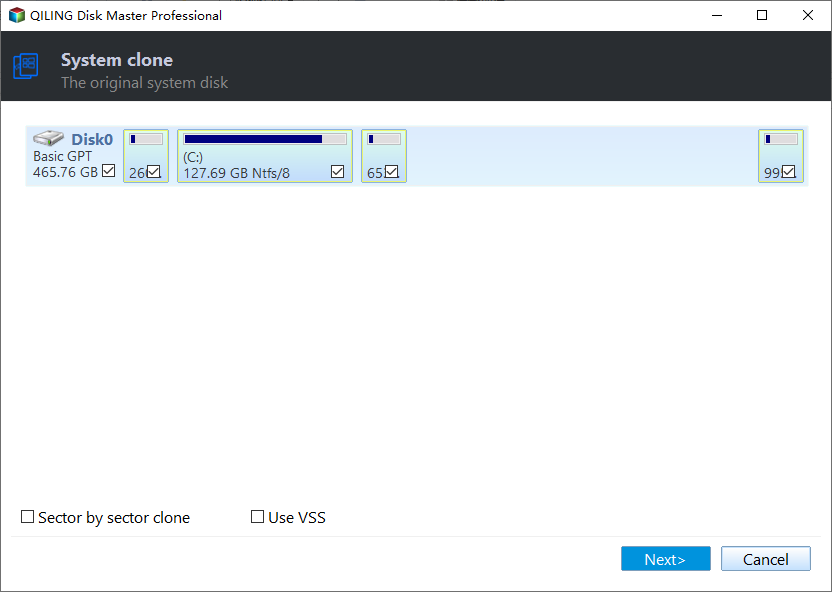
Step 1. Install and launch Qiling Disk Master Professional. Click on "Migrate OS" under Clone list.
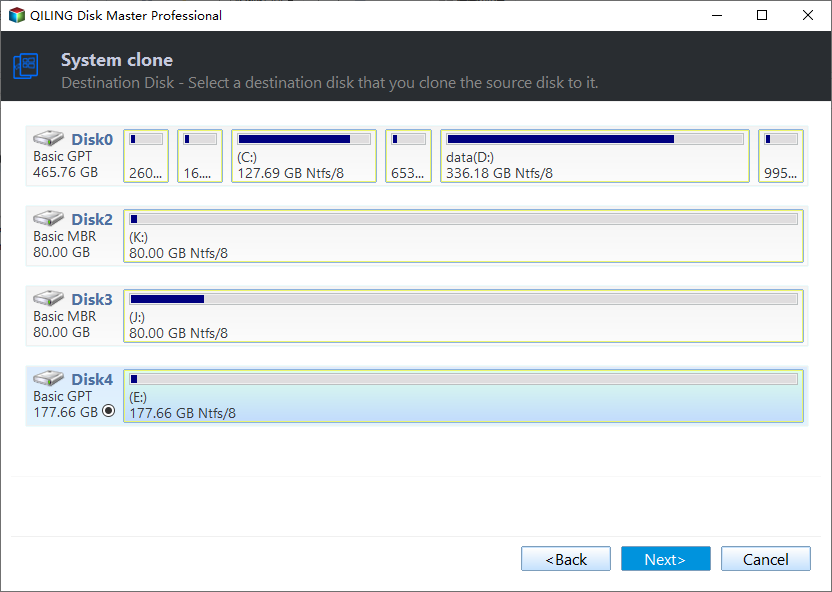
Step 2. Choose the unallocated space on the larger disk and click on "Next".
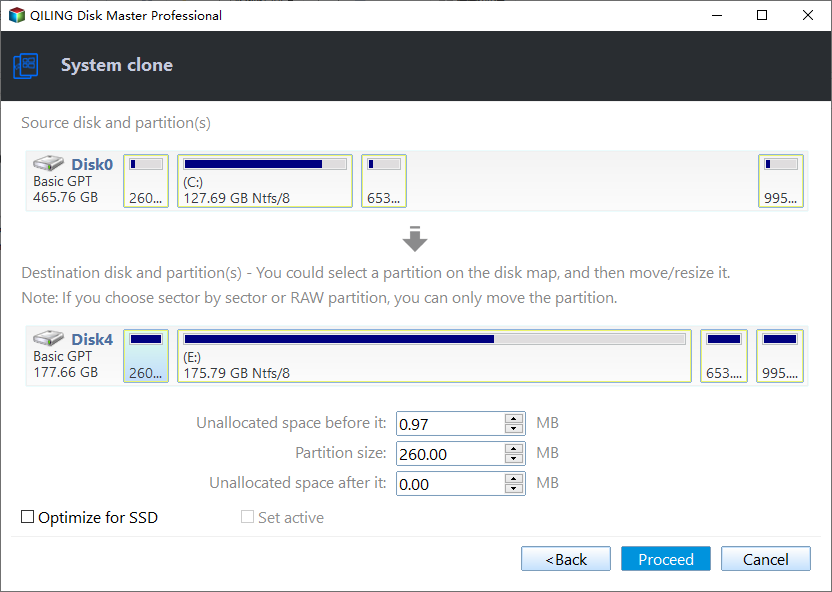
Step 3. Now, you can resize the new C drive on the larger disk as you need or prefer.
Step 4. Click on "Proceed" to commit the pending operation.
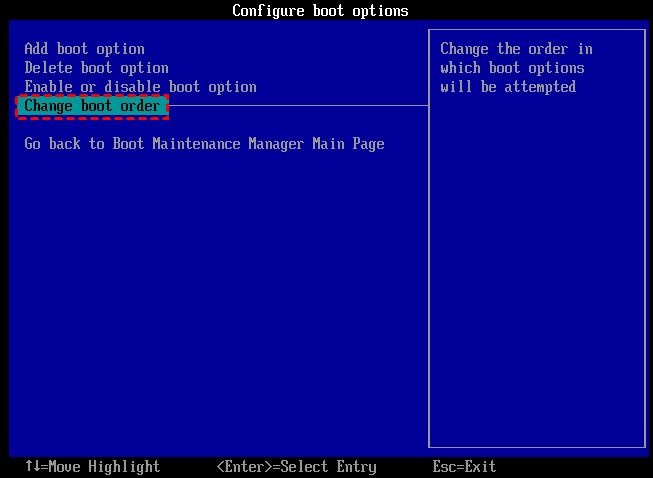
When the process is complete, the C drive will be moved to the destination disk. You can then either replace the old startup disk with the larger one or reboot your computer, enter the BIOS settings, change the boot order, and set the destination disk as the first boot device. This will allow your computer to boot from the new disk.
Further study on getting a bigger C drive
To move the C drive to a larger hard disk and free up space, you can either transfer data from a larger hard disk to a smaller one by adding unused space to the system partition or by moving data from other partitions to the C drive, effectively making the C drive bigger and the other partition smaller.
You can use the Qiling Disk Master Professional to allocate free space from one drive to another, making it a simple way to increase the size of your C drive.
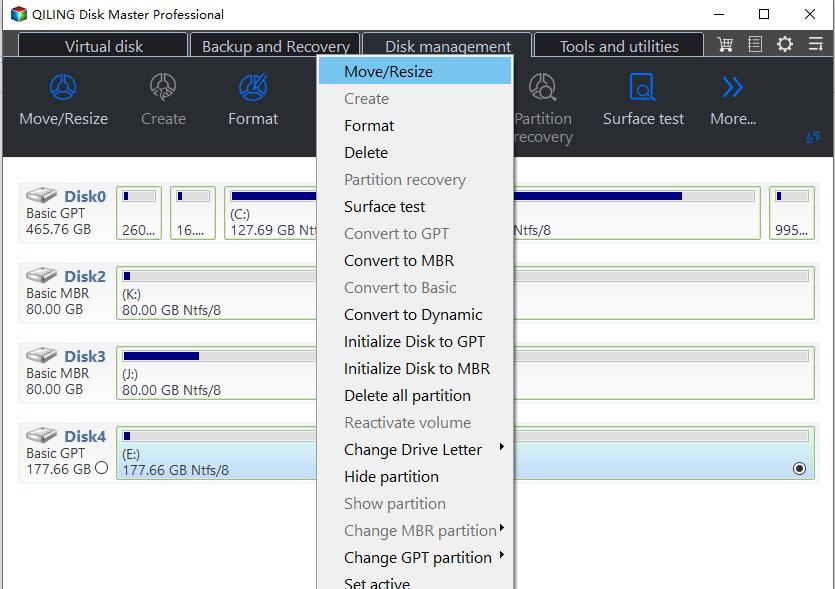
Step 1. Open Qiling Disk Master Professional. Right-click the partition with lots of free space, choose "Move/resize", and select D drive.
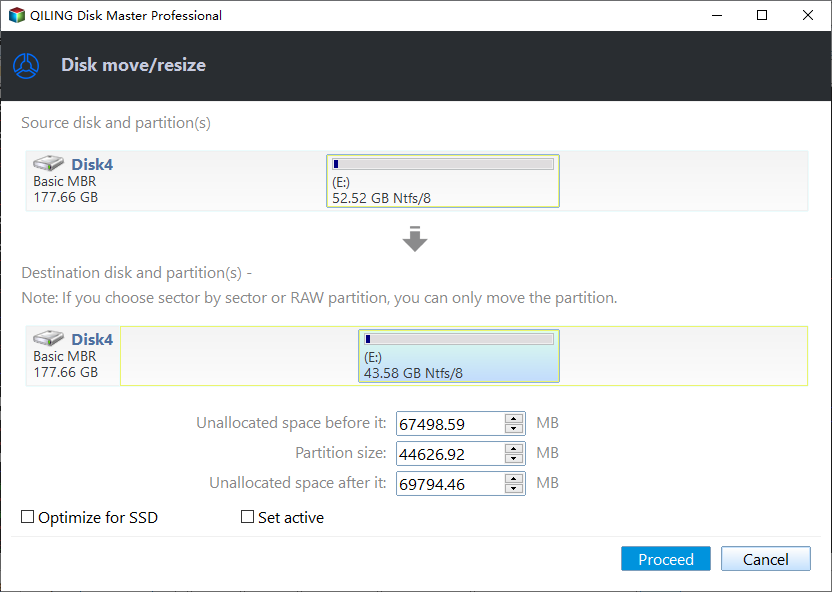
Step 2. Then, you can decide how much free space to transfer to C drive.
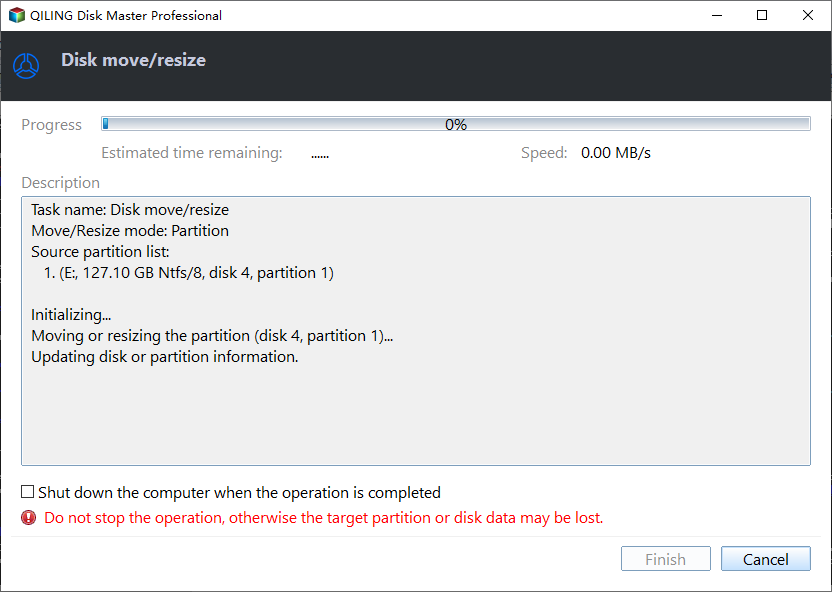
Step 3. Click "Proceed" to commit the pending operation.
Summary
You can learn how to move your C drive to a larger disk without reinstalling Windows 10, 8, 7, and also make your C drive bigger and another partition smaller to make your disk partitioning structure more reasonable. The recommended software can also convert MBR and GPT without deleting partitions, clone SSD/HDD/USB flash drive/SD card, convert primary drive to logical drive without data loss, and is a great choice for Windows Server users.
Related Articles
- D Drive Suddenly Missing in Windows 10 | How to Recover?
D drive missing and cannot see the D drive in Windows 10/11? Here you can learn why D drive disappeared in Windows 10 and how to restore D drive or other lost partition in Windows computer. - C Drive Full, D Drive Empty-What Should You Do?
If your C drive is full D drive is empty, you can delete D drive and extend C drive. If your C drive is full but D is nearly empty, you can transfer the free space from D drive to C drive or move apps from C drive to D drive. This post offers the complete details. - How to Shrink C Drive beyond Limit Successfully in Windows?
Unable shrink C drive in Windows? Here you'll learn how to shrink volume from C partition beyond limit successfully. Disk Management, Command Line DiskPart and professional software are introduced for you. - Free Corsair Data Migration Software for Cloning
How to clone hard drive to Corsair SSD safely? The best free Corsair data migration software - Qiling Disk Master provides you powerful way to migrate data to Corsair easily with just a few clicks.
