How to Move Partition with GParted in Windows 11, 10, 8, 7
Why need to move partition?
The "Move Partition" feature in GParted is an advanced tool for resizing partitions in Windows 11, 10, 8, 7, allowing users to manage their disks and partitions.
To merge an unallocated space with the C drive when there's a partition in between, you can use a partition editor like GParted to move the existing partition out of the way, allowing the unallocated space to be merged with the C drive. This is necessary because unallocated space can only be added to an adjacent partition. By moving the partition, you create the necessary adjacency to merge the unallocated space with the C drive.
To move a partition with GParted, follow these steps: first, download and install GParted, then create a live USB or CD, boot from it, and select the disk you want to modify. Next, create a new partition or delete an existing one to free up space, then move the partition to the desired location.
How to move partition with GParted in Windows 10, 8, 7?
To use GParted, you need to create a bootable GParted USB, boot from the USB, and then use it to move a partition. This process involves creating a bootable USB drive, booting from it, and using GParted to manage partitions.
✍Preparations:
● Prepare a USB flash drive, and back up the data on it to either a cloud storage service or another USB drive, if there is important data on it.
● Download GParted image file on your computer.
Step 1. Open the GParted zip file, and extract it to the USB flash drive.
Step 2. Run the "utils\win32\makeboot.bat" from the USB drive, and follow the instructions to burn the GParted file to the USB.
Step 3. Boot your computer from the GParted USB.
1. Connect your USB to your PC, and tap the BIOS key to enter the BIOS interface.
2. Go to the "Boot" tab, click on "Change boot order" and set the USB as the primary boot device.
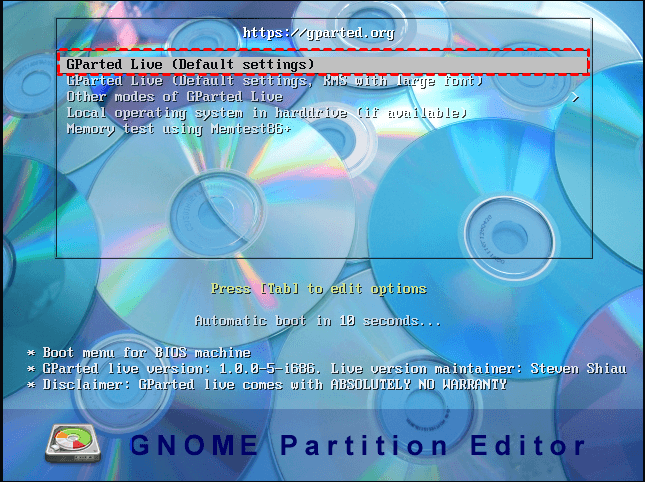
4. Restart the computer. And when you see this setting window, just choose the default settings.
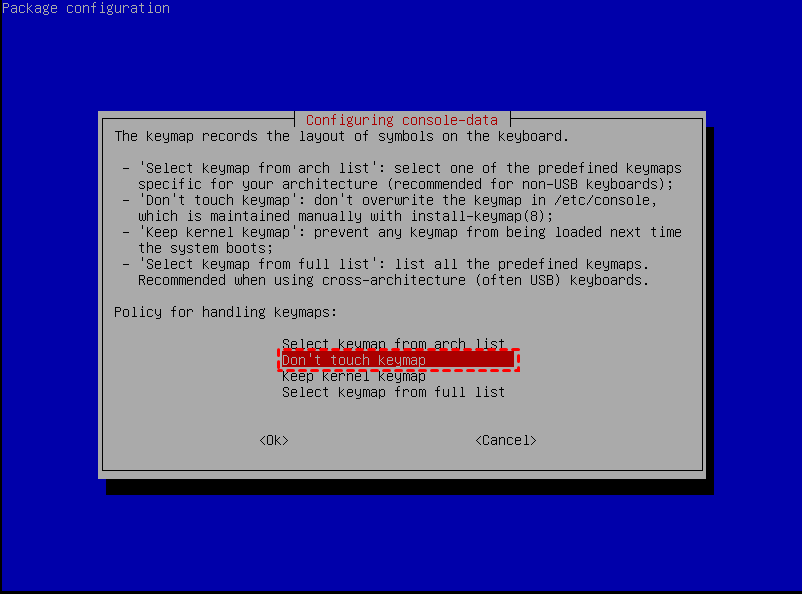
5. To set up your keyboard, first, press the "Esc" key to bring up the boot menu. Next, select the "Advanced options" and press Enter. In the Advanced options menu, select "Configure keyboard" or a similar option, depending on your system.
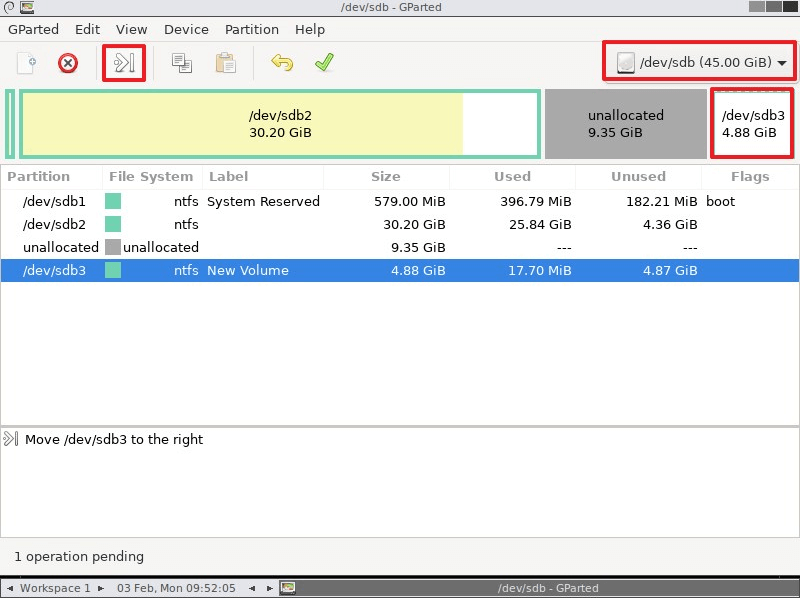
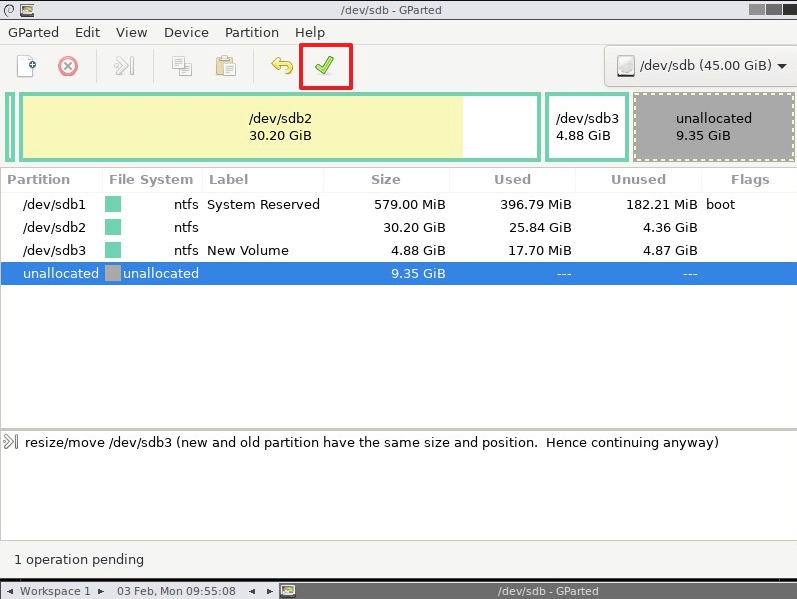
6. To move a partition using GParted, follow these steps: Select the partition you want to move on the GParted interface, then click the "move" button. The partition information will be displayed, and you can choose the new location for the partition. Once you've made your selection, click "apply" to make the changes.
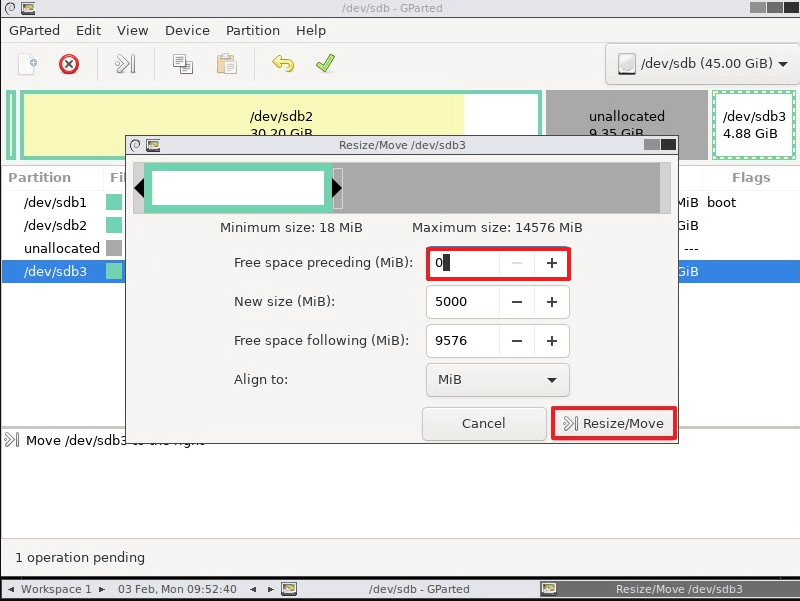
7. To move the partition, you can slide it to the other side. Additionally, you can resize the partition by clicking "Resize/Move".
Step 8. Click the "Apply" to commit the operation.
After completing the "Move Partition" operation, you can resize the partition to the desired size.
Using GParted to move a Windows partition can be effective, but it's often too complicated for most users and may result in errors like "Windows failed to start" when you disconnect the USB and restart your PC. A simpler alternative is to use the next partition to move the Windows partition.
A better tool than GParted to move partition by 3 steps
To move a partition in Windows 11, 10, 8, 7, you can use a specialist disk management software like Qiling Disk Master Professional, which has a user-friendly interface and doesn't require any additional media to create a Windows PE environment.
Qiling Disk Master not only allows you to move partitions but also provides other useful functions, such as resizing and merging partitions. This enables you to directly adjust partition sizes or combine unallocated space with another partition as needed.
To get started, click the button to download the Demo version and follow the steps below to see how to use it.
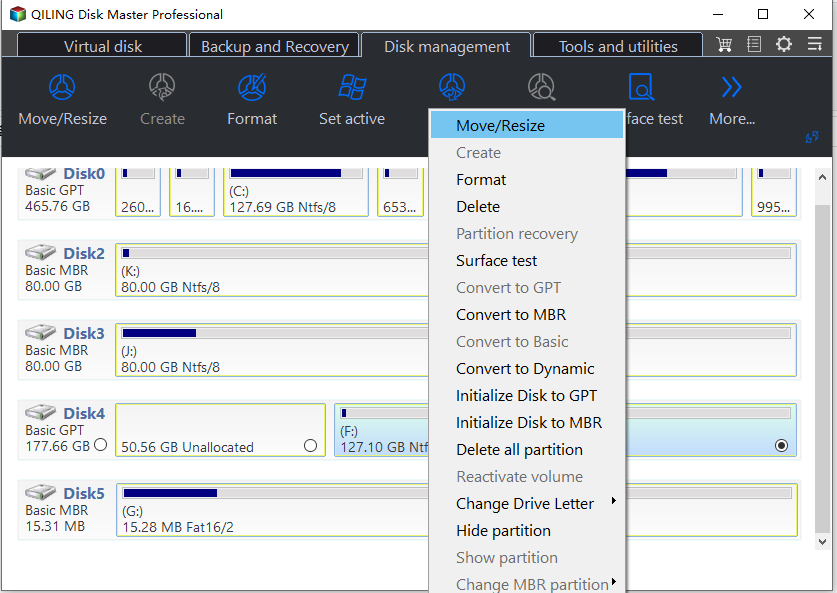
Step 1. Launch Qiling Disk Master, and right-click on the partition you need to move, and choose "Resize/Move Partition".
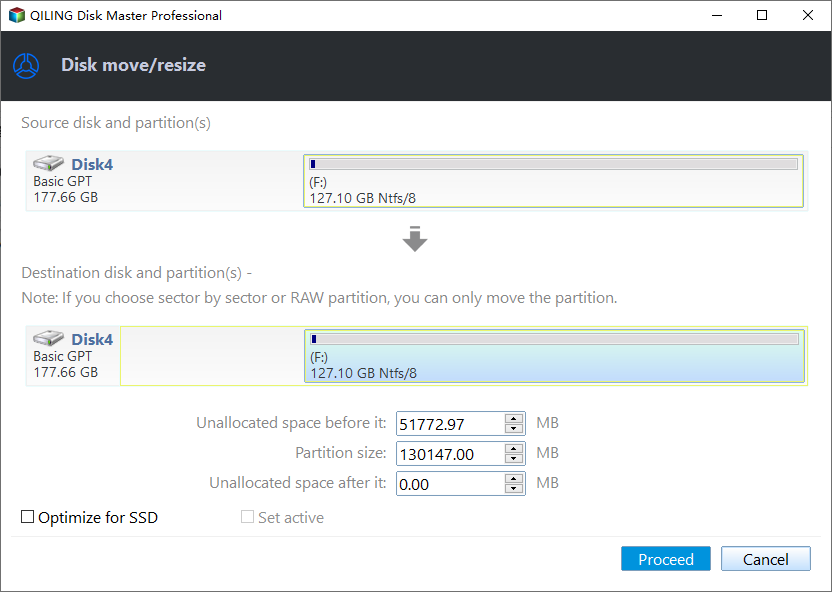
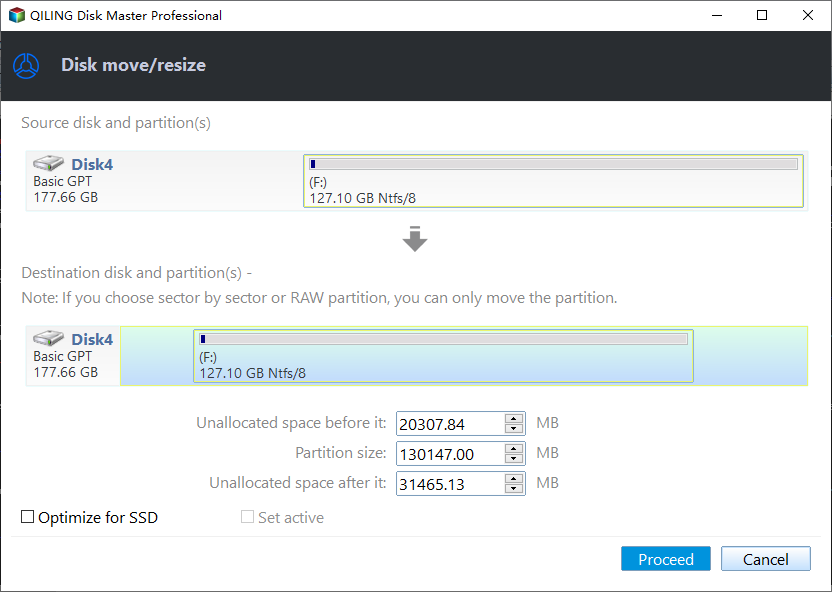
Step 2. Move the partition to the other side.
Step 3. Then, click "Proceed" button to move the partition.
Conclusion
GParted and Qiling Disk Master are two effective ways to move partitions, but Qiling Disk Master is easier to operate. Unlike GParted, which requires burning a file to a USB drive and making it bootable, Qiling Disk Master simplifies the process. Additionally, Qiling Disk Master also supports creating a bootable Windows PE media, which can be used to fix boot problems and manage disks and partitions.
Qiling Disk Master supports most Windows operating system, including Windows 11, 10, 8, 7, XP, Vista, and Windows Server, with a Server Edition available.
Related Articles
- 3 methods to Move Unallocated Space to the C drive in Windows 10, 8, and 7
This article provides you 3 ways to move unallocated space to C drive in Windows 11, 10, 8, and 7 to extend system partition space to keep Windows running smoothly.
