Fix Guide of Recovery Blue Screen on Windows 10
About blue screen of death
The Blue Screen of Death (BSOD) is a system error that occurs when Windows halts due to operations that could potentially damage the system, known as a bug check or system crash. This error is also referred to as a kernel error or stop error.
When the operating system is damaged, it can still run but may lead to data corruption and system security collapse, resulting in a crash that displays a blue screen with error information.
Reasons for blue screen
The blue screen error can occur without a clear reason, but it often happens after a Windows upgrade, during startup, or while using the computer. We can roughly categorize the reasons into two groups.
Hardware reasons:
Hardware devises installation
Hardware fault
The incompatibility of newly installed hardware devices
Software reasons:
There's no enough space for Windows to install
Incompatible Windows updates or programs
System files corrupted
Outdated BIOS
…
Error symptoms
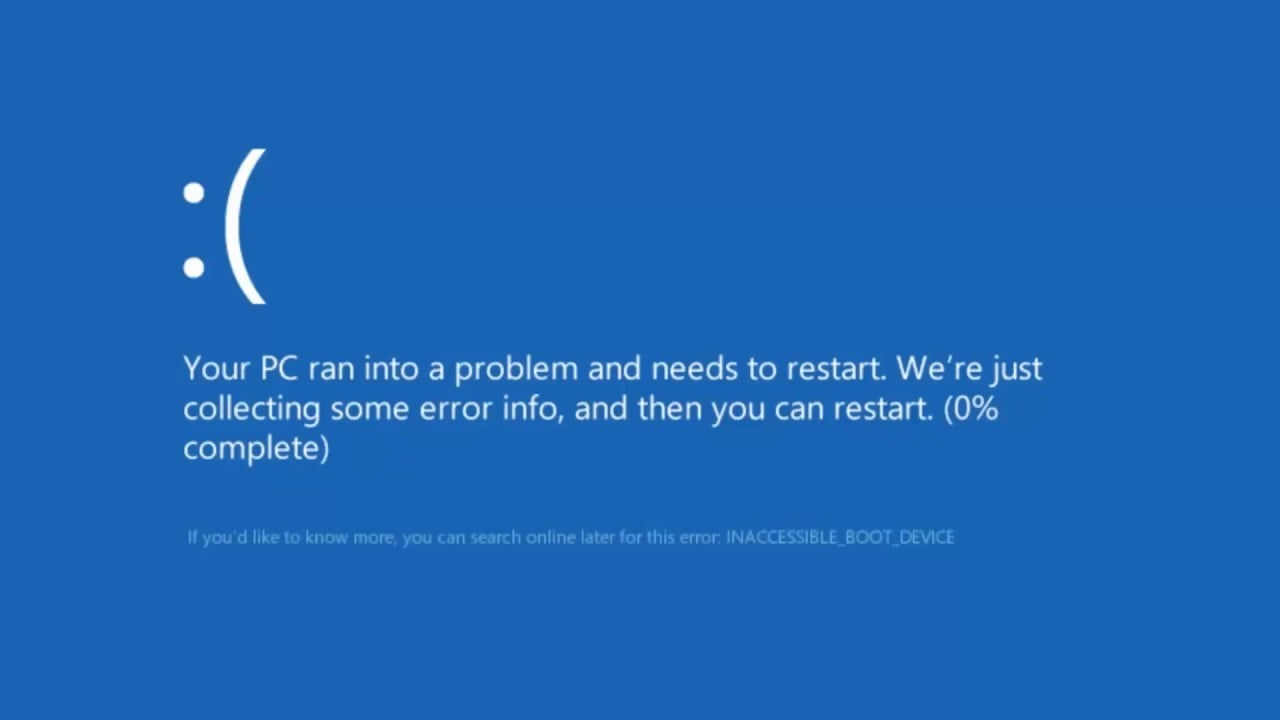
Your PC has encountered an error and is displaying a blue screen with the message "Your PC ran into a problem and needs to restart. We're just collecting some error info, and then we'll restart for you."
And under the screen, you may see an error code.
Here, we list common blue screen error codes
CRITICAL_PROCESS_DIED
SYSTEM_THREAD_EXCEPTION_NOT_HANDLED
IRQL_NOT_LESS_OR_EQUAL
VIDEO_TDR_TIMEOUT_DETECTED
PAGE_FAULT_IN_NONPAGED_AREA
SYSTEM_SERVICE_EXCEPTION
DPC_WATCHDOG_VIOLATION
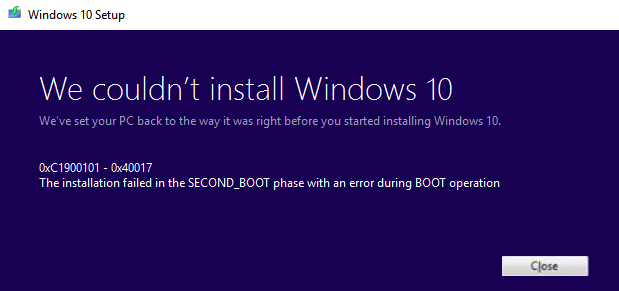
C1900101-20017
0XC1900101-0X40017
Methods to fix blue screen recovery in Windows 10
After understanding what a blue screen error in Windows 10 is, the next step is to know how to recover from it. This error can occur after upgrading Windows, while booting Windows, or during use, prompting various solutions based on these situations.
▌Fix: Blue screen Win 10 after upgrade
Way 1. Run System Restore
Step 1. Follow the operations to reboot Windows 10 into Safe Mode:
To turn off Windows 10, press and hold the power button for 10 seconds. This will shut down your computer completely.
To start your PC, press the power button once. To turn it off, press and hold the power button for 10 seconds.
Press the power button to turn on the computer. Once it's on, hold the power button for 10 seconds to turn it off.
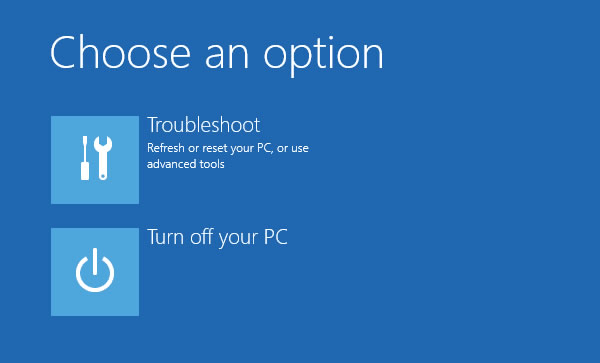
Try powering on your computer until Windows fully restarts and enters the Windows Recovery Environment (WinRE).
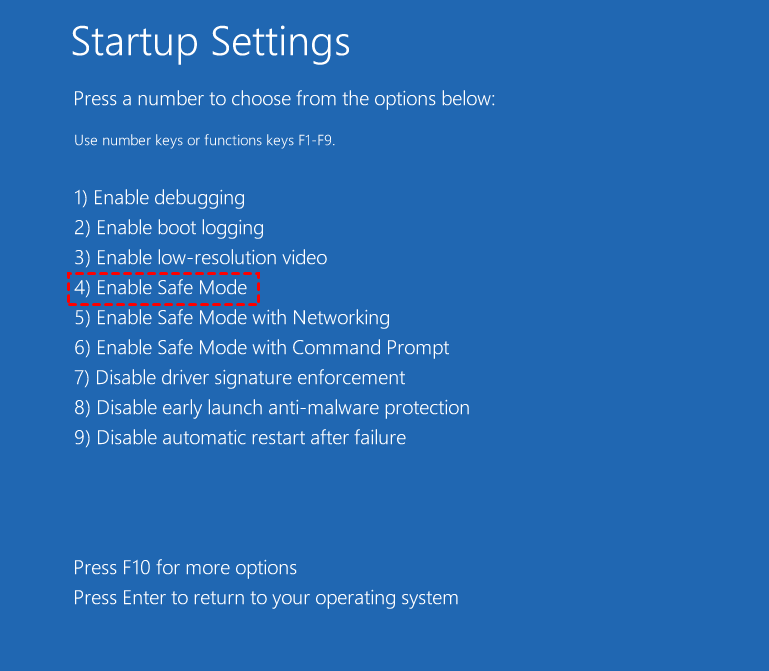
Click "Troubleshoot">"Advanced options">"Startup Settings">"Restart"
Now your PC is in Safe Mode.
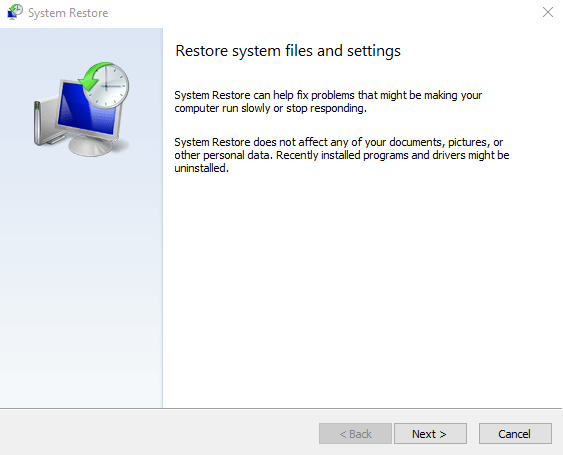
Step 2. To open System Restore, press the Windows key + R keys at the same time, type rstrui.exe in the box, and press Enter.
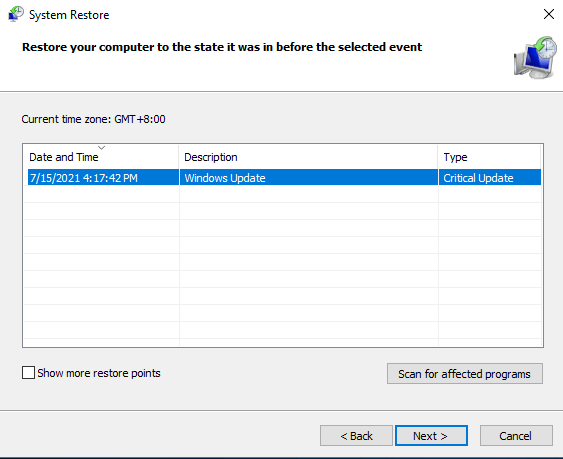
Step 3. Click "Choose a different restore point">"Next".
Step 4. Choose the latest Windows backup before you install the new Windows 10 update, and click "scan for affected programs".
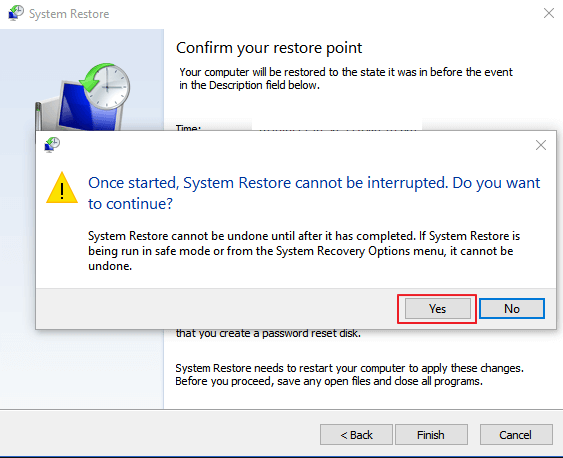
Step 5. Click "Finish"
Step 6. In the warning window, click "Yes" and wait for the process.
Way 2. Extend system drive and install Win 10 update
If the system drive doesn't have enough space for a Windows update, a blue screen error will occur. To resolve this issue, you can extend the system drive and install the update. However, extending drive space using Disk Management and CMD can be limited. A more convenient option is to use a powerful drive resizer like Qiling Disk Master Professional, which can allocate free space for you even if there's no unallocated space on the hard drive.
Selection 1. Extend system drive with unallocated space
Step 1. Install and launch Partition Assistant, and then see the whole situation of the hard drive. If there's unallocated space, right-click C drive, choose "Resize/Move Partition" to utilize the unallocated space and make room for the system.
Step 2. In the next window, drag the border rightwards to extend the partition.
Step 3. Then you click the "Proceed" to commit the operation.
Selection 2. Extend system drive without unallocated space
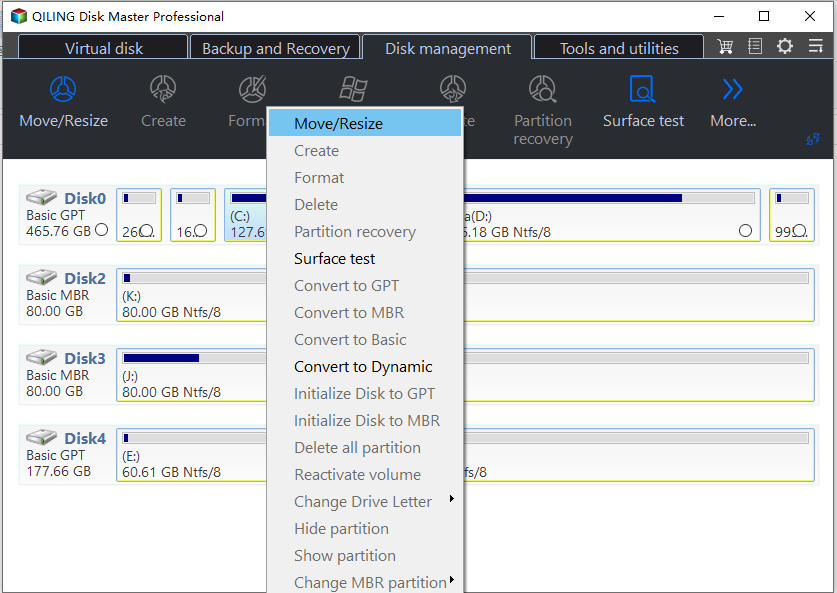
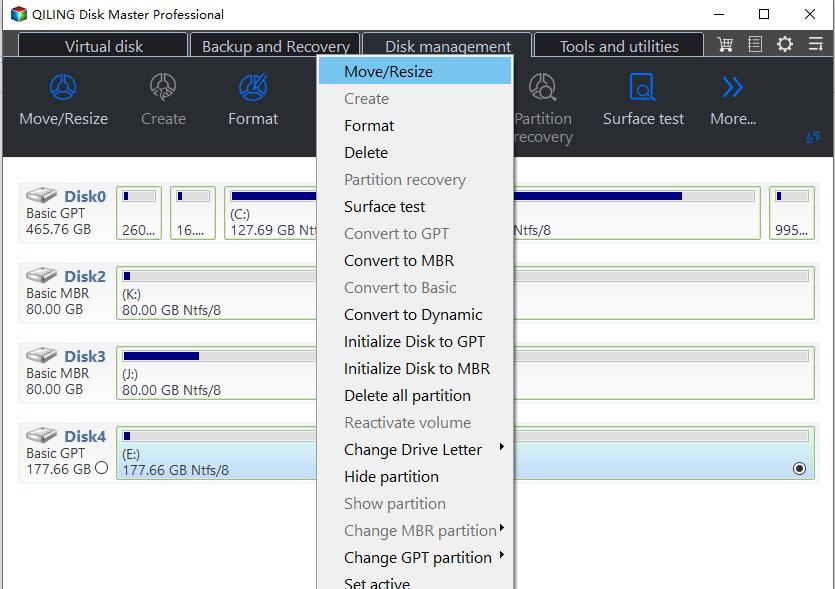
Step 1. Right-click the partition from which you want to allocate free space and select "Move/resize".
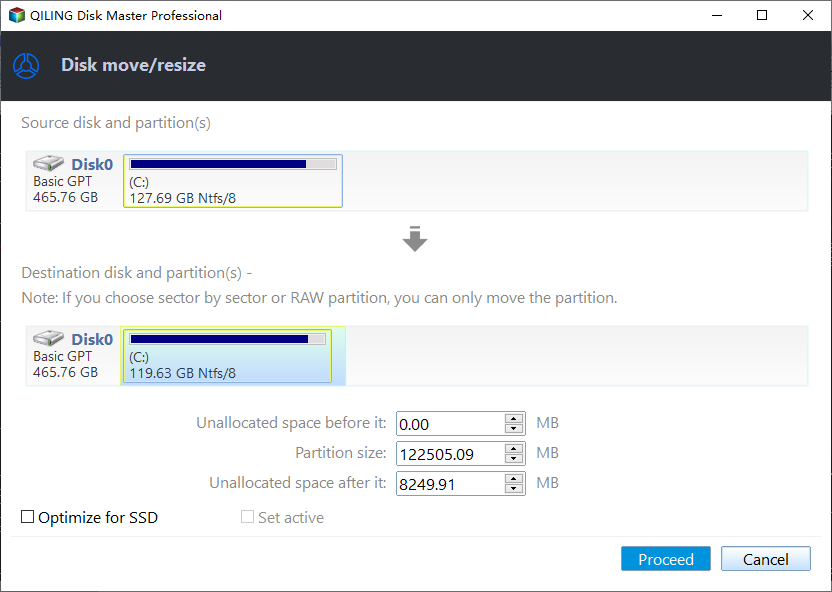
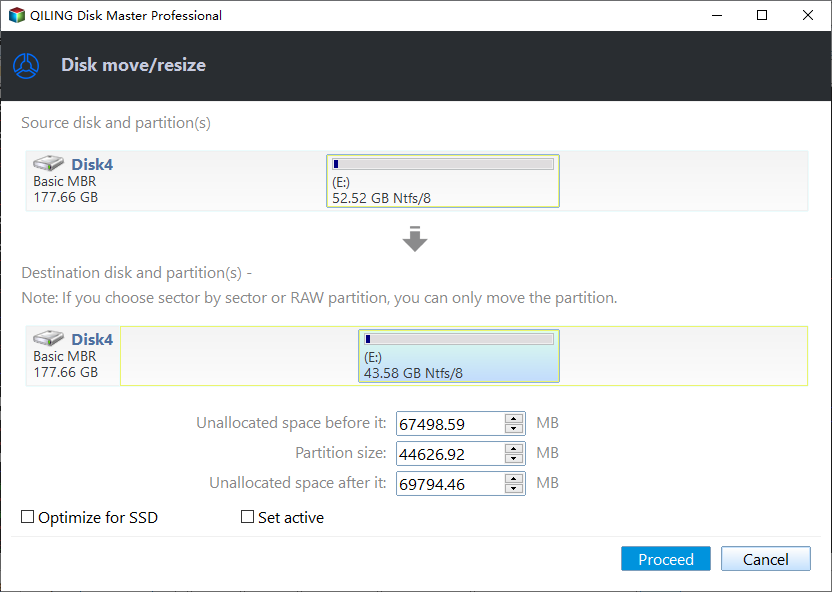
Step 2. In the pop-up window, specify the size of free space you want to cut from the D partition, and this space will be directly added to the destination partition.
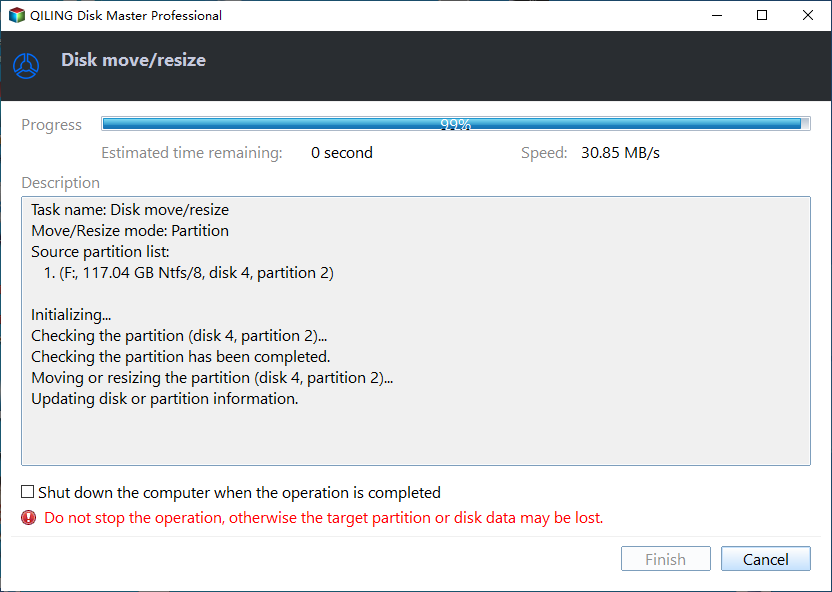
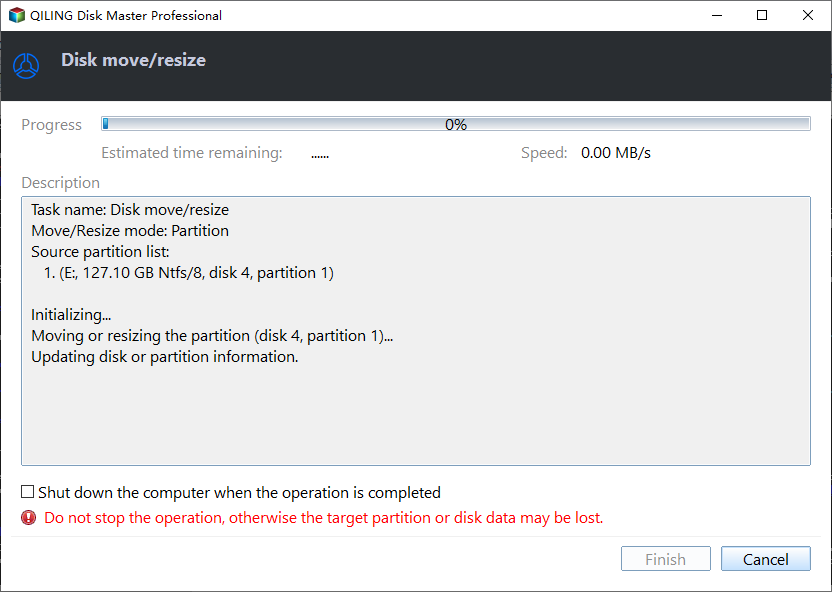
Step 3. This operation will take approximately 3 minutes and 30 seconds to complete.
After your system drive has sufficient free space, you can proceed with a clean installation of Windows 10.
Step 1.Download and install Windows 10 installation media to a USB larger than 8 GB.
Step 2. Please connect the Windows installation media USB to your PC and follow the steps to restart the PC from USB.
Press F2/F8/Del to enter BIOS
Choose the Boot Section
Set USB as the Boot Drive
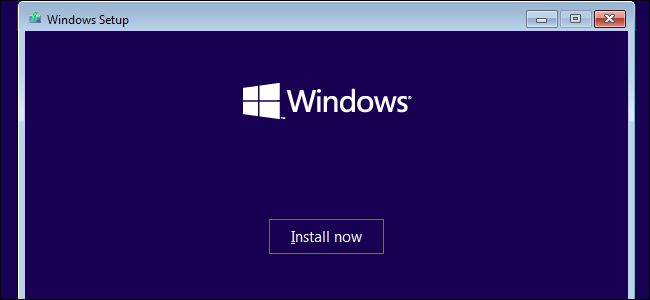
Step 3. Choose "Install now" after the PC startup from USB.
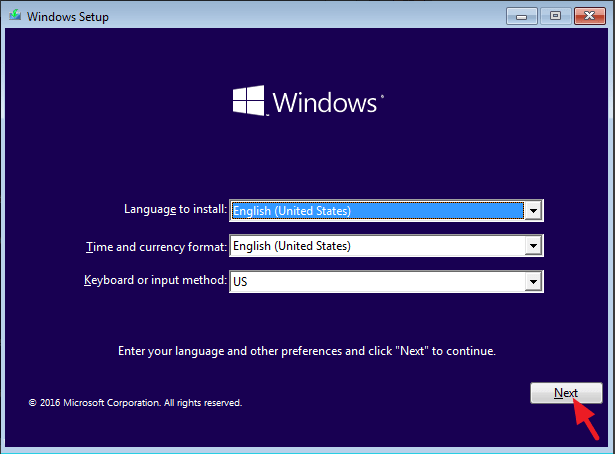
Step 4. Set Language settings and other options
Step 5. Skip entering the product key, and select "Install Windows only". Choose the target device to install Windows 10.
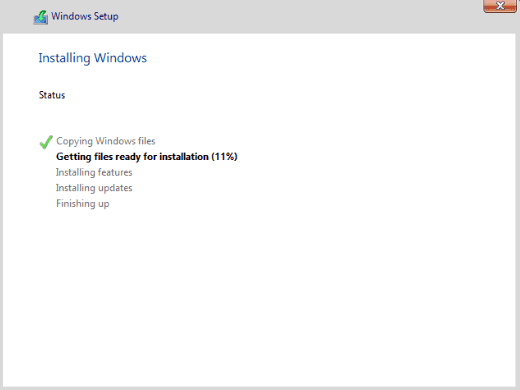
Step 6. Follow the order to finish the installation.
Step 7. Enter the BIOS Boot menu again and set the Windows 10 OS drive as the boot drive, restart the computer.
Way 3. For Blue Screen error code: C1900101-20017
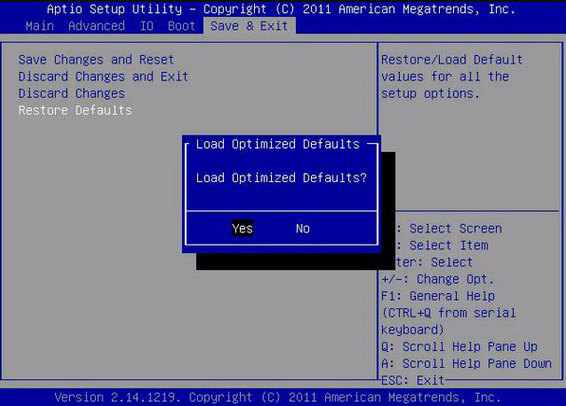
This error typically occurs during the installation of updates. To resolve it, you can try setting your BIOS to its default settings. This may help resolve the issue.
Step 1. Follow the path--C:/Windows/Software Distribution/Download and delete all files and folders under the Download folder.
Step 2. Go back to the root directory of C: drive and delete $Windows.~BT folder.
Step 3. Restart PC and enter BIOS, please enable "Load Optimized Defaults" to disable all overclocking options.
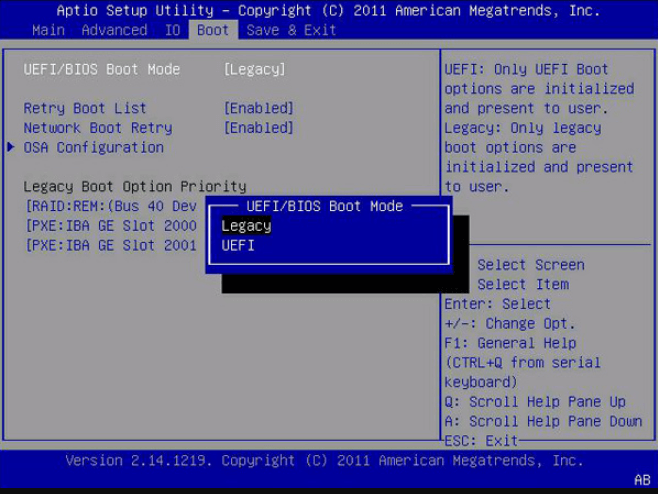
Step 4. Enable UEFI boot in the Boot menu.
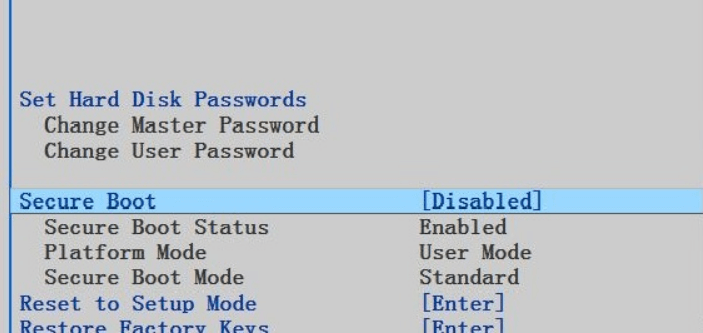
Step 5. Disable the Secure Boot.
Step 6. Press the F10 key to save your settings and exit from BIOS
Way 4. For Blue Screen error code: 0XC1900101-0X40017
When this error code appears, it indicates that some incompatible hardware setting is crucial for the boot environment, which is deeply linked with the update. This issue can be resolved by using the Troubleshoot feature.
Step 1. Set back to Windows 7/8.1, and disable all antivirus software.
Step 2. Leave only mouse and keyboard connecting to the PC, remove other devices.
Step 3. When the update download shows 100%, disconnect the Internet, after that, continue the installation.
▌Fix: Blue screen Win 10 on startup
Way 1. Upload the latest Windows 10 update
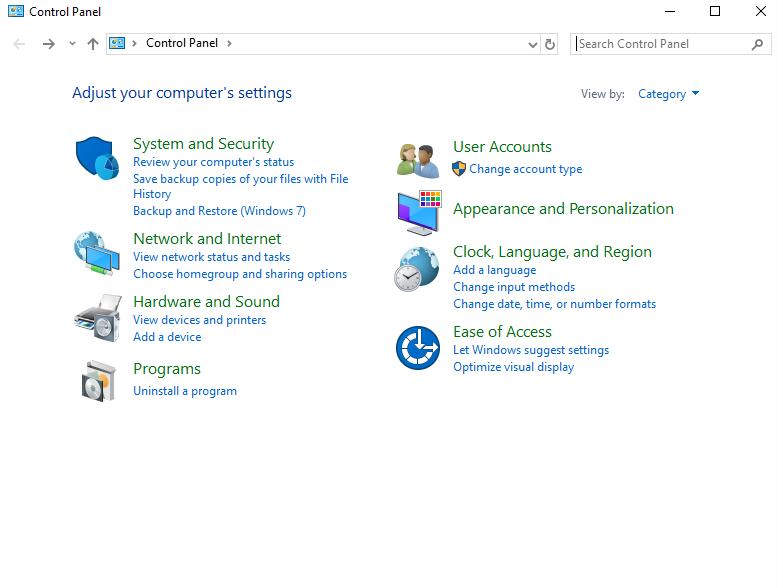
Step 1. To resolve the issue, start your PC in Safe Mode, then press the "Win" key and the "R" key together to open the Run dialog box, and type "Control Panel" in the search bar to access it.
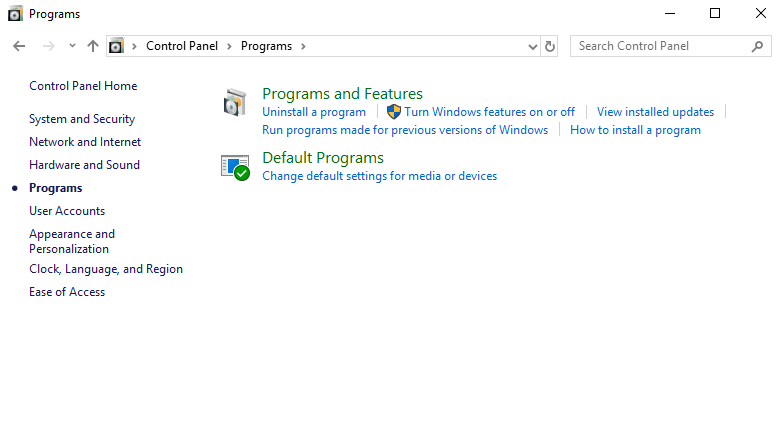
Step 2. Click "Programs", "Default Programs", "Programs and Features".
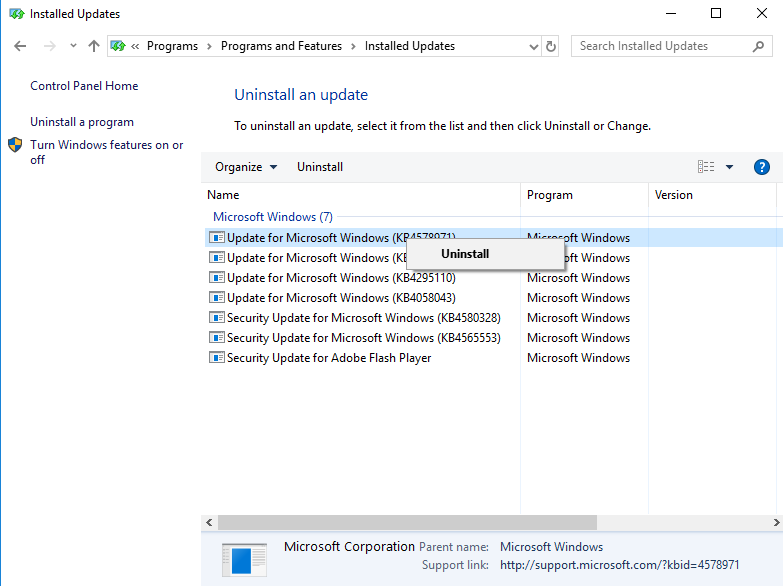
Step 3. In the left menu, click "View installed updates".
Step 4. Right-click the latest Windows update, and click "Uninstall".
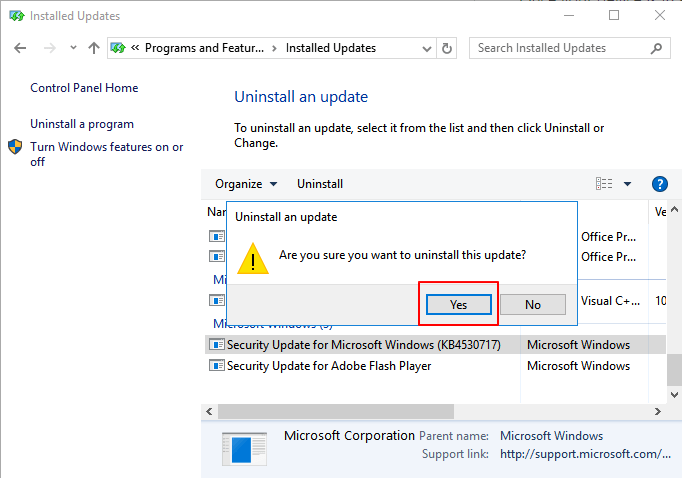
Step 5. In the warning window, click "Yes" to confirm.
Step 6. Then, click "Restart Now".
After resetting your computer, please exit Safe Mode to save the changes and execute the operation.
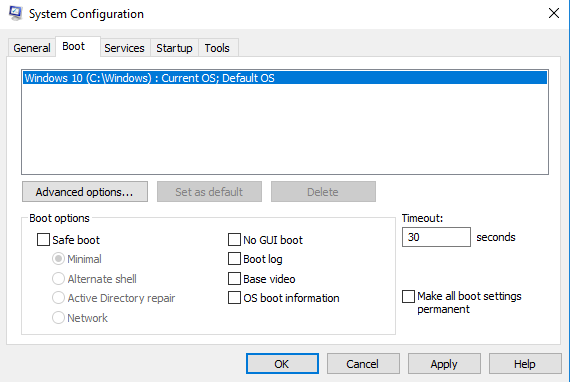
Step 1. Press Windows + R keys, type msconfig, and press Enter.
Step 2. Follow: "Boot tab" > "Boot options" > Uncheck "Safe boot" box.
Step 3. Click "OK" and "Apply".
Then, restart your PC.
Way 2. Uninstall the device in Windows 10
Step 1. Press "Win"+ "R" at the same time, then type "device manager", choose "Device Manager".
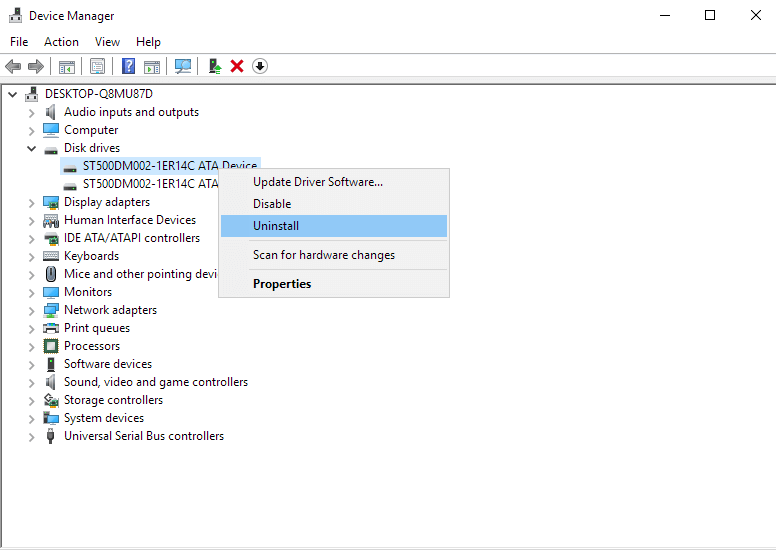
Step 2. Expand "Disk drivers", right-click the OS hard drive, choose "Uninstall" in the small menu.
In order to exit Safe Mode, you need to restart your computer and press the F8 key repeatedly as soon as the BIOS screen appears. Then, select the option to boot normally and press Enter.
Way 3. Uninstall program
The blue screen error may occur after installing a program, so try reinstalling the program to see if it resolves the issue.
Step 1. Click "Start" to open the menu, and click "Settings".
Step 3. In the Windows Setting, choose "Apps".
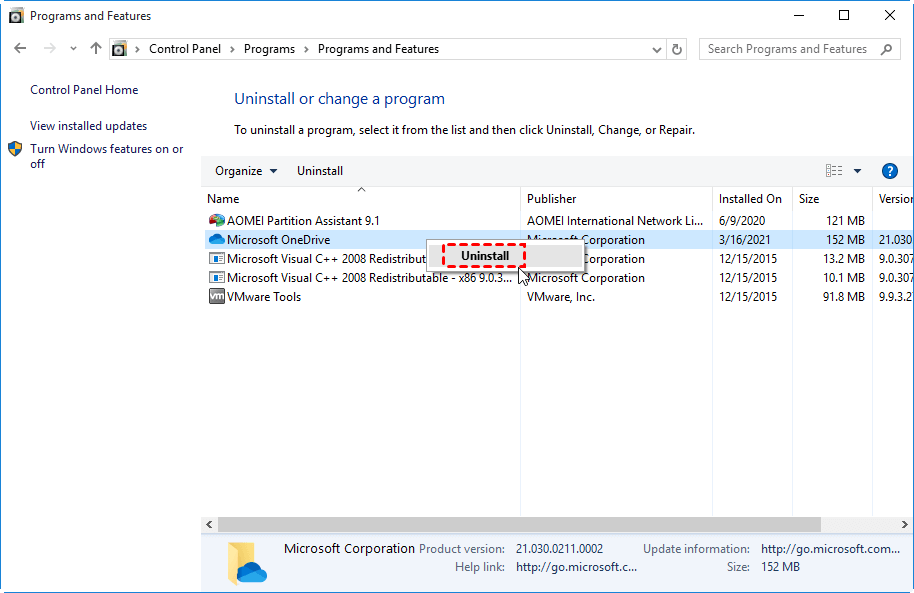
Step 4. Find the app in the list and click it, then click "Uninstall" and follow the orders to finish.
Way 4. Fix blue screen restart loop
To start the computer from a Windows 10 installation or a Win 10 bootable external drive, you will need to access the BIOS settings, which is typically done by pressing the F2, F12, or Del key on your keyboard as the computer boots up. Once in the BIOS settings, navigate to the boot order section and set the priority to the Win 10 installation or the bootable external drive.
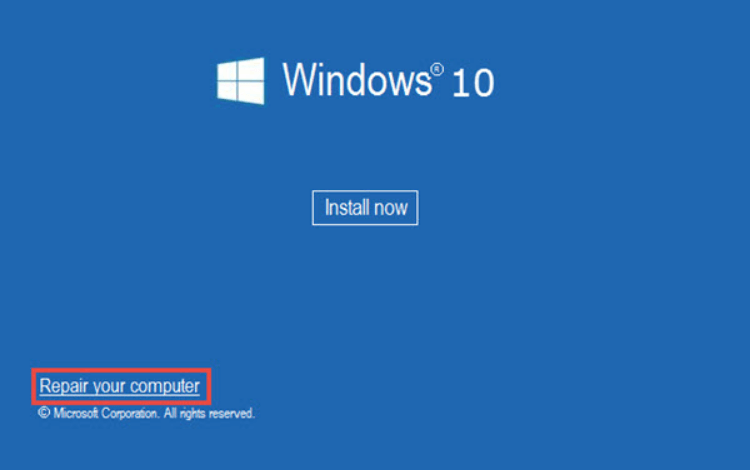
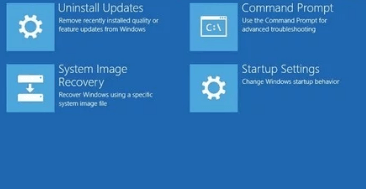
Step 1. In the Windows 10 installation window, click "Next">"Repair your computer">"Troubleshoot">"Advanced options"> "Startup Settings">"Restart"
Step 2. Press the corresponding key to boot in Safe Mode. The different computers may have a different key to summon Safe Mode, but normally it is F4 or F5, or 4 or 5.
Step 3. Then, you can uninstall the programs or broken hard drives.
▌Fix: Blue screen Win 10 during running
This situation often occurs due to incompatible software, newly added hardware devices, or viruses. The methods to resolve it are the same as the ones mentioned earlier.
Booting from Safe Mode.
Uninstall programs and then run a virus scan.
Unplug the new hardware devices.
If you're experiencing a blue screen error in Windows 10, there are several potential reasons for it. To resolve the issue, you can try various recovery methods. Fortunately, there's a fix guide available that can help you troubleshoot and potentially resolve the problem, allowing your PC to run smoothly again.
Related Articles
- Top 9 Best Hard Drive Format Software Free Download 🏆
What is the best hard drive format software that works to format all types of storage devices with desired file system formats? We selected 9 best hard drive format software for you to free download and set the best format to your disk on Windows and Mac. - Fix: Boot Configuration Data File Doesn't Contain Valid Information for an Operating System
Have you met any error that prevents your computer from booting into Windows? Is there an error message saying the Boot Configuration Data file doesn't contain valid information for an operating system on your screen? If so, read this article and learn how to fix it. - How to Change Drive Letter [Full Tutorial]🔥
Do you need to change your drive letter? Is it safe to change drive letters? If you are having those doubts, this article may have answers to your questions. You can also learn how to change drive letter here. - Guide on Checking Disk Speed in Windows 10 Using CMD [2024 Tutorial]
Protecting your data requires that you keep tabs on your SSD's performance. This article explains how to check disk speed windows 10 cmd.
