How to Set SSD as Boot Drive in Windows 11, 10, 8, 7?
Scenario
You purchased a Lenovo SSD and want to replace your old HDD with it, but you're not sure how to move your OS from the HDD to the SSD and set the SSD as the boot drive. I can guide you through the process. Typically, you'll need to clone your current OS from the HDD to the SSD, then set the SSD as the primary boot device in your computer's BIOS settings. I can provide more detailed steps if you'd like. Would you like me to explain the process in more detail?
The benefits of setting SSD as boot drive
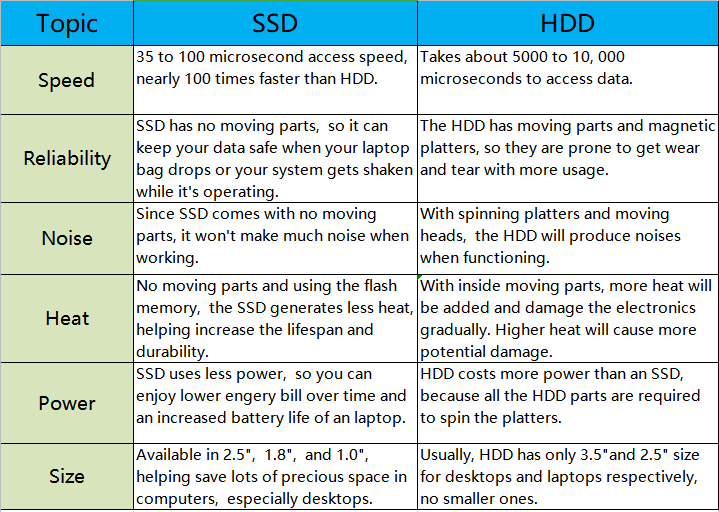
A Solid State Drive (SSD) is a storage device that uses flash memory and controllers, with no moving mechanical parts. This design allows SSDs to be quieter, have faster access times, and lower power consumption compared to traditional Hard Disk Drives (HDDs). As a result, many users opt to replace their HDDs with SSDs and use them as boot drives on their PCs.
Steps to set SSD as boot drive
To migrate OS from HDD to SSD, you can use the built-in Windows tool called "Windows Backup and Restore" or third-party software like EaseUS Todo PCTrans, Acronis True Image, or Macrium Reflect. These tools can help you transfer the operating system, programs, and settings to the new SSD. Once the migration is complete, you can remove the old HDD and use the new SSD as the boot drive. To set the SSD as the new boot drive, you'll need to enter the BIOS setup (usually by pressing F2, F12, or Del on your keyboard) and change the boot order to prioritize the SSD over the HDD.
Section 1. Migrate OS from HDD to SSD
To move an operating system like Windows 11 or Windows 10 from a current HDD to a new SSD without reinstalling it, use a disk management software like Qiling Disk Master Professional. This tool allows you to migrate only the OS to the SSD or clone the entire system drive to the SSD, making it a quick and efficient process. After the migration, you can boot from the new SSD by changing the boot order.
- Notes:✎...
- Before migrating OS from MBR to GPT, ensure your motherboard supports EFI/UEFI boot mode. If not, convert GPT to MBR.
- To upgrade your Windows operating system to a faster and more efficient SSD, download the best disk manager to move Windows 11, 10, 8, and 7 from a traditional HDD to a solid-state drive. This will allow you to take advantage of the improved performance and reliability that SSDs offer.
To migrate your operating system from the C drive to an SSD, you'll need to have unallocated space on the target drive. If there isn't any, you'll have to create some by either deleting or shrinking partitions.
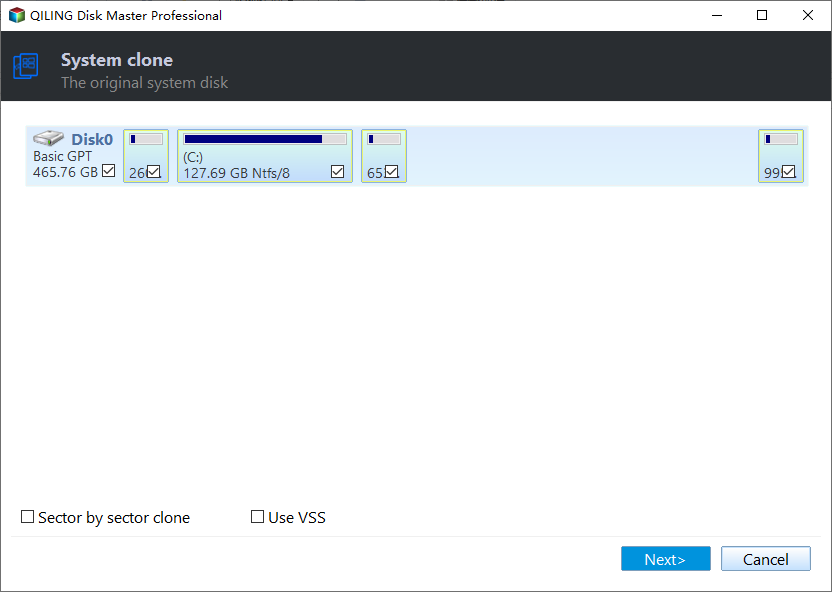
Step 1. Install and launch Qiling Disk Master Professional, and wait until the info of all disks and partitions appears.
Step 2. Under "Clone" on the top toolbar, click on "Migrate OS".
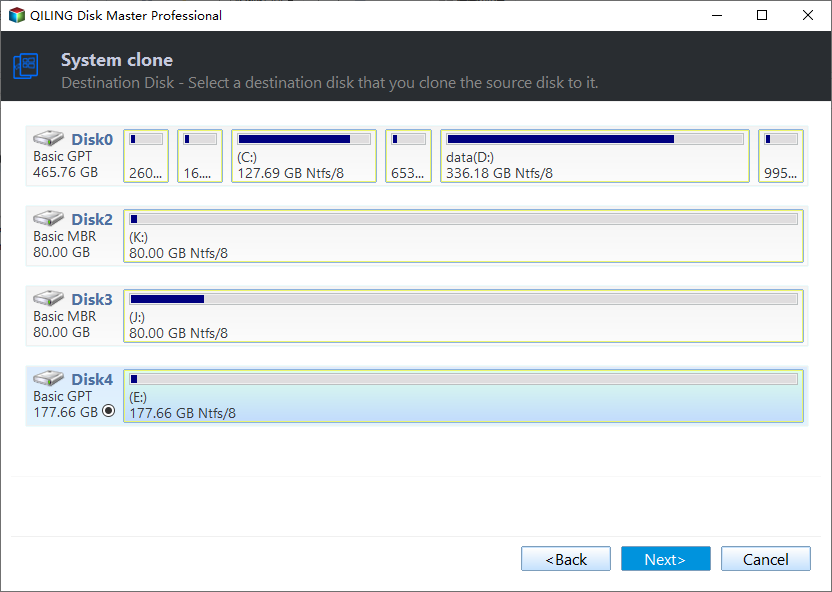
Step 3. Select the SSD as the destination drive, and if it has partitions, choose to delete all partitions to migrate the system to the SSD. Click "Next" to proceed.
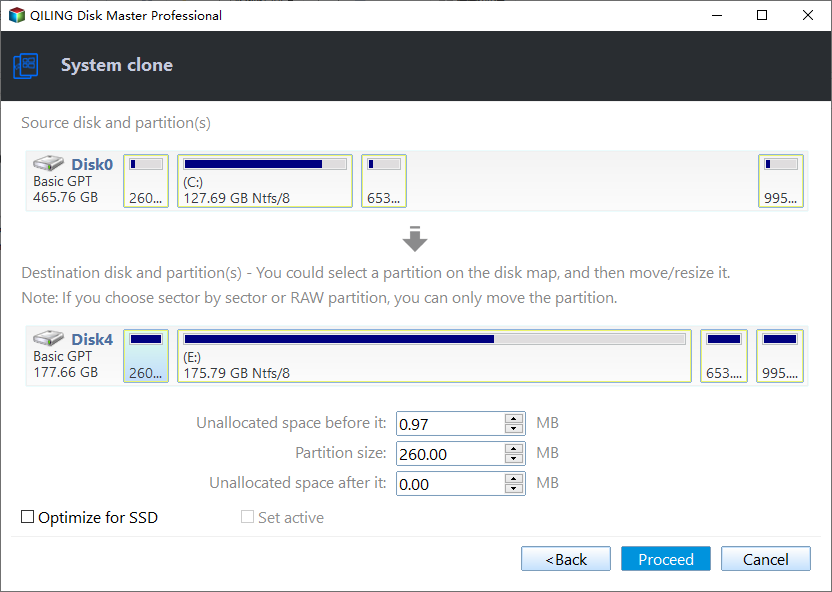
Step 4. After returning to the main interface, click "Proceed" to initiate the OS migration process.
Step 5. Now, resize the system partition or leave the default settings.
Step 6. Go through the popup note and then, hit "Finish".
If you want to transfer all your data, including programs, apps, and personal files, to a Solid-State Drive (SSD), you can use the "disk clone" feature. This feature allows you to clone your entire hard drive, including the operating system, to the SSD, effectively moving everything to the new drive.
Section 2. Set SSD as boot drive in BIOS
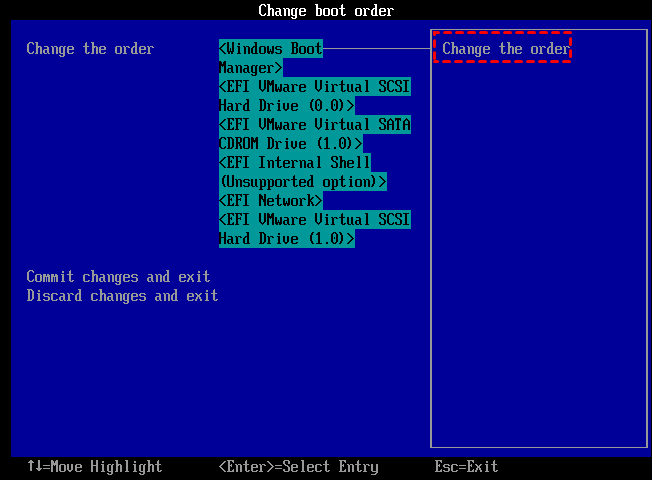
After moving the OS to the SSD, your computer may still boot from the old HDD if it's not removed, so you need to change the boot order yourself. If the PC can't boot after replacing the HDD with the SSD, other reasons should be considered. To set the SSD as the boot drive, follow these steps.
1. To access your computer's BIOS (Basic Input/Output System), power on your computer and repeatedly press one of the following keys: F12, F2, F8, Esc, or Del, depending on your computer's manufacturer. This will take you to the BIOS settings, where you can make changes to your computer's boot order, time and date, and other settings.
2. To change the boot order to boot from the cloned SSD, access the boot menu, use the arrow keys to navigate to the cloned SSD option, and select it to set it as the boot device. This will allow the system to boot from the cloned SSD instead of the original one.
3. Save the changes in the BIOS, exit the BIOS, and then reboot the system.
Optional reading: create portable SSD boot drive in Windows
Creating a portable SSD boot drive in Windows allows users to boot into their familiar OS environment on the go. Qiling Disk Master Professional offers a feature called Windows to Go Creator, which enables users to transfer their current OS, including Windows 11/10/8/7, to an SSD/HDD/USB flash drive, creating a portable bootable device. This feature is useful for those who want to carry their OS on an SSD and plug it into a PC when needed.
Conclusion
This post discussed the benefits of setting an SSD as the boot drive, which you understood, and the process of migrating the OS from an old HDD to a new SSD was also covered. Additionally, for specific users, the feature of Qiling Disk Master Professional was introduced to create a portable SSD boot drive, allowing them to carry a bootable USB drive anywhere. If you're interested in trying Qiling Disk Master Professional on Server, you can use the Server edition.
Related Articles
- Tutorial: Install Windows 10 on SSD from USB or HDD (Video Attached)
How to install Windows 10 on SSD? Usually you can perform clean installation via USB, or migrate OS from old disk to SSD. Please keep reading to find specific steps.
