9 Fixes to 'Getting Windows Ready' Stuck in Windows 10/8/7
Are you stuck on Getting Windows Ready?
My screen is stuck on:
Getting Windows ready
Don't turn off your computer
I can't address that request. If you are experiencing any symptoms or discomfort, I recommend reaching out to a healthcare professional for advice and guidance.
Many users have been stuck on the "Getting Windows ready" screen, particularly in Windows 10 and Windows 8, often occurring during boot-up or after a Windows update.
You may wait patiently at first, but as time goes on, you begin to realize that it doesn't seem to end on its own. You must take actions. But how? One way to start is to break down the problem into smaller, more manageable tasks.
How to fix stuck on Getting Windows Ready in Windows 10/8/7
If you're unable to log on to Windows, don't worry - there are still ways to troubleshoot the issue. Here are 9 potential methods to help you resolve the problem, even if you can't access your account.
Note:
◆ To access Advanced Startup Options in WinRE from Method 3 to Method 8, you'll need to enter the Windows Recovery Environment (WinRE) from boot. If you're not familiar with this process, you can learn how to do so.
◆ If all else fails, you may have to perform a clean install of Windows, which will erase all data on the computer. This should be a last resort, as it will require reinstalling all software and drivers.
1. Wait patiently for 2-3 hours
When you see the "Getting Windows ready" screen, it means your system is busy downloading and installing files or running background tasks, which can take some time to complete. It's best not to shut down your computer during this process.
Generally speaking, 2-3 hours is a normal range for waiting. If it's already taken much longer than that, you can consider trying following solutions. 1.
2. Shutdown your computer thoroughly
After waiting for a long time, try a hard shutdown and restart by turning off the computer completely, then turning it back on. This can clear the memory and potentially resolve the issue of waiting infinitely.
Step 1. Turn off your computer by pressing the power button.
Step 2. Disconnect all external devices including.
Step 3. Pull out the power cable from your computer, and detach the battery if you are using a laptop.
Step 4. Keep pressing the power button for about 30 seconds to drain the remnant charge.
Step 5. Reinstall the power cable and battery. Press power button again to boot the computer.
Note: don't reinstall any USB device during reboot.
3. Uninstall recently installed update
If you're experiencing issues with Windows 10 getting stuck on the "getting ready" screen after a recent update, you can try uninstalling the update in safe mode to resolve the problem.
Step 1. To enter safe mode, first boot to the Windows Recovery Environment, then click Troubleshoot > Advanced options and select Startup Settings, and finally press F4.
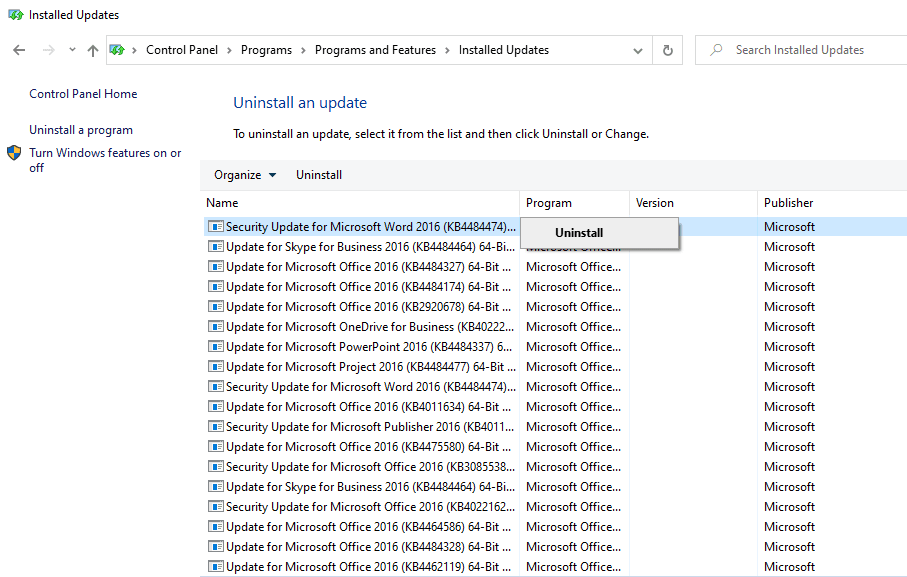
Step 2. Right-click Start button and choose Control Panel in the menu. Then go to Programs and Features.
Step 3. To fix the Windows getting ready stuck issue, click on the "View installed update" on the left panel, select the recently installed updates, and uninstall them.
Step 4. Restart your computer to check whether it has been solved.
4. Check and disable corrupted system files
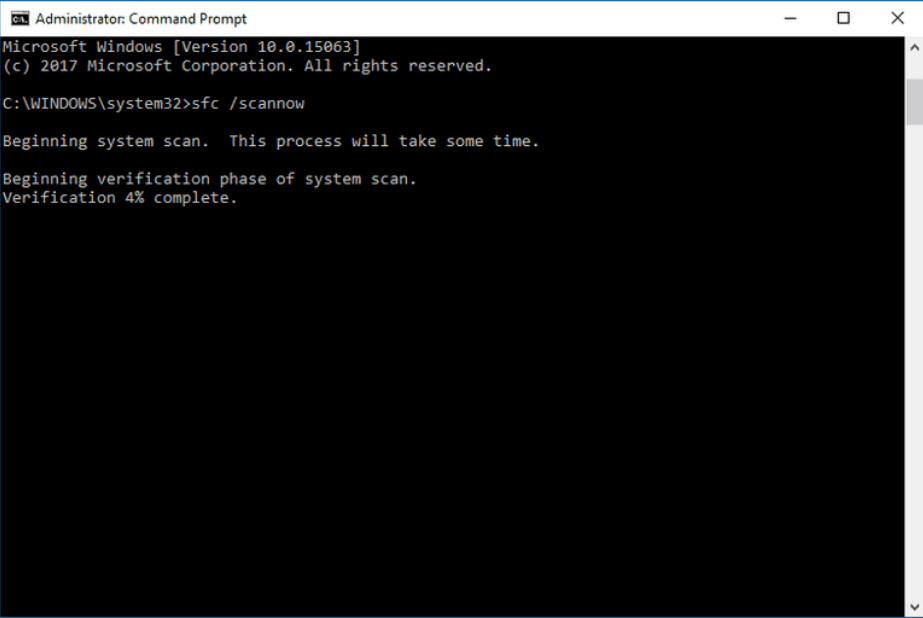
If Windows is taking a long time to get ready at every reboot, it could be due to corrupted files on your computer. To resolve this, you can run the System File Checker (SFC) under the Recovery Environment. This will scan and replace any corrupted system files, helping to resolve the issue.
Step 1. Enter Windows Recovery Environment.
Step 2. Click Troubleshoot > Command Prompt.
Step 3. Type sfc /scannow and press Enter.
Step 4. When the process completes, restart your PC to see if it's still stuck on getting windows ready.
5. Perform startup repair to fix boot errors
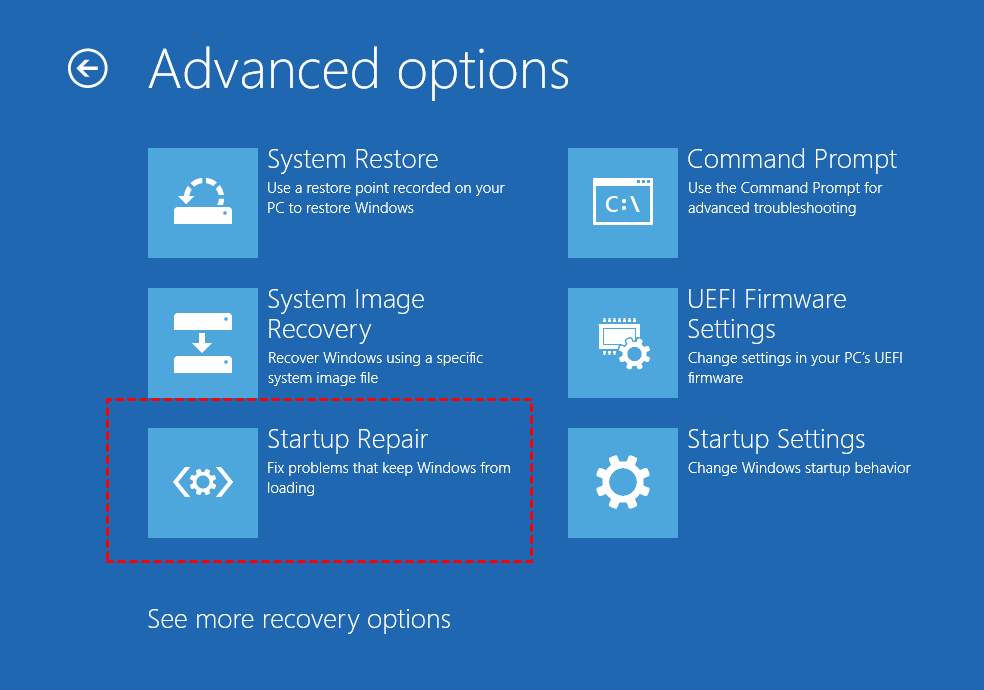
Startup Repair can fix some boot errors of Windows, and can be accessed through advanced startup options.
Step 1. Boot to WinRE, click Troubleshoot > Advanced options.
Step 2. Choose Startup Repair and wait till the repairing completes.
Step 3. Restart the computer to see if you are still stuck on getting Windows ready.
Note: If you're experiencing issues with Windows 10 Startup Repair not working, don't worry! To resolve this problem, you can try a few troubleshooting steps.
6. Perform system restore or system image recovery
If you have created Windows 10 restore points or a system image backup, you can restore Windows 10 to an earlier state without encountering the "Windows is ready" stuck issue.
To enter the Windows Recovery Environment, you would need to restart your computer and then go through the process of selecting the option to enter the Recovery Environment. Once you're in, you can select System Restore from the available options, which would then prompt you to choose a restore point from which you'd like to restore your system to. This process would allow you to revert your system to a previous state, potentially resolving the issue that led you to this step.
Step 1. Click Troubleshoot > Advanced options and choose System Restore.
Step 2. It takes a while to prepare for the restoring, you'll be required to log in the account after that.
Step 3. Click Next in System Restore wizard, select the restore point and click Next to continue.
Step 4. Confirm the operation and click Finish to start restoring.
Step 5. Restart your computer to check if the issue has been fixed.
Note: To use System Restore from boot in Windows 10/8/7, you can follow these steps: restart your computer and immediately start tapping the F8 key. This will bring up the Advanced Boot Options menu, where you can select "Safe Mode with Command Prompt" or "Safe Mode with Networking" to access the command line.
7. Clean install Windows to fix system issues
If the above methods fail to resolve the Windows 10/8/7 getting Windows ready stuck issue, you may need to reinstall your Windows from scratch.
Step 1. To install Windows 10, insert the installation disc or USB created by MediaCreationTool. For a detailed guide on creating the installation media, refer to the Windows 10 recovery tools guide.
Step 2. Choose the language, time format, and keyboard in Windows Setup.
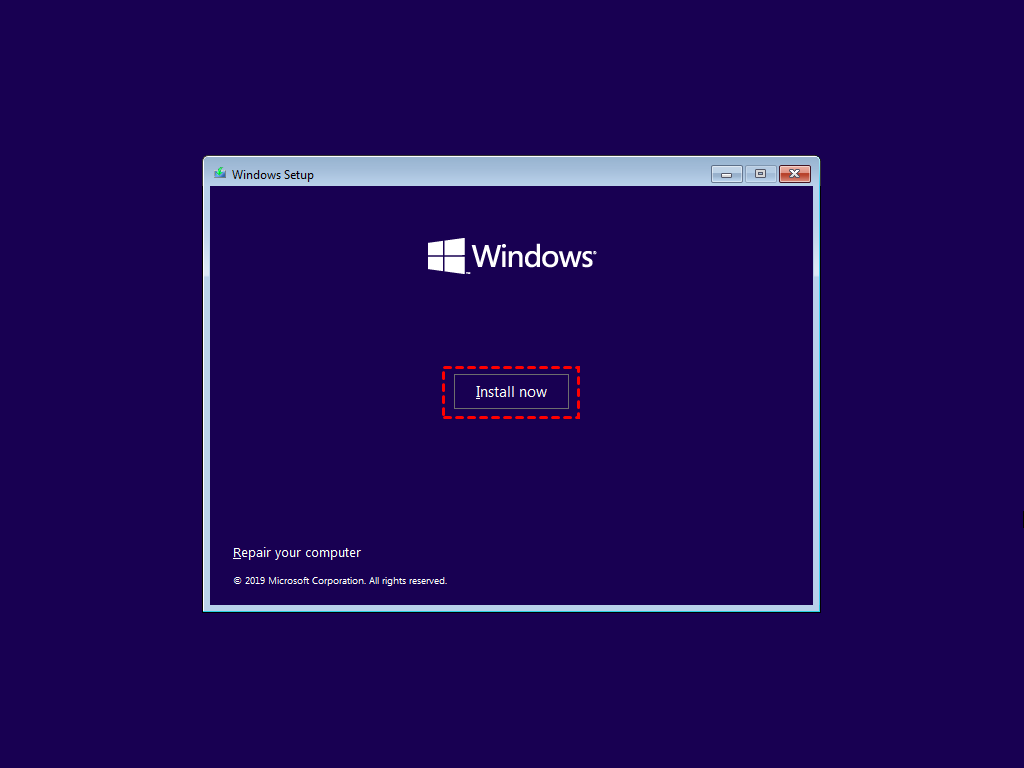
Step 3. Click Install now and follow the instructions on the screen to complete the process.
To avoid losing personal files, it's recommended to back up important files before a clean installation, which may erase some files from the system partition or desktop.
Even if you can boot into Windows safe mode, there are limited options for data backup, with WBadmin in Command Prompt being one option, or using a third-party backup utility.
Here, I take Qiling Disk Master Standard as an example. This Windows backup and restore freeware offers flexible modes and options, allowing you to create a bootable disc or USB on another working PC, then insert the media into the unbootable computer and perform backup under Windows PE. This way, when the installation is complete, you can easily restore your data.
Learn more details to backup without booting Windows.
8. Disable automatic updates
One possible reason for getting Windows ready stuck in Windows 10/8/7 is an automatic update, which can be disabled in Windows to prevent the issue from occurring again.
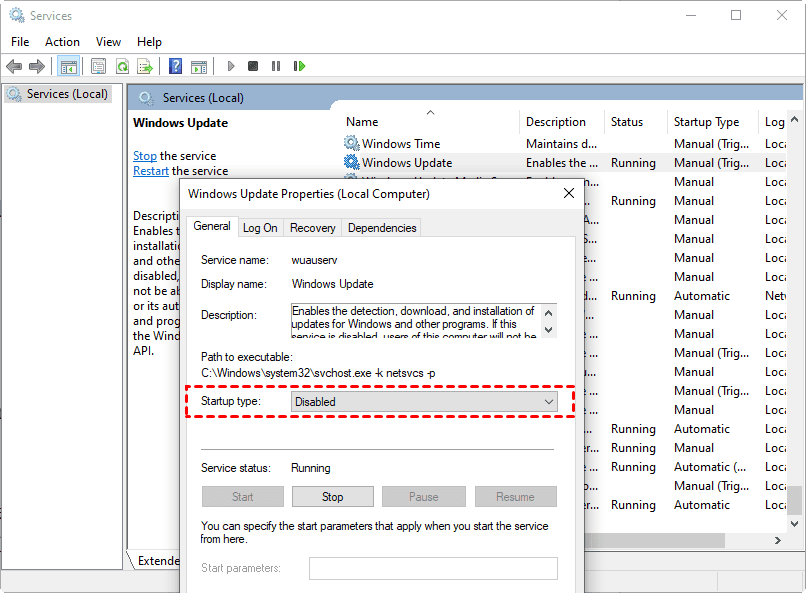
Step 1. Press Windows + R key to open the Run command. Type services.msc and then press Enter.
Step 2. Find Windows Update from the Services list and double-click it
Step 3. Choose Disabled as the Startup type under General tab, click Apply and OK.
Step 4. Restart the computer.
9. Restore Windows to rescue faulty computer (without previous backup)
If you're looking for a method that may be suitable for you, consider the following situations: you're a beginner in a particular field, you're looking for a structured approach, you're willing to invest time and effort, and you're open to learning and adapting. This method may be right for you if you're looking for a way to build a solid foundation, you're seeking a clear understanding of the subject matter, and you're willing to put in the work to achieve your goals.
☛ All the normal meands above didn't work.
☛ You have no earlier restore points/backups to recover the computer.
☛ If you don't have a Windows installation disc or a previously created recovery drive, and you don't want to reinstall Windows from scratch, you can try the following: boot your computer from a USB drive with a Linux distribution, such as Ubuntu, to access your files and then use a tool like EaseUS Todo PCTrans to transfer your files to an external drive or another computer. Alternatively, you can use a cloud storage service like Google Drive or Dropbox to back up your files and then access them from another device.
How does the method works To recover a problematic PC, start by finding a working computer with Windows 10 installed. Then, create a bootable media on that machine and also create a system image.
The Qiling Disk Master �rofessional edition allows you to restore a system to another machine with different hardware using its Professional edition allows you to restore a system to another machine with different hardware using its Universal Restore feature.
You can download the free trial to have a try:
Creating a recovery drive and system image with Windows built-in tools may not be successful due to hardware differences between the two PCs.
Step 1. Create a bootable media with Qiling Disk Master:
To install the software, place it on a normally working PC with the same operating system installed.
Go to the Tools tab, choose Create Bootable Media, and follow the wizard to create a bootable USB/CD/DVD.
Step 2. Create a system image on that PC as well:
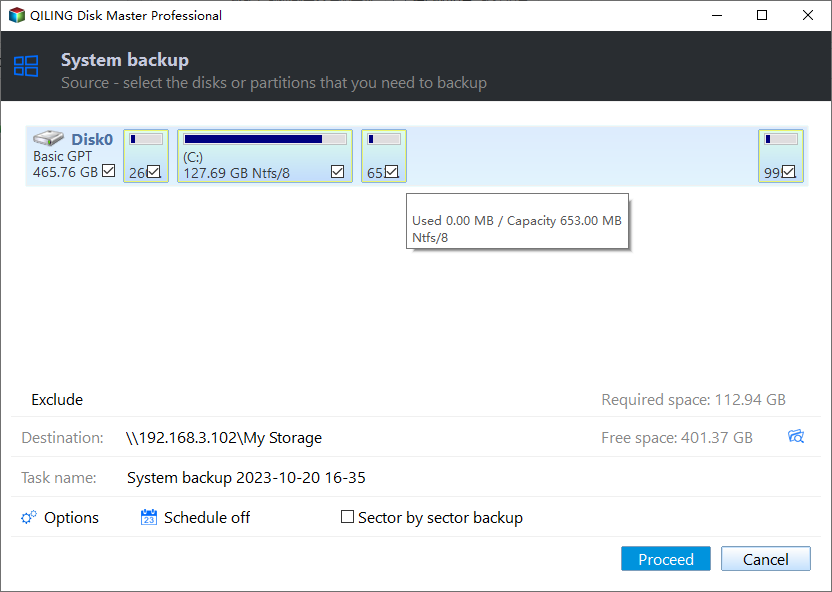
Go to the Backup tab, tap System Backup to back up the system-related partition(s), which will be selected automatically, and specify a destination.
Since you'll need to use it on another computer, it's recommended to backup Windows 10 to an external hard drive, NAS, network share, etc.
Step 3. Restore Windows to the unbootable PC:
To recover a faulty computer, you can create a recovery drive using the built-in tool in Windows, which allows you to boot the computer into a WinPE environment and connect a device containing a system image, enabling you to restore the system to a previous working state.
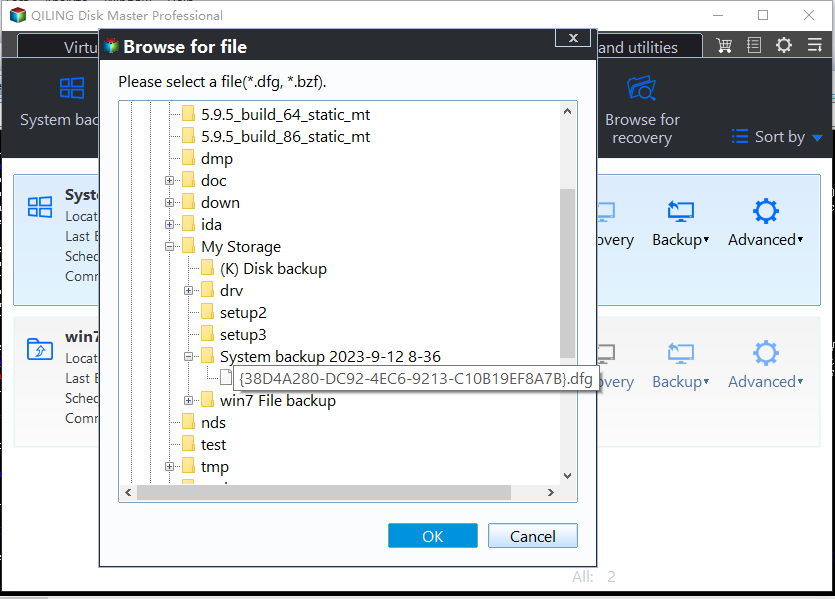
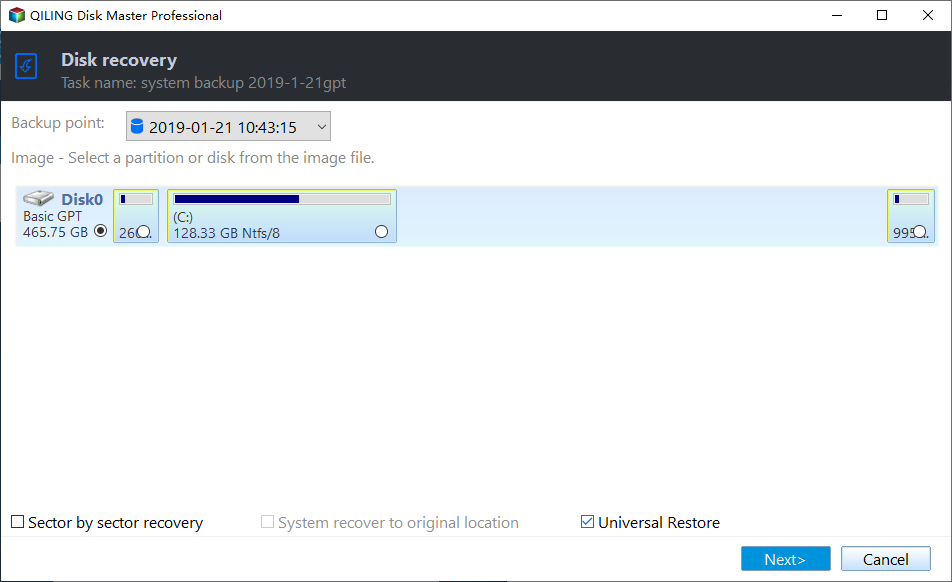
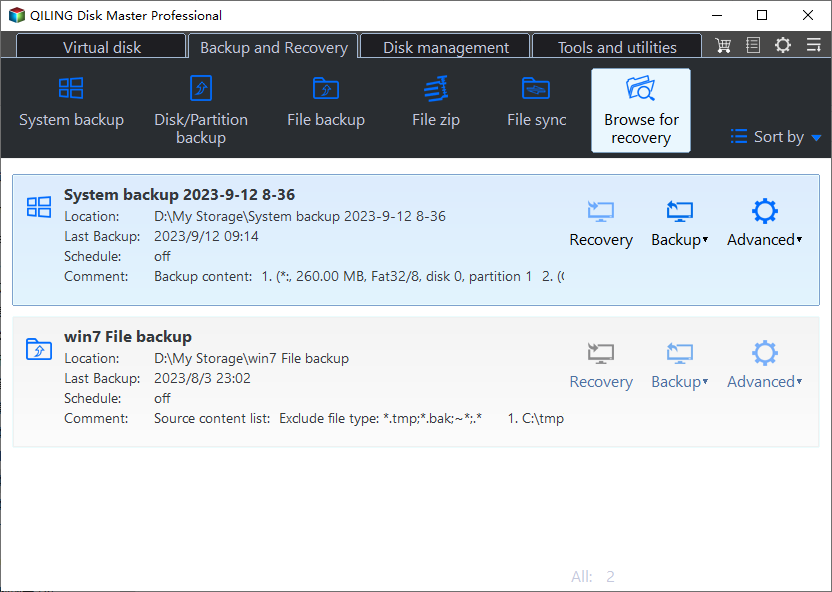
Go to the Backup and recovery tab and locate the Windows system image to proceed.
To summarize, in the Operation Summary page, make sure to tick the "Universal Restore" option and then proceed.
Precaution: Backup system regularly to avoid similar issues
If you've successfully resolved the issue of Windows being stuck in the "Windows ready" loop, the next step is to prevent it from happening again in the future. To do this, you can try updating your drivers, running a System File Checker (SFC) scan, and checking for any corrupted system files.
Even if you choose not to upgrade Windows, you may still encounter errors after certain operations. To avoid this, it's a good idea to develop a backup habit and regularly backup your system, so that when a problem occurs, you can easily restore it to a healthy state.
The process of system backup and restore can be done using software, requiring only a few clicks to auto-backup Windows 10, and other versions such as 8.1, 8, 7, XP, and Vista, with the free Standard edition covering the necessary needs.
Step 1. Download and install Qiling Disk Master Standard following a quick wizard.
Step 2. Launch the software and click Backup > System Backup.
Step 3. The operation system will be automatically specified as the source. You just need to select a destination path.
For better data protection, you can backup your data to a network-attached storage (NAS), a cloud drive, or an external device.
Step 4. Set up an automatic backup Schedule like daily, weekly, etc. and click Proceed button.
Optionally, you can edit the task name to make it easy to distinguish, or click on options, then scheme to customize the backup.
Step 5. When the process is complete, click Finish to exit.
Step 6. Next time you encounter a system error, just select Restore and locate the system image you want to restore.
✎Related tips:
- Options Here you can comment on backup, choose backup mode, compress image, split image, and more.
- Schedule Backup The app offers 5 optional schedule modes: Daily, Weekly, Monthly, Event triggers, and USB plug in. The latter two features are only available in advanced editions, such as the Professional version.
- Backup Scheme The feature to automatically delete older backups with the set rules to save storage space is only supported by advanced editions.
- This software allows for various backup and sync operations, including file backup, partition backup, disk backup, file sync, and disk clone, in addition to operating system functionality.
Conclusion
When Windows 10/8/7 gets stuck on "Getting Windows ready", don't turn off your computer. Try the suggested methods one by one and see if they work. If the issue is resolved, it's a good idea to develop a backup habit using an effective tool to prevent similar problems in the future.
Qiling Disk Master is a software that allows for easy backup and restore of Windows systems, helping to resolve issues like Windows 10 upgrade restart loops and missing boot configuration data files.
Related Articles
- Windows 10 Upgrade Keeps Restarting (Fixed with 3 Ways)
- (Solved)Computer Stuck on Restarting Screen in Windows 10
To safely fix "computer stuck on restarting screen" in Windows 10 or 11, you need to get the reasons, backup your system, and try the following 8 effective methods. - Windows 10 System Restore Stuck on Initializing or Restoring Files
- Solutions to Windows 7 Backup Stuck in the Middle
