How to Switch Laptop HDD to SSD without Reinstalling in Windows 7/10?
About SSD You Should Know
SSD, or Solid-state Drive, has gained popularity in recent years. To better understand its advantages, consider comparing it to traditional hard drives. One key benefit of SSDs is their significantly faster running speed. Unlike traditional hard drives, SSDs have no moving parts, eliminating the need for defragmentation. Additionally, SSDs operate in a quieter environment, consume less power, and possess better shock resistance, making them a more reliable choice for protecting data in unexpected events.
Why Need to Switch HDD to SSD in Windows?
While SSDs have many advantages, they don't entirely replace HDDs due to higher prices, lower capacities, and limited writing times. However, prices have decreased, making them more accessible to average computer users. For a detailed comparison, refer to the SSD vs HDD article.
Many people are switching from hard drives to solid-state drives (SSDs) due to their improved performance. For gaming PCs, installing the operating system and games on an SSD can provide a smoother experience. To make the switch, you can either install the OS on the SSD and then add games later, or move the existing OS from the hard drive to the SSD, and then install games on the SSD. This allows you to keep your existing setup intact while still benefiting from the speed and performance of an SSD.
How to switch HDD to SSD in Windows 7/8/10?
Switching a laptop hard drive to an SSD or desktop hard drive requires different approaches. For laptops, such as ASUS, you'll need to replace the HDD with an SSD, which may require an USB-to-SATA cable due to the single internal disk bay. In contrast, desktops often have external disk enclosures, allowing for direct disk switching. To ensure a successful boot after migration, it's recommended to use the Backup & Restore method, as detailed in the Sony laptop hard drive upgrade guide.
Upgrading a hard drive to an SSD without reinstalling can be made easier with the help of a hard drive cloner. Qiling Disk Master Professional is a reliable assistant that can help solve hard drive switching problems. This software provides three features: Disk Clone, System Clone, and Partition/Volume Clone, allowing you to choose the method that suits your needs. You can clone the hard drive to the SSD bit by bit or only use the used part, and the software also performs partition alignment with the "Align partition to optimize for SSD" option, making it a convenient and efficient way to change an HDD to an SSD.
Upgrade HDD to SSD on Windows 10 Desktop
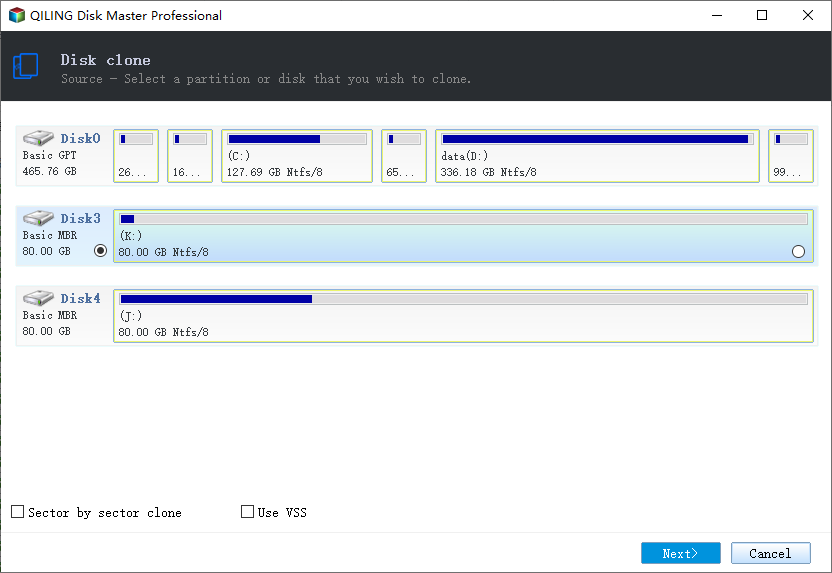
Step 1. To upgrade your desktop's storage, install an SSD and ensure it's detected. Next, launch Qiling Disk Master Professional and navigate to the Clone feature, followed by selecting Disk Clone.
Step 2. Select HDD as the source disk.
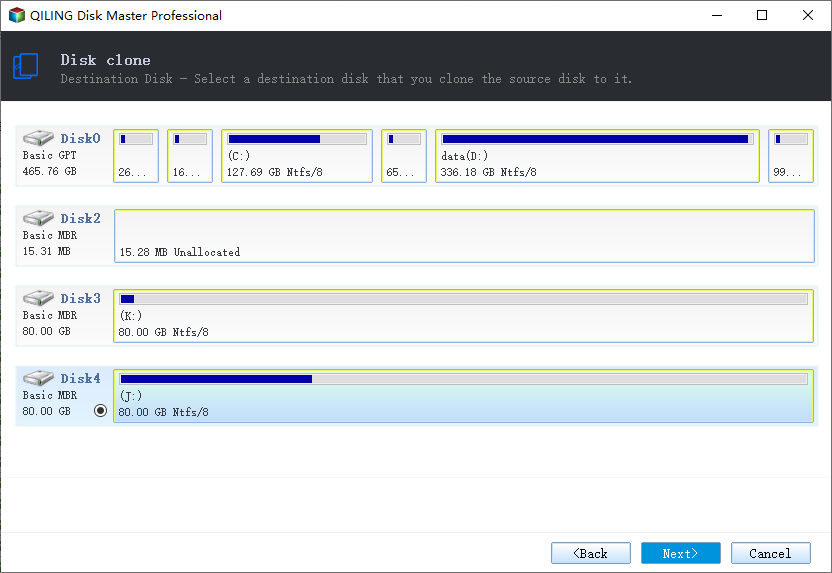
Step 3. Select SSD as the target disk.
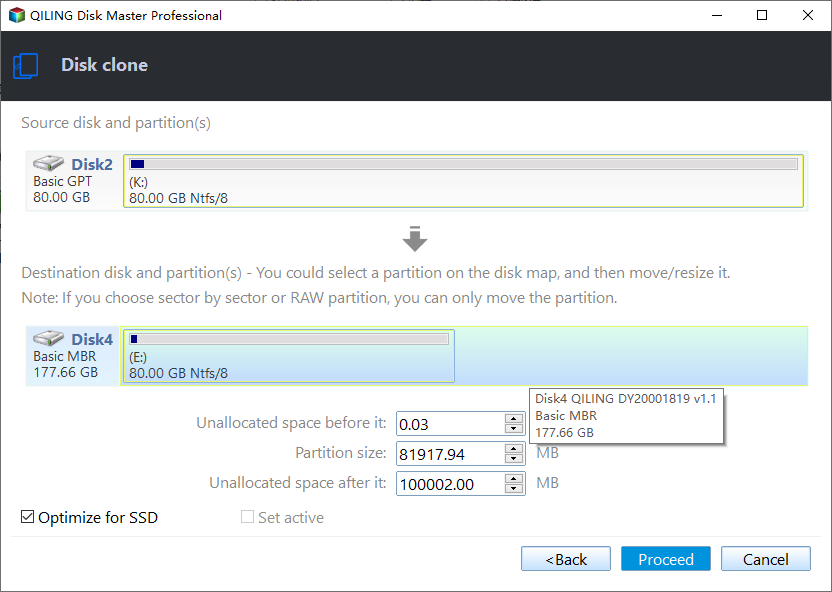
Step 4. Check the "Align partition to optimize for SSD" box and make any other desired changes. Then click "Proceed".
Step 5. After the cloning process is complete, shut down your machine. Then, either swap the old hard drive with the cloned solid-state drive (SSD) by opening the computer case, or simply change the boot priority to the SSD in the BIOS settings. Swapping the drives is the recommended method.
Tips:
- If everything on your SSD is working fine, you can format the old hard drive and use it as a secondary storage device. This means you can store backups, media files, or other data on it without affecting your main operating system and programs on the SSD. Simply connect the old hard drive to your computer and follow the formatting process in your operating system's settings or disk management tool to erase all data and prepare it for new storage needs.
- If you have more than 3 partitions on a GPT disk that's formatted in MBR, you may get a message saying you can only clone 3 partitions. You can either use Partition Clone to copy the remaining partitions or merge them together to solve the issue.
Replace HDD with SSD on Laptop without Reinstalling
To replace a hard drive with a solid-state drive (SSD) when no bootable device is available, you can try the Backup & Restore method. This approach allows you to create a bootable device manually, ensuring a successful boot on a laptop. You'll need a USB flash drive or CD/DVD disc for this process.
Step 1. To create a bootable USB drive using Qiling Disk Master, insert the USB drive into your laptop, open Qiling Disk Master, and navigate to Tools > Create Bootable Media. Follow the in-app wizard to complete the process, and then safely remove the USB drive.
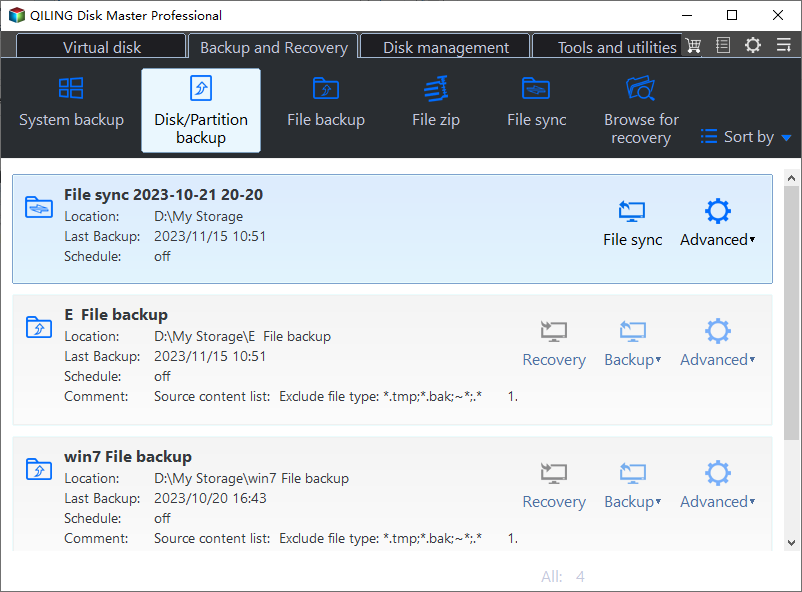
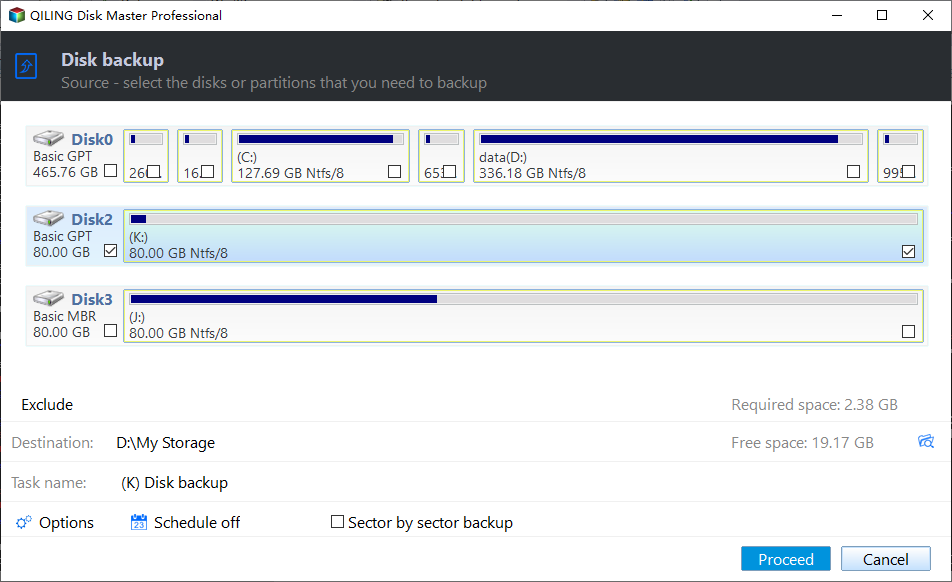
Step 2. At the main console of Qiling Disk Master, click Backup and then Disk Backup.
Step 3. Select the current hard drive as the source disk, then choose a destination path to store the backup image, ensuring it can be accessed later, and click Proceed.
Step 4. To swap the hard drive (HDD) with a solid-state drive (SSD) in your laptop, first shut down your laptop and ensure all data is backed up. Then, you'll need to physically access the internal components, which may require a screwdriver to remove the old HDD. Once you have access, you can disconnect the power and data cables from the old HDD and then remove it. Next, take the SSD and connect its power and data cables to the appropriate ports.
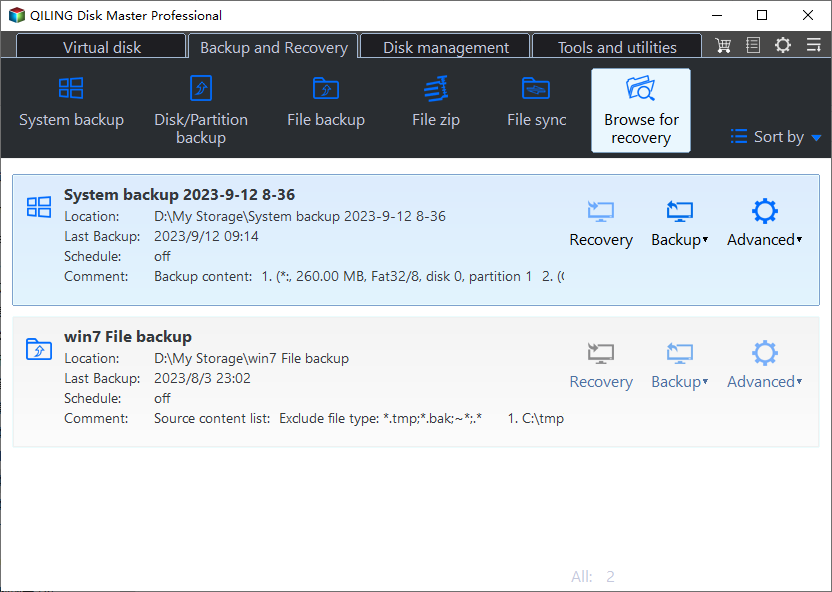
Step 5. After swapping the laptop's hard drive with a new one, boot the laptop from a bootable USB stick you created earlier. You'll see Qiling Disk Master after logging on. Open this software, click "Restore", and then select the disk backup image file to navigate to the backup. The subsequent steps are straightforward.
Tips: You may need to restart the laptop after restoring completes.
Important: Do not touch any other cables or circuit on the laptop. Take a picture of the caddy before lifting it out to help you place the new disk in the right location later.
Qiling Disk Master is a helpful tool that can assist with switching from a hard disk drive (HDD) to a solid-state drive (SSD) on both laptops and desktops in Windows. It has additional capabilities beyond just this, including the ability to transfer files from an SSD to an HDD in the future.
Related Articles
- Completely Wipe External Hard Drive in Windows 10 with Freeware
Learn the best way to securely wipe all data on external hard drive like WD Maxtor external drive completely on Windows 10 with free disk eraser. - Backup Windows 11 to Synology NAS (3 Easy Ways)
This article aims at explaining how to backup Windows 11 to Synology NAS easily. Read this tutorial to catch 3 methods to finish the task to protect Windows 11. - How to Easily Sync Local Folder to OneDrive in Windows 11 (2 Ways)
You can learn how to easily sync local folder to OneDrive in Windows 11 with 2 effective methods. You can read on to catch more details. - 3 Ways to Safely Delete Windows 11 Windows.old Folder
Is it safe to delete the Windows 11 Windows.old folder? How to do this to free up space? Read this article to find out. You can also find an effective way to protect your system.
