What is System Reserved Partition and Can You Delete It in Windows?
What is system reserved partition used for?
In Windows, a system reserved partition is created when installing the operating system, taking up around 100-500MB of space, depending on the version. This partition can cause issues, such as the error "We couldn't update the system reserved partition," when upgrading to a newer version, if it runs out of space.
To avoid errors during the upgrade process, it's recommended to extend the system reserved partition before upgrading, as it contains essential boot files such as Boot, System Volume Information, bootmgr, BOOTSECT.bak, and $RECYCLE.BIN, making it a crucial part of the system.
Can you delete system reserved partition?
When you start your computer, the Windows Boot Manager loads Windows from a partition. You can't just delete this partition, which is usually the last primary partition created, without causing problems. To delete it requires complex operations not confirmed by Microsoft, so it's best to leave it alone as it only takes up a small amount of space. Instead, you can prevent it from being generated in the first place.
How to get rid of the system reserved partition
To avoid creating an unwanted partition while installing Windows, you need to select an existing partition on your hard drive to install the OS. This means you should create a partition before installing the operating system. There are two ways to do this: you can either create a new partition or use an existing one.
▶ Extend system reserved partition
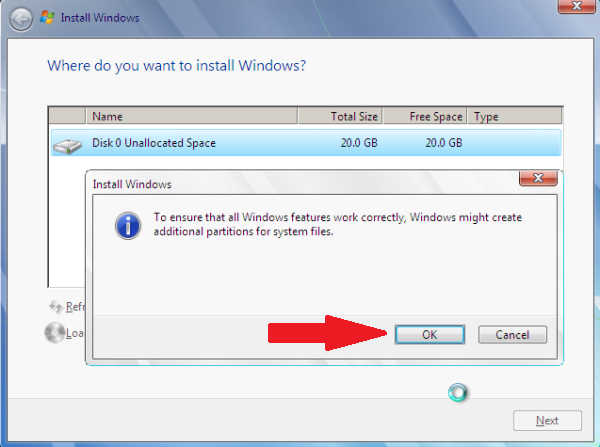
1. When you boot the Windows installation disc to install Windows on an empty disk without partitions, you'll be prompted to create additional partitions for system files. Simply click "OK" to continue.
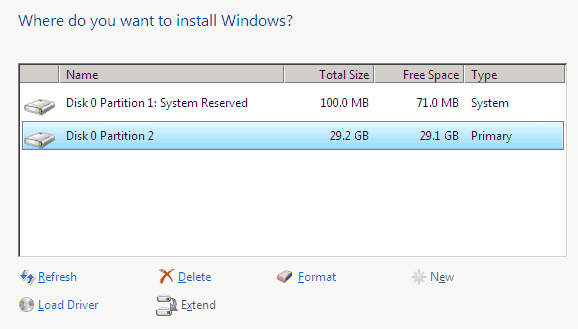
2. Select the system partition and click "Delete" to confirm in the next pop out window.
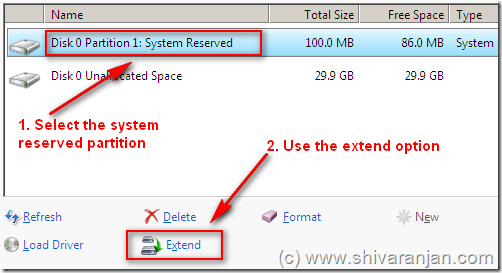
3. To make the system reserved partition larger, select it and click "Extend" to add the unallocated space to the partition.
4. To install Windows, click on "format" to format the system reserved partition, and then select this partition to install Windows.
To merge two partitions on your computer, you can either use Windows Setup to combine them or create a new partition with Diskpart before installing Windows. This can be done by pressing Shift + X to access the command prompt and using Diskpart commands to create a new partition.
▶ Create partition with third party software
If you need more advanced options for creating partitions, you can use Qiling Disk Master Professional. However, before doing so, you need to create a bootable disk with Qiling Disk Master on a Windows computer.
1. Connect an empty USB drive to a Windows PC, download and install Qiling Disk Master, and use it to create a bootable USB drive.
2. To install Windows on a computer, start by booting the computer from the Qiling bootable media you've created. This will allow the installation process to begin.
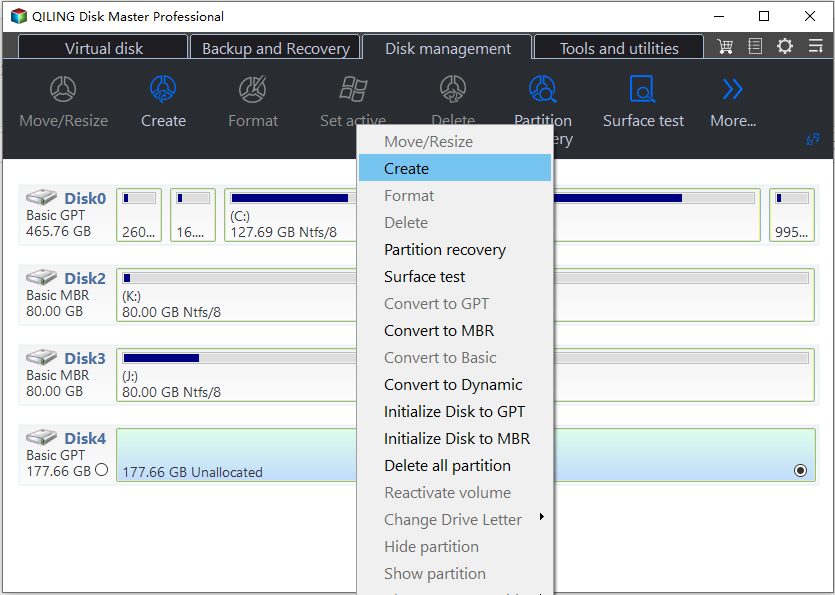
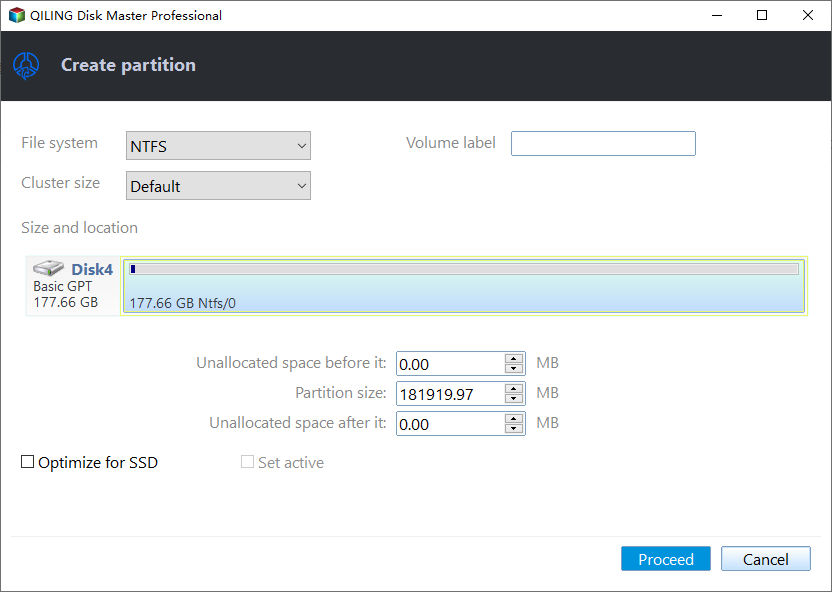
3. Right-click on the unallocated space, and then select "Create Partition".
4. The pop-out windows allow users to specify the size, location, and other parameters of the new partition, such as its name and file system type, to ensure it is properly created and configured.
5. Before making any changes to your hard disk, preview the partition layout to ensure you're satisfied with the results. Once you're happy, click "Proceed" to apply the changes.
When a system reserved partition is created, this software can be used to extend or move the system reserved partition without data loss.
Conclusion
Compared with Windows built-This software offers a more user-friendly interface with additional options for creating partitions, eliminating the creation of a system reserved partition.
You can also explore advanced features such as allocating free space, converting dynamic disks to basic, and converting primary partitions to logical. For server users, Qiling Disk Master Server is a suitable option. Additionally, the Quick Partition feature allows you to quickly create partitions with pre-set or default parameters.
Related Articles
- Fix System Repair Disc Could not be Created in Windows 11, 10, 8, 7
How to fix system repair disc could not be created problem in Windows 11,10, 8, 7. Read this guide to get the solution. - How to Protect Sensitive Data During Computer Repair | Windows
This article explains the risks your personal files may face while in maintenance, and offers step-by-step tutorial to protect sensitive data during computer repair. - How to Make Norton Ghost Bootable USB Drive in Windows 11/10/8/7
This article provides users with 2 available ways to create Norton Ghost bootable USB. Also, an easier way to create bootable USB for Windows is given. - Solved: How to Recover Data from Corrupted Windows OS
You will learn how to easily recover data from corrupted Windows OS? Get the reason in your case and recover files with corresponding way. Here are 5 ways intotal.
