How to Transfer Files Between Laptop and Desktop PC | 5 Ways
- Why do you need computer to computer file transfer?
- Top 5 ways to transfer files from laptop to desktop or vice versa
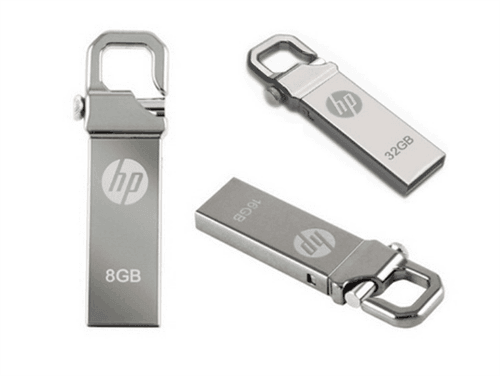
- Way 1: File transfer through external device
- Way 2: Transfer files with Windows Easy Transfer
- Way 3: Transfer files using cloud storage (remotely)
- Way 4: File transfer over network
- Way 5: Transfer files via Qiling File Sync
- Summary
Why do you need computer to computer file transfer?
It is not uncommon that people use more than two computers nowadays. Maybe you work at desktop in the office and do personal things at laptop at home. Then you have to transfer files between laptop and desktop when you need to work overtime during the vacation or holiday.
Besides, you might buy a new laptop to replace the old and cumbersome desktop, and it is necessary for you to transfer files. There might be many other situations you have to do this. Therefore, it is important to find out how to transfer files between computers.

Top 5 ways to transfer files from laptop to desktop or vice versa
There could be two circumstances you probably confront: transfer files once and transfer files regularly.
To transfer files once
To transfer files regularly
- Way 3: Transfer files using cloud storage (remotely)
- Way 4: File transfer over network
- Way 5: Transfer files via Qiling File Sync
Way 1: File transfer through external device
If you are going to transfer files between desktop and laptop once, use a big enough memory stick, USB flash drive or other removable hard drives as the medium. This method saves time and requires no complicated operations. Take transferring files from desktop to laptop for example.
1. Connect the removable medium to desktop, drag the files you want to transfer to the removable device, and then disconnect this device.
2. Connect the fulfilled device to laptop, and then drag those files to the laptop.
Note: You canalso backup files first in the old computer, store the backup image to removable storage device, and then restore it on the new computer.
Way 2: Transfer files with Windows Easy Transfer
The Windows Easy Transfer (WET) application can also help you transfer files between PCs. It offers you three transfer methods: “An Easy Transfer cable”, “A network”, and “An external hard disk or USB flash drive”. Take “A network” as an example. Learn how to transfer files between two computers running Windows 7 below:
Note: This utility doesn’t support Windows 10 because it has been replaced with PCmover (need to purchase).
1. Make sure your laptop and desktop are connected to the same wired or wireless network and both computers are able to share files and folders.
2. On the source computer, click Start, type “easy transfer” in the Search field, and then select Windows Easy Transfer in the list of search results.
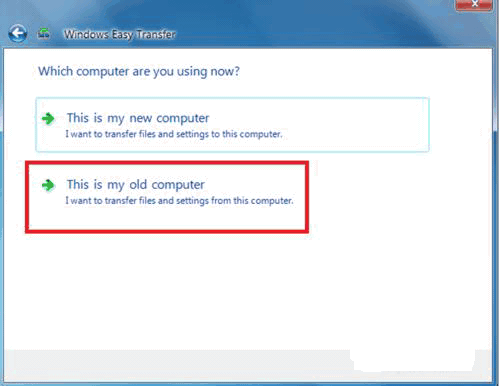
3. It will pop up a welcome window. Click Next and select A network > This is my old computer. Then take a note of the Windows Easy Transfer key, and leave this computer alone now.
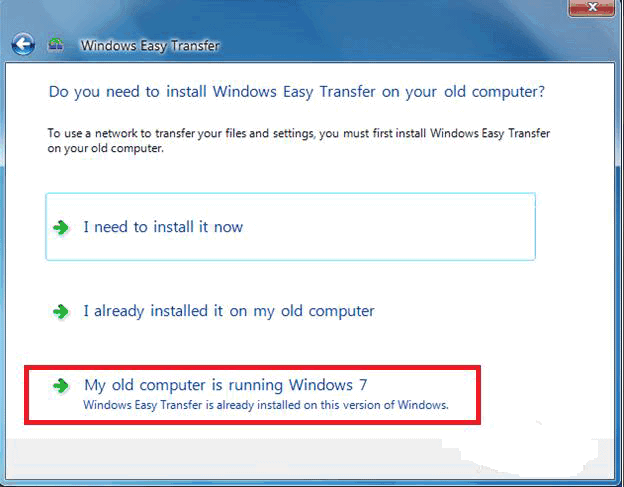
4. Open Windows Easy Transfer on the destination computer. Repeat above steps to the third window, and select This is my new computer. Then select My old computer is running Windows 7. Now type in the Windows Easy Transfer key and click Next.
5. The network will display “Connected”, and it will check what can be transferred for a few minutes. After that, you can choose what to transfer as per your need.
This method works, but it is a little bit complicated. Moreover, Windows Easy Transfer doesn’t support the new operating system - Windows 10/11, which could be somehow annoying. Also, it cannot transfer files from 64 bit OS to 32 bit OS.
Way 3: Transfer files using cloud storage (remotely)
Cloud storage like OneDrive, Google Drive and Dropbox has made it simple to copy files between PCs. More pleasing, you can get a few gigabytes of online storage for free. Take OneDrive as an example. Let’s see how to share files between laptop and desktop using OneDrive step by step:
1. Install OneDrive desktop app on two computers. If your computers are running Windows 10, then the app may have already been installed.
2. On the computer you want to transfer files from, enter “OneDrive” in the search box on the taskbar and select it from the list of results.
3. Sign in with your Microsoft account and follow the wizard to complete OneDrive setup.
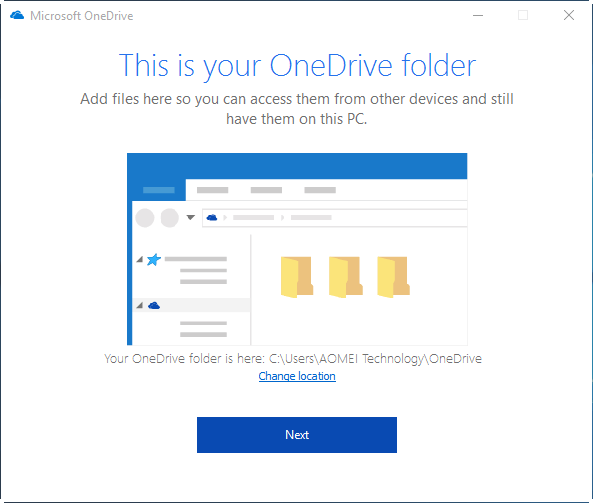
4. Open File Explorer and click OneDrive from the left panel. You’ll get to your OneDrive folder. Then, drag the files you want to transfer from this computer into the folder.
5. On the other computer, open OneDrive app and log into the same account.
6. The app will sync files to the OneDrive folder on your second device automatically. Copy the files to a new location on your computer as you wish.
Way 4: File transfer over network
To transfer files regularly, you might require the help of network (LAN or WIFI).
1. Create a local area network (LAN) using a router or hub, and then plug both computers into the hub using cat5 cable.
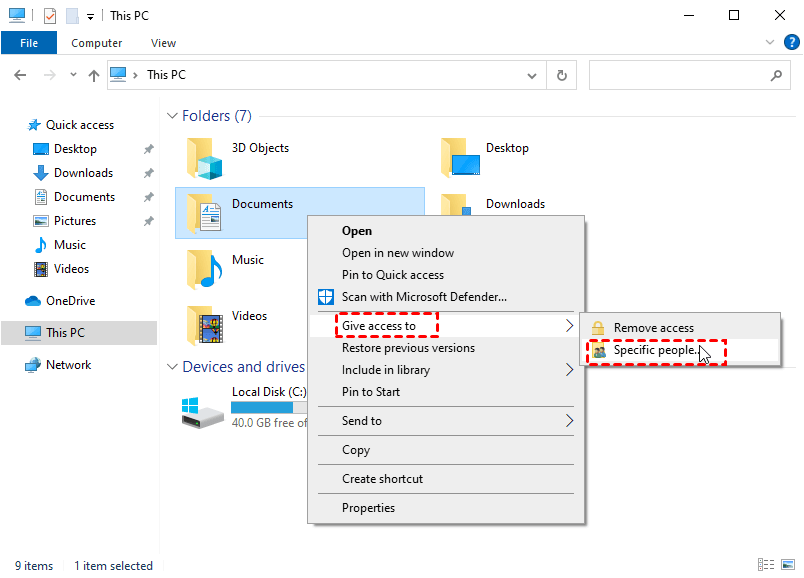
2. Share all the folders you want to transfer on your desktop by right clicking them one by one and choosing Give access to. Follow the wizard to go through all the security stuff and wait for the process to be done.
3. Go to Network on your laptop, double click on your desktop name, and all the folders shared from your desktop will appear after that. The rest step is to click and drag the files to the designated drive on your laptop.
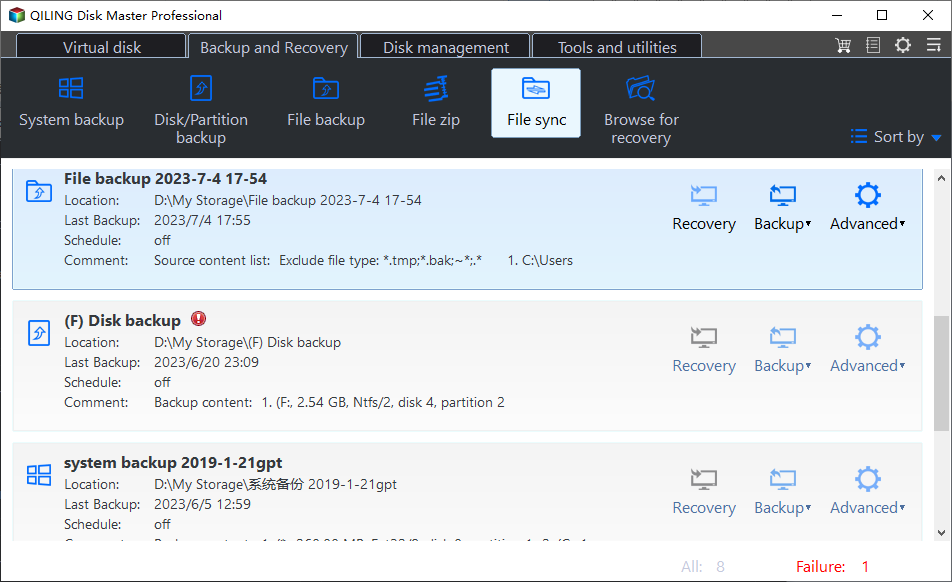
Way 5: Transfer files via Qiling File Sync
Fortunately, you can make the process easier with freeware, Qiling Disk Master Standard. This freeware supports Windows 11/10/8/7 and Windows XP/Vista. The Sync feature can help you synchronize files from laptop to desktop with a few clicks. Download Qiling Disk Master to have a try.
To get started, you need to create a LAN as mentioned in the second part and create a network shared folder on the source computer. Then, follow the steps below to transfer files from old PC to new PC without a USB cable:
Step 1. Install and launch Qiling Disk Master Standard on the source computer. Click Tools and utilities, and then click File Sync.
Step 2. Add folders you want to transfer by clicking Add Folder.
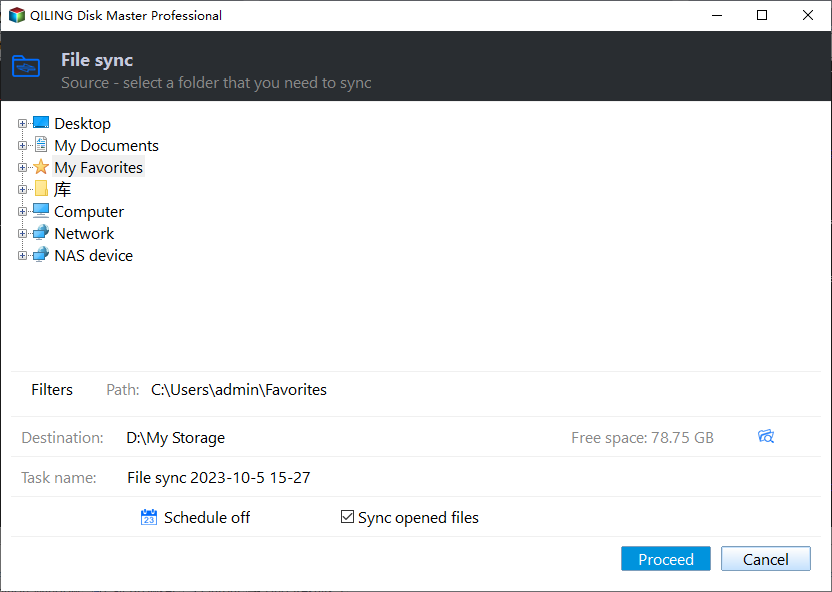
Step 3. Choose the destination location. Here you can select Add Share or NAS Devices and type the IP address of the source computer in the pop-up window. Then, select the shared folder you created before.


Step 4. Click Schedule Sync, and you can set a schedule to synchronize files daily, weekly, or monthly. Then click Proceed.
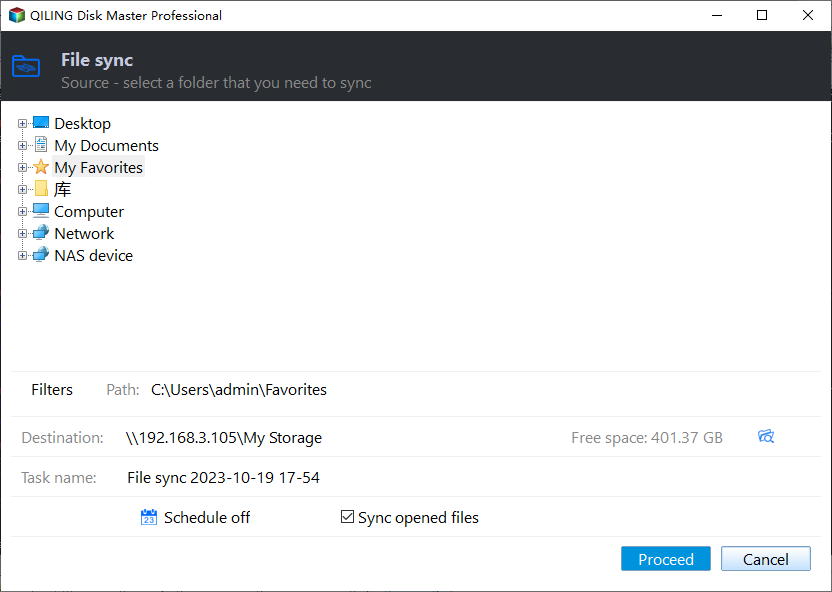
Step 5. Go to This PC > Network on the new computer to access the synced files wirelessly.
Notes:
- File/Folder can’t be synchronized to CD-ROM/DVD/Blue-Ray.
- Individual file that is more than 4GB cannot be synchronized to FAT/FAT32 because of partition limitation.
- If you create an Qiling account, you can also backup laptop files to Qiling cloud and then restore them on your desktop. You'll get 1TB free storage for 15 days after you sign up for an Qiling account.
Summary
There are five ways offered in this article to help you transfer files between laptop and desktop once or regularly - removable device, Windows Easy Transfer, cloud drive, network share and free Qiling Disk Master. You may pick up one way according to your situation.
To be honest, Qiling Disk Master offers easier operations and multiple schedule modes. If you are using File Sync, don’t waste other powerful features in Qiling Disk Master, like System Backup, Disk Backup and Disk Clone.
If you want to protect unlimited computers within your company, you may pick Qiling Disk Master Technician. It also allows you to create portable sync software so that you can sync files on any computer. Just go for this tool!
Related Articles
- Transfer OS from Laptop to Desktop without Reinstalling Windows 10/8/7
- How to Sync Desktop to OneDrive Automatically (2 Ways Included)
- Freeware to Sync Files Between 2 Computers on the Same Network
- How to Monitor a Folder and Move Files Automatically?
Need to copy files from one folder to another automatically? Read this article patiently to get the best automated file mover utility in Windows to assist you.