How to Use Unallocated Space After Cloning to A Larger HDD/SSD?
Unallocated space after cloning
I had a 500GB HDD that suddenly started freezing, leading me to suspect it was failing. I replaced it with a 1TB Samsung SSD and cloned the old drive to the new one using software. However, after cloning and replacing the HDD, Windows only recognizes 500GB of the Samsung drive in Explorer, but sees it as a 1TB drive in Disk Management, with 500GB of unallocated space remaining. I'm unsure why the clone left unallocated space and how to resolve this issue. Can you help me understand what's going on and how to fix it?
After cloning a hard drive to a Samsung SSD or other types of hard drives, you typically get an exact byte-for-byte copy of the original partition, including the same file system and partition tables. This results in the same layout as the original drive, with the same allocated and unallocated space before and after the cloned partition.
How to use unallocated space after cloning SSD/HDD?
If you clone a hard disk to a larger HDD or SSD and end up with unallocated disk space, you won't be able to use it for data storage until you create a new partition or add it to an existing one. Creating a new partition is straightforward, but what if you want to add the unallocated space to an existing partition? The approach varies depending on the situation.
Situation 1: Unallocated space right behind the target partition
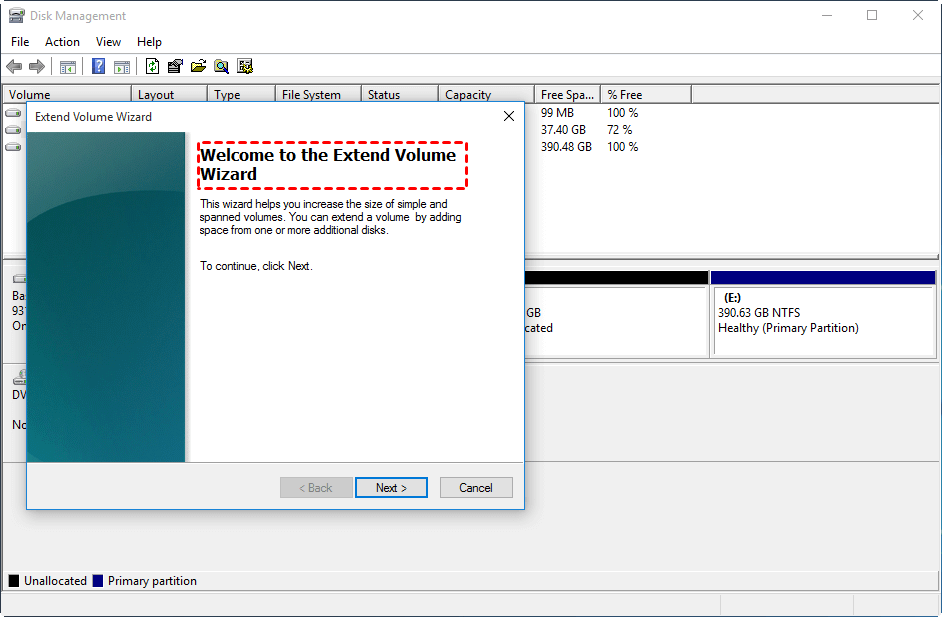
If the unallocated space is right behind the target partition, you can combine them using Disk Management. Right-click the nearest partition to the unallocated space and select "Extend Volume".
Follow the prompts that will appear to complete this operation.
Situation 2: Unallocated space is distributed throughout the hard drive
If the unallocated space isn't directly behind the target partition and is scattered throughout the hard drive, you can use a free partition manager like Qiling Disk Master Standard. It's free and adware-free for Windows 7/8/10/11 and XP/Vista users, allowing you to merge multiple unallocated spaces into one partition or create a new partition with the unallocated space. You can download it and try it out.
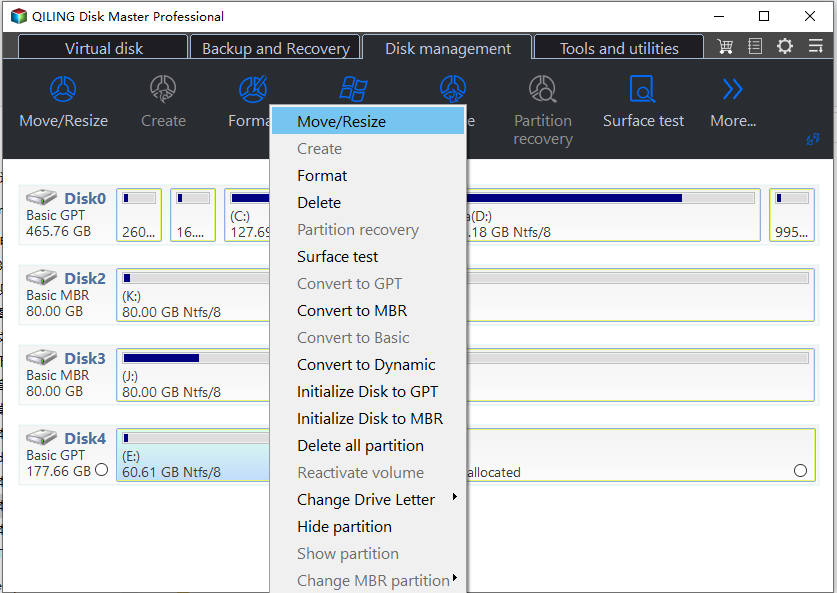
Step 1. Install and start Qiling Disk Master Standard. Right click the partition you want to merge to, and select Move/resize Partitions.
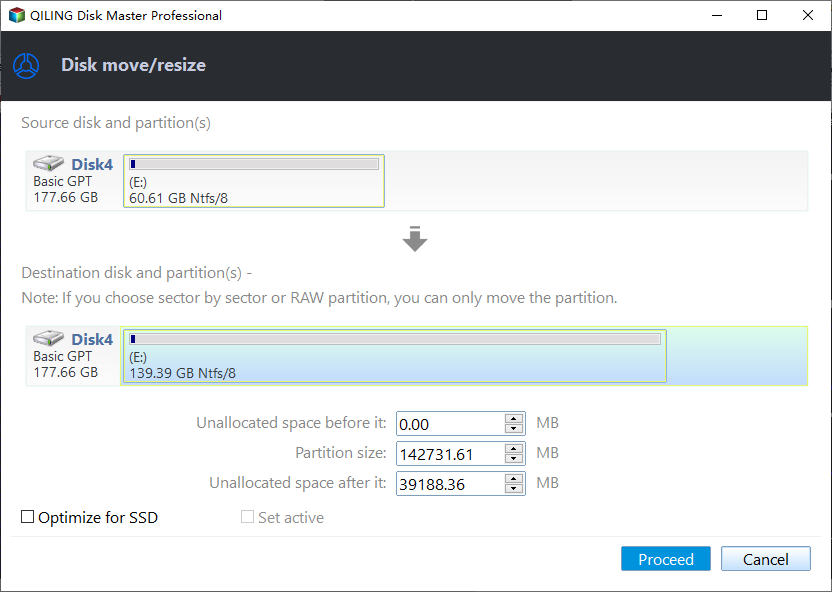
Step 2. Drag the right of partition to the unallocated space.
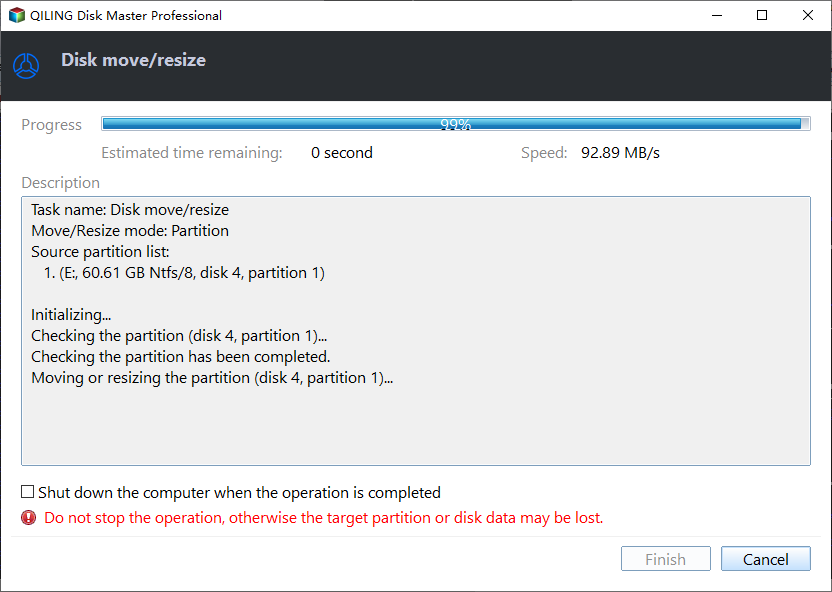
Step 3. Click Proceed to put the operation into practice.
When your hard drive shows a large unallocated space after cloning, don't panic! This space still exists, but it's hidden. You can use the free Qiling Disk Master Standard to unhide and utilize this space. With this tool, you can shrink your C drive, create a bootable CD, format or delete partitions, and even create a Windows to Go (W2G) for Windows 11 and 10.
Further reading: how to avoid unallocated space left after disk clone
To avoid allocated space being generated in your new disk clone, you can allocate space proportionally to the cloned partitions during the cloning process. If your current disk clone tool doesn't support this setting, you can switch to Qiling Disk Master Professional, which allows you to edit partitions on the new disk as needed.
When cloning a smaller disk to a larger one, you have the option to choose "Fit partitions to entire disk", which ensures that all space on the larger disk is utilized by distributing it into multiple partitions according to the size of the original disk's partitions, thereby avoiding unallocated space.
Summary
When cloning a SSD or HDD to a larger disk in Windows, you may encounter unallocated space. This can also occur after formatting one hard drive or partition. If you need to use the unallocated space, you can either create a new partition or extend other partitions to utilize the available space. If you formatted an entire hard disk, the "quick partition" feature of a disk management tool can quickly divide the disk into several partitions in one click. This can be a convenient solution to make the most of your disk space.
Related Articles
- Ways to Add Unallocated Space in Windows Server 2016
This article shows you how to add unallocated space in Windows Server 2016. Three different methods will be shared to add unallocated space into partition. - How to Remove/Delete Unallocated Partition Effectively in Windows 10/8/7?
To delete unallocated partition in Windows 11, 10, 8, 7, you can create a new partition or extend another partition. Either way, you can find the step-by-step guide on how to do it right here. - Effective Hard Disk Unallocated Repair Methods for Windows 10/8/7 Are Here!
Hard disk becomes unallocated space? Here, we have rounded up 5 easy methods to help finish hard disk unallocated repair in Windows 11, 10, 8, 7 computer. - [Tutorial] 2 Ways to Breaking 2TB File System Limit
In this post, you are going to learn how to break 2TB file system limit, including using Disk Management and a powerful third-party tool.


