2 Ways to Unpack Windows Backup File and Restore Individual Files
Want to restore individual files from Windows system image backup
Windows Backup and Restore is a built-in tool that helps users backup their system and important files, making it a fundamental disaster recovery technology. With this tool, users can easily backup their system and files, providing a safeguard against data loss in case of system crashes or other disasters.
▶ You can create a system image that will restore your entire computer in case it stops working, but it will restore everything, not just individual items.
▶ To set up a custom backup for multiple drives or specific folders, you can create a backup job that includes these items. This allows you to restore individual files using the Restore Files wizard in case of data loss or corruption.
The user had a Windows system image backup but wanted to retrieve a specific file. He tried to use the Windows Backup and Restore feature but it didn't work. He then used a third-party tool called EaseUS Todo Backup to extract the file from the system image backup.
"Hi everyone,
You can restore the Windows Image Backup to an external drive, then copy the lost file to the Local Disc C without overwriting other files. The restored image will be a complete copy of the original system, including all files, so you'll be able to browse through it and copy the specific file you need, leaving the rest of the files on the external drive untouched. This way, you can recover the lost file without affecting the original system.
To mount a WindowsImageBackup, you can use the Windows Recovery Environment (WinRE) or the Windows 10 built-in tool, DISM (Deployment Image Servicing and Management). Once mounted, you can browse and restore individual files from the backup image. You can also use third-party tools like AOMEI Backupper or Acronis to mount and restore files from a WindowsImageBackup.
👉 Extract files from Windows 10 backup with Disk Management
👉 Unpack Windows backup file via Qiling Disk Master🔥
Extract files from Windows 10 backup with Disk Management
A system image is saved as a VHD file with the .vhd or .vhdx file extension, which can be attached (mounted) as a separate disk using Disk Management, allowing you to browse the contents and extract individual files from the WindowsImageBackup.
1. Right click on This PC and hit the Manage option. In the pop-up window, click Disk Management on the left panel.
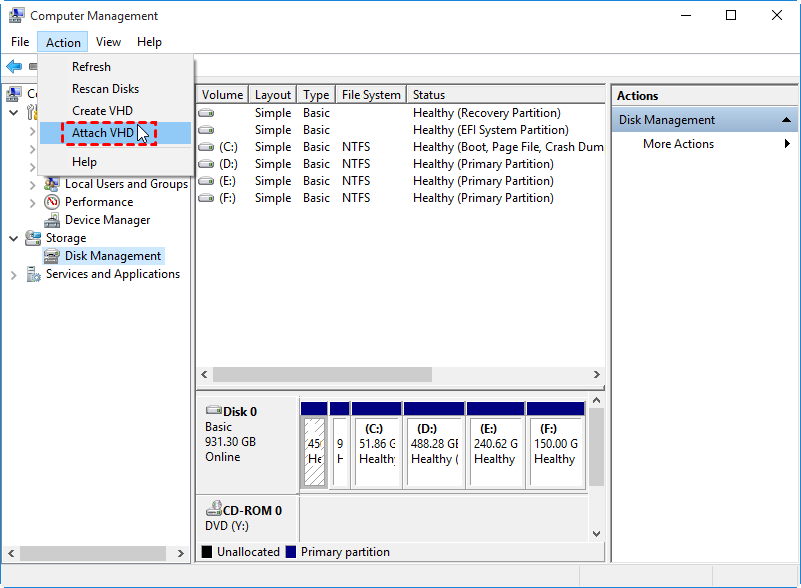
2. In the Computer Management window, go to the Action Menu and select Attach VHD.
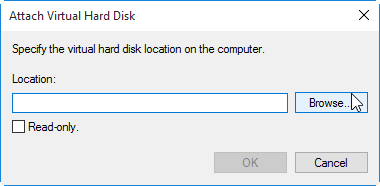
3. Locate the system image backup file and click Browse to select it. Then click OK to start attaching the VHD.
✎ Tips:
System images are saved in a folder with the format "[Drive Letter]\WindowsImageBackup\[Computer Name]\Backup [date and time]".
The multiple VHD files under a path are due to the backup of all system-related partitions, not just the C drive, resulting in various file sizes. To select the correct VHD file, choose the one that matches the expected file size.
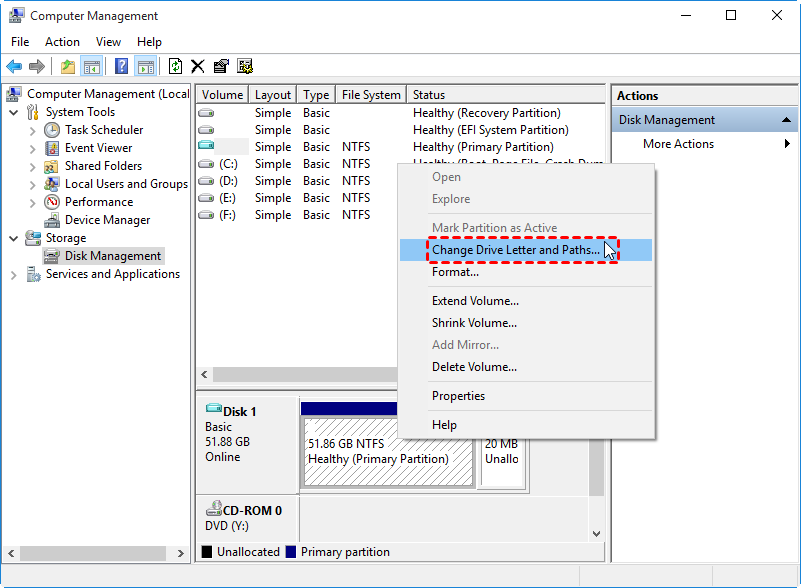
4. To access a mounted drive in File Explorer, right-click on it and select "Change Drive Letter and Paths" to assign a drive letter, making it visible in File Explorer.
5. To recover files from a newly-added drive, open File Explorer by pressing the keyboard shortcut Win + E. Then, navigate to the drive, select the files you want to retrieve, and copy them to another drive.
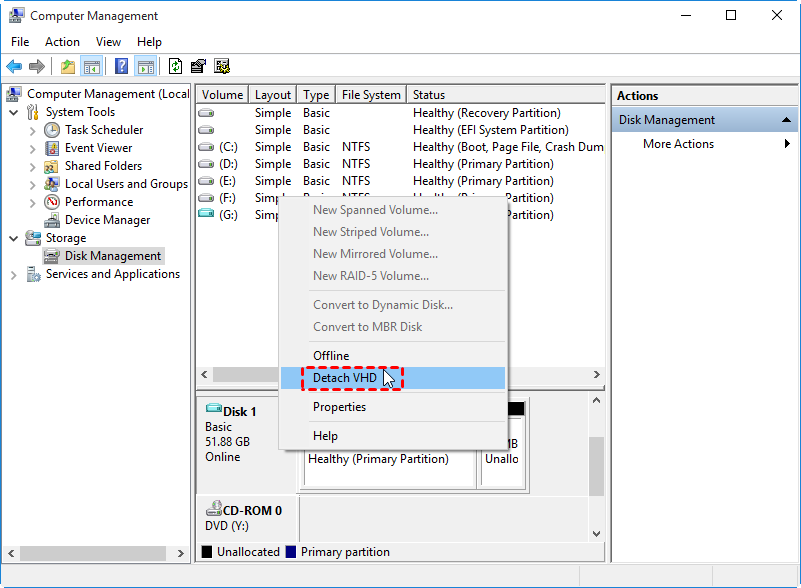
Once you've copied files from the backup, detach the mounted drive by right-clicking the "Disk" box corresponding to the VHD in the Disk Management window and selecting "Detach VHD".
Unpack Windows backup file via Qiling Disk Master
Qiling Disk Master Professional is an all-in-one backup software for Windows that allows users to extract files from a �ystem image backup, making it easier to restore specific files instead of the entire system, all within the software itself, without the need for additional tools.system image backup, making it easier to restore specific files instead of the entire system, all within the software itself, without the need for additional tools.
It also enables you to run file backup for your important files so that you can restore them without mounting an additional drive. Learn how to extract individual files from a Windows 10 system image backup using Qiling Disk Master below. Before you start, please click on the download button to securely download this professional backup tool.
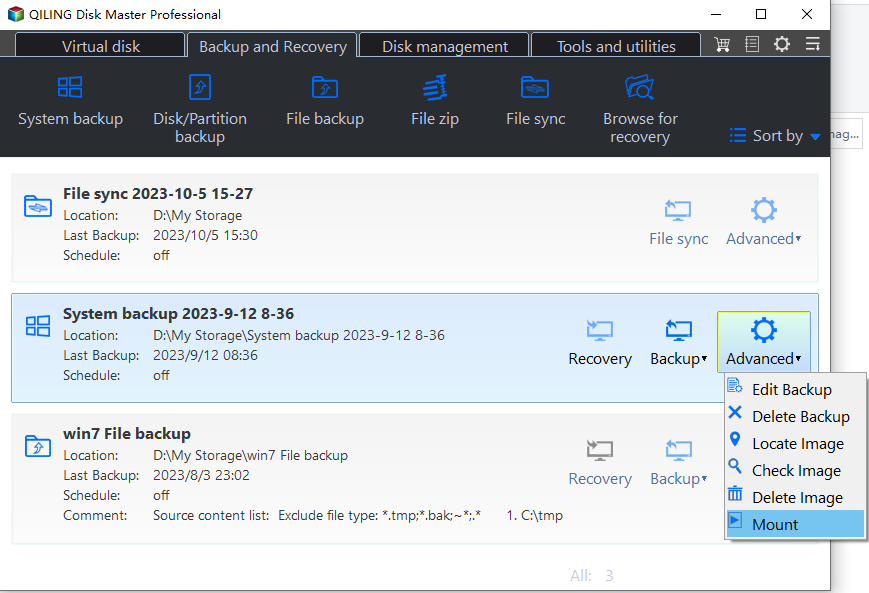
Step 1. To access the system backup task, click the "Advanced" option, followed by selecting the "Mount Image" option.
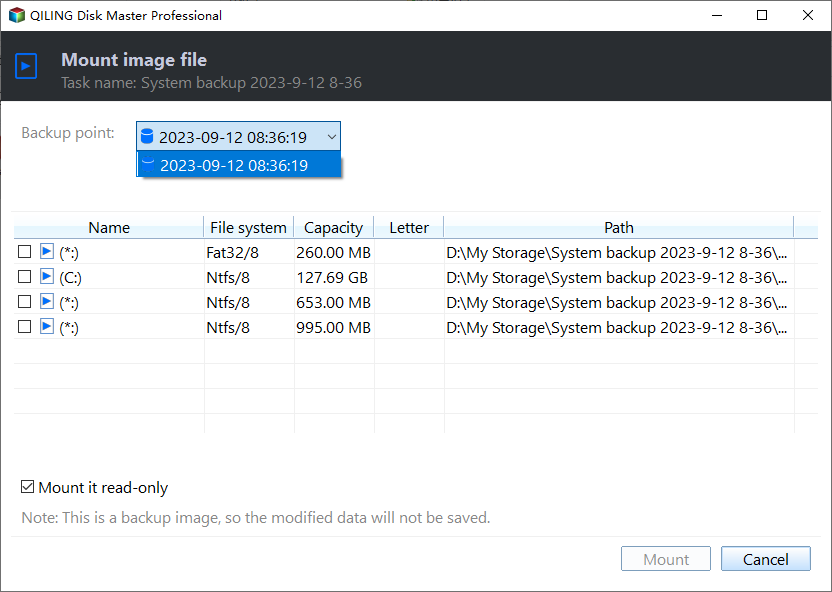
Step 2. Select a backup point from the available ones, choosing one based on the date of the backup.
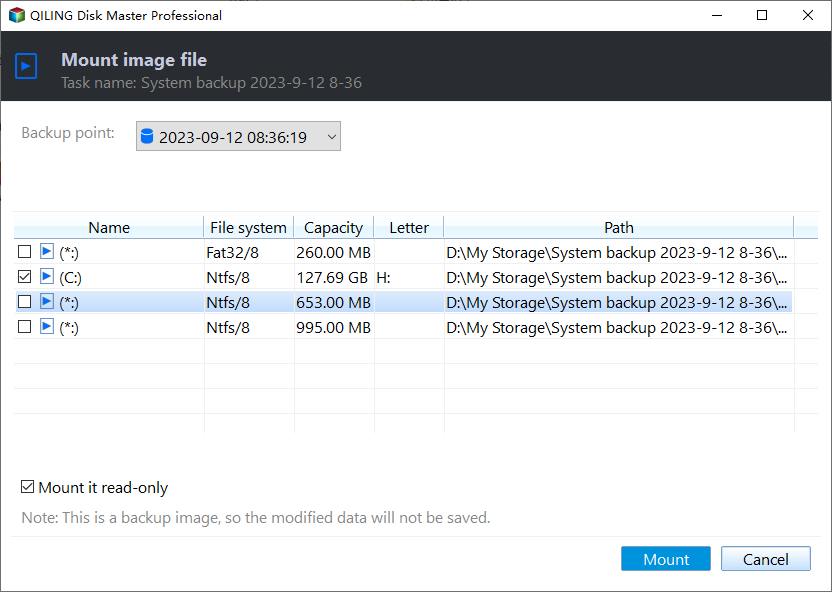
Step 4. To mount a virtual drive, select the drive(s) you want to mount and assign a drive letter, then click "Proceed" to mount the image.
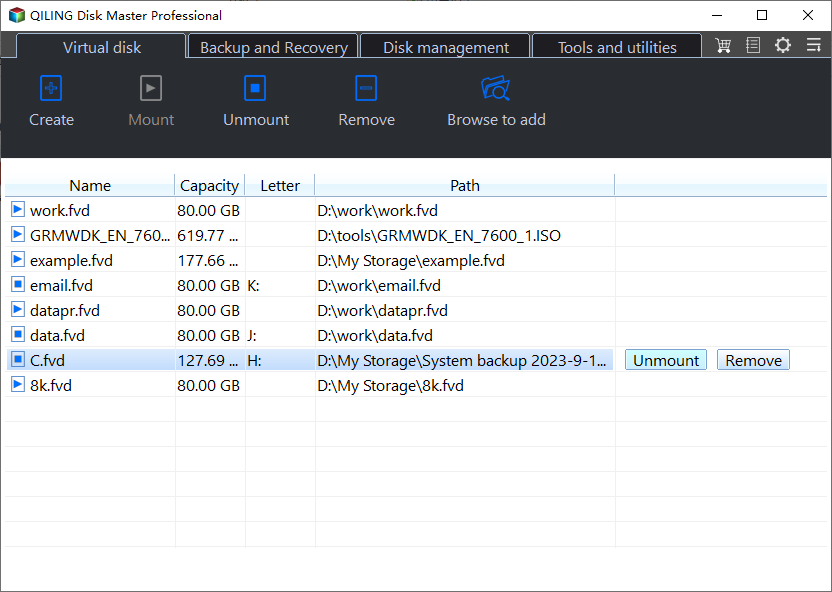
Step 5. Wait for the process to complete, then explore the contents in your backup image from Windows Explorer or This PC, and copy and paste the files you want to recover.
✎ Tip:
The mounted drive will be removed automatically after your next boot. If you want to detach it manually, go to "Tools" > "Explore Image" > Select the virtual drive > Click "Detach".
Verdict
To restore individual files from a Windows system image backup, you can use Disk Management to unpack the backup files, or use Qiling Disk Master, a backup software that allows you to backup the operating system, disks, partitions, and specific files based on your needs, and also has an Explore Image feature to mount a system/disk/partition image as virtual drives to extract individual files.
Related Articles
- How to Mount a Windows 10/8/7 System Image Backup as a VHD
4 ways provided in this article to mount or unmount Windows image backup VHD or VHDX file in Windows 10/8/7 and Servers, just refer to the step-by-step guide to mount VHD/VHDX. Please read on. - Fixed: System Restore Failed to Extract the File in Windows 7/8/10
Learn how to fix the issue System Restore failed to extract the original copy of the directory from the restore point in Windows 7/8/10 with the easiest solution. - How to Create Windows 7 Recovery USB Drive Quickly and Simply
It's wise to learn to create Windows 7 recovery USB drive, which can help you to repair or restore your system if your computer fails to boot. - Two Simple Ways to Run an Incremental Copy in Windows
Running an incremental copy in Windows is a good way to save backup storage space and minimize the time required for backup. To do so, two easy ways are listed here.
