How to Download, Install, and Setup Windows 11 (2 Cases)
Windows 11 is coming
On June 3, Microsoft sent a Tweet saying “Join us June 24th at 11 am ET for the #MicrosoftEvent to see what’s next.” Many insiders predict the event is the debut of the next generation of Windows – Windows 11, and it turns out to be true. Let’s have a quick peek at the big changes coming with Windows 11:
- Start menu: the new Start menu lies at the center of your taskbar. If needed, you can move them all back to the left-hand side.
- File Explorer: some folder icons are updated. Besides, if you hover your mouse over the "maximize windows" icon, you'll see an option to align your window in a variety of configurations.
- Widgets drawer: Right in the middle of the Taskbar icons is Widgets. Instead of desktop widgets, it shows nothing more than News & Interests at the moment.
For more new features of Windows 11, please visit Microsoft website.

How to install Windows 11 on your PC step by step
In this part, I’ll show you how to install Windows 11 from scratch or by upgrading from your old operating system separately.
👉 Case 1: Windows 11 clean install from boot
👉 Case 2: Windows 11 upgrade from Windows 10/8/7
👉 Troubleshoot: Windows 11 installation has failed
👉 Bonus tip: Always backup OS for unpredictable errors
Case 1: Windows 11 clean install from boot
1. Boot your computer from Windows 11 installation media. Or you can download Windows 11 ISO file and then boot from the file.
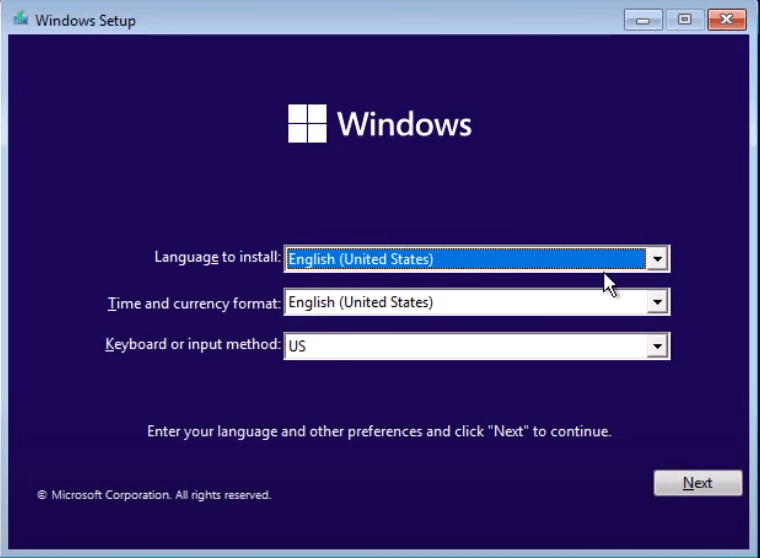
2. When you see the Windows Setup window, choose your language and other preferences and click Next. Then, click Install now.
3. You’ll be asked to activate Windows. Enter your product key or click I don’t have a product key if you’re reinstalling Windows.
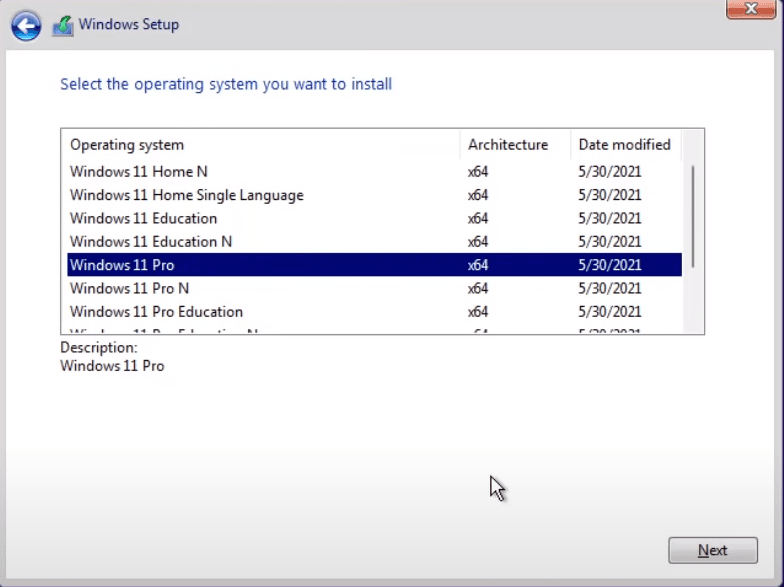
4. Select the operating system you want to install and click Next. You can choose from Windows 11 Home, Pro, Education, and Enterprise, etc.
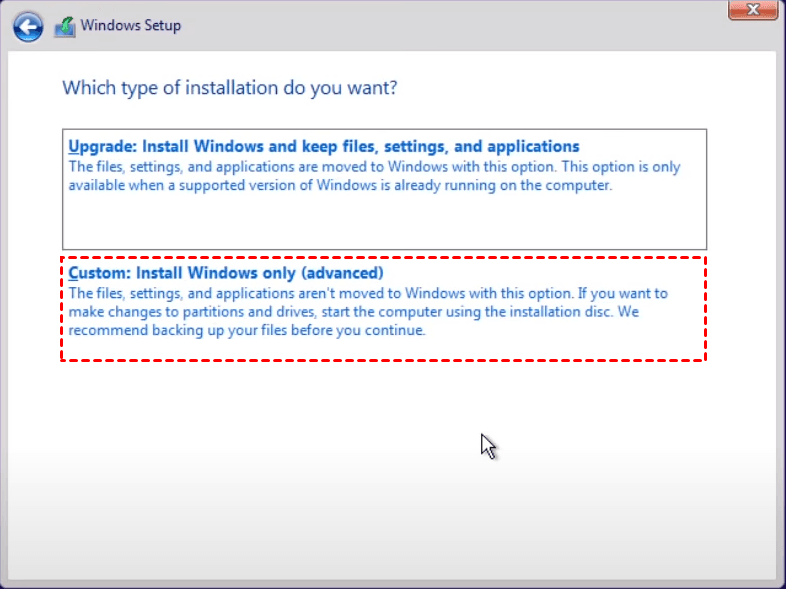
5. Accept the license terms and click Next. Then, choose Custom: Install Windows only (advanced).
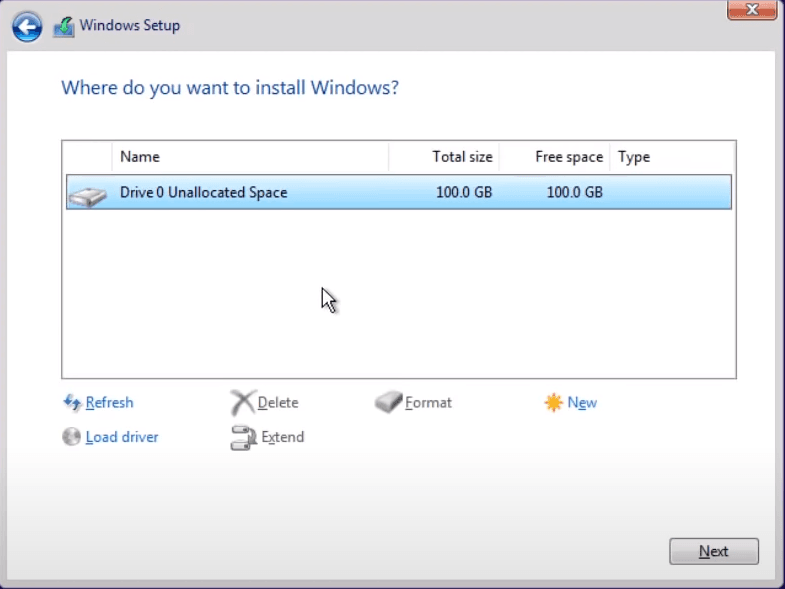
6. Select the drive where you want to install Windows and click Next. Wait for the installation process to be done.
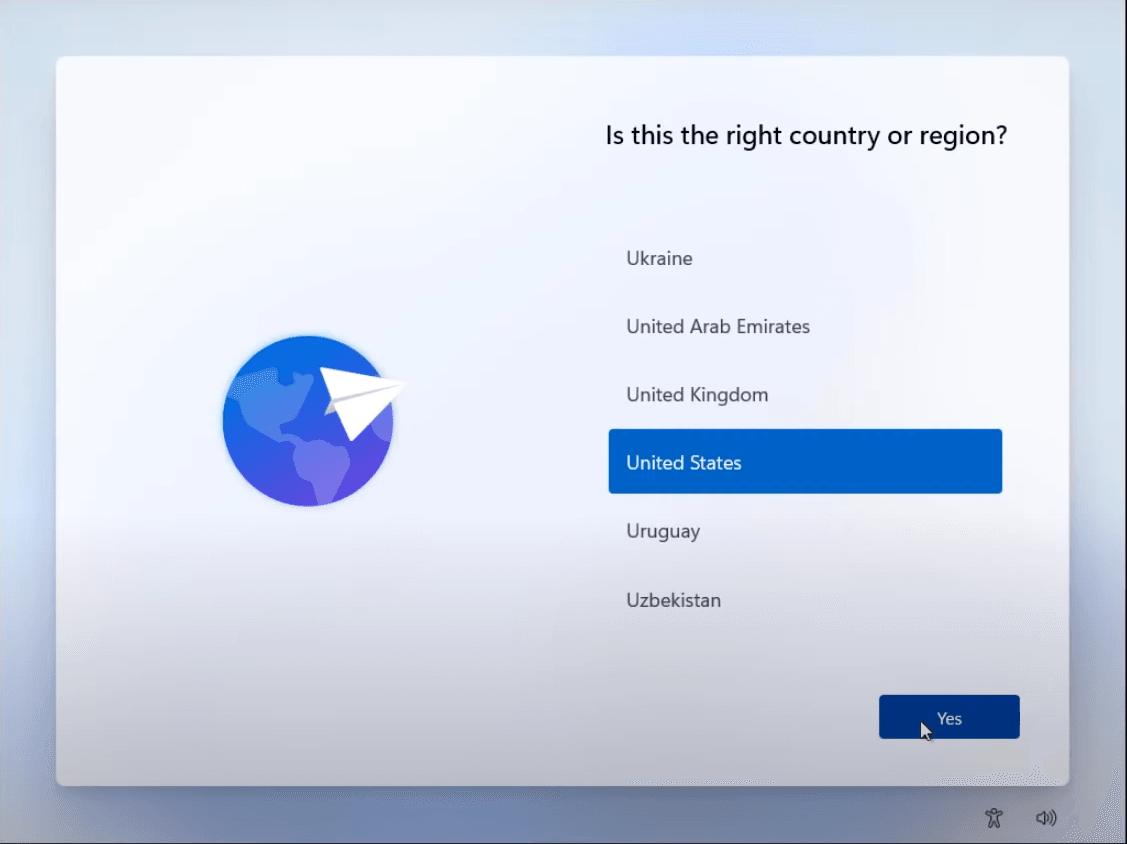
7. You’ll go to Windows 11 setup process. Choose the right country, keyboard layout, and personal/work use. Then, add your account and choose privacy settings. After a few minutes, you’ll get into Windows 11 new desktop.
Case 2: Windows 11 upgrade from Windows 10/8/7
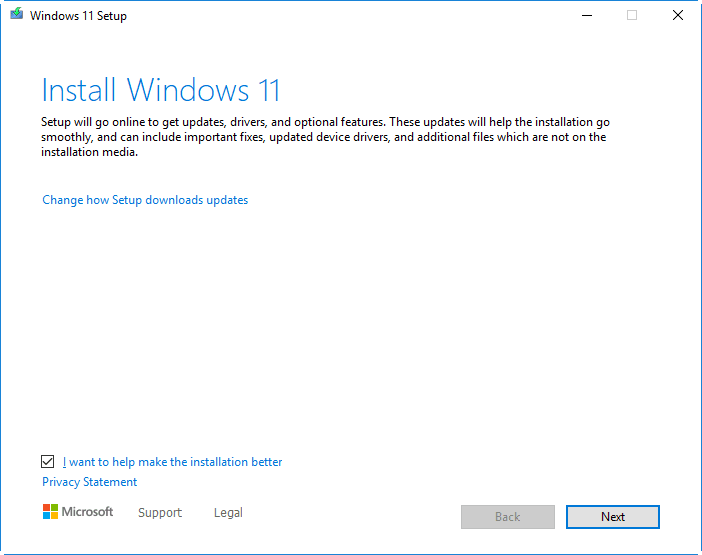
1. Download Windows 11 ISO file from the official website. Open the ISO file and launch the setup.exe file.
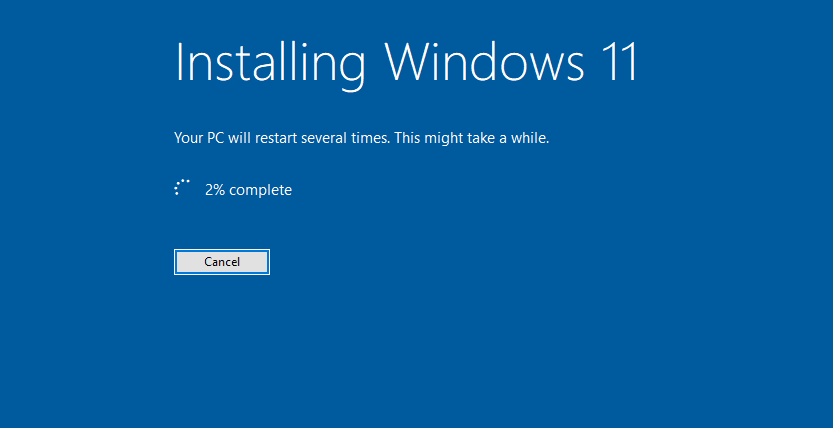
2. Wait for the Windows 11 Setup wizard to be loaded. At the “Install Windows 11” page, click Next.
3. It will check for updates and check your PC automatically. If your PC meets the system requirements for installing Windows 11, you’ll get into the “Applicable notices and license terms” page. Click Accept to continue.
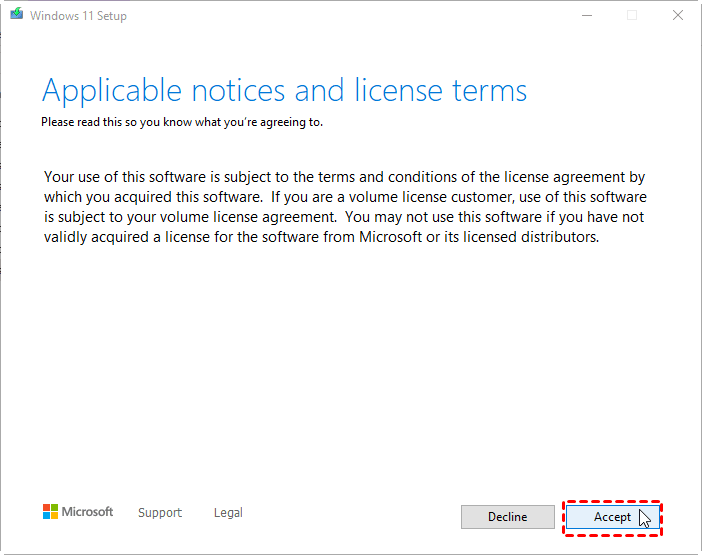
Tip: If you are prompted “This PC can’t run Windows 11”, install available updates for your current version of Windows and try Windows 11 upgrade again.
4. At the “Ready to install” page, confirm the pending operation and click Install.
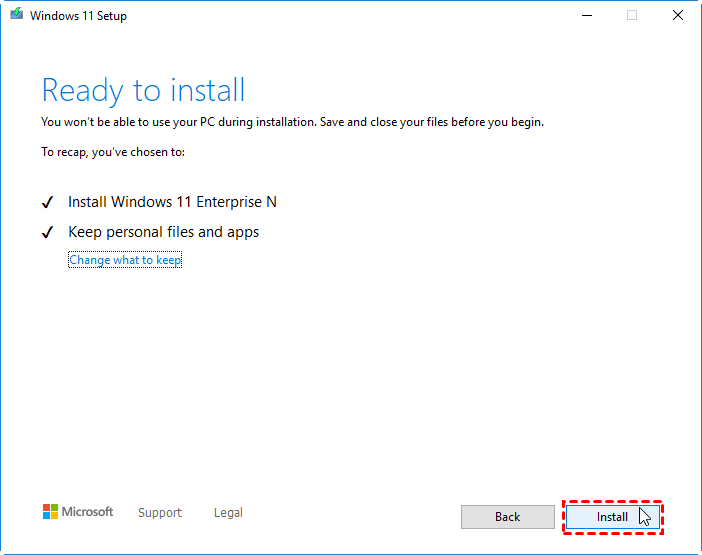
Tip: By default, the installation process will keep your personal files and apps. You can change the default option by clicking Change what to keep.
5. Windows 11 installation starts, and your PC will restart a few times. Make sure you don’t turn off your PC.
Troubleshoot: Windows 11 installation has failed
Many users are faced with the problem of “Windows 11 installation has failed” when trying to install Windows 11. It can be caused by not meeting the minimum system requirements of Windows 11. TPM 2.0 and Secure Boot are the two most likely reasons. Here’s how to fix it.
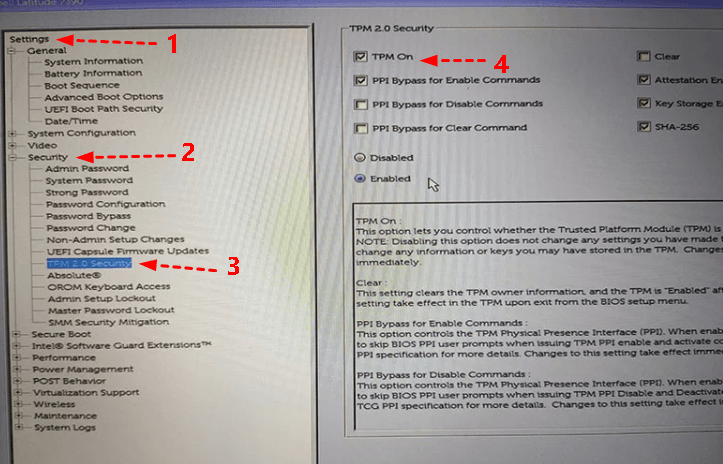
Fix 1: Enable TPM 2.0
1. Press the Shift key while clicking Restart to enterWindows Recovery Environment.
2. Select Troubleshoot > Advanced options > UEFI Firmware Settings in order.
3. Find TPM option and enable it. The TPM option can differ from computer to computer. Some computers’ TPM option is located in the advanced options and the name is Trusted Platform Module.
Fix 2: Enable Secure Boot
1. Restart your computer and press ESC/Delete/F1/F2/F10 while it is booting to enter BIOS. Then, click Boot and select Secure Boot.
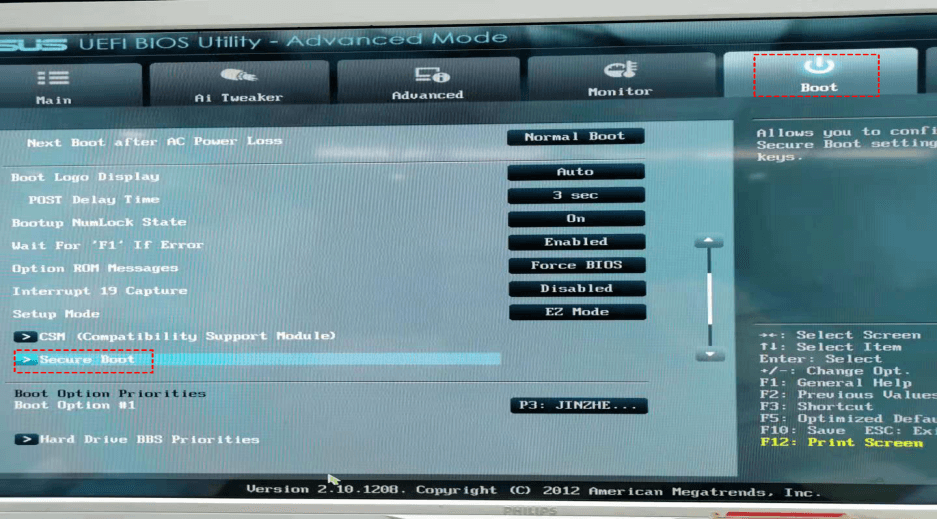
2. You can see the Secure Boot state reads “Disabled”. Click Key Management to continue.
3. Select Install default Secure Boot keys and then Yes to turn on Secure Boot. Finally, back to the previous page and you’ll see the Secure Boot state reads “Enabled” now.
Bonus tip: Always backup OS for unpredictable errors
System errors happen now and then. No matter which version of Windows you are using, it is wise of you to create a system image backup. As a result, you won’t be panic when your computer crashes, because you always know you can bring your computer back to work from the system image.
Then, how to backup Windows OS easily and safely? The best free backup software - Qiling Disk Master Standard comes to help.
- It offers multiple backup types to meet your different needs, including System Backup, Disk Backup, Partition Backup and File Backup. You can also backup Outlook live emails if you upgrade to advanced versions.
- To ensure your backups are kept up to date, you can schedule automatic backups.
- All Windows PC operating systems like Windows 11/10/8.1/8/7/Vista/XP are supported.
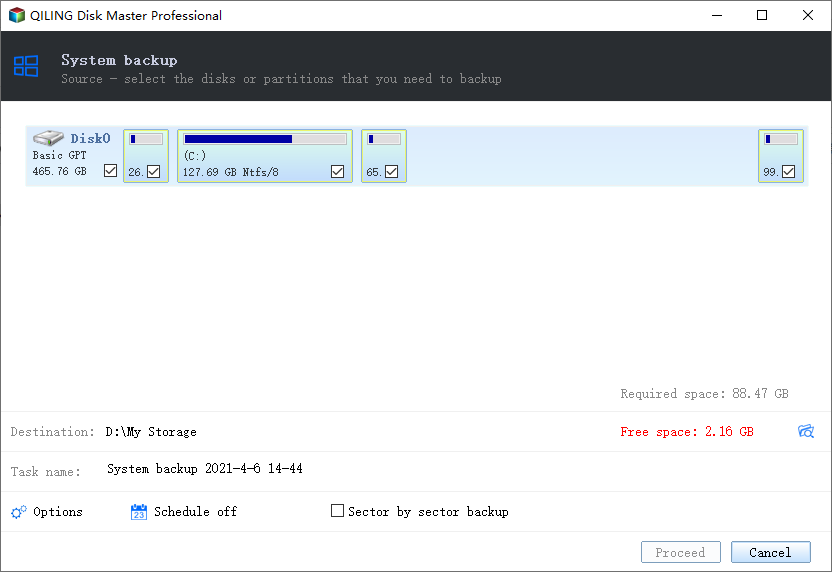
Free download Qiling Disk Master now to have a try. To create a system image backup, just go to Backup > System Backup. The backup process is as easy as a piece of cake thanks to the user-friendly interface.
Summary
That’s all about Windows 11 install. Whether you want to do Windows 11 clean install or upgrade install, you can find the detailed steps from this page. What’s more, it is suggested to backup your OS with Qiling Disk Master so that you can recover from serious system errors. Besides, Qiling Disk Master enables you to clone Samsung SSD to another SSD and automatically sync folders to NAS. Try it now to discover more!
Related Articles
- Best Free Backup Software Windows 11 to Protect PC and Data
- How to Install Windows 10 from Command Prompt? (2 Methods)
- How to Factory Reset Windows 10 Computers from Boot? [3 Methods]
- Alienware Backup and Recovery in Windows 10, 8, 7 | 2 Ways
If you are looking for a way to do Alienware backup and recovery, learn more about Alienware Respawn and Qiling Disk Master below and select the way suitable for your situation.