Solved: Windows Could Not Format A Partition on Disk 0
- Error code 0x80070057: Windows could not format a partition on disk 0
- 3 Methods to fix "Windows could not format a partition on disk 0"
- Method 1. Delete the existing partitions, create a new partition, and continue with the formatting
- Method 2. Format partition with free partition software
- Method 3. Format partition using command prompt window
- Conclusion
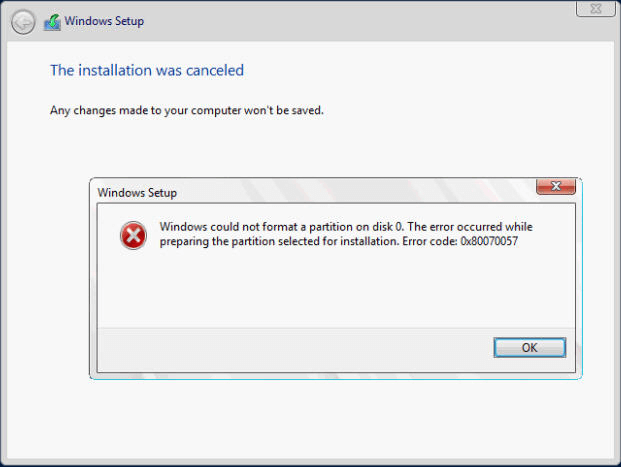
Error code 0x80070057: Windows could not format a partition on disk 0
When updating Windows to a newer version like Windows 10 or installing a new application, you might encounter the Windows error code, stating that Windows could not format a partition on disk 0. This error is often linked to storage issues and typically occurs when the partition reserved for the operating system is damaged.
3 Methods to fix "Windows could not format a partition on disk 0"
The reserved system partition is an area reserved for BitLocker encryption and Windows operating system installation. To resolve issues related to this partition, three methods are provided: [insert methods here].
Method 1. Delete the existing partitions, create a new partition, and continue with the formatting
1). Insert the Windows installation disc into your computer's CD/DVD drive. 2.
1). Insert Windows installation disc. Start the installation.
2). Then, it will show you the Windows OS logo. Here you need to enter your language and other preferences and click Next to continue.
3). Then, click Install now.
4). In this screen, click I accept the terms of license and then, click Next.
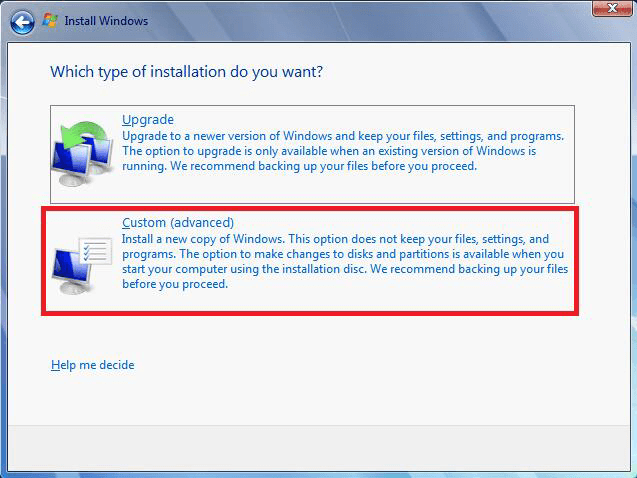
5). Click Custom (Advanced).
6). Select Disk 0 partition 1, and click Delete.
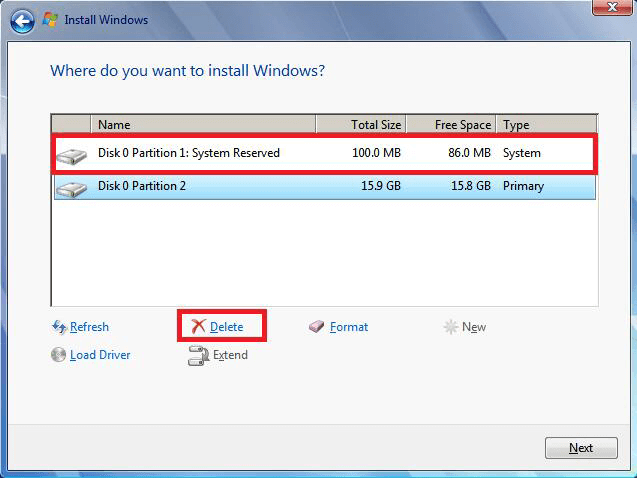
7). Click OK.
8). Delete Disk 0 partition 2 using the same steps of deleting Disk 0 partition 1.
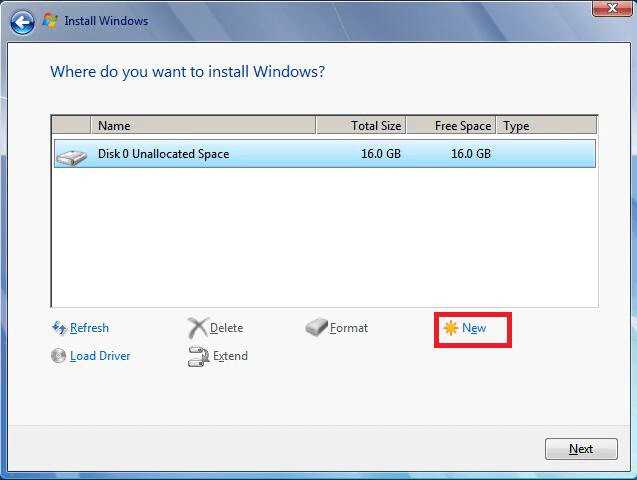
9). Then, click New to create new partition.
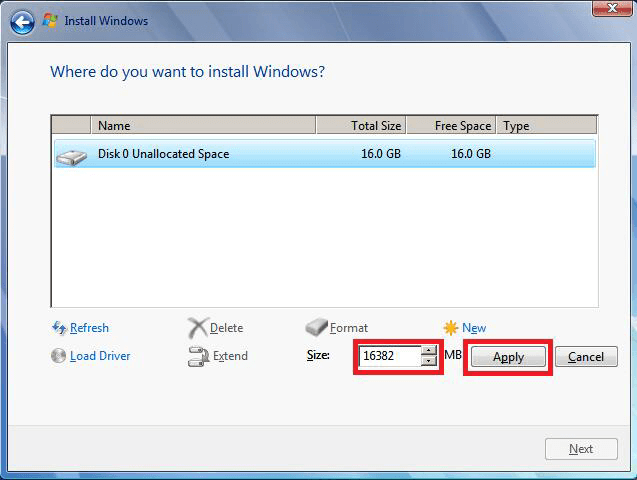
10). Define the size of the disk. Click Apply.
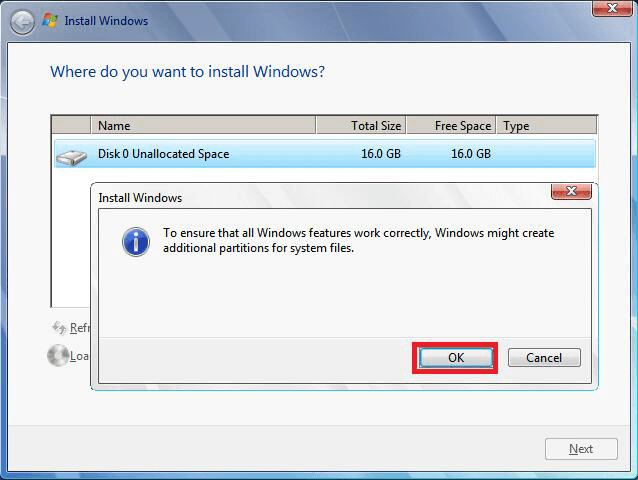
11). Click "OK" in the window that says "To ensure that all Windows features work correctly, Windows might create additional partitions for system files".
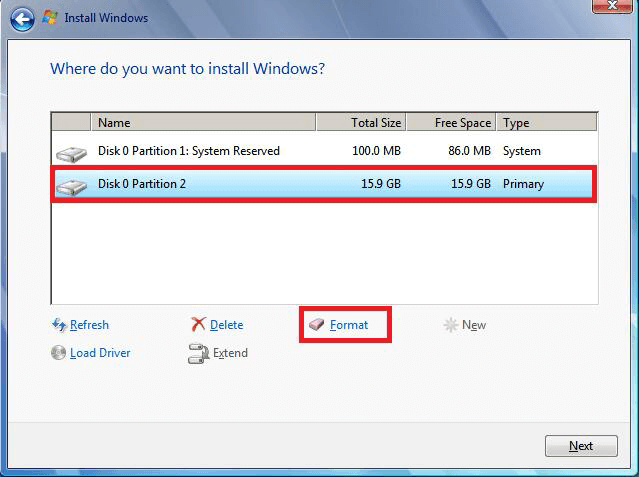
12). To format the selected disk partition, select the partition (in this case, Disk 0 partition 2) and click the Format button.
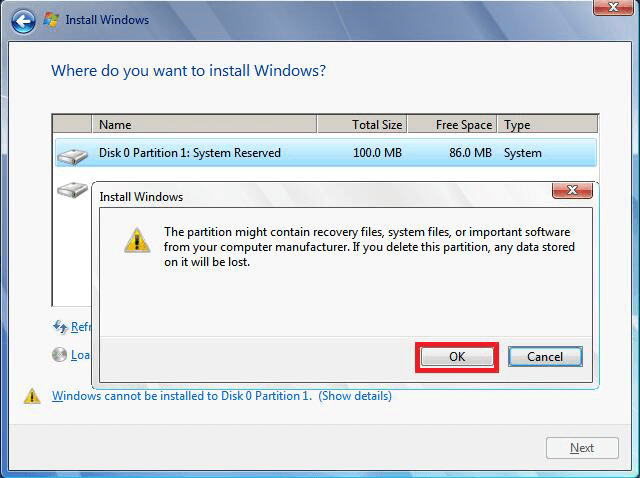
13). It will remind you that the partition might contain recovery files, system files, or important software from your computer manufacturer, and that formatting it will result in the loss of any data stored on it. Click OK.
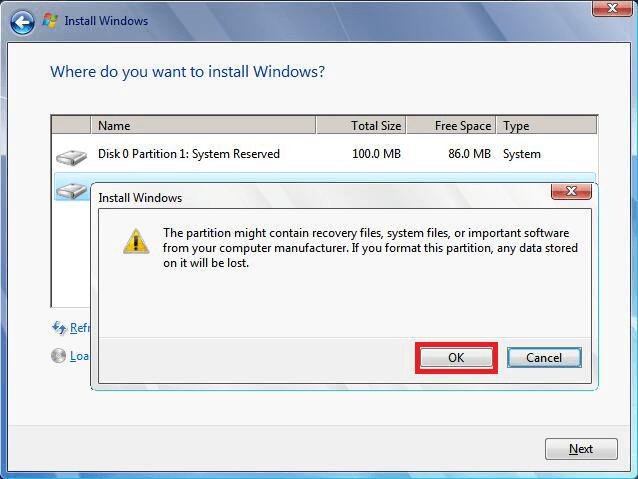
The partition on Disk 0 can be formatted completely, allowing for a clean installation without any issues.
Method 2. Format partition with free partition software
Using a Windows installation disc can help fix the error "Windows could not format a partition on Disk 0", but it requires a series of complex steps. Fortunately, an alternative and easier solution is available - using the third-party software Qiling Disk Master Standard, which allows you to create a bootable media and boot your computer from it, making it easy to solve the problem.
Preparations:
☞To prepare an empty external hard drive for creating a bootable disc with Qiling Disk Master, you can simply format the drive to FAT32 or NTFS file system, which will erase all existing data on the drive. This will make the drive ready for creating a bootable disc with Qiling Disk Master or any other software that requires a blank drive.
☞Free download Qiling Disk Master Standard.
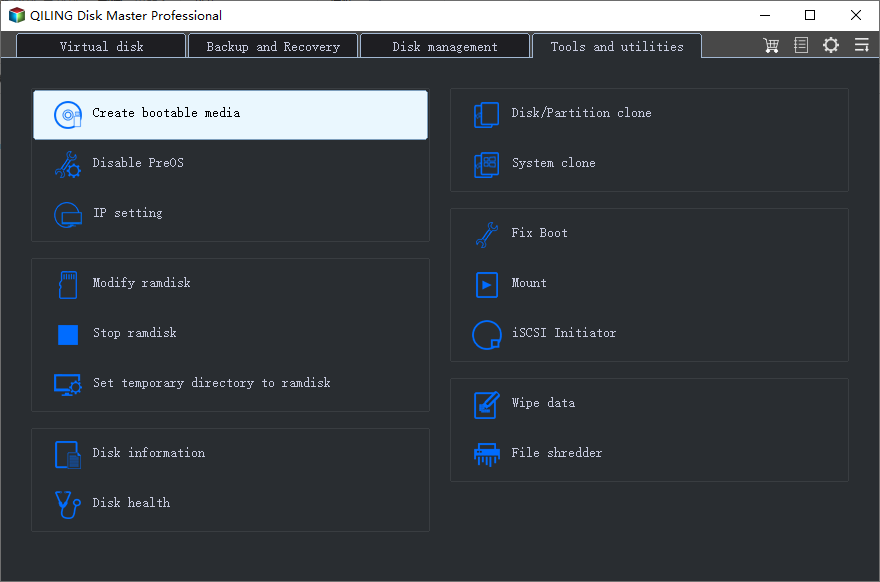
Step 1. To create a bootable disc using Qiling Disk Master Standard, connect the external hard drive to a computer with the software installed. Then, navigate to the Make Bootable Media tool, which can be found under the Tools menu. Follow the prompts to create the bootable disc.
Step 2. Insert the bootable media into the computer that needs to be reinstalled. Set the computer to boot from the bootable media in the BIOS settings. This will allow the computer to boot into Qiling Disk Master.
Step 3. On To install a Windows operating system on Qiling Disk Master, right-click the partition you're targeting and select "Format Partition" from the context menu. This will prepare the partition for the OS installation.

Step 4. Choose the proper file system.
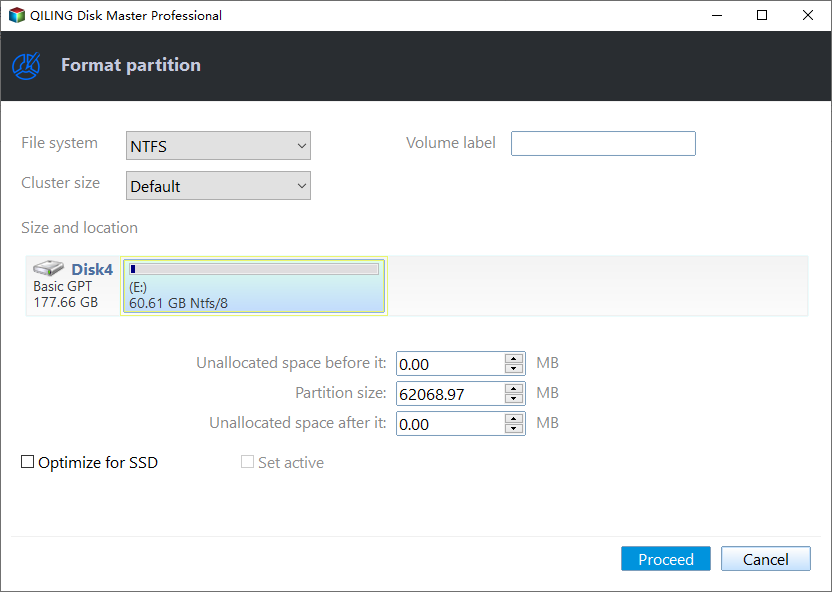
Step 5. Then, click Proceed button to submit the operation.
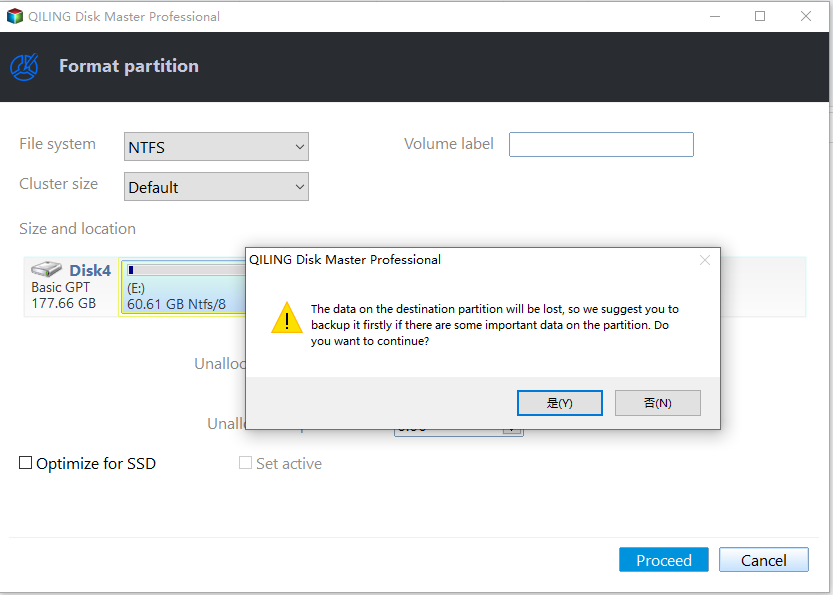
The instructions are to format the disk, exit Qiling Disk Master, disconnect the bootable media, and then reinstall Windows OS. This process should be done shortly.
Method 3. Format partition using command prompt window
You can also use the Windows command prompt to format a partition on disk 0 for reinstalling, but you will also need a Windows installation disc.
To boot the computer with a Windows 7 installation disc, start the computer and when the Windows setup screen appears, press Shift+F10 to open a Command Prompt window.
To open the diskpart command prompt with administrative privileges, type "diskpart" and execute the following commands in turn: list disk, select disk (followed by the disk number), list partition, select partition (followed by the partition number), delete partition override, and exit.
- list disk. It will display a list of disks on your computer.
- select disk [nThe command "select disk 0" is used to choose the first disk (disk 0) from the list of available disks. This command is typically used in a disk management or command prompt environment to specify which disk to work with. It's a way to tell the system which disk to operate on, and it's usually used in conjunction with other disk-related commands.
- clean to clean the disk.
- create partition primary to create new partition.
- select partition 1
- active to activate the partition on the disk.
- format fs=ntfs to do a full format into NTFS.
To finish the format, type "exit" when you are done. Then, type "exit" again to exit the command prompt.
After that, you can reinstall Windows 7 once again.
Conclusion
If you're experiencing the issue "Windows could not format a partition on Disk 0" during Windows installation, there are three methods to resolve it. Additionally, these methods can also help with other problems like creating a partition before installing Windows, extending a volume to unallocated space, and more. To access even more advanced features, such as converting MBR and GPT without deleting partitions, allocating free space between drives, and transferring an OS to an SSD, you can upgrade to the Professional version.
Related Articles
- Quick Fix: File:\EFI\Microsoft\Boot\BCD Error in Windows 7/8/10
Sometimes, you might meet the "File:\EFI\Microsoft\Boot\BCD Error code: 0xc00000f" error when booting Windows PC. In this below article, you can figure out how it comes and how to fix this error effectively.