Causes and Fixes to Windows Detected A Hard Disk Problem
The content of this article:
- Windows Detected A Hard Disk Problem Error
- Backup Your Hard Disk Immediately as Recommended
- Why Windows Has Detected a Hard Disk Problem?
- Windows Detected a Hard Disk Problem - Fix Quickly
- Ultimate Way to Fix Windows Has Detected a Hard Disk Problem
- Disable Windows Detected A Hard Disk Problem to Prevent This Prompt
- The Epilogue
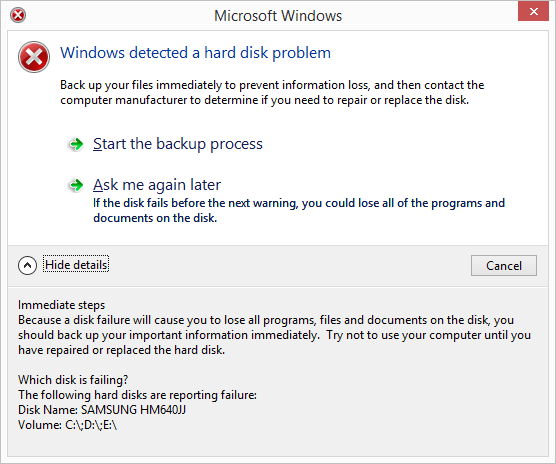
Windows Detected A Hard Disk Problem Error
Your Toshiba Satellite laptop is showing a SMART (Self-Monitoring, Analysis, and Reporting Technology) failure predicted on the hard drive, indicating potential issues with the Toshiba HDD. This could be a sign that the hard drive is nearing the end of its lifespan and may fail soon. You may want to consider backing up your data and considering a replacement or upgrade of the hard drive to prevent data loss.
I pressed F1 to continue the start-up process, and the computer loaded normally. However, shortly after, a warning message appeared stating that Windows detected a hard disk problem and advised me to backup my files immediately to prevent information loss. I'm not sure what this means or what I can do to fix it. Can you help me understand the issue and provide guidance on how to proceed?
Windows detected a hard disk problem error means that your computer is experiencing issues with its hard disk, which can cause it to take longer to load or become unresponsive. This error indicates a potential problem that may worsen over time, but it does not necessarily mean the computer is going to "die" immediately.
If you don't back up your data on the hard disk, you'll lose all programs and documents on the disk, even if the hard disk causes Windows to fail to start. Please follow the recommended steps to troubleshoot the issue based on the specific reason.
Backup Your Hard Disk Immediately as Recommended
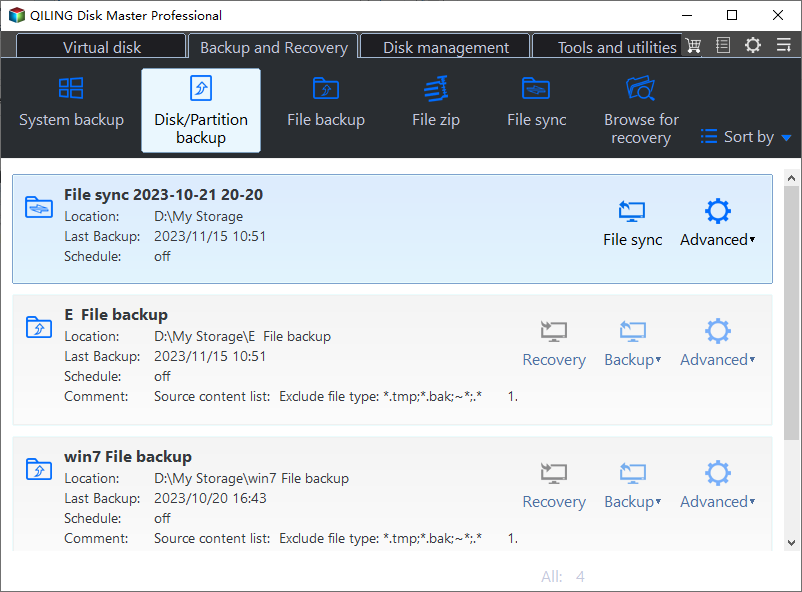
If your computer encounters a hard disk problem, it's essential to backup your data immediately. However, the Windows built-in backup software, Backup and Restore, has limitations and is not always reliable, making it a less-than-ideal solution.
It's highly recommended to use Qiling Disk Master Standard, a free backup software, to backup the entire disk. It supports Windows 11, 10, 8.1, 8, 7, Vista, XP, including 32-bit and 64-bit versions. Just download it to get started.
As a matter of fact, you have more than one way to backup your hard drive.
- To upgrade your computer's hard drive, you'll need to backup your data to an external hard drive or network drive, then install the new hard drive and restore your data from the backup. This will ensure that all your files and programs are transferred to the new drive without any loss.
- To transfer everything, including the Windows operating system, installed programs, settings, and personal files, you can clone the hard drive to another one. This process creates an exact copy of the original drive, including all data, which can then be used to boot up the computer and access all files, programs, and settings as if nothing had changed.
To create a disk image file using Qiling Disk Master, you can use either the command line or the graphical user interface. The first way is to use the command line by running the command "ql-disk-master" followed by the name of the disk image file, such as "ql-disk-master mydisk.img".
Way 1: Backup Hard Disk that Has A Problem
To resolve a hard disk problem detected by Windows, you can try backing up and restoring the data. Prepare an external disk or network drive to temporarily store the backup image. Follow these steps: [insert steps].
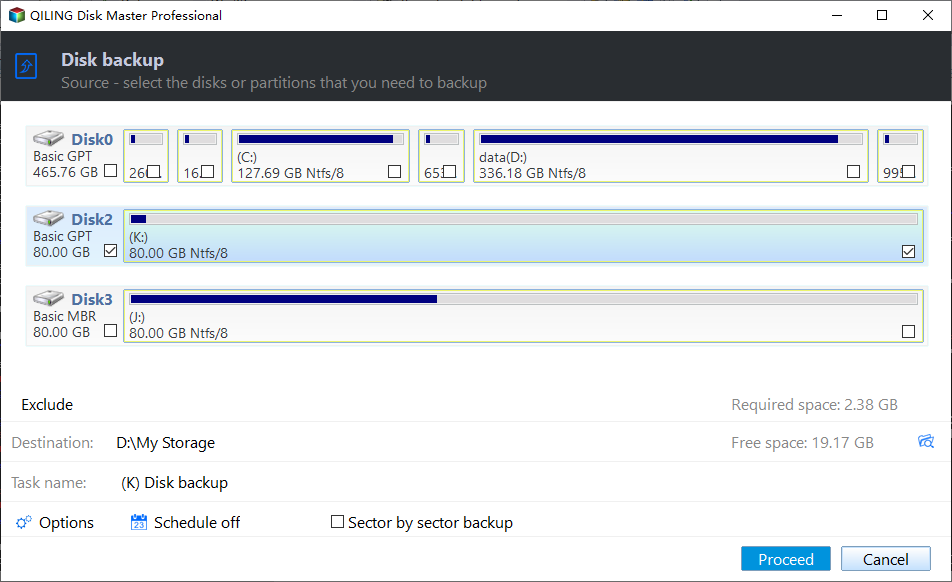
Step 1. Launch Qiling Disk Master Standard, go to Backup > Disk Backup.
Step 2. Windows detected a hard disk problem. To troubleshoot, click "Disk" to choose the affected hard disk and rename the task name if necessary.
Step 3. Select the external hard disk as the destination and press Proceed to backup the failing hard drive, which will automatically skip any bad sectors if present.
Way 2: Safely Clone Hard Disk to Another One [Advanced]
If your hard disk doesn't contain Windows, you can directly clone it to migrate data. However, if it does contain Windows, you'll need to upgrade now to enjoy the cloning features. Before starting, please install the new hard disk, taking into account your specific situation.
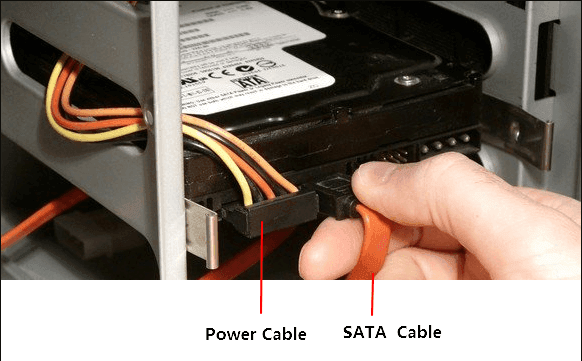
- If your computer has multiple hard drive slots, you can directly install the new hard disk using either the power cable or SATA cable.
- If there's only one hard drive bay available, consider connecting the new hard drive as an external hard disk using a hard disk enclosure. Ensure the new drive can be detected by Windows.
To clone a hard disk to another one, follow these simple steps. First, you'll need to connect both hard disks to your computer, ensuring they are recognized by the system.
1. To upgrade to Qiling Disk Master Professional, click the "Upgrade" button at the top right corner and purchase the upgrade. This will prompt a license code to be sent to you, which you can then enter in the "Register" box located under the Settings tab.
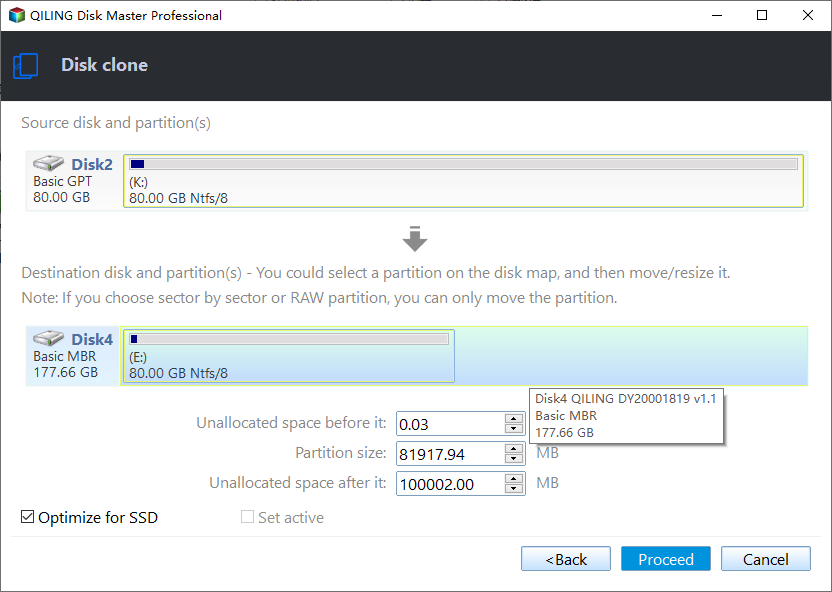
2. To continue, simply reload the software and navigate to the "Clone" tab, where you will find the "Disk Clone" option.
3. Select the hard disk that Windows detected as having a problem as the source disk, and then click Next.
4. Select the new hard disk as the destination and click Next.
5. Press Proceed to clone the hard disk to another one safely, as it only clones used sectors and skips bad ones automatically.
★ Tips:
☂ Edit Partitions This feature allows you to adjust the partition size manually or automatically to fully utilize the storage space on the destination disk when cloning to a larger disk. Additionally, it provides the capability to convert disk type from MBR to GPT or vice versa.
☂ SSD Alignment If your destination disk is an SSD, check the box to optimize the overall performance for the SSD.
☂ Sector By Sector Clone This option allows you to clone all sectors on the destination disk, requiring the destination disk to be larger than the source disk. Ticking this option will make the Edit Partitions feature invisible.
After cloning is done, restart your computer to let it boot from the new hard drive automatically. If it doesn't, replace the hard drive that Windows detected a problem with the new one and boot from it. That's it.
Why Windows Has Detected a Hard Disk Problem?
Before attempting to fix the problem, it's essential to back up your data on the hard disk showing the error. Once you've done that, you can proceed to investigate the root cause of the issue. Possible causes include physical damage to the hard disk, overheating, power surges, or software glitches. Take your time to diagnose the problem, as rushing into a fix could exacerbate the situation.
- cable issue;
- Hard disk failure;
- Registry error;
- Logical error;
- File system corruption;
- Bad sectors on hard disk;
- Virus attack;
- Human error, etc.
After learning the possible reasons behind the issue, you may have a clue about why your computer is encountering a Windows hard disk problem. Don't worry if you're still unsure, as we'll introduce you to some quick fixes to try one by one.
Windows Detected a Hard Disk Problem - Fix Quickly
Here are 3 quick fixes to Windows has detected a hard disk problem: try reconnecting the power cable and SATA cable of the hard disk, run the built-in Check Disk utility (chkdsk), or run a third-party disk check and repair tool like EaseUS DiskGenius.
Quick Fix 1. Reconnect power cable and SATA cable
1. Shut down your computer completely and take out the computer panel, leaving the disk visible. 2.
2. To resolve the issue of Windows detecting a hard disk problem, disconnect the power cable and SATA cable of the hard disk, and then reconnect them.
3. If you're experiencing issues with your computer, try replacing the RAM or updating the BIOS. If that doesn't work, try changing the SATA port, especially if there are extra ones available. After making these changes, reboot your computer and see if the problem still persists.
Quick Fix 2. Repair hard disk error with System File Checker (SFC)
1. To run the Command Prompt as an administrator in Windows, type "cmd" in the search box, right-click on "Command Prompt" in the search results, and select "Run as administrator".
2. Input the sfc /scannow command, and press Enter.
3. The system repair process will start by scanning the system and automatically repairing corrupted files. During this process, you may receive various messages indicating the progress and any issues that may arise.
- Windows Resource Protection did not find any integrity violations. The system files are complete and not damaged. (Note: This is a very short summary, if you want a longer or more detailed response, please let me know!
- Windows Resource Protection found corrupt files but was unable to fix some of them. To manually repair corrupted files, follow the detailed process outlined in the CBS.Log file located in %WinDir%\Logs\CBS\CBS.log. This will guide you through the necessary steps to resolve the issue.
4. If your computer is not experiencing any issues, try rebooting it to see if the problem persists after the reboot.
Quick Fix 3. Check Disk Error with CHKDSK
1. Press Windows + R key combination to open Run window.
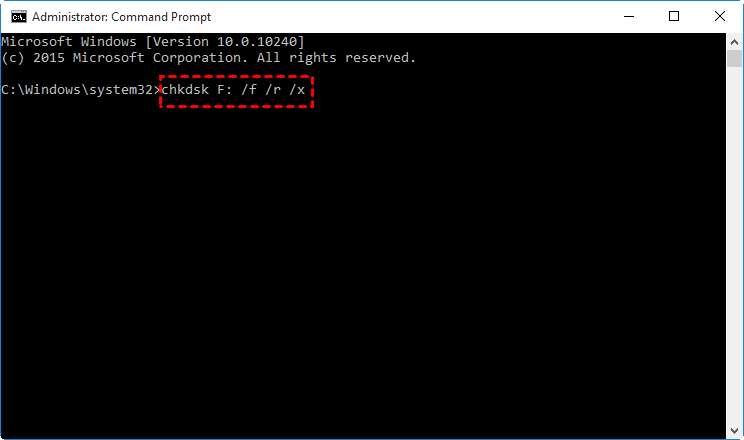
2. Type the chkdsk C: /f /r /x and press Enter.
- /f: fix any errors it finds.
- To recover readable information from a damaged drive, locate the bad sectors on the drive and focus on recovering data from areas that are still readable. This can be done using specialized software that scans the drive and identifies areas that are still accessible.
- /x: force the drive to dismount before the operation.
3. I apologize, but it seems there was a misunderstanding. You didn't provide any text for me to rewrite. If you'd like, you can share the text, and I'll be happy to assist you in rewriting it into a one-paragraph summary.
Ultimate Way to Fix Windows Has Detected a Hard Disk Problem
If the hard disk that shows the Windows detected a hard disk problem cannot be fixed quickly, the ultimate way is to replace the hard drive with a new one. This can be done in two ways: either by purchasing a new hard drive and physically replacing the old one, or by cloning the old hard drive to the new one using a cloning software, which can save time and effort.
To restore a disk image to a new hard drive and use it as the boot drive, you'll need to have a disk backup. This process involves re-imaging the old hard drive onto the new one, effectively transferring the entire system, including the operating system, applications, and data, to the new drive. This approach is useful when you're upgrading to a new hard drive, and you want to keep the same setup, including the same operating system and applications, on the new drive. It's essentially a "clone" of the old system, but on a new drive.
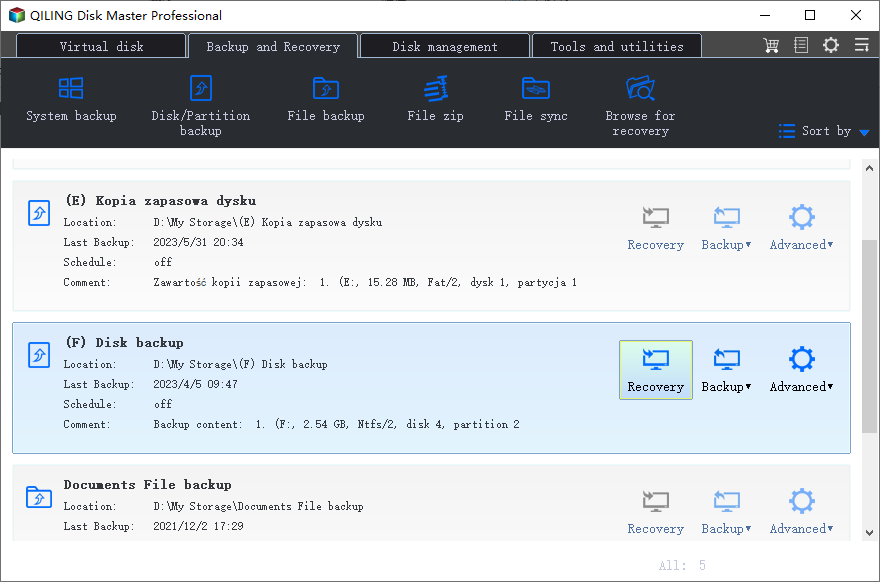
- Open Qiling Disk Master Standard, switch to the Restore tab, click Select Task and select the disk image.
- To restore a disk image, you have the option to either restore the entire disk or a specific partition. This decision depends on the goal of the restoration process.
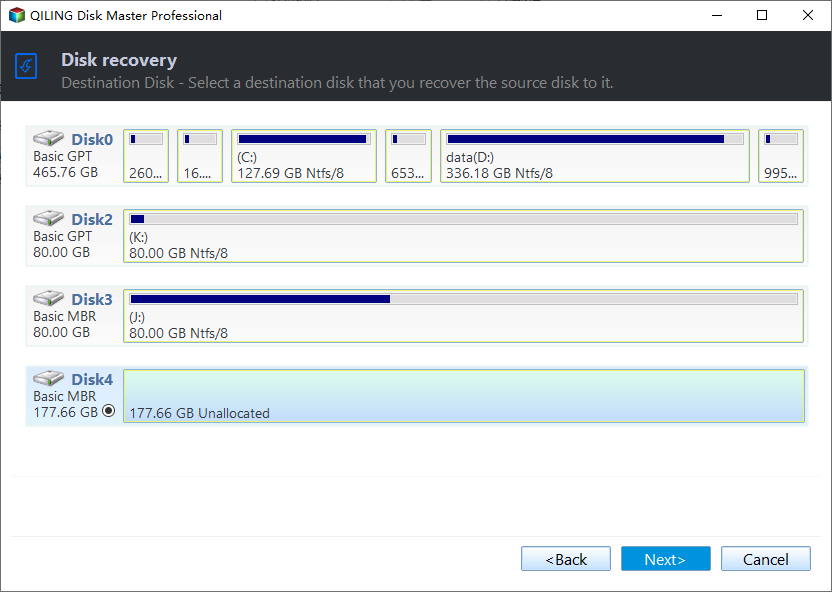
- To fix the Windows detected a hard disk problem, select a new hard drive, click Proceed to restore the disk image to the new hard drive. This will resolve the issue.
If you've cloned a hard disk and it's not working properly, you can try directly replacing the problematic disk with the cloned one and booting from it. This method is a straightforward solution to resolve the issue.
Disable Windows Detected A Hard Disk Problem to Prevent This Prompt
If you receive the "Windows detected a hard disk problem" error in Windows 11, 10, 8, or 7, but no hard disk error is found, you can choose to disable the notification. To do this, follow the steps below.
1. To access the Local Group Policy Editor, type gpedit.msc in the Windows search bar and press Enter. This will open the Local Group Policy Editor, where you can configure various settings for your Windows system.
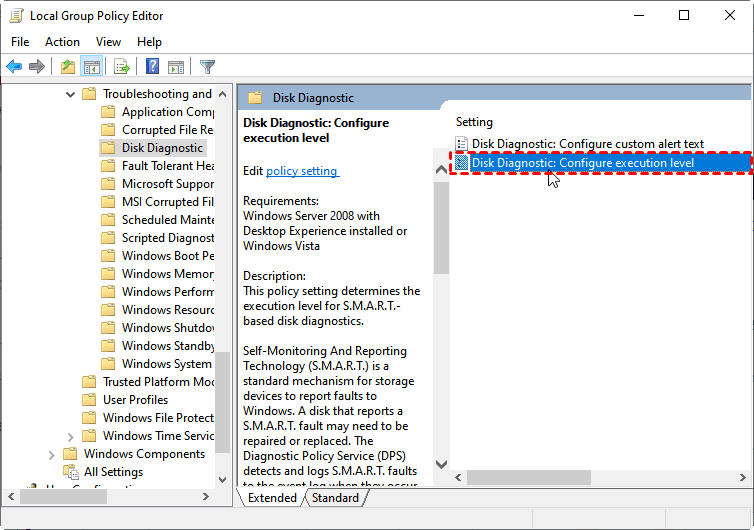
2. Expand Computer Configuration and choose Administrative Templates > System > Troubleshooting and Diagnostics > Disk Diagnostics.
3. Double click the Disk Diagnostic: Configure execution level settings.
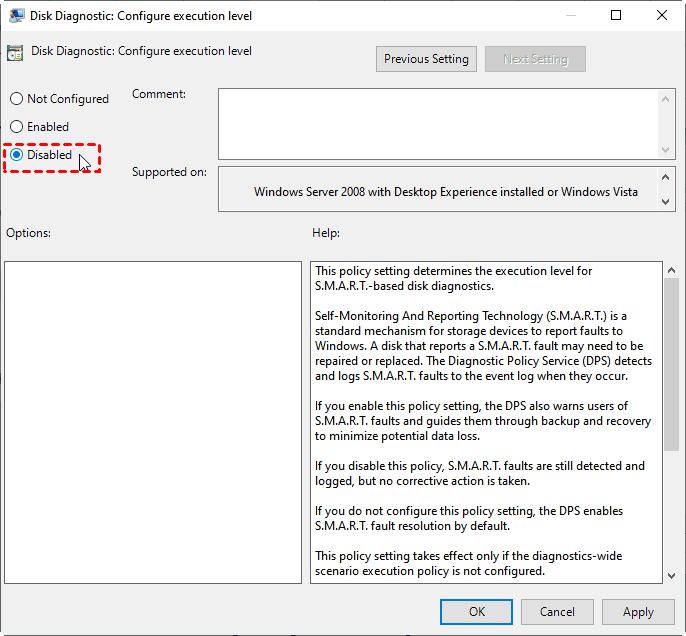
4. Tick Disable option, and click Apply and OK.
The Epilogue
To fix the Windows detected a hard disk problem error in Windows 11/10/8/7, you can consider using quick fixes or the ultimate solution. However, the best way to prevent this error without losing any data is to create a regular backup, such as daily, weekly, or monthly, to ensure your important files are safe.
In Qiling Disk Master, you can choose what to backup - entire disk, system, partition, files, or folders - and how to create an exact copy of them. You can use the backup or clone method for disk backup, or the backup or sync method for file backup. For unlimited computers or servers, consider Qiling Disk Master Technician Plus.
Related Articles
- Top 2 Ways to Fix Hard Disk Failure is Imminent in Windows 7/8/10
What does hard disk failure imminent mean? Is the drive really dying? What should I do? Do I need a new disk at this point? Scroll down to get clear ideas and minimize your data loss. - Fix SMART Failure Predicted on Hard Disk 0, 2 or 4 Error
Learn how to fix SMART failure predicted on hard disk 0, 2 or 4 error in Windows 7, 8 and 10. Although SMART failure predicted is not an actual failure, you have to pay attention to. - How to Solve Hard Disk Error 301 Efficiently? (4+1 Fixes)
Have you encountered hard disk 301 error in your HP computer? Find quick fixes to the error from this page. - Clone Failing Hard Drive to Prevent Data Loss
In this essay, we will walk you through how to clone a failing hard drive in Windows 11, 10, 8, 7 and transfer data without effortless with best disk cloning software - Qiling Disk Master.
