How to Create Windows Recovery Environment USB | 2 Ways
Quick Navigation:
- Why do you need Windows Recovery Environment USB?
- How to use Windows Recovery Environment USB in Windows 10
- An easier way to create Windows recovery USB
- Wrapping things up
Why do you need Windows Recovery Environment USB?
Windows Recovery Environment (WinRE) is a recovery tool that can fix common reasons for an unbootable Windows operating system, automatically loading advanced startup options on the third consecutive restart if Windows fails to start normally twice in a row.
If Windows can't automatically bring up the recovery options, a Windows Recovery Environment USB is necessary. This USB allows you to access and run the recovery options, such as System Restore, System Image Recovery, and Automatic Repair, among others. It provides a way to troubleshoot and fix issues with your Windows installation, including boot problems, driver issues, and more.
- Install or reinstall Windows.
- Use the built-in Windows tools such as Startup Repair, System Restore, and Safe Mode to recover from a serious error and restore your system to a previous working state.
To use the Windows recovery USB, insert the USB drive into a working computer, then boot from it. You'll see the Windows Recovery Environment (WinRE) menu. From there, you can choose to start the Windows Setup process, which will reinstall Windows, or access advanced options like System Restore, Command Prompt, or Startup Repair.
How to use Windows Recovery Environment USB in Windows 10
First, you should create a Windows 10 repair USB. This will allow you to reinstall or recover Windows 10.
Create Windows 10 repair USB
Fortunately, Windows 10 has a built-in feature to create a Windows Recovery Environment USB, but keep in mind that the USB drive will be overwritten during the process, so backup files on the USB drive before you start. To proceed, follow the instructions.
1. Connect a USB drive to your computer, then type "recovery drive" in the search box and select "Create a recovery drive" from the results.
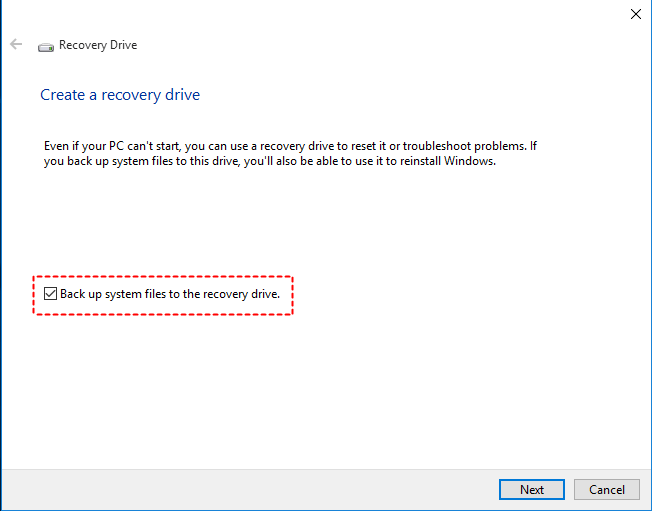
2. In the pop-out window, select the option "Back up system files to the recovery drive" and click "Next".
Note: When you're unable to fix your computer using other recovery tools, the "Back up system files to the recovery drive" option lets you reinstall Windows 10.
3. Connect your USB flash drive to your computer, and then select it in the list of connected devices. Click the "Next" button to proceed with the installation process.
Tips: The USB drive should be at least 8 GB in size to match the capacity shown in the prompt.
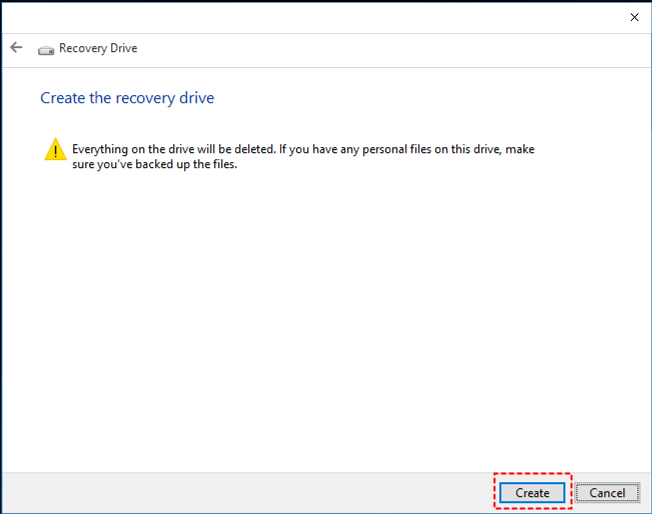
4. Click the "Create" button to start creating the recovery drive.
5. Once the recovery drive is ready, click Finish and safely disconnect your USB drive.
Note: If you're running Windows 7, learn how to create a Windows 7 recovery environment USB to have a backup and recovery option in case your system encounters issues.
Recover from Windows 10 recovery USB
When a serious error occurs, you can reinstall or recover Windows 10 from the recovery drive. To do this, you'll need to boot from the recovery drive and follow the prompts to reinstall Windows 10. This will remove all files and apps, so make sure to back up any important files before proceeding. Alternatively, you can recover Windows 10 from the recovery drive, which will restore the operating system to its previous state without removing any files or apps. This is a good option if you're experiencing issues with your current installation and want to go back to a previous version.
1. To create a Windows 10 recovery USB, follow these steps: 1. Insert the USB drive into your computer.
2. Choose your keyboard layout.
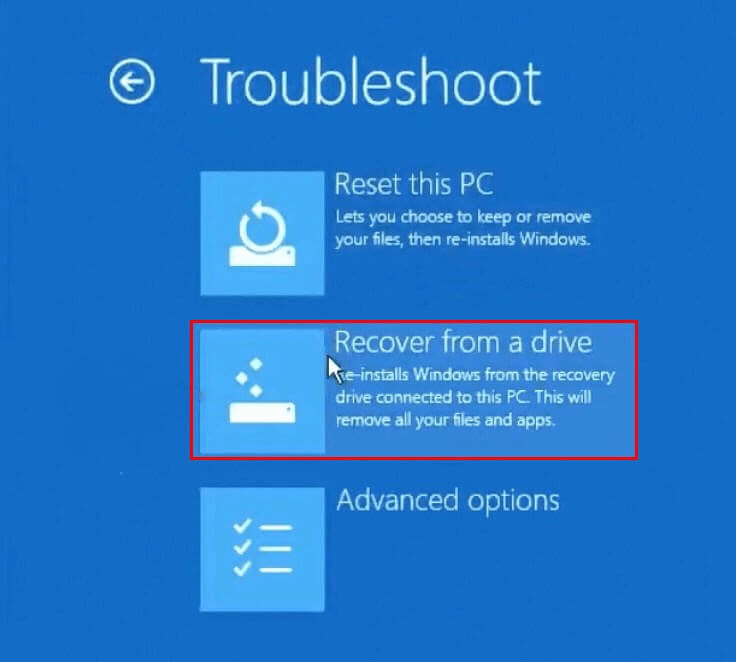
3. To resolve the issue, follow the steps to recover from a drive successively. This will initiate the process of preparing things.
Tips: If you didn't check "Back up system files to the recovery drive" when creating your recovery drive, the options "Reset this PC" and "Recover from a drive" will not be available.
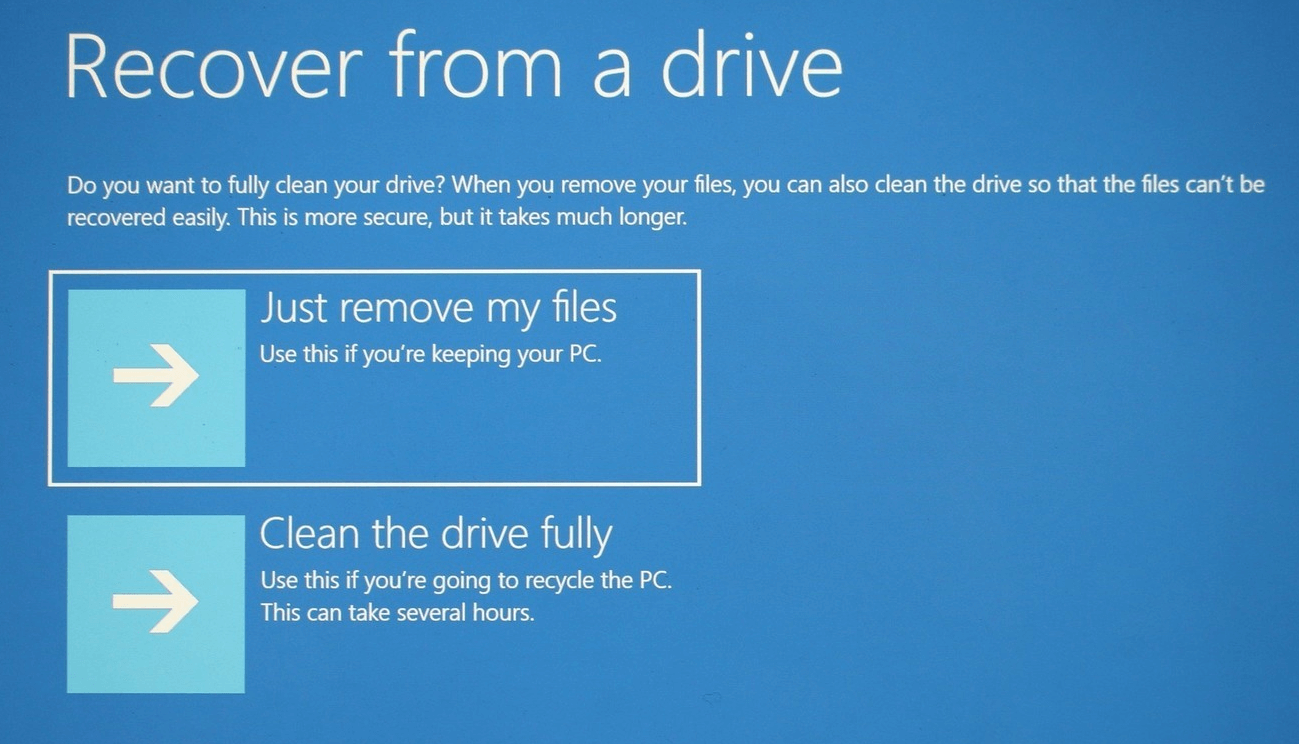
4. Click on either "Just remove my files" or "Clean the drive fully" to choose how you want to clean your drive.
Tips: The first option is quicker, while the second option is more secure.
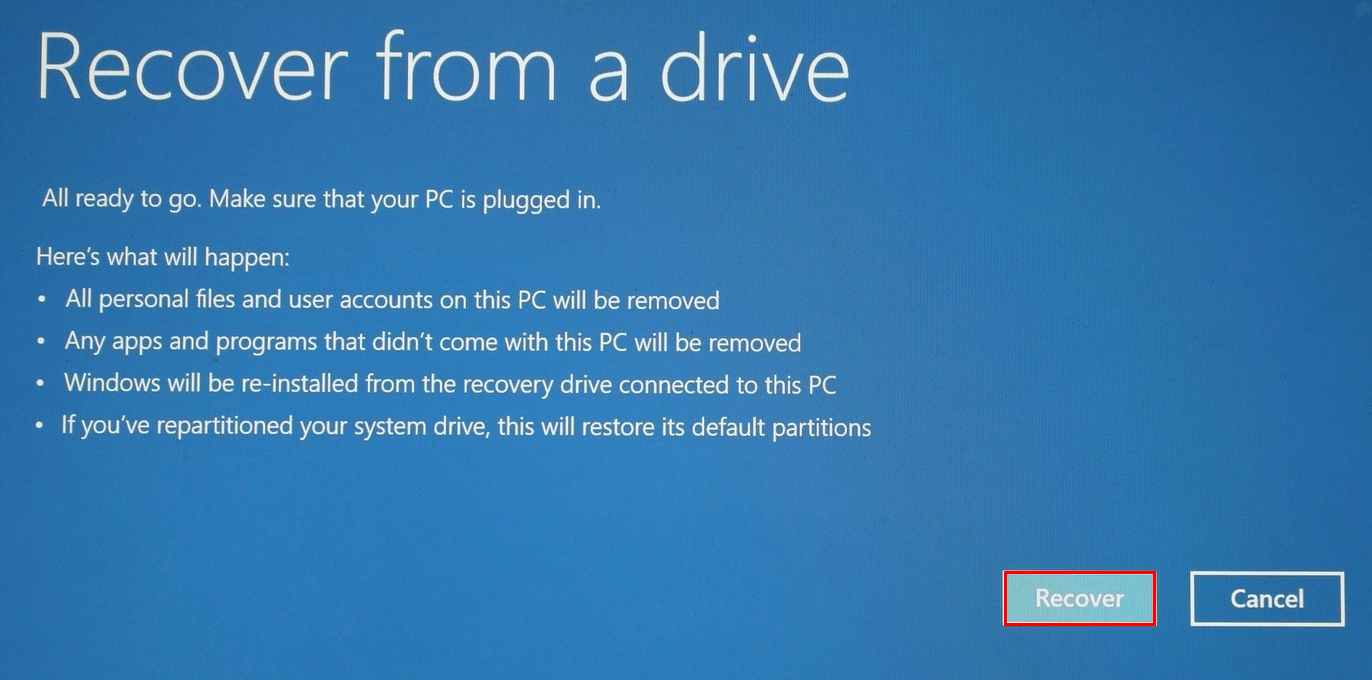
5. Click on Recover to begin the recovery process, which may take some time and require your PC to restart a few times.
6. When finished, setup Windows 10 from scratch.
Note: You can recover Windows 10 instead of reinstalling it by going to Troubleshoot > Advanced options in Step 3 and using the recovery options available there.
An easier way to create Windows recovery USB
In addition to Windows built-You can create a Windows recovery USB using Qiling Disk Master Standard, a freeware that allows you to make a bootable USB drive in all Windows PC operating systems, including Windows 11/10/8.1/8/7/Vista/XP.
You can create a Windows Recovery Environment USB via Qiling Disk Master using either a Linux boot disc or a Windows PE boot disc. Additionally, you can also use CDs as bootable media. To do this, follow the steps below:
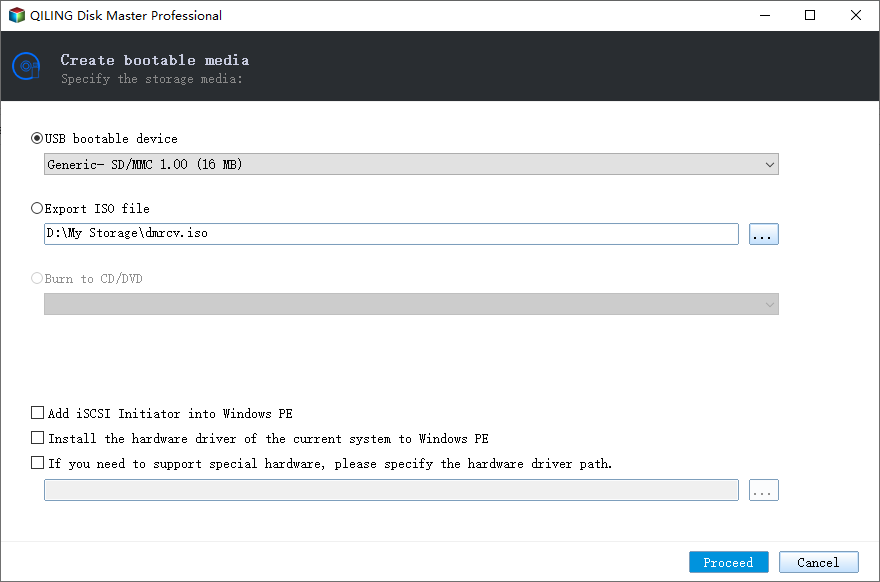
Step 1. Connect a USB drive to your computer, download, install and launch Qiling Disk Master, then click "Tools" and select "Create Bootable Media".
Step 2. To create a bootable USB drive, select the "USB Boot Device" option and click "Proceed". You will then be prompted to format your USB drive, so click "Yes" to proceed.
Note: Regular system backups are essential for ensuring that you can restore your system from a Windows recovery USB in the event of serious problems. This is a crucial step in maintaining system integrity and preventing potential data loss.
Wrapping things up
This guide covers the Windows Recovery Environment USB, including its usage, creation, and recovery process. Qiling Disk Master Standard can create bootable USB drives on all Windows PC operating systems, and for Server 2019, 2016, or 2012, Qiling Disk Master Server is recommended.
Related Articles
- Create Windows 10 Recovery Disk for System Repair or Reset
- Restore Windows 10 from Recovery USB (4 Ways included)
- 3 Ways to Fix Windows Could Not Find Recovery Environment
- How to Make Partition Bootable in Windows 7 Effortlessly
To start a system normally, you should first make the relevant partition bootable. This article provides three methods to make partition bootable in Windows 7.
