How to Perform Windows Scheduled Disk Defragmentation?
Why run Windows scheduled disk defragmentation?
Computers can become slow due to old hardware issues, viruses, outdated drivers, or file fragmentation, which can negatively impact work efficiency and gaming experience.
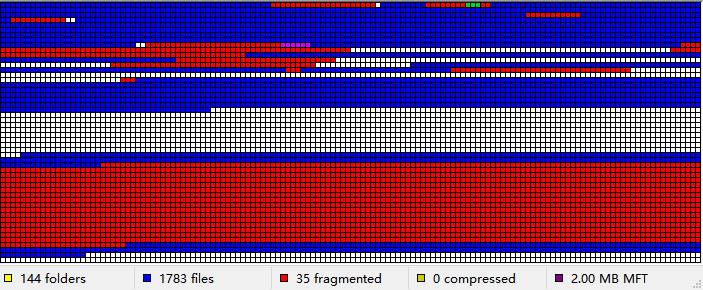
On a PC, files become fragmented over time, spreading across the hard drive and making them harder to access, leading to a slower computer.
Defragmentation is a process that reorganizes files on a hard drive by putting their segments back together, making them easier to find. It's recommended to run Windows scheduled disk defragmentation on a regular basis, daily, weekly, or monthly, to keep the hard drive optimized.
How to set up disk defragmenter schedule in Windows 10?
To schedule disk defragmentation in Windows, you can use the built-in Windows 10 Defraggler tool or a third-party utility with more options. For Defraggler, follow these steps: open the tool, select the drive you want to defragment, and click on the "Schedule" button. You can then choose the frequency and time of the defragmentation. Alternatively, you can use a third-party tool like Auslogics Disk Defrag, which offers more options for auto-defrag and can be set to run at specific times or intervals. Both methods allow you to optimize your hard drives with minimal effort and maintenance.
Method 1. Use Windows built-in defraggler
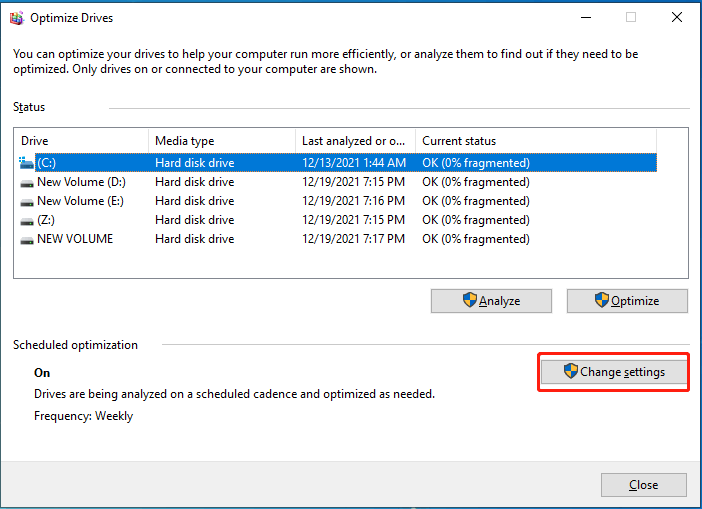
The Windows 10 built-In Defraggler, you can preset the frequency of disk defragmentation to occur daily, weekly, or monthly. To set this up, you can follow the steps below.
1. The built-in Disk Defragmenter tool in Windows allows you to defragment your hard drive, which can improve system performance. To access it, type "defrag" in the search bar on the lower left of the desktop.
2. Under "Best match", choose "Defragment and Optimize Drives".
3. To change the settings in the "Optimize Drives" window, select the drive you want to change settings for, and click on the "Change settings" option. This will open the "Optimize Drives" settings window where you can adjust the settings as needed.
4. To set up a defragmentation schedule, select the "Run a schedule" option, then choose the frequency for defragmentation and select the drives to defragment by clicking on "Choose". Finally, click "OK" to save the changes.
Method 2. Try a third-party disk defrag utility
Windows scheduled disk defragmentation is a good program to some extent, but it lacks options for auto-defrag. A more full-featured software utility, Qiling Disk Master Professional, is recommended to schedule defrag for hard drives more efficiently and conveniently. This software allows setting daily, weekly, monthly defrag, and deciding at which clock, on what conditions, and whether at startup or logon to defrag. Additionally, it is a functional disk manager that can perform various operations including OS migration, SSD secure erase, and disk format.
To set up a disk defragmenter schedule in Windows 10, follow these steps: Open the Start menu and search for "Defragment and Optimize Drives." Click on the result to open the Disk Defragmenter tool. Click on the "Optimize" button next to the drive you want to defragment.
Step 1. Install and launch Qiling Disk Master Professional. On the home interface, right-click the disk and choose "Disk Defrag".
Step 2. In the "Disk Defrag" window, hit "Schedule".
Step 3. You can optimize a drive by selecting it and choosing a defragmentation schedule, such as daily, weekly, or monthly, and optionally setting conditions for when to defragment.
Besides presetting how often to defrag, you can also determine whether to defrag at startup or at logon.
Optional reading: should I defrag SSDs?
Unlike HDDs, SSDs don't need to be defragmented because they can read scattered data as quickly as adjacent data, and defragmenting them can cause unnecessary wear and tear, reducing their lifespan.
Conclusion
To activate Windows scheduled disk defragmentation, you can use the built-in defraggler program or a third-party utility like Qiling Disk Master Professional, which offers a more flexible and optional way to schedule disk defragmentation for your Windows system.
Related Articles
- Easily Clone Raspberry Pi SD Card to Larger Card in Windows 10
How to clone Raspberry Pi SD card to larger card or smaller card in Windows 10 easily, as a backup or for card replacement? Get the stepwise guide here now! - Samsung PC Auto Backup -Wireless Photo Transfer
This article illustrates the Samsung PC Auto Backup Programs and how to use it step by step (with screenshot). Other PC auto backup software is included. - How to Perform Windows 7 Disk Defrag Command Line?
If you want to speed up computer, disk defrag is your first choice. In this tutorial, I will show how to perform Windows 7 disk defrag command line step by step. - How to Add Drive to RAID Without Losing Data?
This is a tutorial on how to use Qiling Disk Master Server to add drives to RAID. It can help improve computer performance and data security.


