Securely Wipe Hard Drive from BIOS and Reinstall Windows
- Can you wipe hard drive from BIOS?
- Why need to wipe hard drive from boot?
- Wipe Hard drive from BIOS using installation disc
- Method 1: Wipe hard drive from boot
- Method 2: Format during Windows installation
- Method 3: Format hard drive using DiskPart
- Wipe hard drive from BIOS using Qiling Disk Master
- Wrapping things up
Content of this article:
- Can you wipe hard drive from BIOS?
- Why need to wipe hard drive from boot?
- You can wipe a hard drive from the BIOS using an installation disc, and there are three methods to do so. The first method involves creating a bootable installation disc, entering the BIOS settings, and selecting the disc as the boot device.
- Wipe hard drive from BIOS using Qiling Disk Master
- Wrapping things up
Can you wipe hard drive from BIOS?
Searching online for how to wipe a hard drive from the BIOS, you'll likely come across many users seeking steps to perform this operation. However, the answer is no, the BIOS does not have the capability to wipe a hard drive.
The BIOS (Basic Input/Output System) is a crucial component that ensures hardware components, such as the CPU, graphics card, RAM, and hard drives, are functioning properly on startup. It's stored on an erasable, programmable, read-only chip, allowing for easy updates and maintenance. This enables the system to boot up correctly and run smoothly, making BIOS an essential part of the computer's overall performance.
If it's not the BIOS, the operating system allows you to format a hard drive, but the current system drive can't be formatted. If the computer isn't working properly, you can still change BIOS settings and format the hard drive from boot or during installation.
Why need to wipe hard drive from boot?
You need to wipe hard drive from boot to reinstall Windows or clean install Windows because formatting the system partition (usually C: drive) cannot be executed within Windows.
If the bootable partition is damaged, the computer won't be able to boot up, and the start-up sequence will need to be re-created by reformatting and re-making the partition. This process cannot be done while the operating system is in use.
Your computer may encounter a startup error, such as a problem loop, requiring you to wipe the hard drive and disk data from boot.
Wipe Hard drive from BIOS using installation disc
To wipe a hard drive using an installation disc, you may need to use the media creation tool, especially if your computer doesn't come with a disc. This tool allows you to create a bootable USB or CD/DVD with at least 8GB of space.
To wipe a hard drive, you can consider the following methods and their steps, selecting the one that best suits your situation. You can use a computer operating system's built-in disk wiping tool, such as Windows' Disk Cleanup or macOS's Disk Utility, to securely erase data.
Method 1: Wipe hard drive from boot
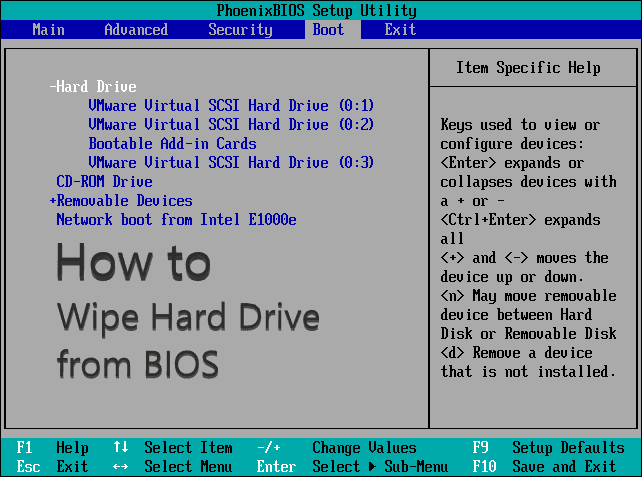
Step 1. To start the installation process, completely shut down your computer and connect the installation media. Restart your computer and, at the initial screen, press the prompted key(s) to access the BIOS. From there, set the installation media as the first boot option.
Step 2. Restart your computer and you will be asked if you want to boot from disk, please select this option.
Step 3. Select the drive you want to wipe and delete any and all partitions on it.
Step 4. Select the unallocated space and create a new partition with it, and format it with NTFS or FAT if prompted.
Step 5. Once the formatting process is complete, you can reinstall Windows 10 or a previous version of Windows, sell it as a second-hand storage device, or use it as a second storage device.
Method 2: Format during Windows installation
Step 1. Connect installation media and set boot priority for it in BIOS.
Step 2. Restart your computer and go to the Windows installation screen. Keep the default settings and click Next.
Step 3. Click Install Now.
Step 4. You can skip entering the product key if you're installing the same version of Windows. The operating system will automatically activate when your computer connects to the network.
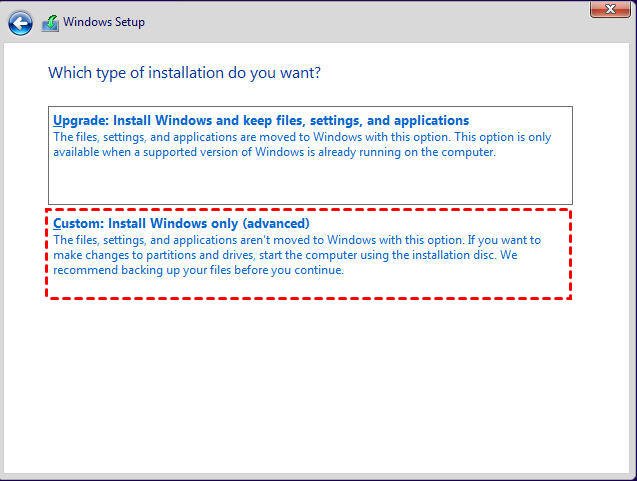
Step 5. Select the installation you want, Custom: Install Windows only (advanced) installation.
Step 6. Then, you will see several options including Format, just select the system partition and click Format.
Step 7. Click OK to confirm you want to wipe system partition and wait for the final result.
Method 3: Format hard drive using DiskPart
Step 1. Go to the Windows installation screen, click Next and then Repair your computer.
Step 2. Select Troubleshoot > Advanced options > Command Prompt to open the command prompt windows.
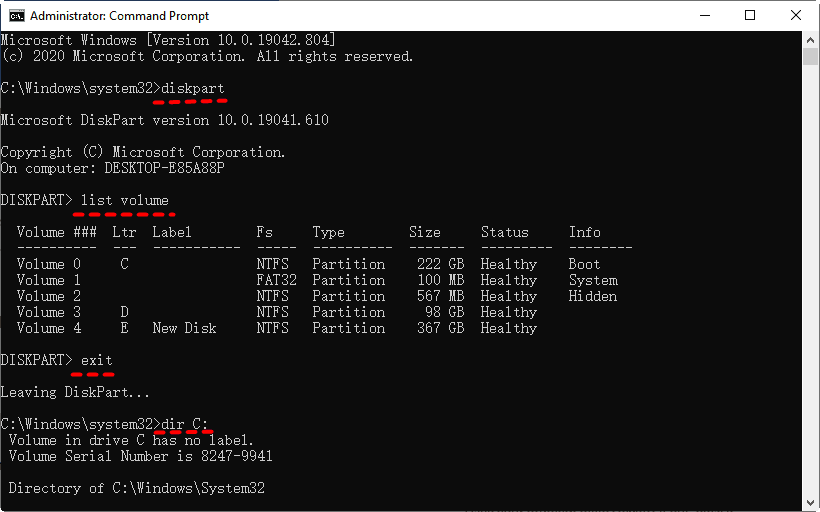
Step 3. Type the following commands and press Enter in order.
- diskpart
- list volume(to list all the existing volumes)
- Exit(to exit diskpart.exe)
- Dir C:You can use the following command to list the directory of volumes and find out the system partition: `df -h` or `df -TH`. This command will display a list of all mounted volumes, including their total, used, and available space, as well as the percentage of used space. The system partition is usually denoted by the "/" or "root" directory, which is typically denoted by a single "/" symbol.
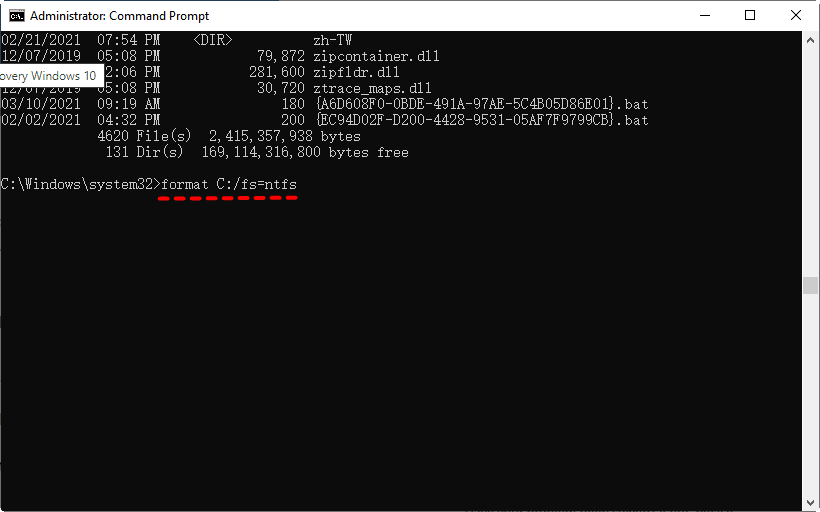
- Format C: /fs=ntfs The system partition you have found is likely C:, but be aware that the drive letter may change in the BIOS settings.
Notes:
If the hard drive you want to wipe has a volume label, you will be asked to type it in later, just do as instructed. You can find the volume label by running the command "list volume" in the diskpart.exe tool.
NTFS provides better stability and higher security compared to FAT32 or FAT file systems.
Step 4. Type Y to confirm you want to wipe hard drive and disk data completely.
Step 5. Wait until the process ends. Format other partitions on the disk using the same steps above.
Wipe hard drive from BIOS using Qiling Disk Master
You can't erase a hard drive directly from the BIOS or with a third-party tool. Instead, you need to create a bootable USB or CD/DVD using a tool like Qiling Disk Master Professional, which can wipe the hard drive and create bootable media in one step.
The wiping process will erase all data, which cannot be recovered, so it's recommended to backup files beforehand.
To wipe hard drive and disk data from BIOS, download the software Qiling Disk Master Professional and prepare the necessary items. Then, follow the stepwise guide below using Qiling Disk Master to complete the process.
Step 1. Connect the bootable USB or CD/DVD and set boot priority for it in the BIOS.
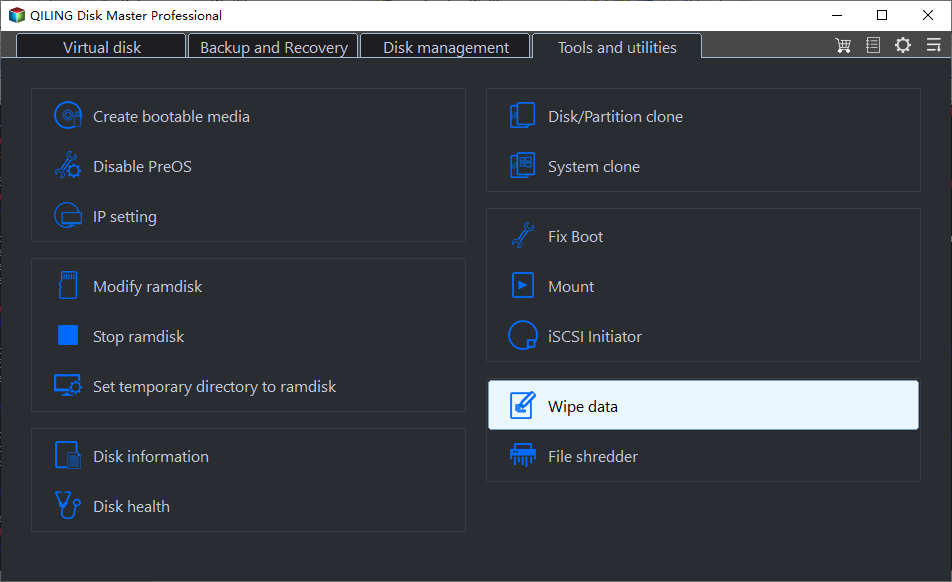
Step 2. To erase the bootable hard drive, restart your computer and go to the main page of Qiling Disk Master. From there, click on "Tools" and then select "Disk Wipe" to open the bootable hard drive eraser software.
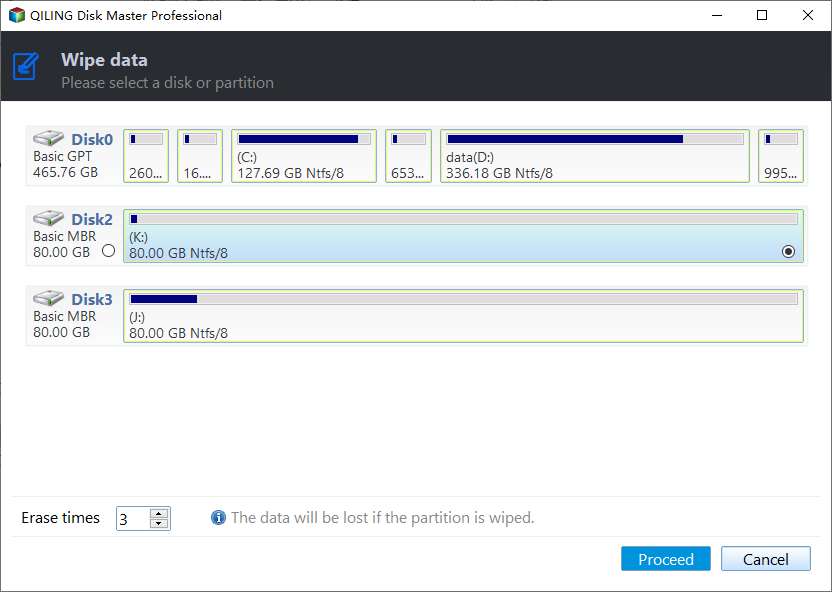
Step 3. Select the disk you want to wipe and click Next.
Step 4. In the wiping method window, select "erase times with one" (default is DoD 52220.22-M) and click "Proceed" to thoroughly erase data, although recovery is still possible. For added safety, consider using fill sectors with random data, DoD 52220.22-M, or Gutmann wiping methods.
The software Disk Wipe can be used to completely erase data from a device. It can be used to wipe a hard drive, solid-state drive, or other storage devices. The software can also be used to wipe individual files or folders.
Wrapping things up
In theory, it's not possible to wipe a hard drive from the BIOS, but you can bypass the hard drive with an operating system installed by using installation media or a bootable device, then erase the disk and data.
The easiest method to zero out a hard drive is using Qiling Disk Master, which offers various features such as system backup, disk backup, schedule backup, daily incremental backup, disk clone, and PXE boot tool.
Related Articles
- Perform Bootable Disk Wipe with Two Easy Ways
- 2 Free WD Zero Fill Utilities for Windows 10/8/7 | Try It Now!
- 4 Ways to Clean a Hard Drive in Windows 10 (Wipe or Cleanup)
- How to Wipe a USB Drive Completely | 3 Methods Included
- Wipe Seagate External Hard Drive Safely on Windows 10/8/7
