Backup Active Directory on Server 2019 – Learn Top 2 Ways Here
Importance to backup Active Directory 2019
Active Directory is one of the most important components in any Windows network. When AD crashes, everything comes to a halt. Having no protection or backup strategy whatsoever could put the entire organization in danger.
This article will walk you through the Active Directory backup best practices with details. Once with a backup in hand, you can restore your Server 2019 AD in case of a failure, Windows Server 2019 task scheduler not working, for example. Now, let's get started.
Active Directory backup best practices – 2 ways
How to enable Windows Server 2019 Active Directory backup? This part will present 2 easy ways to meet your demands. Hope one of them can help you solve your problem.
- Way 1. Backup Windows Server 2019 AD via Windows Server Backup
- Way 2. Backup Windows Server 2019 AD via Qiling Disk Master Server
Way 1. Backup Windows Server 2019 AD via Windows Server Backup
Windows Server Backup (WSB) is the built-in backup and recovery tool for Windows Server environments. It begins with Windows Server 2008 as the replacement of NTBackup. You can use Windows Server Backup to back up a full server (all volumes), selected volumes, or the system state.
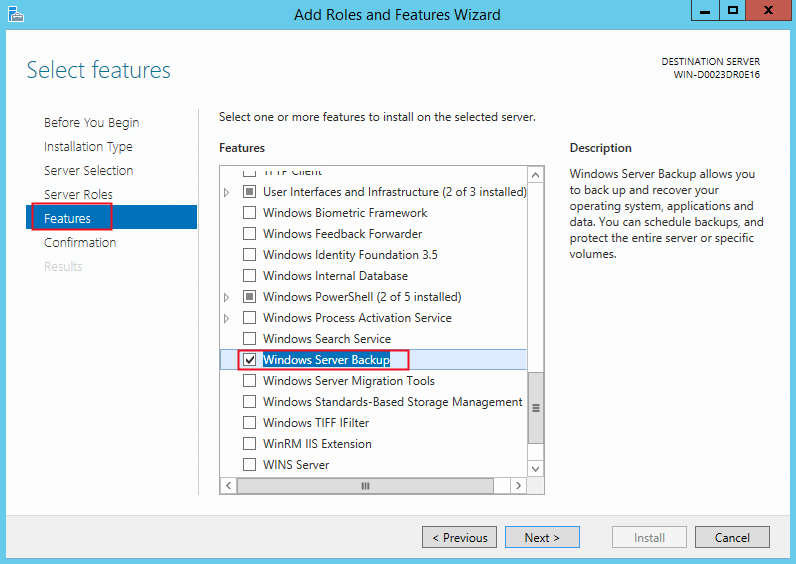
1. The Windows Server Backup is not installed by default, so you need to install it on your selected computer with the steps: Go to Server Manager -> Dashboard -> Manage -> Add Roles and Features, and then follow the wizards to install.
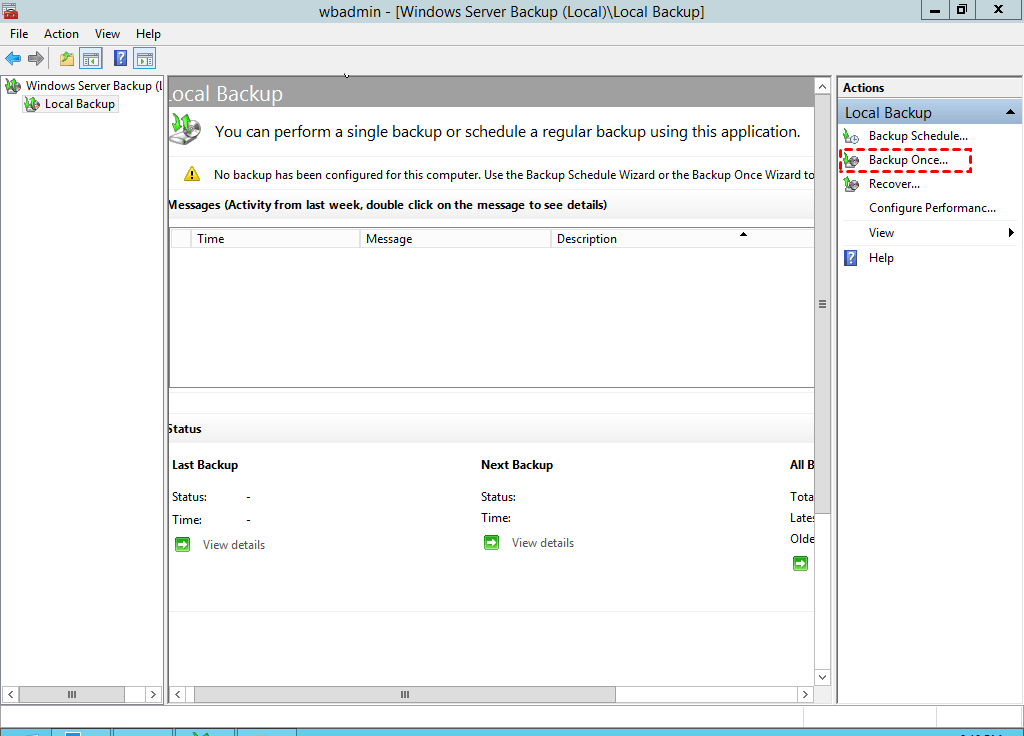
2. Then you can backup your Server. Go to Server Manager > Tools > Windows Server Backup, right-click Backup Once under the Local Backup tab.
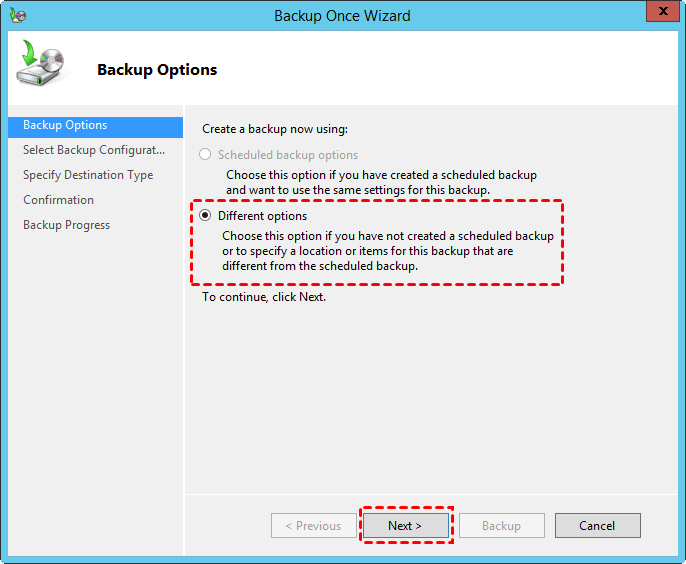
3. Choose the backup options: Different options, and hit Next.
4. Select the Custom type to choose the data you want to create image backup for Windows Server.
5. And then click Add Items, choose System state to create system image backup for Windows Server 2019.
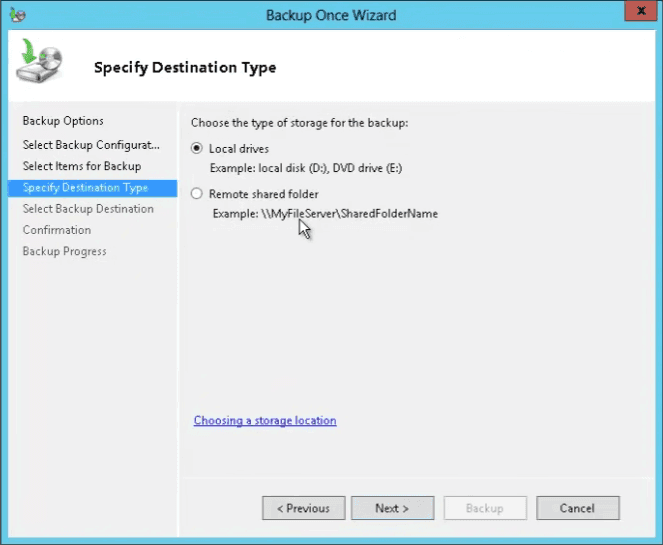
6. Now choose a backup destination: select Local drives, and press Next.
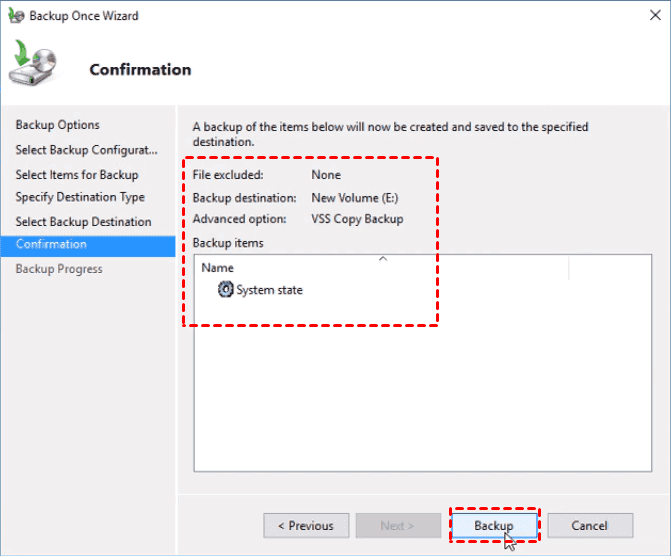
7. Preview the settings and click Backup to backup Windows Server.
Since Windows Server Backup has many restrictions and the operation is quite complicated, it's suggested to try other excellent Windows server backup software - Qiling Disk Master Server. Just keep reading to gain more details.
Way 2. Backup Windows Server 2019 AD via Qiling Disk Master Server
Due to the limitation of Windows Server Backup, you can try a third-party backup software. Qiling Disk Master Server, specialized backup software for server, can be the best Windows Server Backup alternative. It is embedded with multiple backup features to meet all your demands concerning Server backups.
✚ You can choose any files, folders, partitions, disks, or system as backup source, and backup them to any locations, like local disk, external hard disk, USB flash drive, CD/DVD, Network share or NAS, even clouds, etc.
✚ Unlike Windows Server Backup, Qiling Disk Master allows you to schedule daily/weekly/monthly/Event triggers/USB plug in backup task followed by full/differential/incremental backup.
✚ Provide other useful tools like Create Bootable Media (helping you create Windows Server 2019 bootable USB) and Qiling PXE Boot Tool (booting multiple computers from network).
✚ It supports both Windows PC operating systems (Windows 11/10/8.1/8/7/Vista/XP) and Windows Server operating systems (Windows Server 2022/2019/2016/2012/2008/2003, etc.)
Just click the button below to download Qiling Disk Master Server 30-day free trial to have a try.
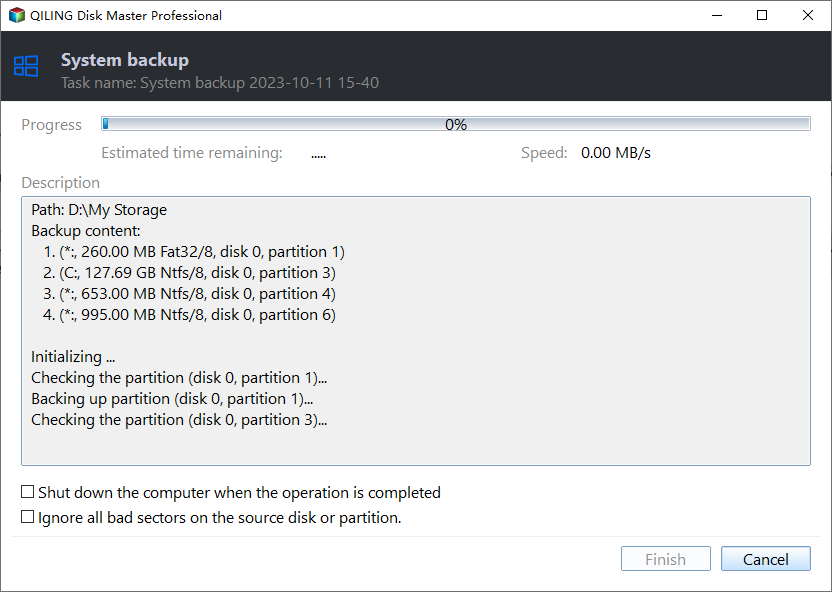
Step 1. Install and launch Qiling Disk Master. Click on Backup and select System Backup.

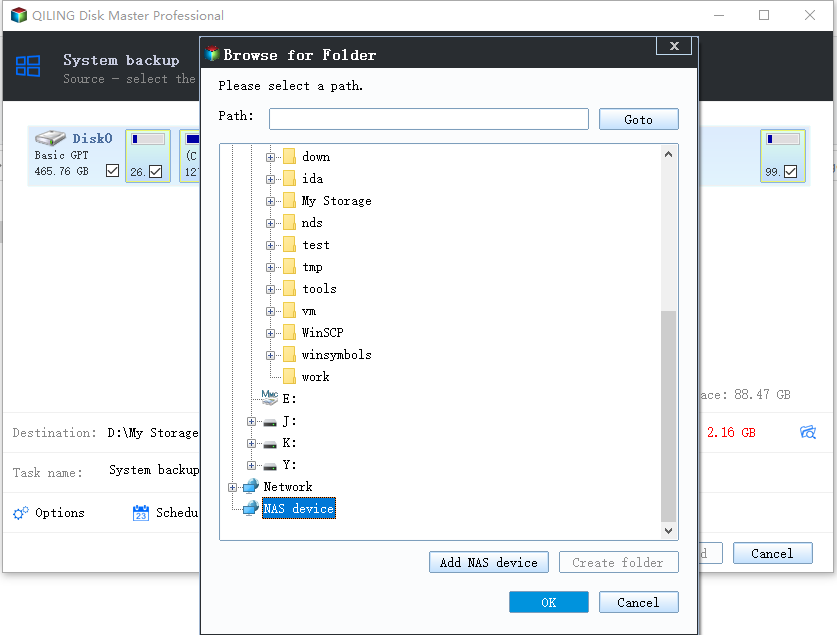
Step 2. The required system partition(s) is (are) selected by default. Choose the destination path to store the server backup image.
Step 3. Click Schedule Backup in the left bottom, and then choose Enable Schedule Backup to set the frequency of the system backup to run, such as daily, weekly, monthly, event triggers, USB plug in.

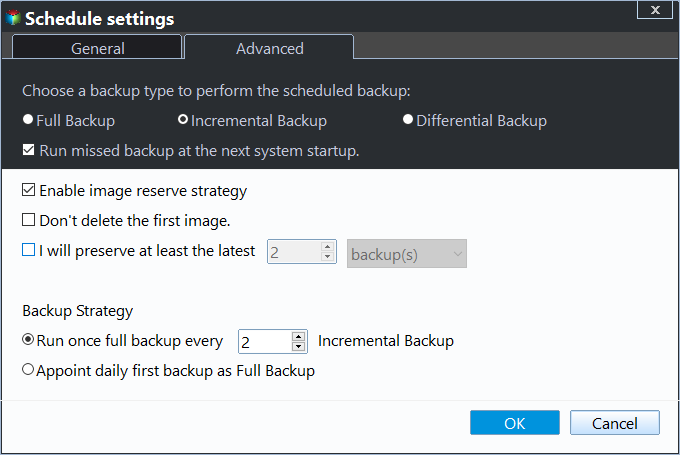
Step 4. In the Schedule Backup window, you can choose to run full/incremental/differential backups, or Enable Automatic Backup Cleanup to clean old backups to free up disk space.
Step 5. Confirm the operations and click Proceed.
FAQs about backup Active Directory 2019
1. You can only select entire volumes to backup, not individual files and folders. 2. You can only select local volumes to backup, not network shares. 3. The Backup Schedule Wizard of WSB offers only two options: Once a day and More than once a day. 4. Windows Server Backup cannot deleting old backups, which will take up a lot of storage.
Open Windows Server Backup. Select Recover. Select This Server for where the backup is stored and choose the backup you want to restore. Then follow the wizard to complete the process. Once the restore is complete, the Active Directory will be restored to the state that it was in when the backup was taken.
A Server backup includes all the necessary components to protect Active Directory and restore it. This includes the raw database, DNS information, the SYSVOL volume/share, Group Policy, and its environment.
To sum up
You can backup Active Directory 2019 use both Windows Server Backup and Qiling Disk Master Server. Owing to the restrictions of WSB, it's a wise option to try Qiling Disk Master, which is more flexible and easier to use. In addition, it can help you solve the problem of Windows Server 2019 slow file sharing. It owns more powerful features that are worth your try.
Related Articles
- How to Use Windows Server Backup for Active Directory Backup
Backing up Active Directory is important for Windows Server users. Learn how to backup Active Directory 2008/2012/2016 efficiently in this article. - Active Directory Backup and Restore – Try Best 2 Ways Here
Wanna know how to realize Active Directory backup and restore? This article will introduce you 2 ways to finish the task without effort, which are Windows Server Backup and Qiling Disk Master. - How to Backup Files in Windows Server 2019 Easily (2 Ways)
Wanna backup files in Windows Server 2019 to prevent data from losing? Scroll down to get 3 professional Windows Server backup tools to help you.