How to Perform Hard Disk Image File Restore in Windows 10
- Need to recover files from disk image
- Method 1. Windows 10 hard disk image file restore with Backup and Restore (Windows 7)
- Part 1. Setting backup using Backup and Restore (Windows 7)
- Part 2. Hard disk image file recovery via Backup and Restore (Windows 7)
- Method 2. Recover files from disk image with Qiling Disk Master Professional
- Conclusion
Need to recover files from disk image
In our PC, we have saved a lot of files, including work documents, precious photos, favorite music, etc. In order to prevent data loss, many people have developed the habit of backing up data. If you have created a hard disk image, you may want to recover files from disk image in the following instances:
❋ Computer suffered a serious error. Many unforeseen problems will appear in the process of using computers in daily life. Such as system crashes, hard disk damage, virus attacks and so on.
❋ Deleted files by mistake. After the computer has been used for a period of time, we will find that the space in the C drive is getting smaller and smaller. At this time, many users will clean the files in the C drive in order to speed up the operation of the computer. It is inevitable that important files in the computer are deleted by mistake.
How to retrieve hard disk image file in Windows 10? In the following essay, I will introduce two approaches for you.

Method 1. Windows 10 hard disk image file restore with Backup and Restore (Windows 7)
Need to perform hard disk image file restore? You should have a backup before problem happens. In windows 10, there is a built-in tool –Backup and Restore (Windows 7) which can help you backup and restore files. Below I will give instructions to show you how to use it to backup and restore hard disk image.
Part 1. Setting backup using Backup and Restore (Windows 7)
It's easy to set hard disk image via Backup and Restore (Windows 7), here it is:
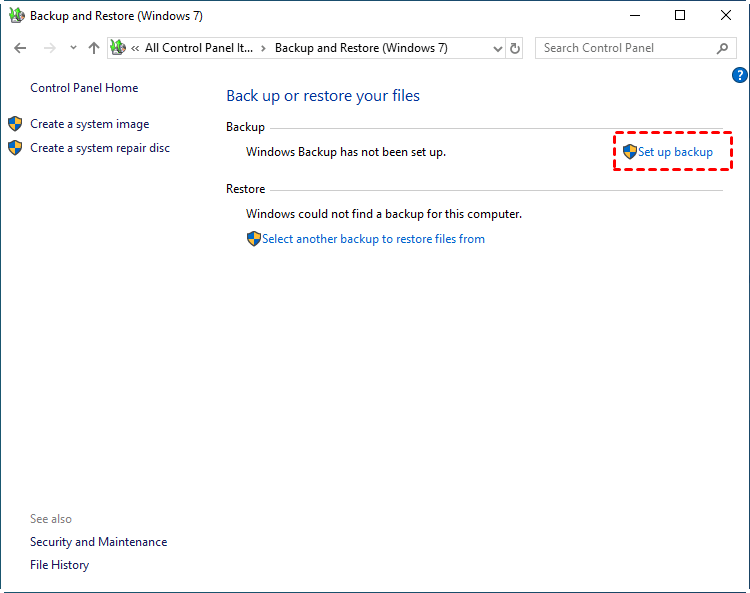
Step 1. Search control panel and click Backup and Restore (Windows 7).
Step 2. Click Set up backup to create a new disk backup task.
Step 3. Select where you want to save your backup, and click Next.

Step 4. Tick "Let me choose" option and click Next. Choose the hard disk that you want to backup, and click Next.

✍ Helpful tip: Check Include a system image of the drive: EFI System Partition, (C:), Recovery option to create a system image backup for restoring Windows 7/8/10 in time if needed.
Step 5. Then you can review your backup settings and change schedule. After confirmation, click Save settings and run backup.
Part 2. Hard disk image file recovery via Backup and Restore (Windows 7)
If something wrong has happened to your PC, you can easily restore files from backup in Windows 10 through the built-in tool. Steps are as follows:
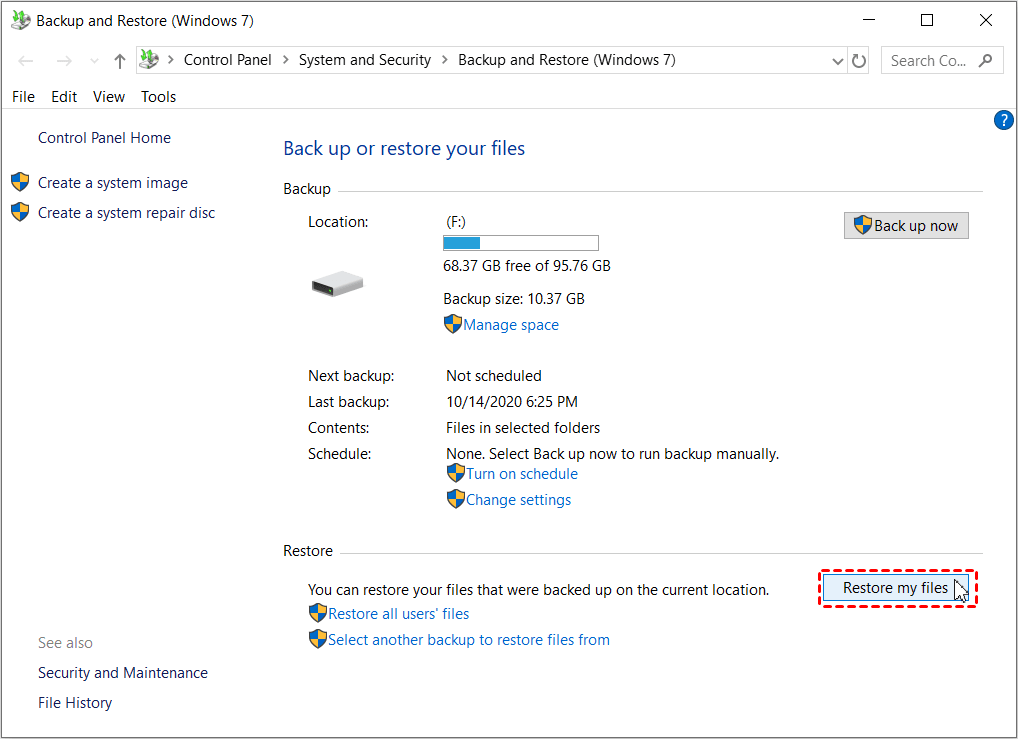
Step 1. Enter into Backup and Restore (Windows 7) Center.
Step 2. Next click "Restore my files".
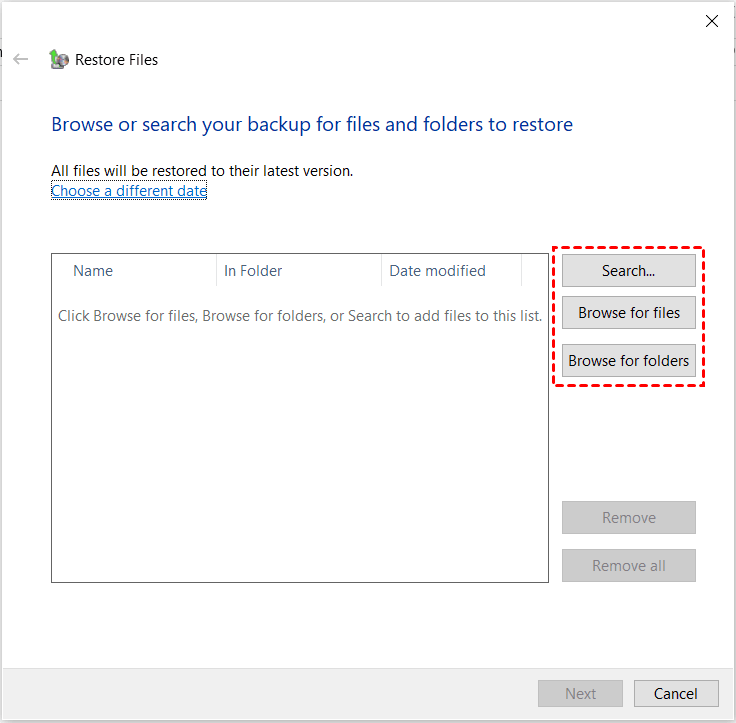
Step 3. In the Restore files page, click Search, Browse for files or Browse for folders to find files or folders you want to restore and select them.
Step 4. Select "In the original location" or "In the following location" to store your files.
Step 5. Click Restore to start the pending operation.
Method 2. Recover files from disk image with Qiling Disk Master Professional
Although Windows built-in tool may provide you the service to recover files from disk image, I want to recommend you a useful third-party software—Qiling Disk Master Professional. It can create disk image for SD card, USB flash drive, external hard drive, CD/DVD, local disk, etc. By the way, you could create a system image to restore the whole Windows operating system in time if the system crashes. It is selected by millions of users due to its security and convenience. Qiling Disk Master offers Backup, Restore, Sync, Clone and other tools for Windows XP, Vista, 7, 8, 8.1, 10.
With its help, you can create disk image with ease. Then you can restore hard disk image file as per your needs with just a few clicks. Try it with a free download.
Part 1. Create disk image with just a few clicks
The detailed steps to create a disk image in Windows 10 are listed below:
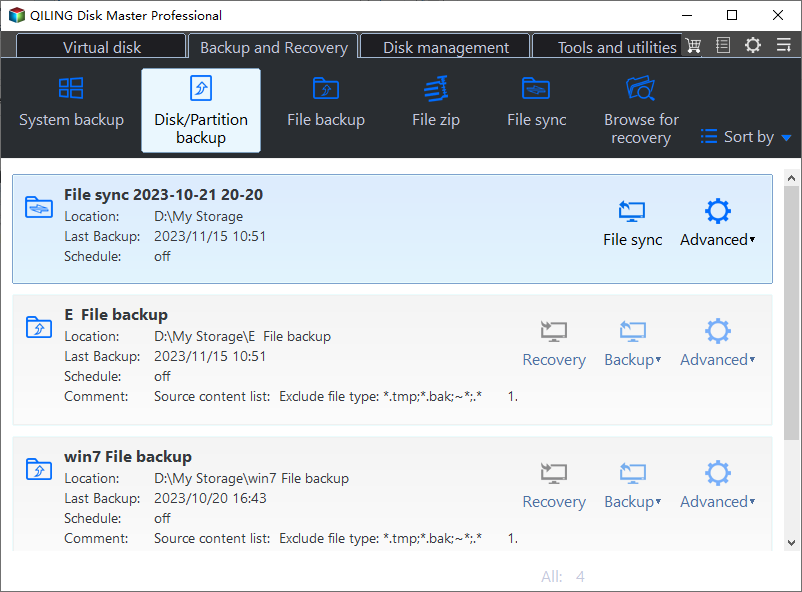
Step 1. Launch Qiling Disk Master Professional, choose Backup -> Disk Backup on the main window.
Step 2. Tap Disks, select the Windows 10 disk that you would like to backup.
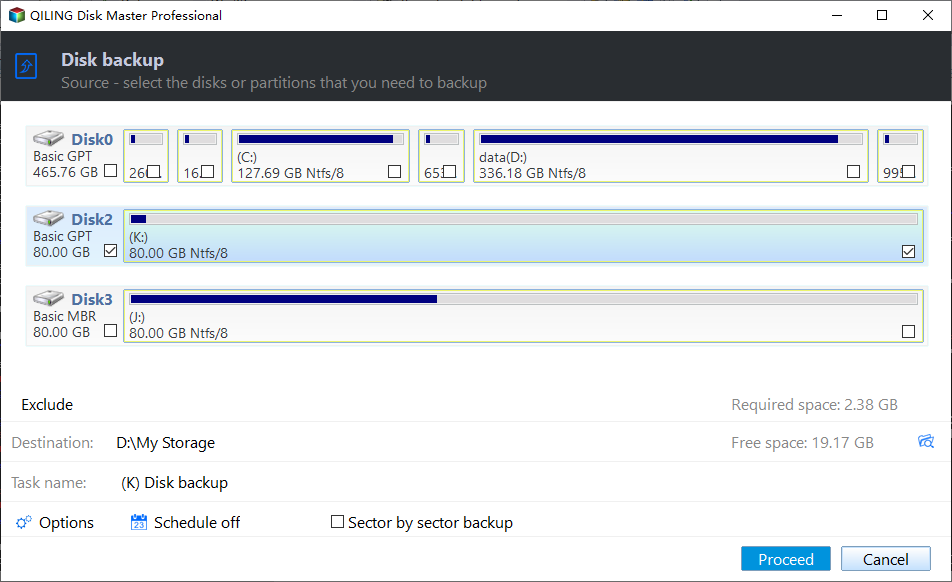
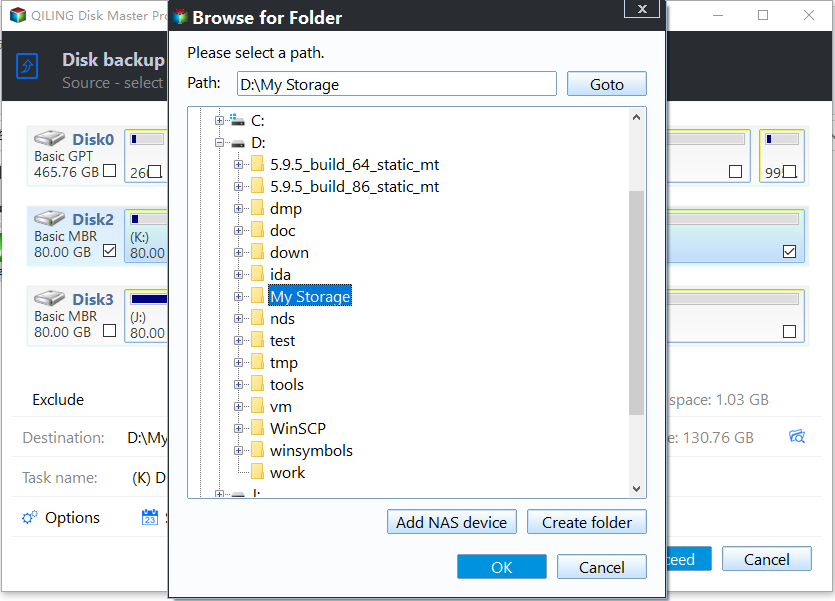
Step 3. Click folder icon or triangle icon to select an external hard drive, or network drive to save the Windows 10 disk image file. Finally, press the Proceed button to create disk image safely.
Tips:
✍ Schedule: you can click Schedule and select Daily, Weekly, USB plug in, Event triggers to run your backup tasks, the last two modes are available in paid versions.
✍ Options: you can enable email notification, choose the compression level for the backup image file and select intelligent sector backup or sector-by-sector backup, etc. If you want to encrypt your backups, the Professional version may help.
Part 2. Restore hard disk image file in Windows 10
After the disk backup finished, you will get an image file, suffix with .fvd, on your destination location. If you want to restore the data from the image file someday, you could perform selective files restore, or restore the entire hard drive. The instructions of both are listed below:
❃ Selective files restore
Operating principle: Qiling Disk Master provides "Explorer Image" which is an approach to realize selective file restore. The image files can be mounted as a virtual partition by this software, and these virtual partitions are similar to those partitions like C:, D:, etc. For example, if you mount the image file as Drive Z, you can access Drive Z from "My Computer", and to explore the files on this partition. You can copy any file to other partitions with "Copy" and "Paste".
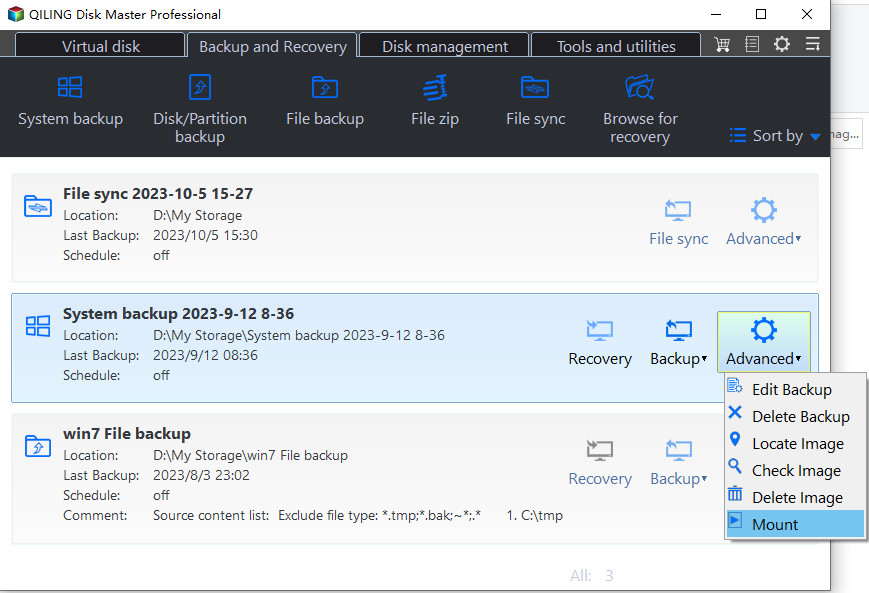
Step 1. Launch Qiling's software, and select a backed-up image file, two methods are mentioned.
>>> Method 1: click "Backup and recovery" tab, and then select a backup task that you want to restore. Click the "Advanced" > "Mount" option under the "Advanced" item.
>>> Method 2: select "Recovery" option under the "Backup" tab.

Step 2. Select a backup point in the "Backup Point" page, and then click "Next".
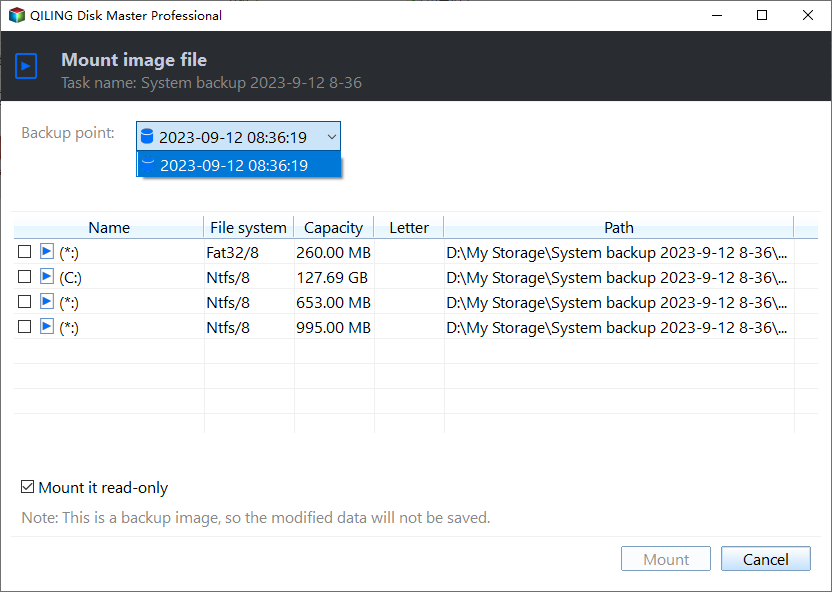
Step 3. In the "Mount Image" page, tick the blank box that you want to explore and select a drive letter for it, and then click "Mount".
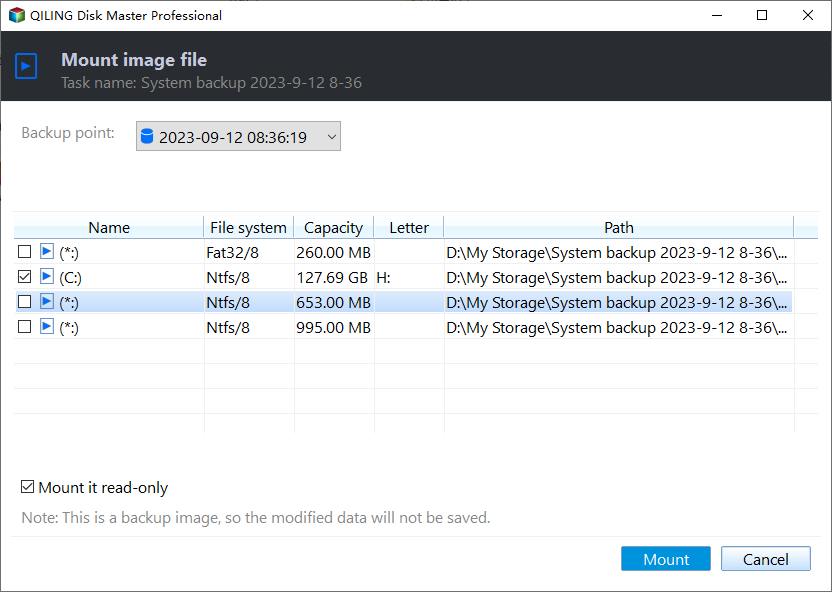
Step 4. Click "Finish" when the operation is done.
Step 5. You can access the virtual partition through "My Computer". The operation of selective file restore can be completed by copying files to other existing partitions with the Windows built-in functions of "copy" and "paste".
❃ Disk restore
Step 1. You can begin restoration through two methods.
>>> Method 1: In the "Home" tab, click "Restore" option of a corresponding backup task.
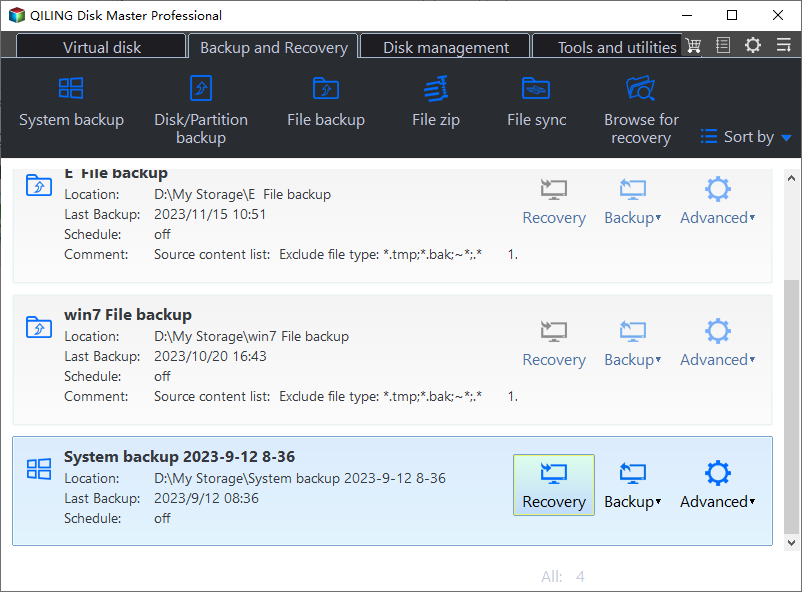
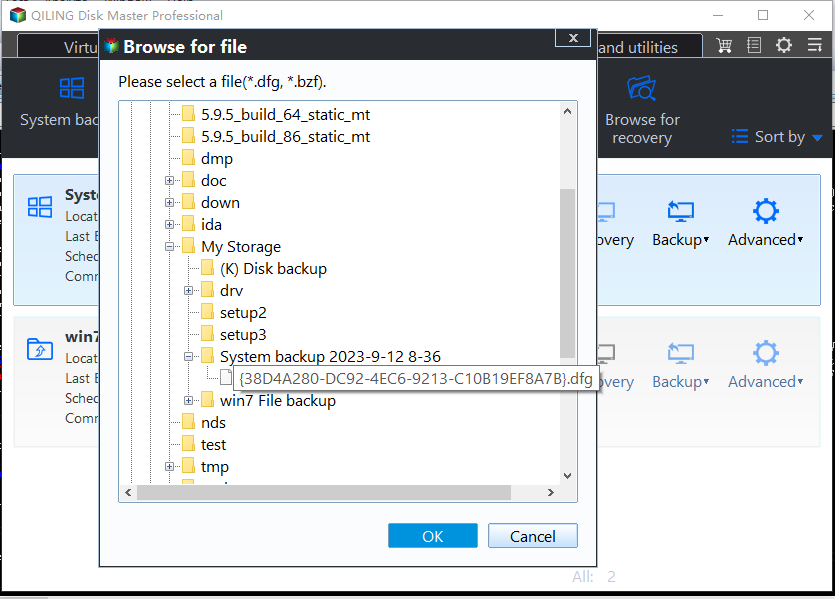
>>> Method 2: Click "Restore" and "Select Task" option. If you can't find the image file in the list box, you can browse the backed up image file by clicking the "Select Image File" button.
In the next interface, you can select backup image from the list, and then click "Next".
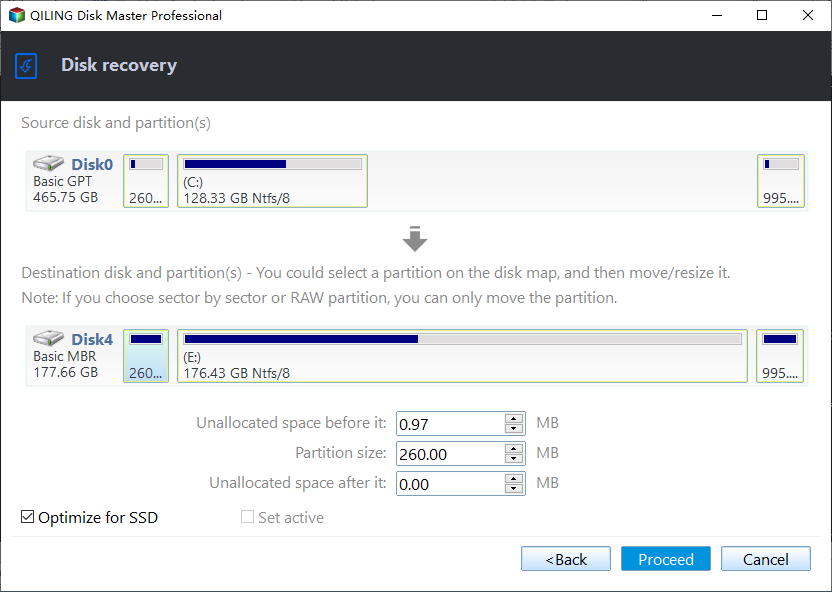
Step 2. Next, you can choose how to restore the backup image, including Restore the entire disk, Restore a partition in the disk.

Step 3. The source disk and the destination disks will be listed in this step. Confirm the operations and click "Proceed".
Step 4. Click "Finish" when the operations have been completed.
💥 Notes:
- Edit Partitions: You can resize the partition size on the destination disk which includes three options: clone without resizing partitions, fit all partitions to the entire disk and edit the partitions on the disk.
- SSD Alignment: If your destination disk is an SSD, it is highly recommended to check the option, and it will accelerate the reading and writing speed for SSD.
Conclusion
With Qiling Disk Master, you can backup and restore hard disk image file with ease. And you can set schedule backup to save your time and energy. Operations of all Qiling features are simple, you can get started quickly. Its powerful features prevent your data from being lost or damaged. Go and try it right now!
Related Articles
- Restore Windows 10 System Image to New Hard Drive | 2 Ways
You will learn how to easily restore Windows 10/11 system image to new hard drive with Backup and Restore (Windows 7) or powerful backup software- Qiling Disk Master Standard. - How to Restore System Image from External Hard Drive?
Restoring system image from external hard drive is a popular way of restoring Windows 7/8/10. And this article will tell you the ways to restore Windows from external hard drive. - 2 Easy Ways to Transfer Disk Image to a New Hard Drive
Are you in need of transferring disk image to a new hard drive? The best free hard drive image software offers you two efficient solutions. Read this article patiently to find out. - 5 Best Free Windows 10 Imaging Software [Updated 2022]
This article will introduce some best free Windows 10 imaging software to you. Imaging software can help safeguard the safety of your data on a computer. After reading this post, you can know some knowledge about five free Windows 10 imaging software.