How to Backup Using Seagate Backup Plus Drives [OS & Files]
Quick Navigation:
- Overview for Seagate Backup Plus
- Best software to backup with Seagate Backup Plus
- Case 1. How to use Seagate Backup Plus to backup non-system files
- Case 2. How to backup all kinds of PC files to Seagate Backup Plus
Overview for Seagate Backup Plus
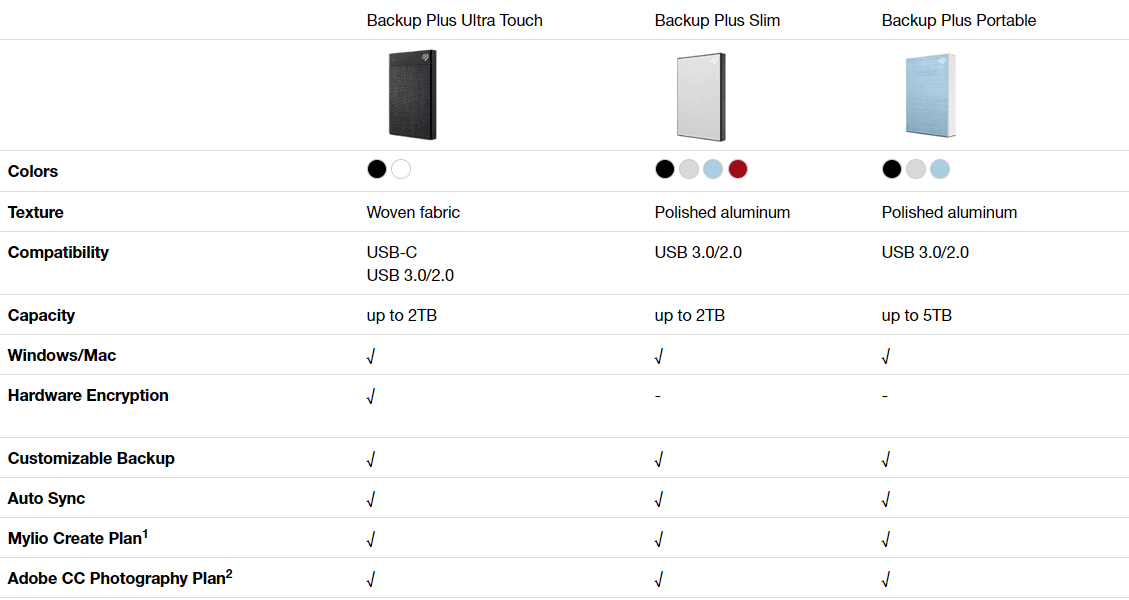
Seagate Backup Plus is a family of high-capacity portable hard drives to manage and protect your photos, movies, documents, etc. It mainly consists of 3 products - Backup Plus Ultra Touch, Backup Plus Slim, Backup Plus Portable, each works with Windows/Mac via USB.
Backup Plus portable drives are shipped with easy-to-use tools to backup your data on demand. With it, you can schedule automatic backups hourly, daily, weekly, monthly, or mirror folders seamlessly. Here in this post, I’ll introduce how to backup using Seagate Backup Plus.
Best software to backup with Seagate Backup Plus
If you’ve ever used Seagate products before, you probably know Seagate Dashboard, the previous generation of backup software during 2012 to 2017. But from 2018 to present, Seagate Toolkit is the current backup software shipped with most Seagate external drives.
In fact, both of the tools support Seagate Backup Plus drives, so you can choose either one for data backup. But since Seagate Toolkit is the latest solution, I’ll use it in this article.
However, Toolkit and Dashboard only backs up your data in Windows root drive (usually C:/) and excludes program files, application data, temporary files, and other types of system files and folders. Also, you can only create one backup plan for one Backup Plus drive.
🔰Better tool to backup both OS and data files
If you want to backup operating system or files in non-system drives even network drives, please try another Seagate Backup Plus backup software. More »
Case 1. How to use Seagate Backup Plus to backup non-system files
With all these limitations, Seagate Toolkit is still a simple and effective solution to backup files using Seagate Backup Plus portable drives. To explain it better, I’ll give an example based on Backup Plus Slim to show you how to use Seagate Backup Plus on Windows 10.
Requirements for Seagate Backup Plus:
- Computer with a USB-A (USB 3.0 or USB 2.0) port.
- Windows 7 or higher operating system
- 600MB and larger free disk space
How to use Seagate Backup Plus Slim for non-system files backup:
Step 1. Connect your Seagate device to computer. USB 3.0/2.0 are available for Backup Plus Slim.
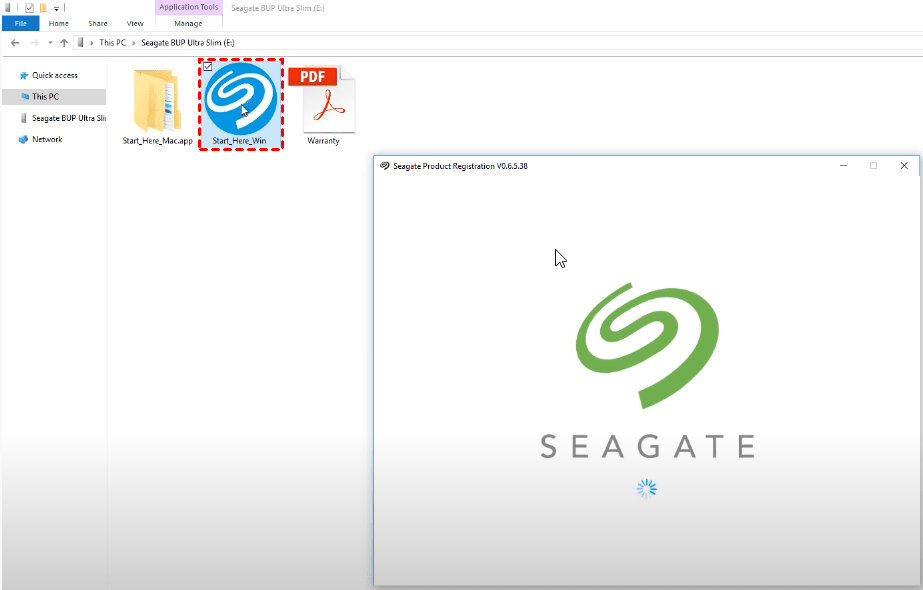
Step 2. For Windows users, launch File Explorer and double-click Start_Here_Win in Backup Plus drive to register it.
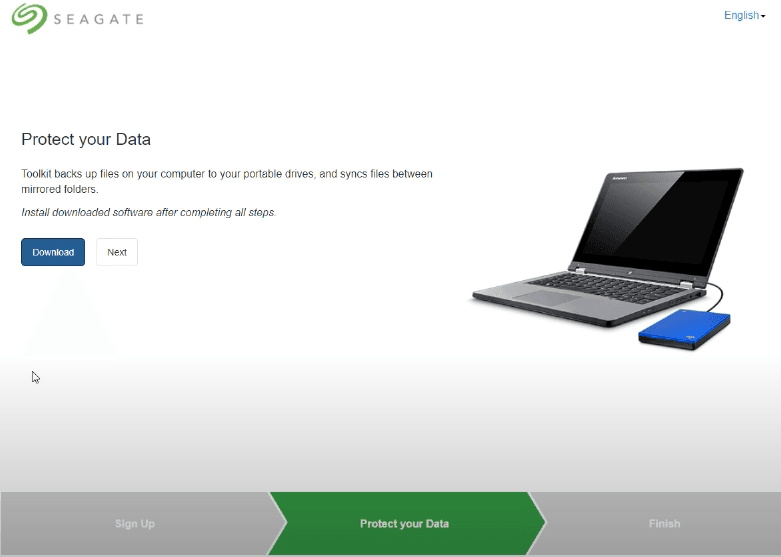
Download the toolkit and click on the SeagateToolkit.exe to install it. Now you can use the software to protect your PC data with Seagate Backup Plus portable drive.
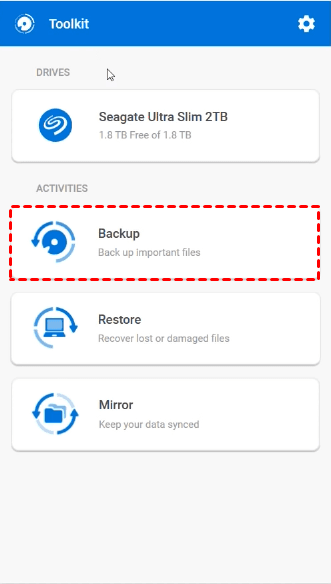
Step 3. After launching Seagate Toolkit, there are 3 activities on the main interface – Backup, Restore and Mirror. Choose Backup here.
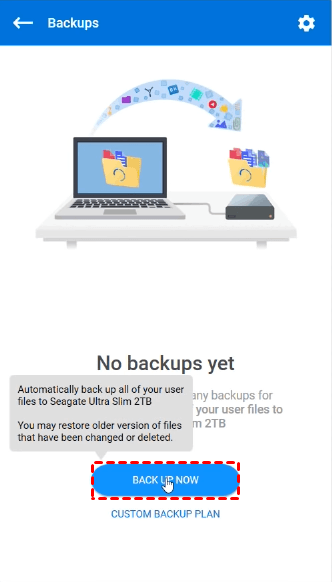
Click BACKUP NOW to get started. By default, it will automatically back up all your files in Windows root drive to Seagate Backup Plus.
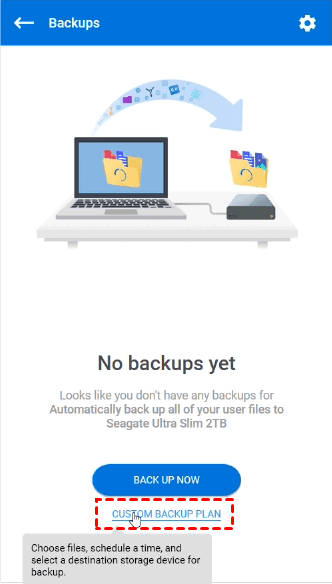
You can also choose CUSTOM BACKUP PLAN to select files and schedule to perform the backup.
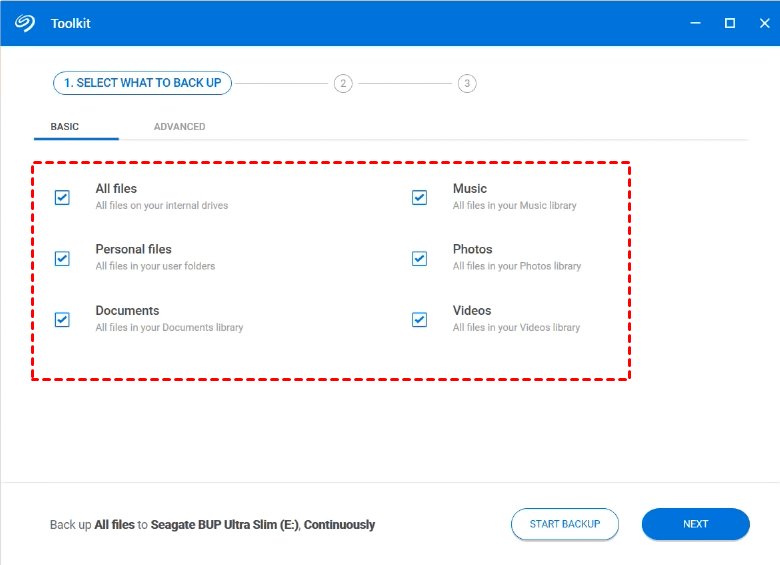
For users who chose custom backup, this set-up window will pop up automatically. Otherwise you can also click on the backup progress and hit Edit to customize the task.
Check and uncheck these file types to decide what to backup. Optionally, you can switch to ADVANCED tab to select folders manually. Hit Next to proceed.
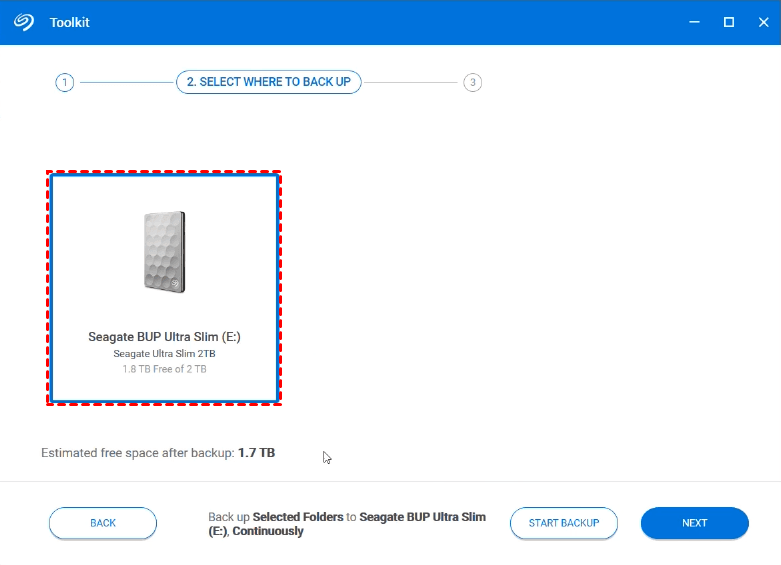
Select the connected Seagate Backup Plus Slim as the destination and click Next. Note you can only create one backup plan for one device.
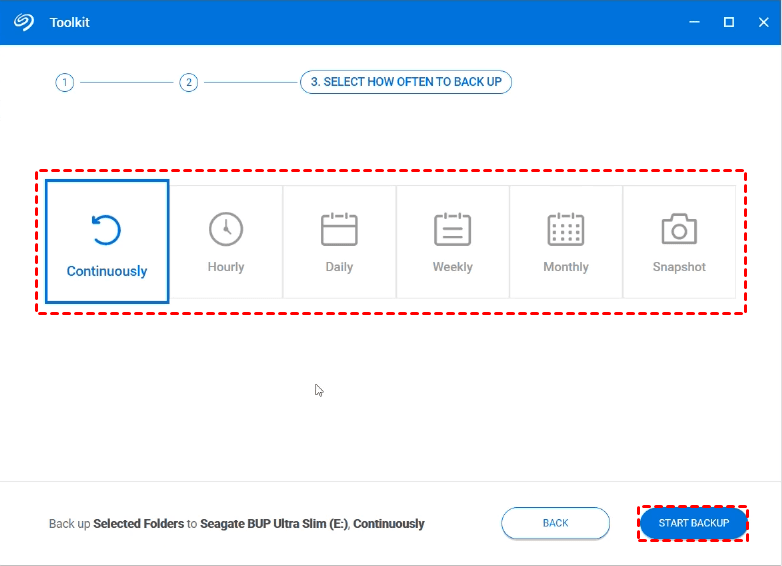
Choose a schedule to perform automatic backup and click Proceed. Continuously is the default selection, which will run automatically whenever files are modified, and Snapshot will execute the backup only once.
How to restore files from Seagate Backup Plus:
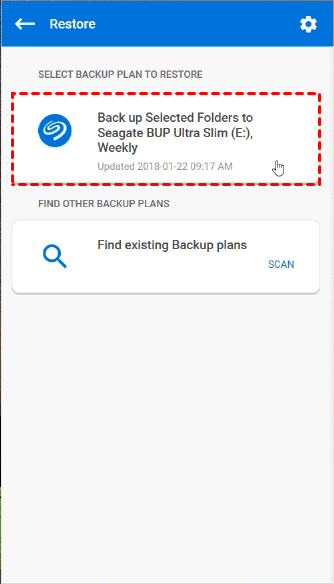
Make sure the Seagate drive is connected and launch Seagate Toolkit. Then choose Restore and select the backup plan.
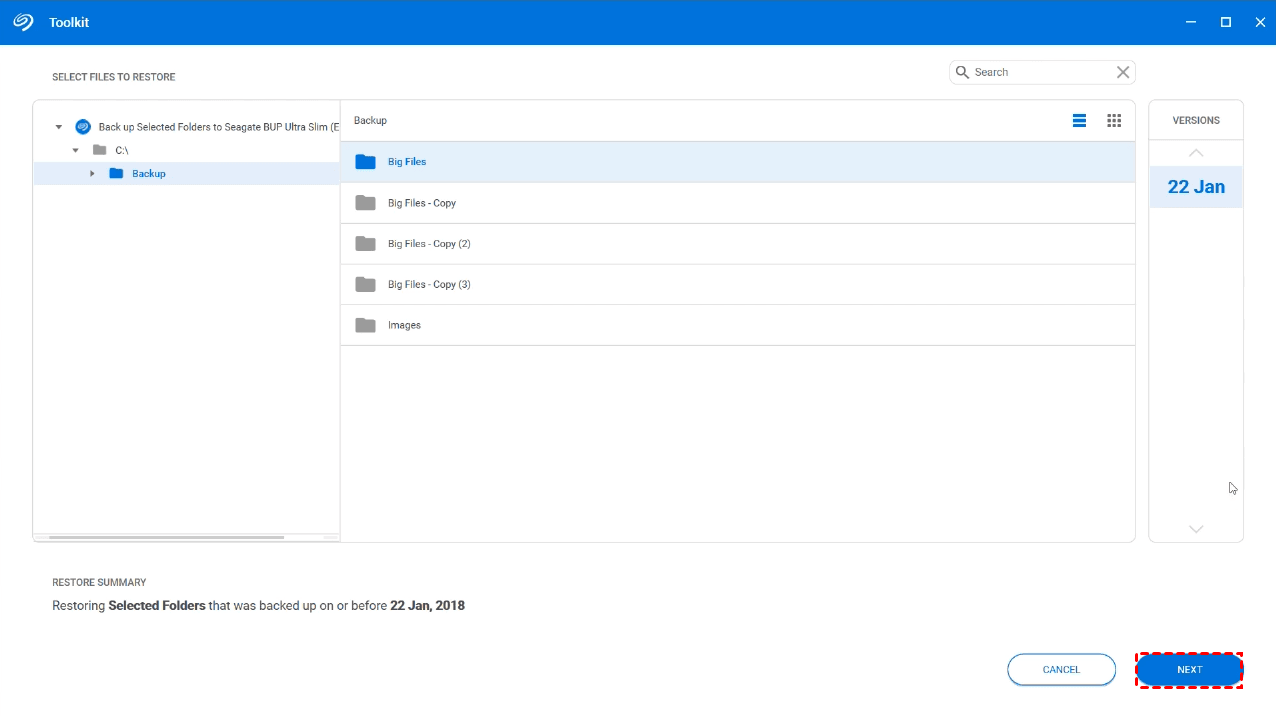
Then you can choose the entire backup job or individual folders, select a backup version created at the time point you want, then click Next to continue.
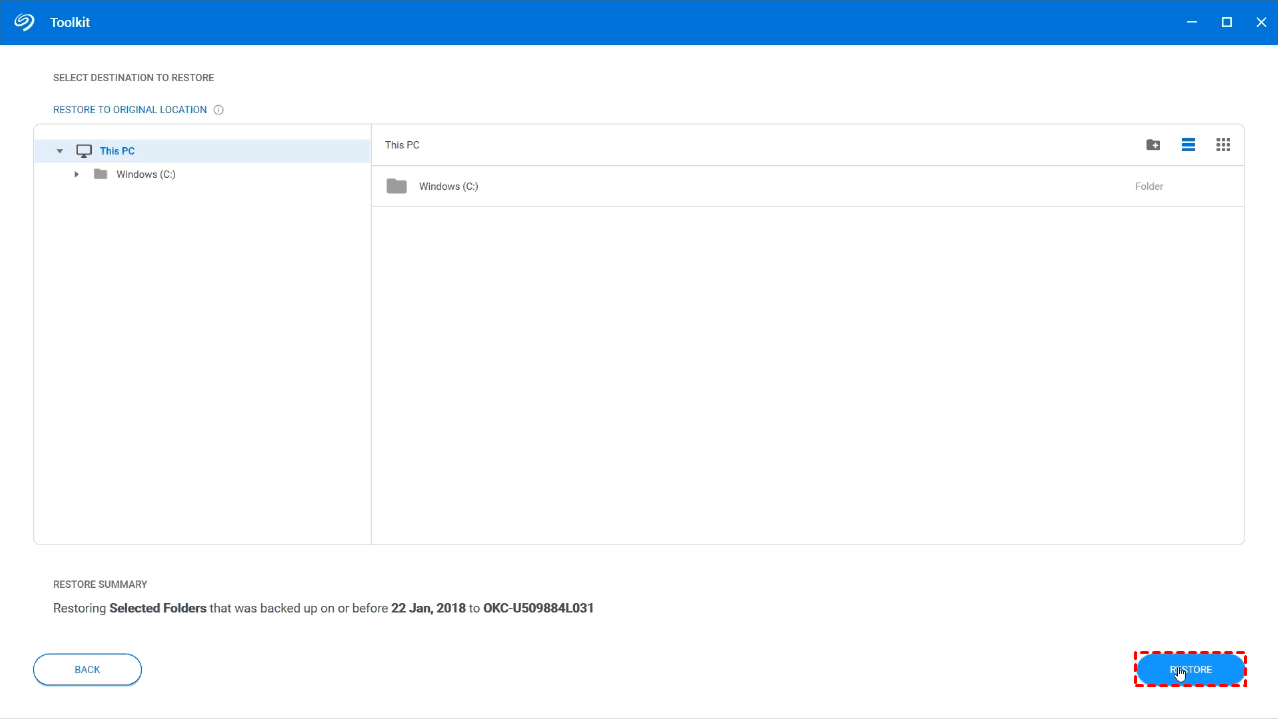
Specify a destination or restore the files to original location by default. Click Restore to execute it.
How about Mirror feature in Seagate Toolkit?
You can choose Mirror activity to create a mirror folder, and any data you drag to it will be copied to the mirror folder in Seagate drive with original format.
Please note it’s not a backup but a two-way sync, any data you delete in either of the mirror folders will be removed from both sides, the same goes for modifications. So if you mean to protect your data automatically and keep different copy versions for recovery needs, Backup is the right way to go.
Case 2. How to use Seagate Backup Plus to backup all files and OS
Seagate Toolkit performs well in the flexibility of backup schedule, but it has great limitations on what to backup and where to backup. For example, it won’t allow you to backup Windows 10 operating system on regular basis in case of system glitches, backup non-system drives to protect more kinds of data, or backup files to diversified devices other than supported Seagate drives.
There’s another software that can be used for system backup, Seagate DiscWizard. But it only runs on Seagate and Maxtor hard drives. In this case, I prefer to use the Seagate Toolkit alternative - Qiling Disk Master Standard with higher compatibility and more optional backup types. Pleae check the following contents:
✔ Supports file/folder backup, partition backup, disk backup and system backup. You can run a task only once, or schedule automatic backup hourly, daily, weekly, monthly. And it is usually used with Incremental backup.
✔ As for file mirror, you can sync any existing folder to another without creating a new folder, and the one-way mirror won’t sync the deletion or modification from target to the source.
✔ Qiling Disk Master also supports various storage devices as the source or target directory – internal/external hard drive, USB drive, NAS, network share or even cloud drive. So you can easily backup local folders drives to Seagate Backup Plus, backup Seagate Backup Plus to another external hard drive, etc.
*The free Standard version already contains complete backup and restore features. However, if you want to enjoy more schedule options, different backup, USB plug in, File Sync, dissimilar hardware restore, etc., you could also upgrade to Professional or higher editions.
To show you the basic operation of Qiling Disk Master, I’ll use the Standard version as an example.
How to auto backup PC files to Seagate Backup Plus:
First of all, install this Seagate Backup Plus backup software on your Windows computer and connect your portable drive. Then you can try following steps to perform automatic backup. The same approach also applies to other external hard drives or USB drives.
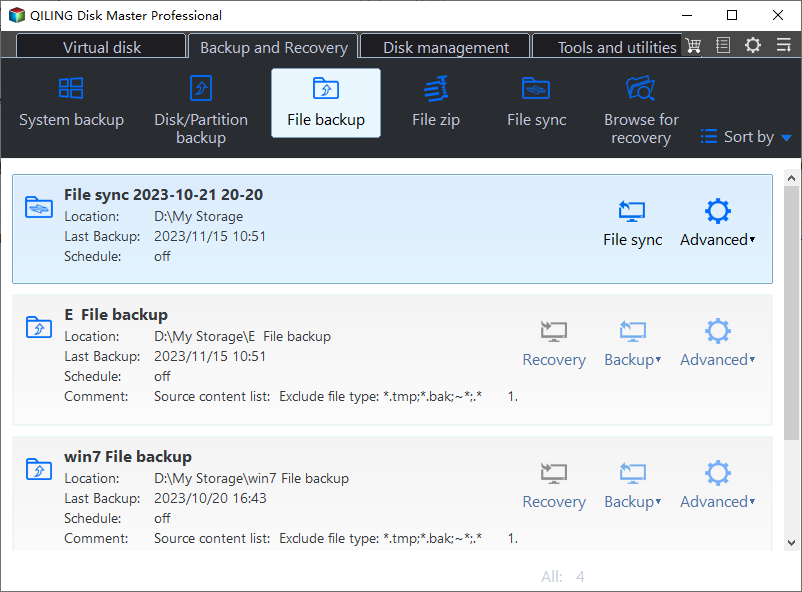
Step 1. Go to Backup tab and choose File Backup. You can also back up Windows operating system with System Backup, or entire hard drive with Disk Backup.
Step 2. Click Folder or Files to select anything you want to backup. Optionally, you can choose Share/NAS in the pop-up window and Add NAS or NAS devices. Then choose the connected Seagate drive as the destination.
To set up automatic backup, click Schedule Backup > Enable Schedule Backup, choose Daily/Weekly/Monthly and do further settings. For example, you can run it hourly during a certain period of time.
Options: Manage compression level, image splitting, operation priority, comment, email notification, etc.
Advanced schedule: In higher editions, you can also choose Event triggers (like startup or shutdown), USB plug in as the schedule backup.
Backup Scheme: In Pro or higher editions, it could auto delete old backup images according a customized rule and change the default backup method to differential backup. You could try it if your Backup Plus has insufficient space or you want to avoid backup disk full.
Step 3. Click Proceed to execute the task.
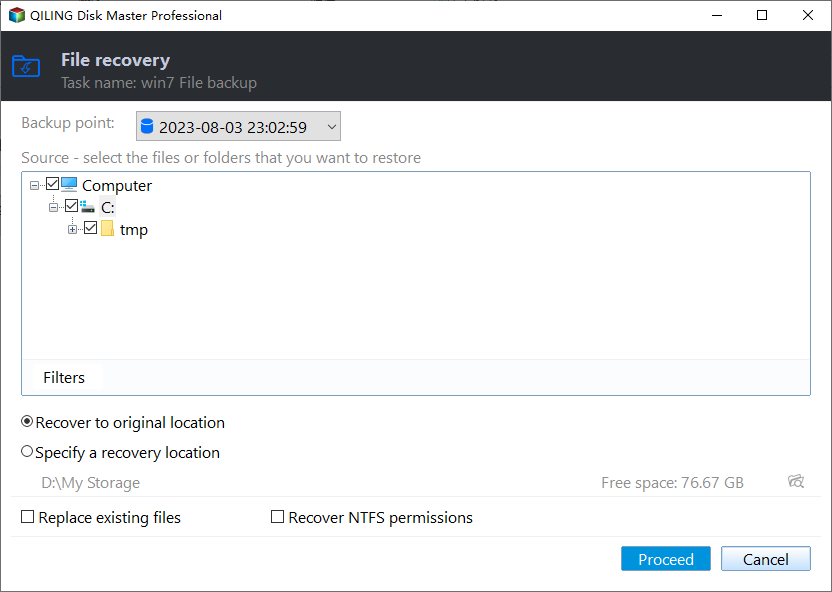
Then you can manage it in Home page, or go to Restore tab to restore files from Backup Plus or other devices.
Create a portable Seagate Backup Plus backup software to use on any PC
No matter which of the above methods you use, you will need to install the backup software on your computer for further operation. If you have multiple computers to protect or maintain, this may not be very convenient.
In this case, you can use the practical tool of Qiling Disk Master to create a portable version on Seagate Backup Plus drive, and plug it into any target computer for direct use without installation.
Technician and Technician Plus edition both offer you all the standard and advanced features of Qiling Disk Master, including the tool to create portable backup software. but the Technician edition also works on Windows servers in addition to Windows PCs. You can download the one you need to proceed, here take Technician as an example.
How to create Seagate Backup Plus backup software for portable use:
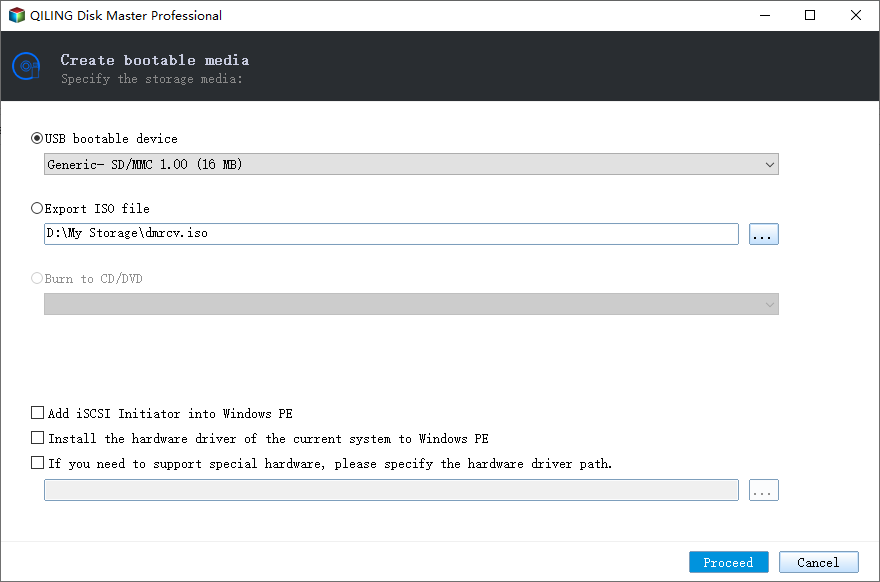
Step 1. Connect the Seagate Backup Plus drive to the computer with Qiling Disk Master installed. Open the software and choose Create bootable media in Tools tab.
Step 2. The connected removable device should be selected as the target location by default, otherwise you can click Browse to select a target path manually.
Step 3. Click Proceed to copy the installation directory to the target location, hit Finish when it's complete. Then you can insert the Seagate Backup Plus drive to any computer and double click Disk Master.exe to run the portable backup software without installation.
✍Tips:
- This tool doesn't support network path or CD-ROM drive as target location by far.
- You cannot use Portable version simultaneously with Qiling Disk Master.
- If Qiling Disk Master has been installed on the target computer before, you may encounter problems using the portable version. Then you can use the Register.exe to register for correct edition.
Conclusion
Seagate Backup Plus drives come with latest backup software - Seagate Toolkit for automatic file backup and mirror. But it only applies to data in Windows root drive and excludes system files & program files.
To backup other files or system partition, even the entire disk, try Seagate auto backup software - Qiling Disk Master. And it helps you keep all the changes using schedule backup and avoid backup disk full with automatic cleanup methods. Its technician or techplus edition allows you to Create bootable media that works on any PCs or servers.
In addition to backup, Qiling Disk Master can also be used as Seagate cloning software to migrate hard drive to smaller SSD or larger HDD. If you are running Windows Server, there’s a specialized Server edition to suit your backup and cloning needs.
Related Articles
- Backup Files on Seagate External Hard Drive | 3 Ways
How to backup files on Seagate external hard drive? This article offers you 3 effective methods as well as solutions to Seagate external hard drive not showing up problem. - Top 3 Seagate Hard Drive Backup Software in Windows 10/8/7
Find the best Seagate hard drive backup software to backup data to Seagate external hard drive safely and easily according to the following text. - Quickly Create Seagate DiscWizard Image Backup | 2 Ways
This article introduces you to Seagate DiscWizard and how to create Seagate DiscWizard image backup and recovery in detail. Scroll down below to learn everything you want to know. - Best Free Seagate NAS Backup Software in Windows 10/8/7
What Seagate NAS backup software can best suit your needs? Given the usage restrictions of tools like Seagate BlackArmor Backup and Backup Manager, you may need a more robust NAS backup software with higher compatibility.
