Move Program Files to Another Drive Windows 10 | 4 Worry-Free Ways
Can I move program files to another drive? Is it safe?
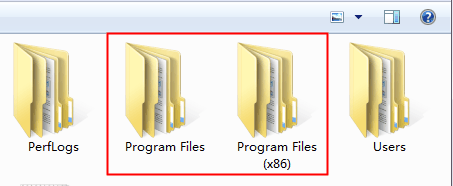
You may be aware that many programs are installed on the C: drive by default, with the 64-bit programs stored in the "Program Files" folder and the 32-bit programs in the "Program Files (x86)" folder. These folders are hardcoded into Windows, and attempting to move them to a different location can have unintended consequences.
Need to move program files to a different drive
In most cases, it's not recommended to move program files to a different drive. However, if you find yourself in a situation where you need to do so, here are some factors to consider:
Situation 1: low disk space warning pop up several times
As your computer ages, the system partition can become increasingly congested due to the accumulation of programs and data. This can lead to a significant slowdown in performance, making it difficult to efficiently use your PC. The situation can become even more critical if you have installed a large number of software applications on your computer.
If you're unable to uninstall certain programs, consider relocating their files to a different partition. This can help alleviate the space constraints on your C drive.
Situation 2: SSD does not have enough space
In today's digital landscape, it's common to repurpose an old hard drive (HDD) as a storage device for your operating system (OS). However, this setup can quickly become congested if multiple programs are installed on the smaller solid-state drive (SSD). To address this issue, some users opt to free up disk space on the SSD or move program files and program files (x86) from the SSD to the HDD. This approach allows you to enjoy the benefits of both storage solutions.
How to move program files to another drive safely
If you find yourself in one of the situations mentioned earlier, you may want to consider a safe and efficient method to resolve the issue. One such approach is to create a system image backup using a reliable backup software. Qiling Disk Master Standard is a free backup software that can help you achieve this. By taking a system image backup, you can ensure that your PC is restored to its normal state without any downtime.
Afterward, you can feel free to try the following 4 methods to move program files to different drive, namely using Registry, mklink, Move, or App mover.
- If you're looking to relocate program files to a different drive, you can use the Registry Editor to achieve this. Here's a step-by-step guide to help you through the process:
- Method 2: Move program files to different drive using mklink
- If you want to relocate an installed program to a different drive, you can use the "Move" feature in the program's settings. Here's a step-by-step guide to help you through the process:
- If you want to transfer program files from the C drive to the D drive, you can use the App Mover tool. Here's a step-by-step guide to help you through the process:
Method 1: Migrate program files to another drive using Registry Editor
If you want to change the program file location from the C drive to the D drive or another partition, you can do so during a clean install of Windows. To achieve this, follow these two initial steps:
- Create a folder named Program files (x86) on another drive (eg: D: drive)
- Copy "Program Files" and "Program Files (x86)" directories to the new location first. Just run CMD as administrator, type the following command prompt and hit Enter.
>> Robocopy "C:\Program Files" "D:\Program Files" /mir
>> Robocopy "C:\Program Files (x86)" "D:\Program Files (x86)" /mir
To change the program file location from the C drive to the SSD (Solid-State Drive) or another partition, follow these steps:
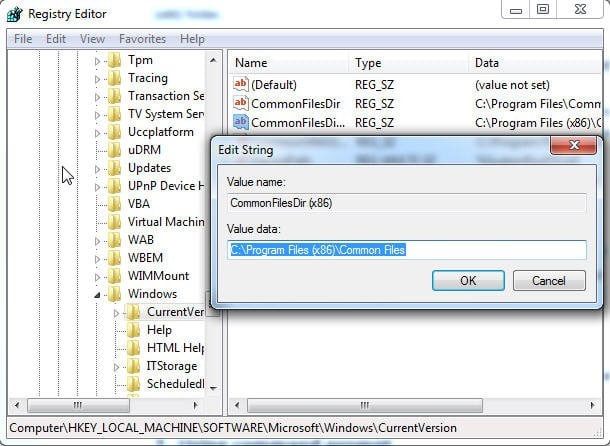
Step 1. Press "Win + R"to summon the Run window, then type Regedit.exe.
Step 2. Find the following path on Registry Editor and change drive letter from C: to D:
To Windows 7/8/8.1:
HKEY_LOCAL_MACHINE\SOFTWARE\Microsoft\Windows\CurrentVersion
To Windows 10:
HKEY_LOCAL_MACHINE\SOFTWARE\Wow6432Node\Microsoft\Windows\CurrentVersion
Method 2: Move program files to different drive using mklink
The second method to change the program file location from the C drive to the SSD involves creating a symbolic link using the Command Prompt. A symbolic link is a powerful tool that redirects access to a folder to a different location, much like a shortcut but with more flexibility.
Moving program files from the C drive to the D drive (or from an SSD to an HDD) can be a straightforward process if done correctly. Here's a step-by-step guide to ensure a smooth transition.
Step 1. Move "C: \Program Files" folder to "D: \Program Files".
Step 2. Type cmd in the search box, click it and run as administrator.
Step 3. To create a junction point, you can use the `mklink` command in the Command Prompt window. Here's how to do it:
mklink /D "Program Files" "D: Program Files"
"Program Files" is the name of your new symbolic link name.
"D: Program Files" is the path your new link refers to.
Then, you can use the C:\Programs Files as the default install path but all the installed files will be stored in D:\Program Files.
Also, you can use mklink /J link target (called hard link) to makes the files or folders appears as if it actually exist at the location of the symbolic link. Based on the above example, you can type as mklink /J “Program Files” “D: Program Files”.
If you want to update the location of your program files and delete the old ones, you can use the `mklink /j` command to create a hard link between the old and new locations.
Method 3: Move installed program to another drive using “Move” feature
This feature not only allows you to move program files from one drive to another, but also enables you to relocate program files to a different drive or location. Simply try it out yourself to see the benefits.
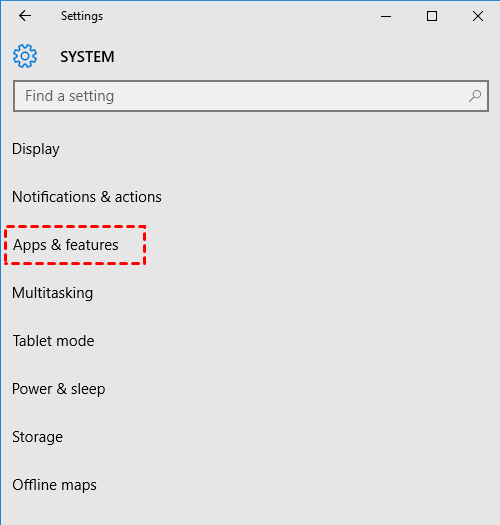
Step 1. Go to start menu > Settings > System > Apps & features, then you will see a list programs.
Step 2. Select an app and hit the Move option under the specified app, and then select a location on another drive.
Step 3. Click Move again.
Step 4. Repeat Step 2 and Step 3 until the last program is moved to a new drive.
Method 4: Transfer program files from C to D with App Mover
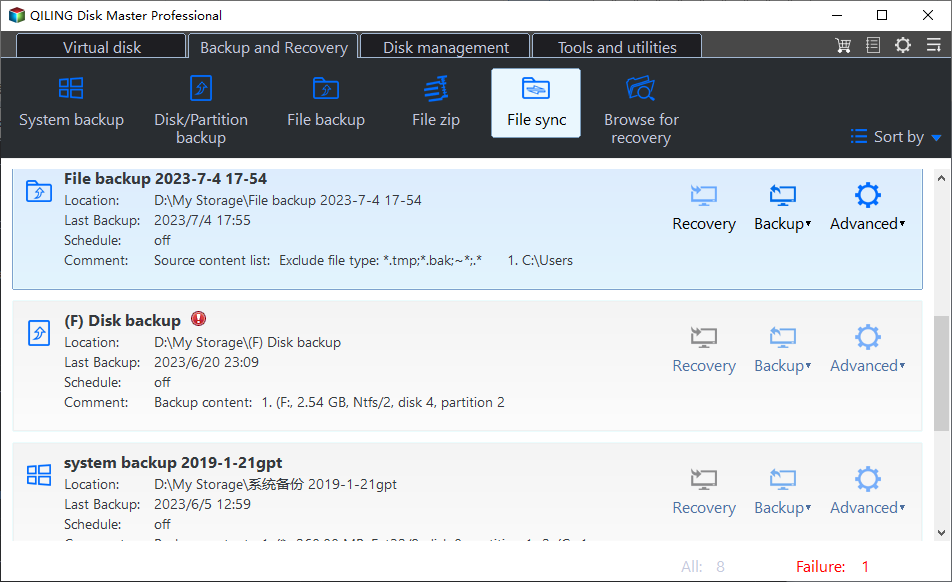
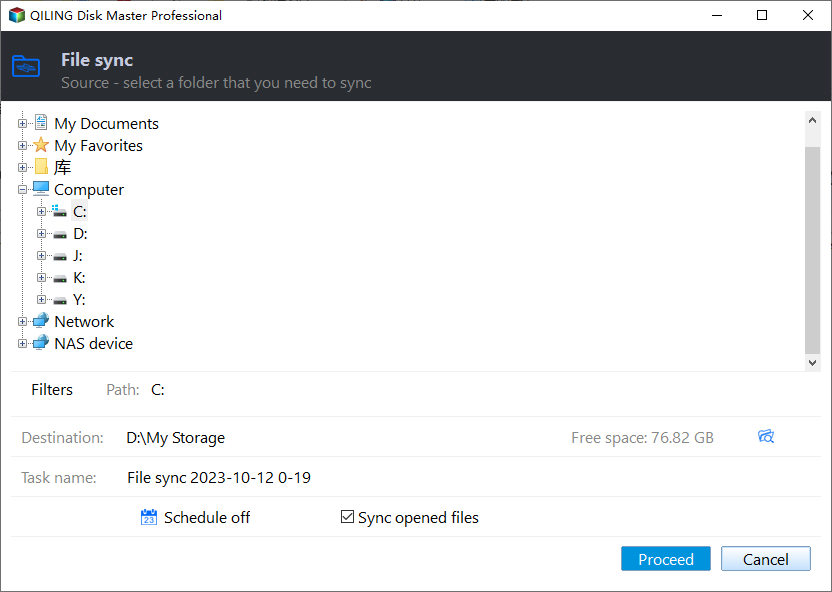
In addition to using the `mklink /j` command, you can also try using Qiling Disk Master Professional to safely move your program and program files from C to D or SSD to HDD. This disk management software is compatible with Windows 11/10/8/7/XP/Vista, making it a versatile solution for your needs.
Step 1. Launch Qiling Disk Master Professional. Then, click All Tools and select App Mover under the Other Tools tab.
Step 2. Select the C drive and hit "Next".
Step 3. Tick the name of applications you want to move and choose D drive to receive it.
Step 4. Click on Proceed and then OK, it will start the program files transfer process.
Tip on how to move Steam Games to another drive:
Some users may not need to move the entire program files folder, but rather specific folders within it, such as the Steam games folder. This is a common scenario where only a subset of files and folders need to be relocated.
I'm using Windows 10 and I need to relocate the Steam games folder to my D drive. I've been informed that simply copying and pasting the folder won't work, and that I'll need to delete and redownload the games. This is a concern for me because the folder is over 36 GB in size, and it contains my entire Steam game library.
Step 1. To begin the process of relocating your Steam games folder, you'll need to access the current location of your Steam library. This can be found by checking the properties of the Steam shortcut on your desktop or taskbar.
Step 2. To relocate your Steam library folder, follow these steps:
Step 3. Wait until the process completes, you can start to rerun Steam.exe from the new location.
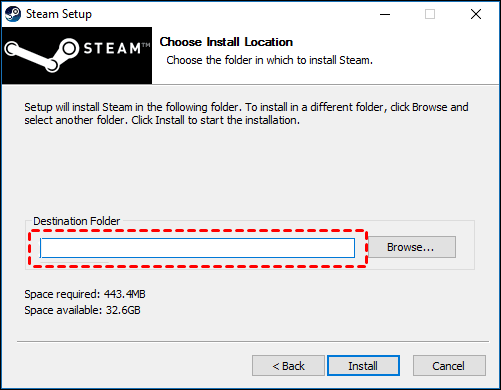
Before rerunning the Steam.exe it's suggested to reinstall it to update all your shorcuts. Download the the installer in the steampowered.com and select the new location as destination folder, here is D:\Steam\folder, at last, click Install to reinstall the Steam.exe.
Protect your OS before moving programs to another drive
As previously mentioned, relocating program files from the C drive to the D drive or from an SSD to an HDD can potentially cause issues with program functionality. To avoid this, it's essential to back up your system and data before making any changes.
With Qiling Disk Master Standard, you can easily create an exact copy of your system using its System Backup feature. This ensures that you have a reliable backup of your system, which can be restored from an external hard drive or other devices if something goes wrong.
To safeguard your operating system, we recommend installing Qiling Disk Master on your Windows-based computer. This software is specifically designed for Windows 11, 10, 8, 7, XP, and Vista operating systems.
Step 1. To access the features of Qiling Disk Master Standard, simply launch the software. Upon opening, you'll be greeted by its intuitive deep-blue interface.
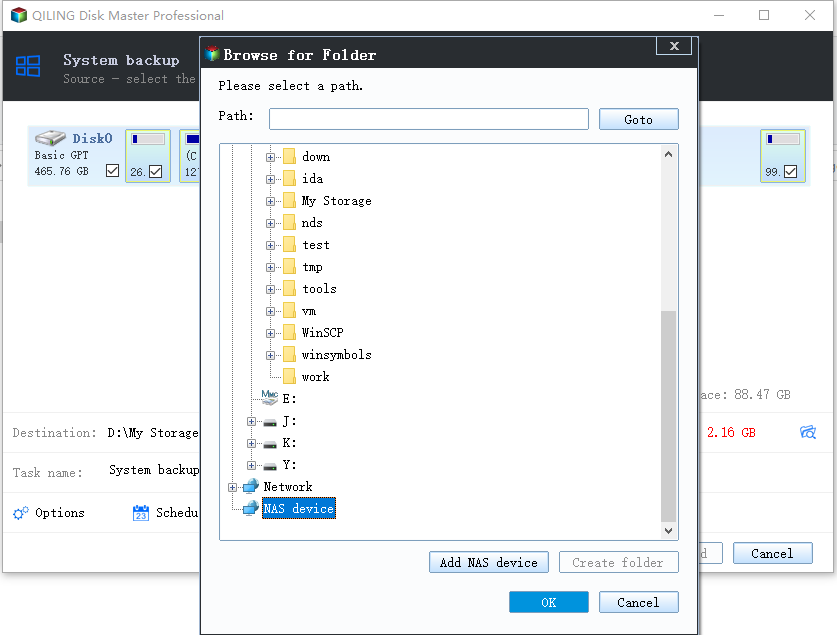
Step 2. To initiate a system backup with Qiling Disk Master, you'll need to select the destination partition where the backup image will be stored. Once you've chosen the destination, simply click **Proceed** to begin the backup process.
Once you've initiated the system backup process with Qiling Disk Master, simply wait for a while. Your computer will be backed up with a system image, ensuring that all your files, programs, and settings are safely stored.
Click Tools and go to Create Bootable Media, then select bootable disc type (Windown PE or Linux) and storage device (USB, CD/DVD or ISO file). Remember to click Next in the each step.
How to fix boot failure after moving program files
If your computer fails to boot after moving program files, don't panic! Follow these steps to resolve the issue:
1. Restart your computer to BIOS and set the bootable USB as first boot option, save changes and boot from it.
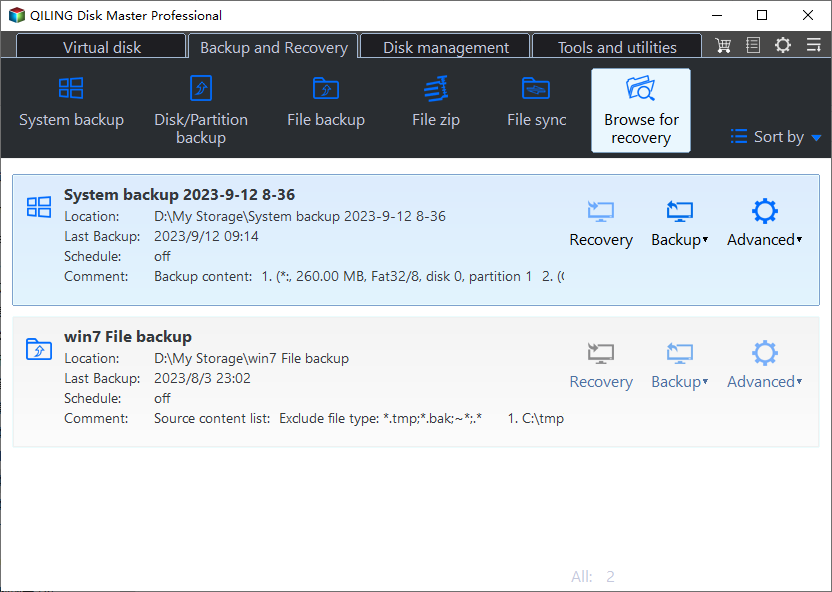
2. To restore your system image, follow these steps:
Advanced backup settings you may need
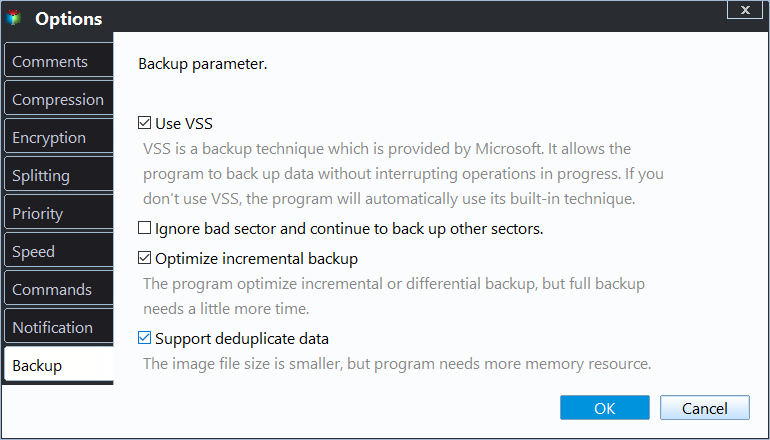
In addition to its primary function, the system backup tool can still be used to backup your system after moving programs to another drive in Windows 10 or other systems. To make this process even more convenient, you can take advantage of the advanced features available during the backup process.
Backup Options: To further enhance your system backup experience, you can take advantage of various advanced features available in the backup tool. These features include:
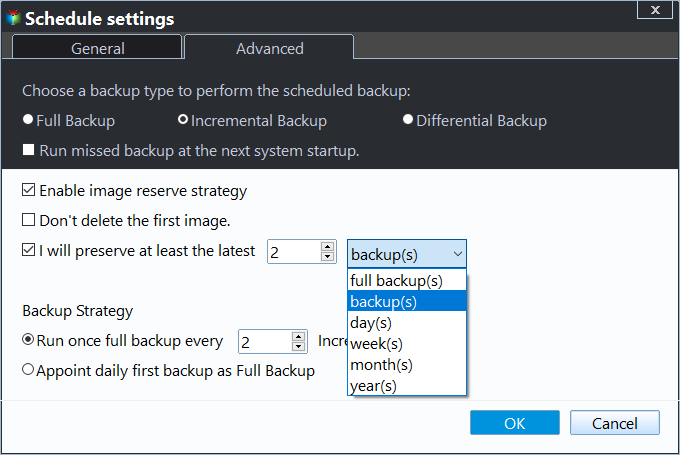
Schedule Backup: The system backup tool offers a range of flexible backup scheduling options to suit your needs. You can choose to backup your system on a daily, weekly, or monthly basis, ensuring that your data is regularly updated and protected.
Backup Scheme: The system backup tool offers a range of advanced features to enhance your backup experience. One such feature is the ability to switch from incremental backup to differential backup, which provides a more efficient and flexible backup approach.
Conclusion
Are you looking to free up space on your primary drive or simply want to organize your program files? Look no further! This article provides you with three convenient methods to move program files to another drive in Windows 11, 10, 8, or 7. You can choose one method or combine them for a more efficient experience.
In addition to helping you move program files to another drive, Qiling Disk Master can also be a valuable asset in protecting your system continuously. This powerful tool allows you to schedule automatic backups of your Windows 10 system, providing peace of mind and ensuring that your data is always safe.
Related Articles
- Best Way to Backup Windows Program Files to External Hard Drive
- Three Ways to Transfer Files from C Drive to D Drive in Windows 10/8/7
- How to Transfer Files From SSD to HDD Easily in Windows 10/8/7
- Transfer Files from One Computer to Another in Windows 10/8/7
- A Simple Way to Move Windows 10 Hard Drive to New Computer
