How to Perform System Restore in Windows Server 2016 | 3 Ways
- Does Server 2016 Include System Restore Points?
- Backup and Restore System State via Windows Server Backup
- How to create a backup in Windows Server 2016
- How to restore from a system state backup in Windows Server 2016
- How to perform bare metal recovery on Windows Server 2016
- Standalone Tool to Perform System Restore in Windows Server 2016
- How to backup Windows Server operating system with Qiling Disk Master
- How to perform Windows Server system restore with Qiling Disk Master
- Conclusion
Does Server 2016 Include System Restore Points?
System Restore is a Windows feature designed to revert system files, settings and applications to an earlier state. To use it in Client OS like Windows 10, you can enable System Protection to create restore point . However, this function does not apply to Windows Server 2016, 2019, 2022 or 2012/2012 R2.
To perform Windows Server 2016 system restore, one common method is to create a backup including system state. But considering the limitations of Windows Server Backup and the cumbersome procedure, you could also try easier alternatives to backup and restore the operating system.
I'll cover 3 methods below:
Backup and Restore System State via Windows Server Backup
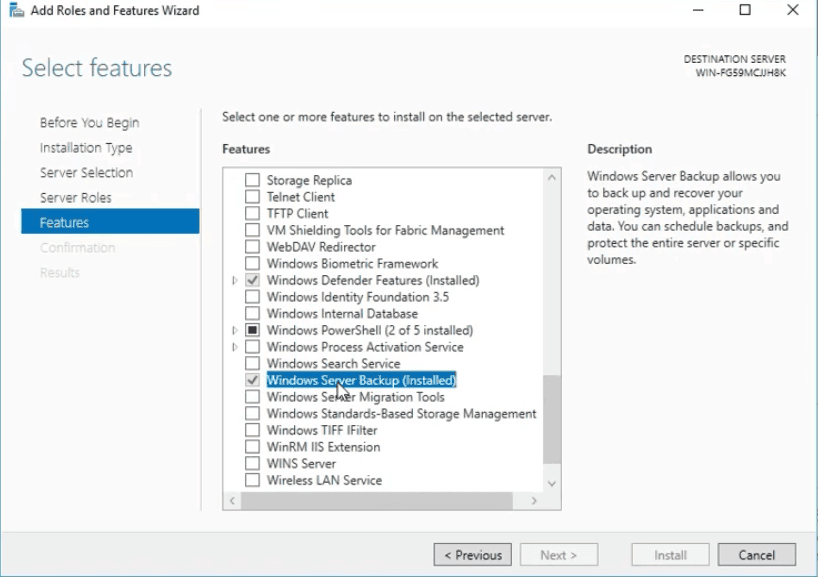
How does Windows Server 2016 backup and restore work? First you need to install the backup tool, the path is:
Server Manager >> Manage >> Add Roles and Features >> Role-based of feature-based installation >> Select a server from the server pool. Then you can follow the wizard to select Windows Server Backup and install it.
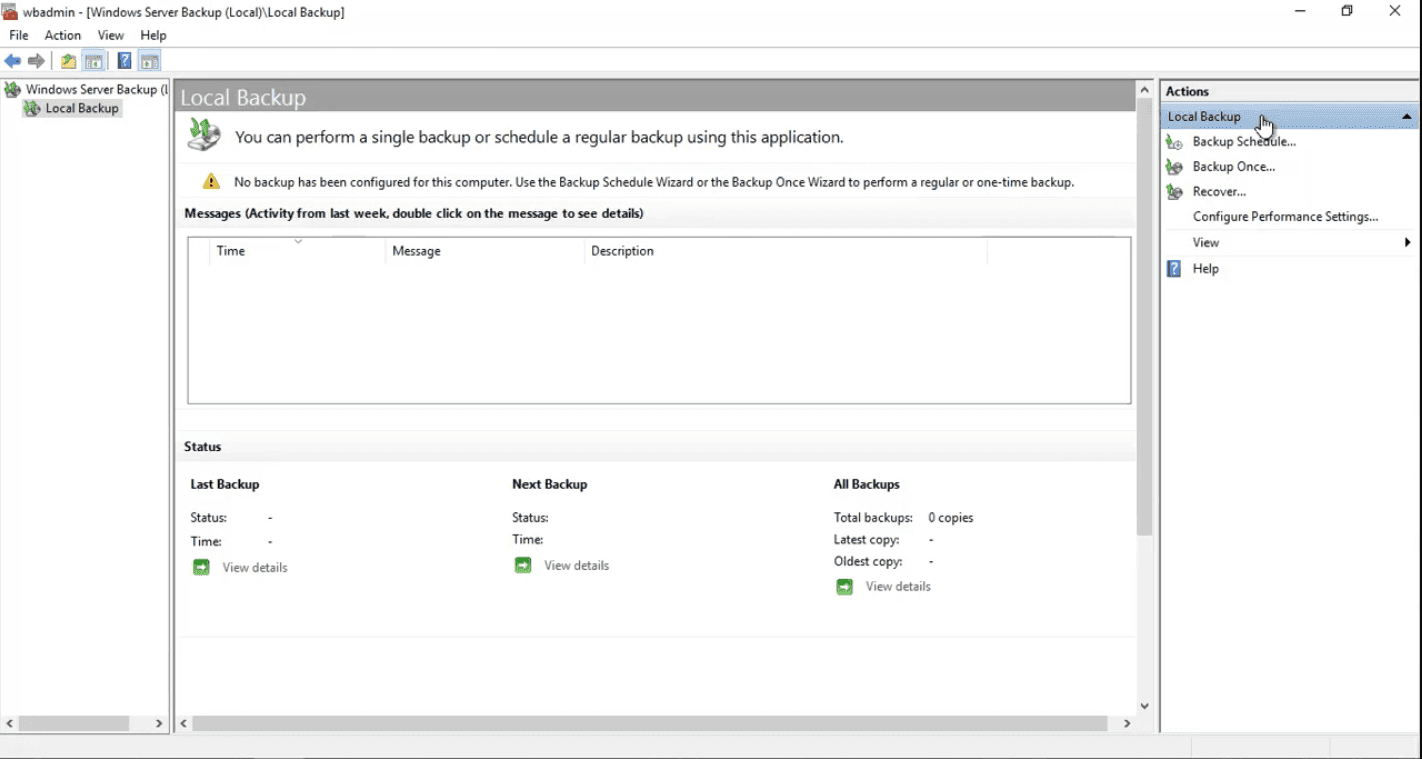
After that, click Tools in Server Manager and choose Windows Server Backup to continue.
*If you can't find this feature or fail to use it, please refer to Windows Server Backup service missing.
How to create a backup in Windows Server 2016
1. Click Local Backup to choose Backup Schedule or Backup Once according to your needs. Here I'll choose the former to set up an automatic backup.
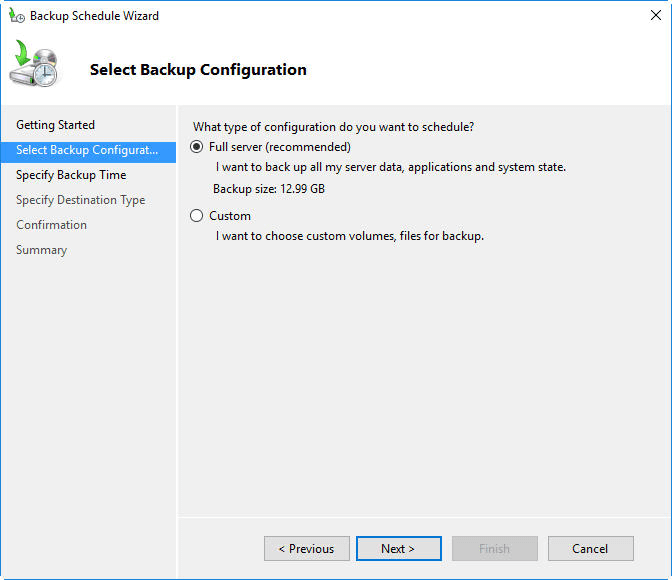
2. Choose backup configuration. Full server refers to all the data on the server, and Custom allows you to select volumes and files manually. I'll choose Custom here to show you what could be included in this backup.
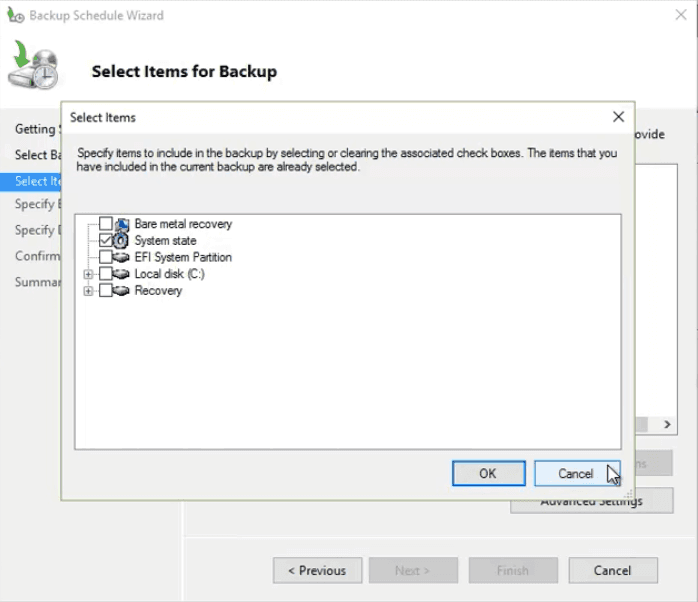
3. To perform system restore on Windows Server 2016, there are several options you could consider:
👉 System state - Backs up operating system files, allowing you to recover a machine when it's still bootable. Optionally, you can tick System Reserved
and C:
drive to include all the data and files in system drives.
👉 Bare metal recovery - Backs up operating system files and all data except user data on critical volumes. It allows you recover everything on the machine when it won't start.
Make your own decision and lick OK to confirm. To learn what you can back up and recover, please read this guide.
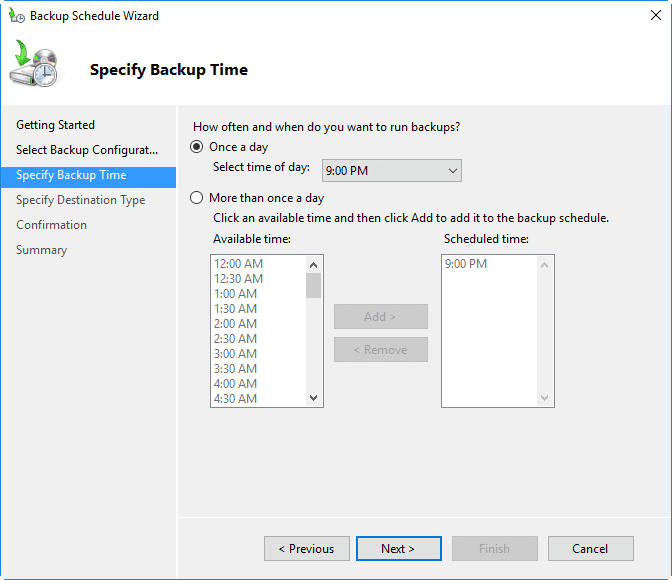
4. Then, set up a schedule to run the backup automatically. You can choose once a day or more than once a day. Click Next to proceed.
Learn how to fix Windows Server Backup schedule not running if the backup does not execute as scheduled.
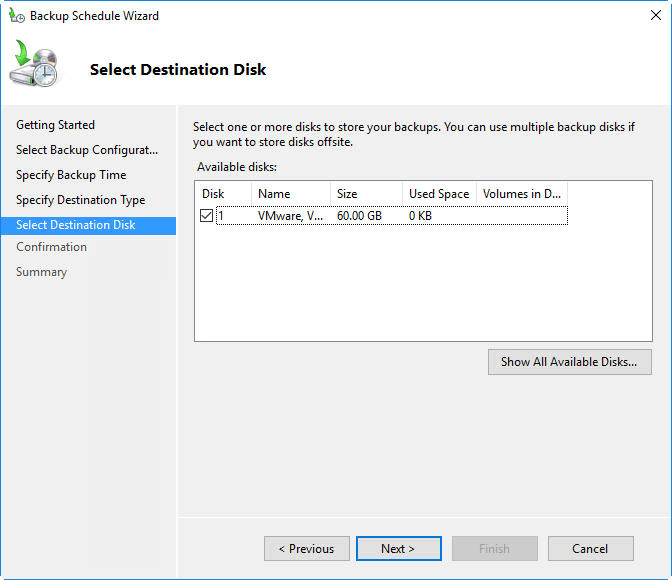
5. Now you can specify a destination type, like a hard disk, a volume or a shared network folder. Hard disk is the recommended one. Then select the destination disk and confirm it.
6. Click Finish to Proceed. Note the destination disk will be formatted after backup, so please use a blank disk or backup the data on it at first.
How to restore from a system state backup in Windows Server 2016
1. With a previously created system state backup, you can select the backup task, and choose Recover to get started.
2. Choose This server if it's a local backup, then select the date of the backup that you want to use for system restore.
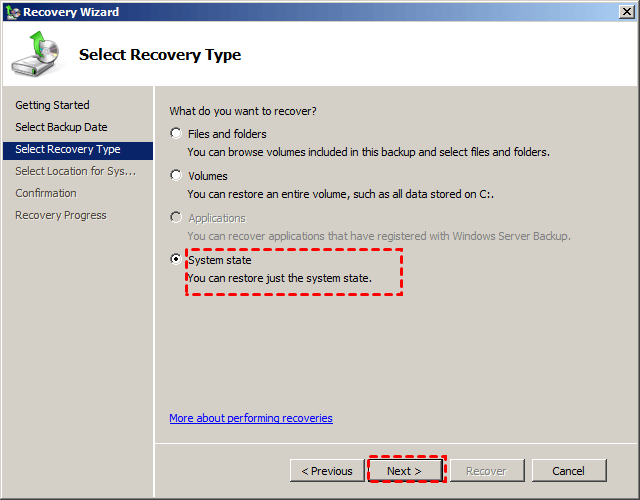
3. Select what you want to recover from the backup. Choose System state here.
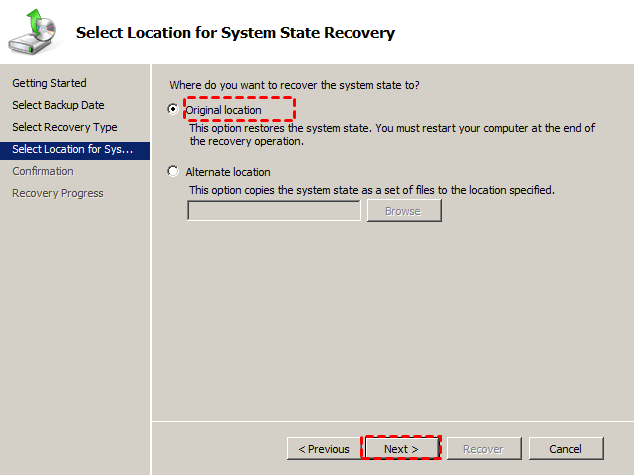
4. Then specify where you want to restore it to. Original location is the default selection.
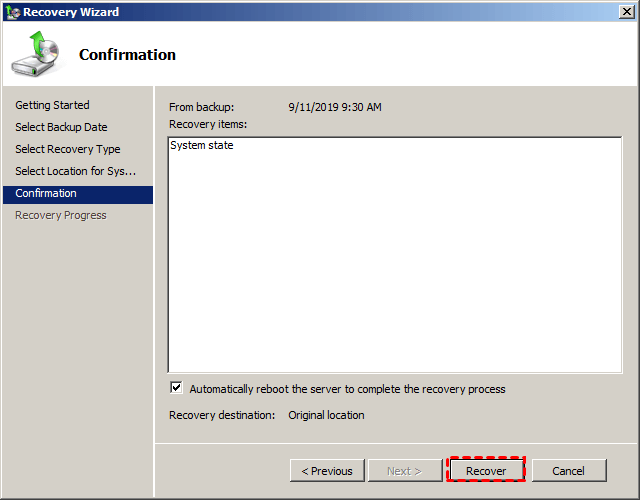
5. Confirm the operation and click Recover to proceed.
*In addition to performing Windows Server 2016 restore from backup, you can also reset it to set up the settings from scratch or fix existing problems. Learn how to make Windows Server 2016 reset to default.
How to perform bare metal recovery on Windows Server 2016
If your machine fails to start and you've created a bare metal backup before, you could perform a bare metal recovery to restore the operating system with all the data in critical volumes (except user data).
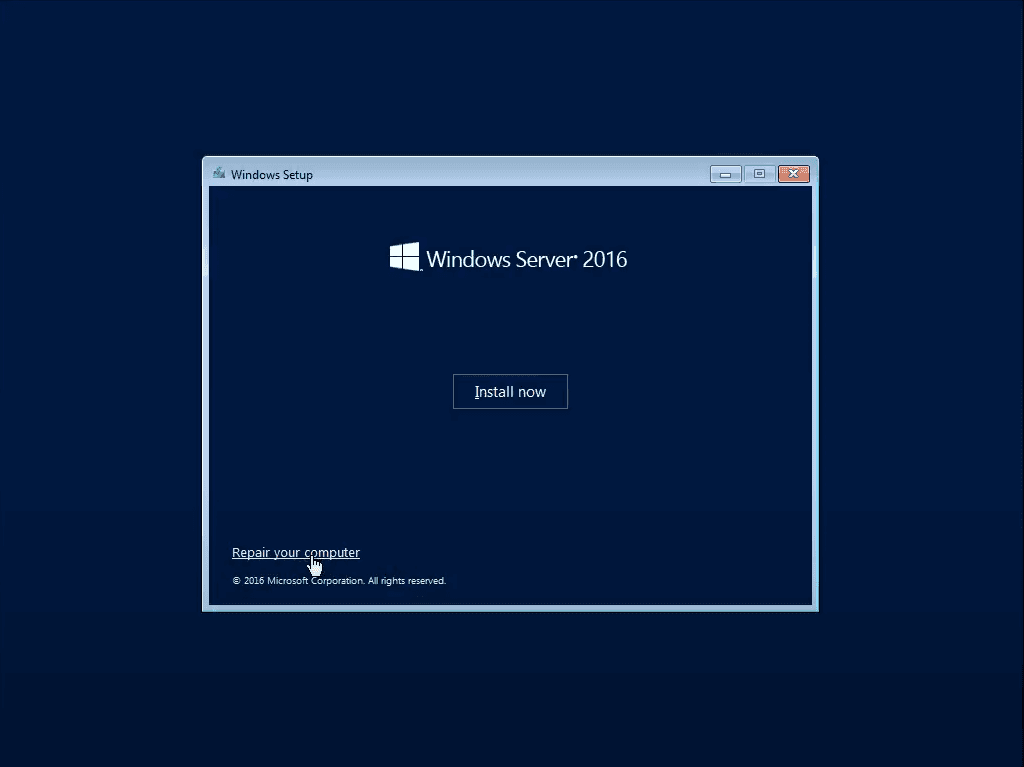
1. Insert the bootable media of Windows Server 2016 to boot it, click Repair your computer to enter recovery environment.
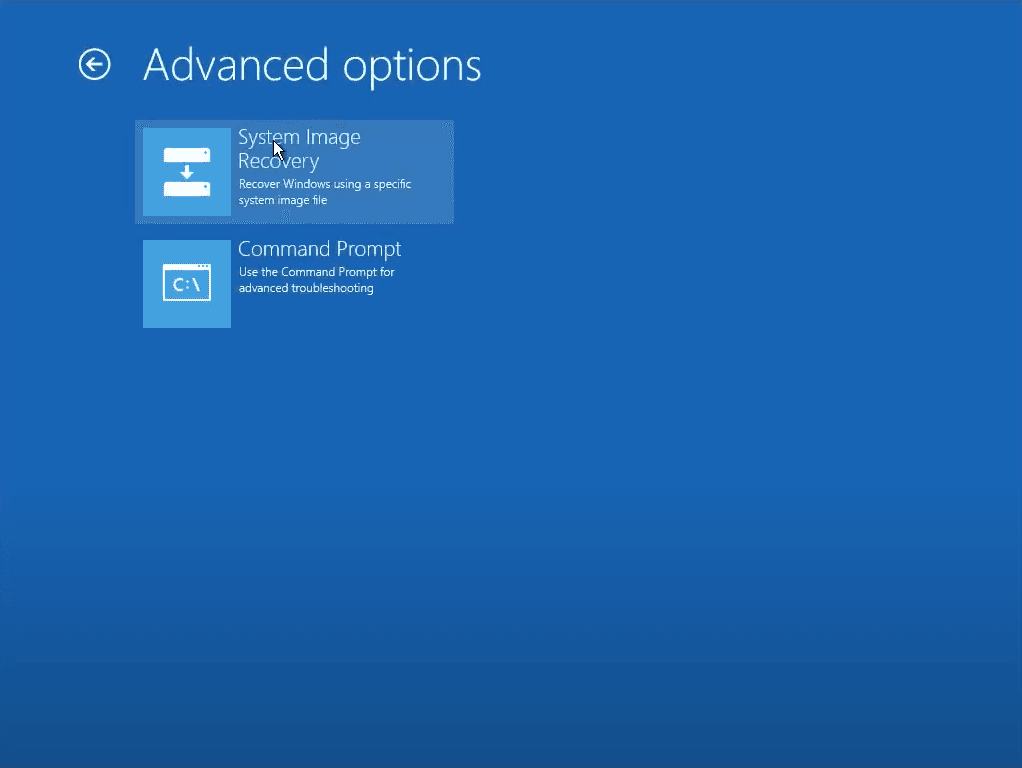
2. Choose Troubleshoot > System Image Recovery to get started.
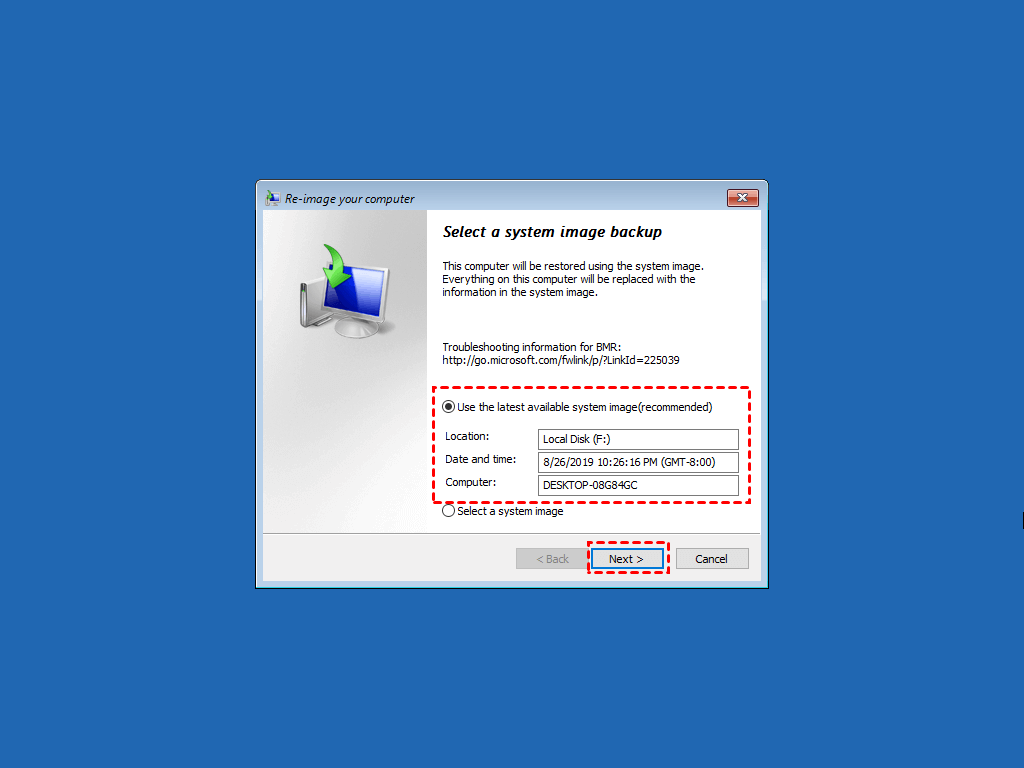
3. Your latest available system image will be auto detected, click Next to continue or choose Select a imageto specify the backup you want to restore from another location.
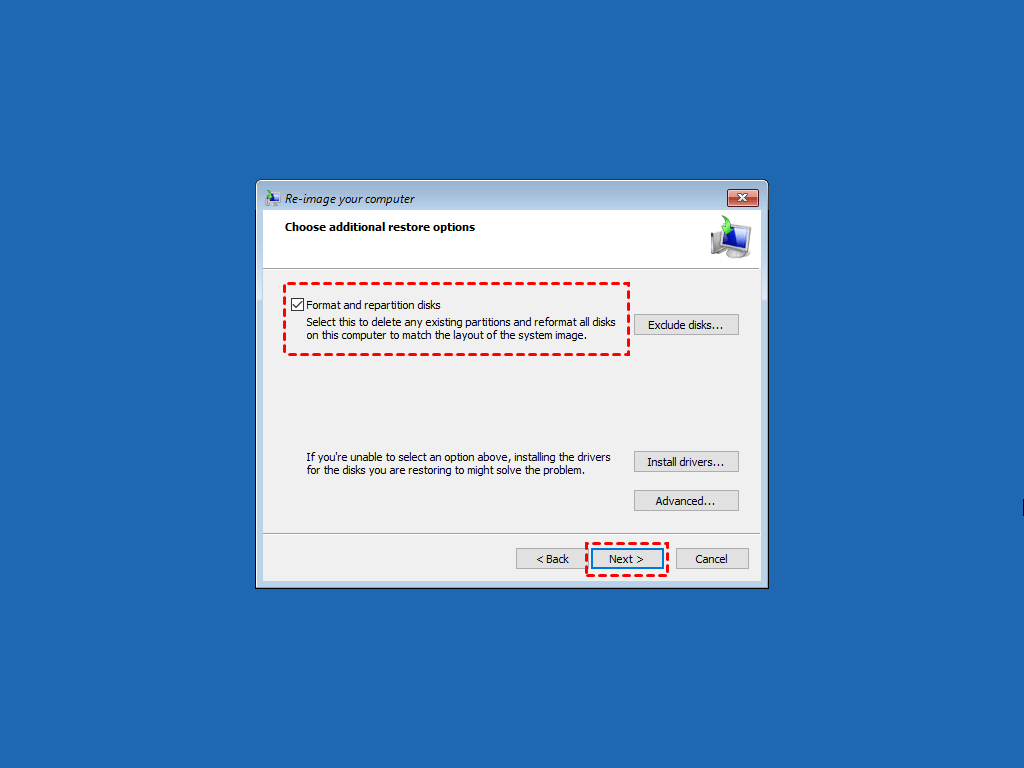
4. Keep the option Format and repartition disks ticked to matched the layout of the system image, and click Next.
5. Confirm the information and click Finish to perform system image recovery on Window Server 2016.
Standalone Tool to Perform System Restore in Windows Server 2016
Windows Server Backup is a full-featured backup utility, but not a simple one. You'll find the operation lengthy and also comes with some limitations. In this case, Qiling Disk Master Server could be an easier alternative to perform Windows Server 2016 system restore, and it also applies to newer versions, like 2019, 2022.
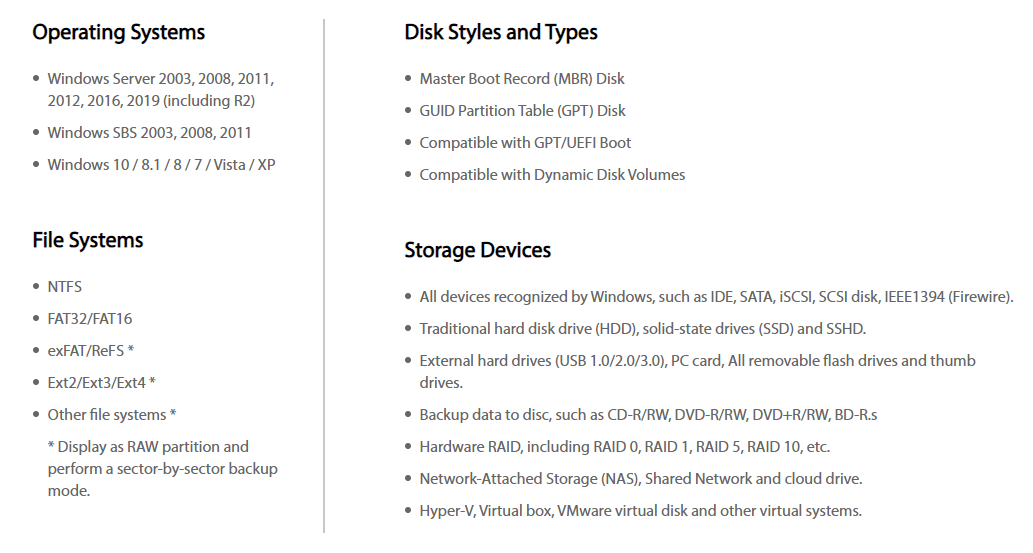
✔ It works on a wide range of Windows OS, including Windows Server 2003, 2008, 2011, 2012, 2016, 2019, 2022 (including R2), Windows SBS 2003, 2008, 2011 and Windows 10, 8.1, 8, 7, Vista, XP.
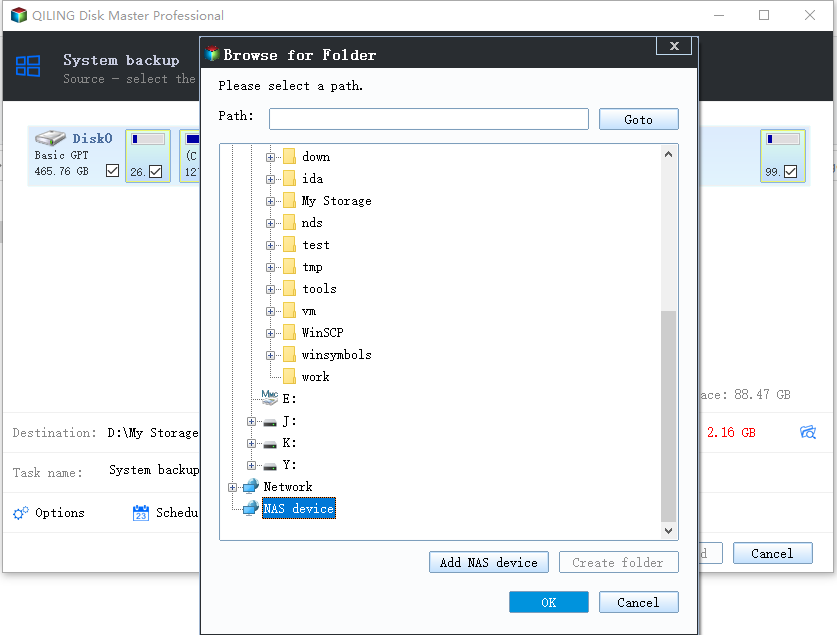
✔ It supports various storage devices, not only internal/external hard drive, but also NAS, network share, cloud service, etc.
✔ In addition to system backup and restore, it also applies to file & folders, partitions and disks.
✔ It enables you to create a recovery drive and restore system in WinPE to rescue a malfunctioning machine.
✔ With the universal restore feature, you could easily restore system image to different hardware.
How to backup Windows Server operating system with Qiling Disk Master
1. Launch the software. Navigate to Backup and click System Backup. Optionally, you could choose Disk Backup to backup everything on the machine including OS and all the drives on the disk.

2. All the system files, settings, applications and personal data in system partitions will be automatically selected as the source, you just need to select a destination path.
3. Before Proceed, you can do further settings to optimize the backup
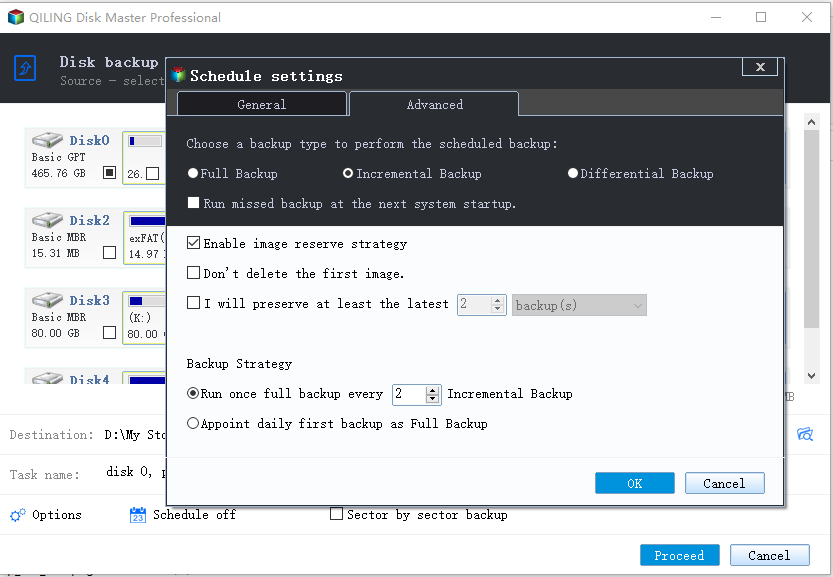
Backup Schedule: Create an automatic system backup. You can choose Daily/Weekly/Monthly/Event triggers/USB plug in.
Backup Scheme: You can select backup method as full/incremental/differential, or enable automatic backup cleanup to auto delete old backups.
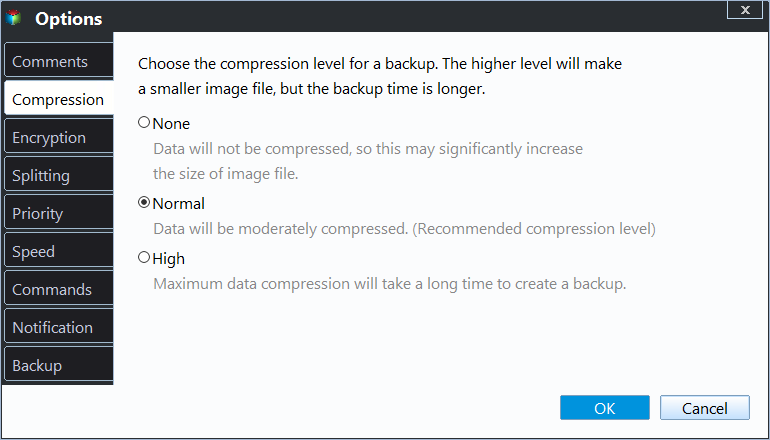
Options: Manage compression level, image splitting, encryption, operation priority, email notification, etc.
*In case you want to perform Windows Server 2016 system restore when it won't boot, please go to Tools > Create Bootable Media to create a Window Server recovery drive.
How to perform Windows Server system restore with Qiling Disk Master
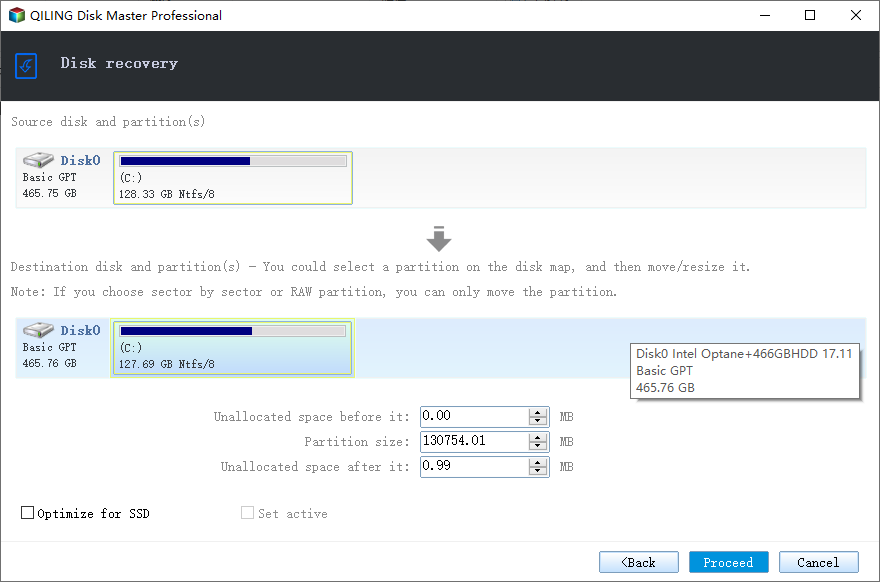
If the machine is still bootable, you could launch the software normally to perform a system restore. Otherwise you need to insert the bootable media, and complete system recovery in WinPE.
If you mean to perform Windows Server bare metal recovery to different hardware, just use the bootable media to launch Qiling Disk Master in WinPE, and tick Universal Restore at the last step.
Whichever case you are in, the operation to restore Windows Server 2016 system are roughly the same:
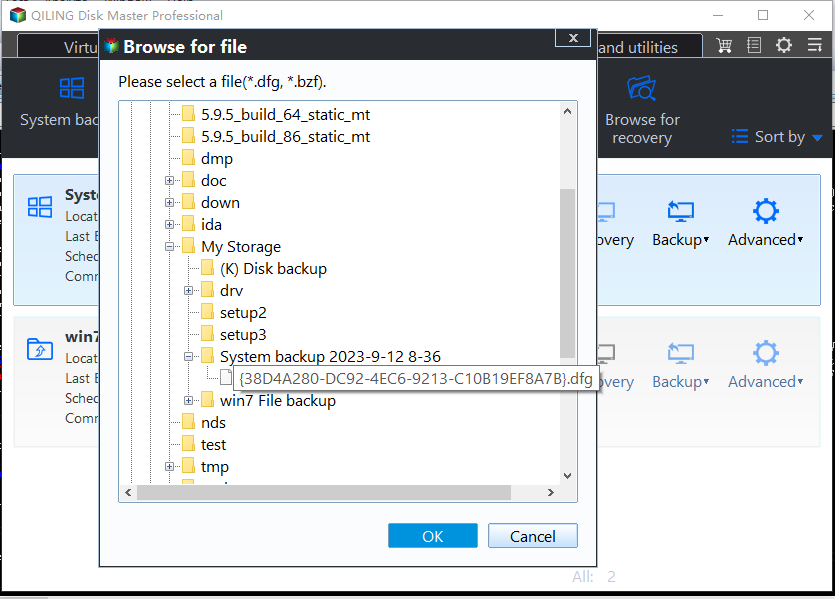
1. Go to Restore tab and choose Select Task or Select Image File to locate the system image you want to restore.
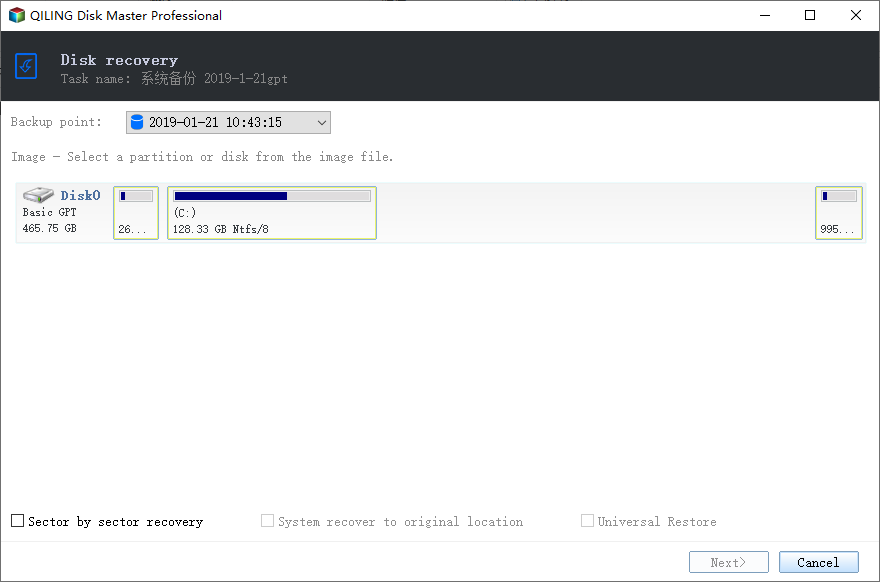
2. Choose Restore this system backup and click Next.
3. Confirm the operation and click Proceed. If the system image is created on different hardware, remember to tick Universal Restore.
Centralized Tool to Run System Restore in Windows Server 2016
The best enterprise backup software - Qiling Backup provides a convenient and reliable solution for centralized backup management of all Windows operating systems.
- It enables you to create system/disk/partition backup for a bunch of Windows PCs and Servers, supporting Windows 11/10/8.1/8/7 and Windows Server 2022/2019/2016/2012 (R2)/2008 (R2).
- You can schedule a backup task to run daily/weekly/monthly using the full/incremental/differential backup method.
- You are allowed to restore the backup image to the same computer or different computer.
- If your backup has multiple versions, you can choose to restore from any point you want.
Download Qiling Backup now to have a try!
Notes:
◑ If you are restoring system image to a different device, click Source Device > Windows > Add Windows Device to add the target device first.
◑ It is advised to enable the Universal Restore option when restoring to another computer, thus ensuring secure boot.
Conclusion
Can you do system restore in Windows Server 2016 when there's no restore point option? Well, the built-in tool Windows Server Backup is an answer. It enables you to create a backup including system state, and recover it when needed. But since the operation isn't very simple, I prefer to use Qiling Disk Master or Qiling Backup as the alternative to backup and restore system or the entire disk.
What's more, they offer the Universal Restore feature to restore system image to server with different hardware. In addition to backup and restore, Qiling Disk Master provides the powerful clone feature which allows you to clone hard drive in Windows Server.
If want to protect unlimited Servers and PCs within your company, Qiling Disk Master Tech Plus could be a better choice.
Related Articles
- 3 Ways to Backup Windows Server 2012, 2016, 2019
In this post, you will get 4 effective methods to create image backup in Windows Server, which apply to Windows Server 2008(R2), 2012(R2), 2016, 2019, 2022, etc. Let's get started! - How to Create Restore Point in Windows Server 2012 (R2)?
A restore point allows you to restore system to the previous state. This article will show you how to create Windows Server 2012 restore point with two ways. - How to Use System Restore from Boot in Windows 10/8/7?
System Restore from boot in Windows 10, 8, 7 can save you from serious system failures. If you find the process too complicated, an easier alternative is available. - How to Backup Windows Server 2016 to NAS Device?
Backup Windows Server 2016 to NAS is very safe and convenient for data protection and disaster recovery.
