Easy Guide to Clone Disk to Larger Disk (HDD or SSD)
Content of this article:
- Can I clone a drive to a larger drive?
- Why clone hard drive to larger drive?
- Prepare for your new hard drive
- Powerful hard drive cloning software to clone disk
- Here are the top 2 ways to clone a disk to a larger disk in Windows 10 or 11:
- Summary
Can I clone a drive to a larger drive?
I recently got a "low disk space warning" when I opened my computer, and since then, the same message keeps popping up, saying I don't have enough disk space. As a result, I'm unable to add new files, folders, or install programs on my computer. I was wondering if it's possible to clone my disk to a larger disk to resolve this issue.
If your computer is old or you've installed many programs and saved a lot of data, you might get a low disk space warning. In this case, you can replace your current drive with a larger one.
Why clone hard drive to larger drive?
The primary reason for cloning a hard drive to a larger drive is to address low disk space warnings. However, there are four additional key reasons for doing so:
👉 Get more space. If you replace your smaller disk with a larger one, you'll have more space to install programs and store data.
👉 Boost performance: The more free space on a system disk, the smoother the computer will run, especially if the larger disk is an SSD, which will result in a more dramatic boost.
👉 Replace old or damaged disks: What is the thing you're referring to that needs to be replaced? Is it a part of a machine or a tool, or is it something else entirely? I'll do my best to help you identify what needs to be replaced and why.
👉 Double data protection. Data is fragile and can be easily corrupted unless it's duplicated or stored on a secure disk. If not, it's vulnerable to deletion due to system crashes, virus attacks, malware, and other digital threats.
Prepare for your new hard drive
To clone a disk to a larger drive, connect the new disk and use a reliable disk clone software to clone the original disk, ensuring the new drive is prepared beforehand.
👉 Select destination disk: Whether you prefer a Hard Disk Drive (HDD) or a Solid State Drive (SSD), the choice ultimately depends on your specific needs. If you prioritize larger storage capacity, an HDD might be the way to go. However, if you're looking for better performance, an SSD is likely a better investment, especially if you have the budget to spare.
👉 Check the disk size: To ensure a successful cloning process, the new HDD or SSD must be at least as large as the old hard disk, taking into account the used space. If the new drive is smaller, free up space by deleting large files or uninstalling unnecessary programs to avoid cloning failure.
👉 Prepare connector: For desktops, a new hard drive can be directly installed on an extra socket, but for laptops, a cable or adapter, such as SATA-to-USB, is required due to varying disk interfaces.
👉 Alternatives: If you don't have a disk connector, you can still back up your Windows system to a NAS (Network-Attached Storage) device, then replace your disk with a larger one and restore the backup image from the NAS.
Powerful hard drive cloning software to clone disk
To complete the process, you'll need the best disk cloning software, such as Qiling Disk Master Professional, which offers two practical methods: using the "Disk Clone" feature or the "Disk Backup and Restore" feature.
Both the full backup and the incremental backup will include the operating system, boot files, personal data, installed programs, etc., and handle disk space or compatibility issues well. However, there are some differences between the two methods, which can be checked in the following.
- Disk Clone: Clonzilla supports cloning HDDs/SSDs, MBR/GPT disks, and even those with different sector sizes. It can also align partition sectors between HDDs and SSDs, which helps maintain the SSD's performance.
- Disk Backup and Restore: It allows you to choose different options, schedule backups, and set up a backup scheme to create multiple backups using less disk space, or delete old backup images to free up space for new backups, all while compressing data into an image file.
Please download this software to have a try!
You can create a bootable USB using either cloning or backup and restore method, allowing you to perform both operations without booting into Windows.
Top 2 ways to clone disk to larger disk in Windows 10 or 11
To clone a smaller disk to a larger disk or SSD, you can use two methods. The software supports Windows 11/10/8/7/XP/Vista, and for server users, Qiling Disk Master Server is available. Please note that this software only supports Windows operating systems.
👉 If you want a quick way to clone a hard drive, try Method 1.
👉 If you're more concerned about data security and want to protect it continuously, try Method 2, which is the safest way.
Method 1: Clone smaller disk to larger disk with Disk Clone
Step 1. Open Qiling Disk Master Standard, click Clone and Disk Clone subsequently.
Note: The Clone feature in the trial version can only be demonstrated, and to directly clone an HDD to a Samsung SSD, you need to upgrade the trial version to the full version of Qiling Disk Master Professional.
Step 2. To begin the process, select the source disk from the available options, which in this case is Disk0. Then, choose the destination disk, which is Disk1. Once both disks are selected, proceed by clicking the "Next" button.
Step 3 1. Click Edit Partitions to clone and resize hard drive with the following 3 options. 2. If the source disk and destination disk have different disk types, you will also see "Convert the destination disk from MBR to GPT" or vice versa. 3.
- Copy without resizing partitions: It will not resize the partition size.
- Add unused space to all partitions: The tool will redistribute the unallocated space to each partition of the target disk, taking into account the disk's actual size.
- Manually adjust partition size: It allows you to extend unallocated space to any partition on the destination disk you want.
📔How to check disk type (MBR or GPT) of a disk:
To ensure both disk types and boot from the cloned drive successfully, you can follow these overall steps:
- Press the Windows key + R to open the Run window. Type "diskmgmt.msc" and press OK to open the Disk Management window.
- Then, right-Click the disk you want to clone and select Properties in the pop-up window.
- In the Properties window, select the Volume tab and confirm the partition style, which can be either MBR (Master Boot Record) or GPT (GUID Partition Table).
- Check the disk partition style of the destination disk. If they have different styles, convert MBR to GPT or vice versa with Edit Partitions option.
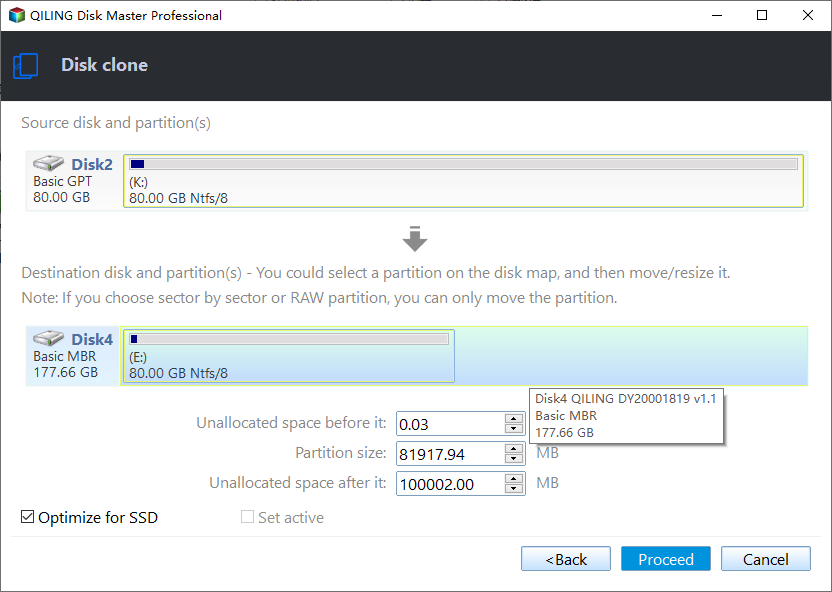
Step 4. When cloning a disk to a larger SSD, check the "SSD Alignment" option to optimize performance. Review the details of both disks to ensure accuracy, then click "Proceed" to initiate the cloning process.
If you've successfully cloned a hard drive to a larger one, you can try booting from it. However, if the destination disk is smaller, the cloning process may fail. In this case, you can use the "System Clone" feature to migrate the OS instead.
Method 2: Copy boot drive to larger drive with Disk Backup & Restore
In addition to cloning a HDD to a larger one using the "Disk Clone" feature, Qiling Disk Master's Disk Backup & Restore allows for continuous system and data protection by backing up all data currently on the disk and automatically backing up changes made later.
Backup a hard drive in Windows 10
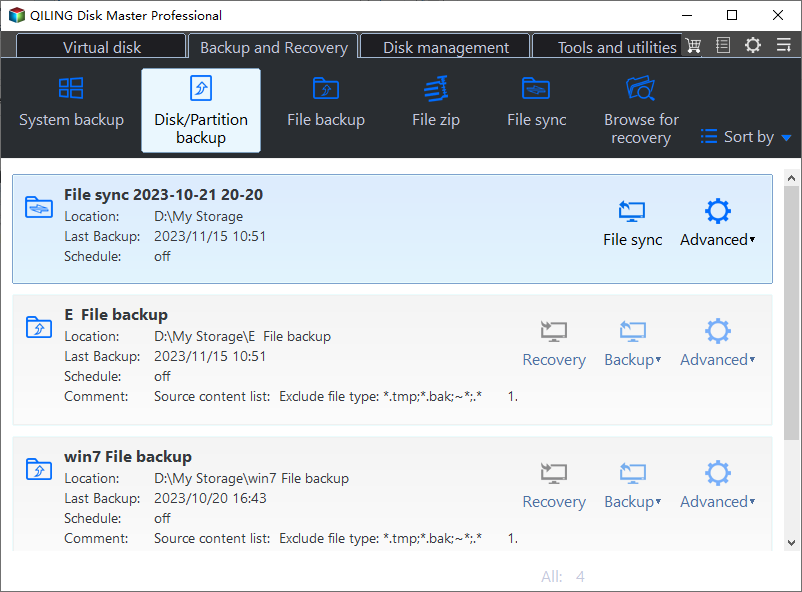
Step 1. Open Qiling Disk Master Standard, click Backup and Disk Backup.
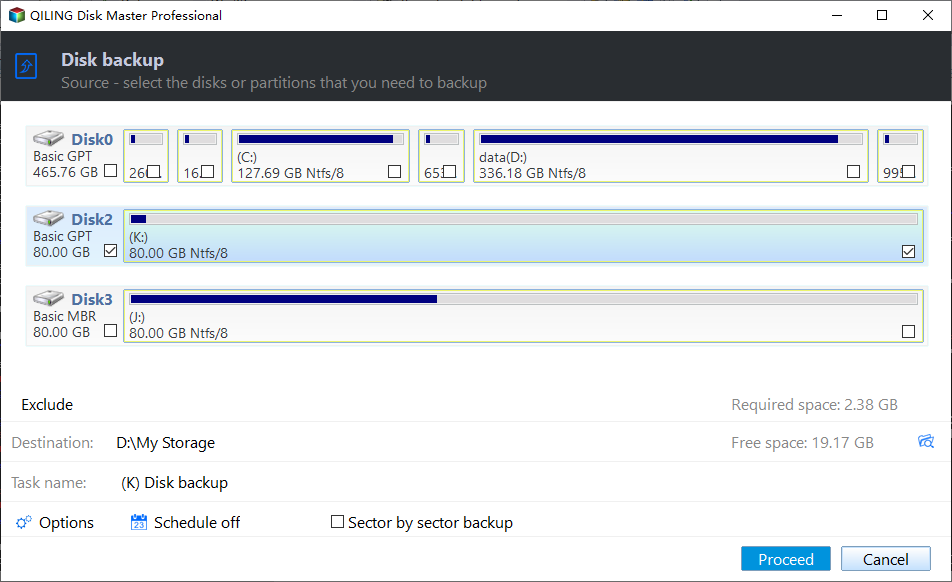
Step 2. Select the source disk you want to backup and the destination disk to store the backup image.
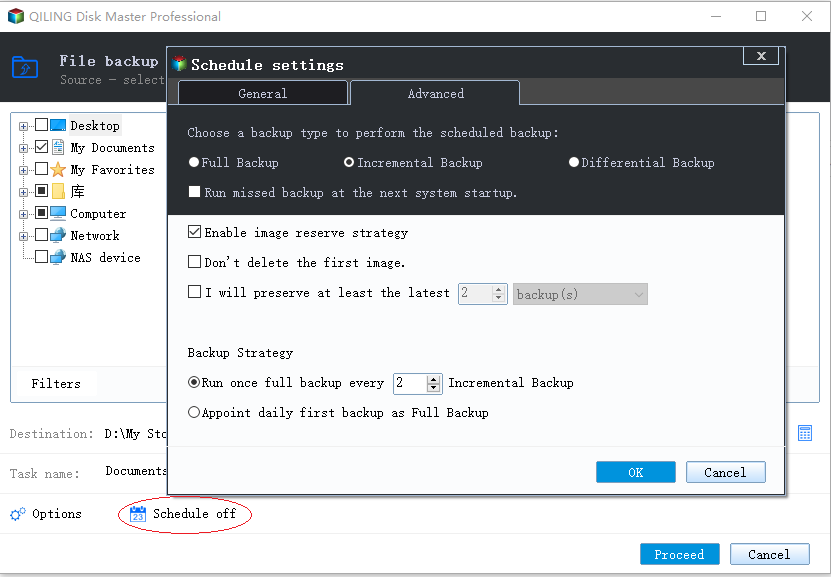
Step 3. This software allows you to set a daily, weekly, or monthly scheduled backup, backing up only changed files in the scheduled task. It also features an event trigger and USB plug-in, available on the full professional version. To complete the task, click Proceed.
📔 Important: good and sustainable data protection
To avoid Qiling Disk Master from continuously creating backups until the backup disk is full, enable automatic backup cleanup in Backup Scheme, which will delete backup files to free up disk space for new backups.
Restore disk image to get computer back quickly
You don't need to restore a disk backup immediately after backing up, but rather wait until a disaster or abnormal behavior occurs. This process also includes editing partitions to utilize disk space efficiently and prevent boot failure due to different disk types.
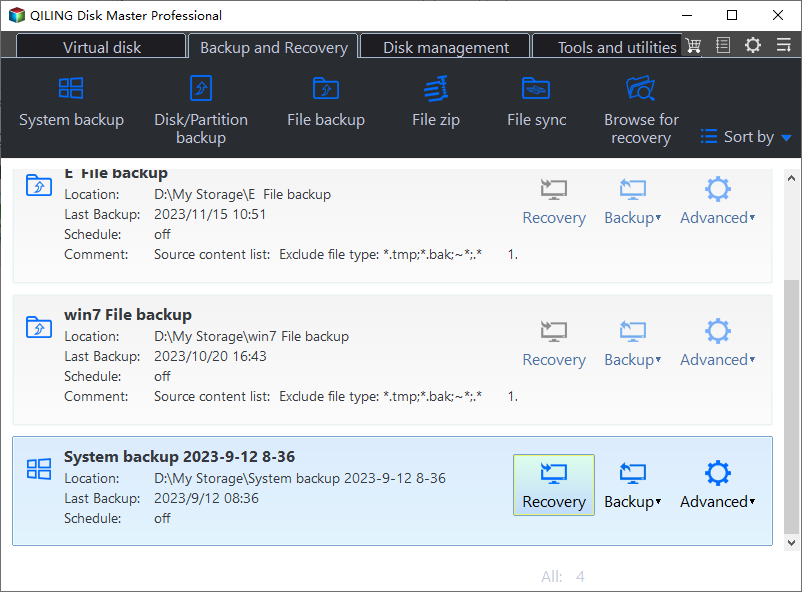
Step 1. To restore a backup image, connect both the backup disk and the new drive to your computer, then open the software, click "Restore" and "Select Task" in order.
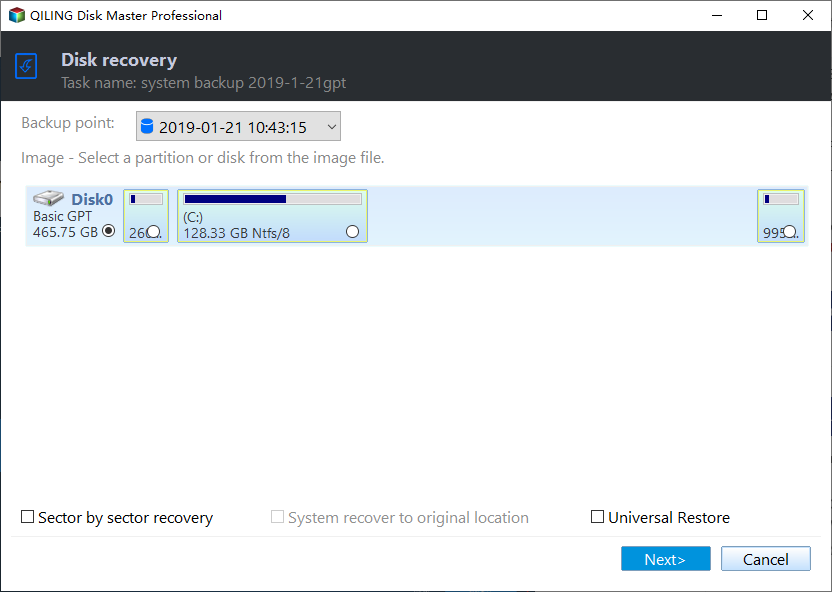
Step 2. After selecting the source disk, you will be asked to choose the disk image version, select restore items, and select the destination disk. Simply follow the prompts and click "Next" at each step.
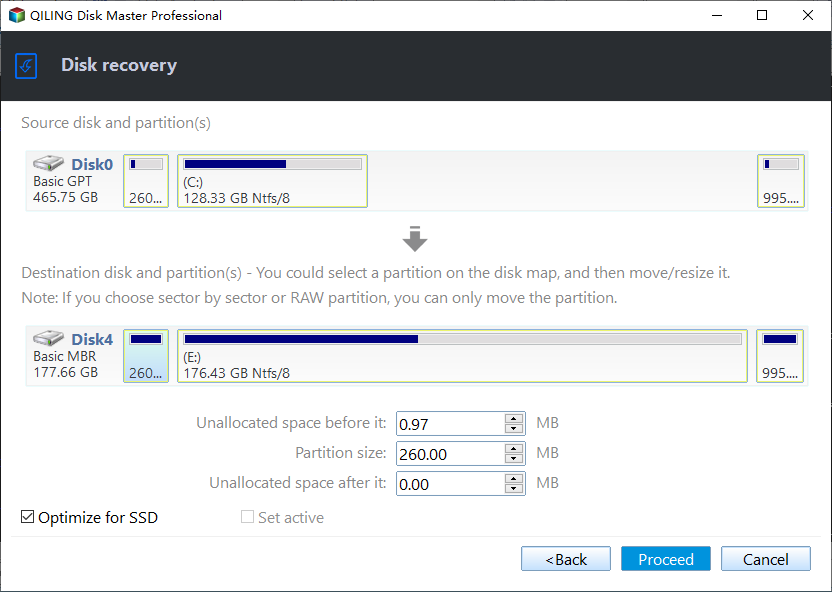
Step 3 To adjust the partition size on the destination disk, click "Edit Partitions." If you're moving Windows to a new computer, verify the "Universal Restore" to ensure a secure boot, which will install necessary drivers for the PC to start.
Step 4. To proceed with restoring a disk backup to a new hard drive, preview the details and click "Proceed" to initiate the process. If the target disk is an SSD, select the option to "Optimize for SSD" to ensure the SSD performs at its best capabilities.
📔 Advanced feature: Explore Image - restore only individual files from a disk
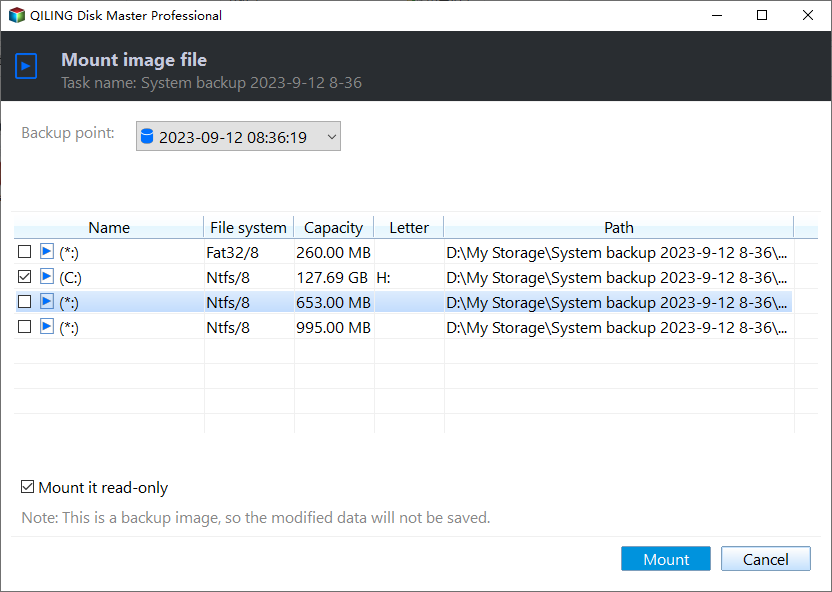
Qiling Disk Master's "Explore Image" tool enables you to restore hard disk image files, allowing you to assign drive letters to partitions and mount the backup image in Windows Explorer, making it possible to directly access and copy files from the image.
📔 Advanced feature: Qiling Image Deploy - restore image to two or more computers
In the Technician or Techplus Edition, Qiling Disk Master enables simultaneous system image deployment to multiple computers over a network using Qiling Image Deploy, allowing for presetting computer names, IP addresses, and universal restores for all targeted computers.
How to boot from larger cloned or restored disk
The boot process for a disk clone or backup and restore is similar. Regardless of the method used, the basic process involves booting from the cloned or restored disk, which then loads the operating system and programs from the new disk.
Step 1. Switch the smaller disk and larger disk with a screwdriver.
Step 2. Restart your computer, press a specific key (eg: Del, F2, ESC) on the initial screen to enter BIOS.
Step 3. In the Boot tab, change the new disk to the first boot option, save changes, and restart your computer. Also, pull out the old disk at a 30 or 45 degree angle during the installation process.
Summary
You can easily clone a disk to a larger one using Qiling Disk Master, an all-in-one disk clone software that offers two practical ways to do so. Whether you need to upgrade your disk quickly or protect your data for the long-term, you can choose the method that suits your purpose.
With this software, you can easily clone or backup your hard drive in Windows 10, enjoying benefits like accelerated SSD performance, automatic disk space addition, and scheduled backups. It's definitely worth trying!
Related Articles
- [Get the Answer!] Can I Safely Clone an HDD to an SSHD?
Description: Have you been stuck by a question like - [Quick Guide] How to Copy a Hard Drive to SSD Easily
As more and more computer users are making the switch from traditional hard drives to solid-state drives (SSDs), it is important to know how to copy your hard drive to an SSD. In this article, you will learn how to copy a hard drive to an SSD easily and quickly with Qiling Disk Copy, which is a powerful disk cloning software that offers a variety of features to make disk copying and cloning simple and effective. - When Should I Replace My HDD? You May Noticed Signs...
This article provides information on time to replace HDD and how to replace it without having to reinstall windows. Qiling Disk Copy is a reliable HDD to SSD cloning tool that helps upgrade, replace and clone an old, small and slow HDD to a new one without losing the operating system. - Clone HDD to OCZ SSD with Free Clone Software
Is there any better OCZ SSD clone software to clone HDD to OCZ SSD easily while OCZ SSD utility occur the error no drive available? Below the words will show you how to clone safely.


