Best SSD to Larger SSD Cloning: Guide & SSD Comparison
Quick Navigation:
- Error: Clone to Larger SSD Showing Wrong Space
- Choose A Right SSD: Top SSDs Comparison
- Best SSD Cloning Software for Windows 11/10 - Qiling Disk Master
- How to Safely Clone System Disk to Larger SSD Step by Step
- Important: Tips on SSD Cloning
- Conclusion
Error: Clone to Larger SSD Showing Wrong Space
Encountering an issue while attempting to clone my 256 GB SSD to a larger 1 TB SSD has left me puzzled. Despite having the new disk visible in Disk Management, the disk cloning software displayed a message stating,
"Not enough space on the target disk. To make sure the boot ability of the target disk, please delete partitions on there first."
Following the instructions, I deleted the existing partitions, but to my dismay, the newly cloned 1 TB SSD only showed a capacity of 256 GB, and the backup disk reached its maximum capacity.
When confronted with a situation where the newly cloned 1 TB SSD displays only 256 GB of available space, mirroring the capacity of the old SSD, there are two potential explanations to consider.
- "Sector by sector clone" option: Selecting this option during the cloning process results in an exact replication of all sectors, regardless of their usage. Consequently, the new disk will mirror the size of the old disk. It is advised to avoid this option when cloning from a smaller disk (e.g., 256 GB) to a larger one (e.g., 1 TB), as it does not utilize the full capacity of the new disk.
- Unallocated space: Although the disk may appear full, there is likely unallocated space that can be utilized. To access this space, open the Run box by pressing Win + R, enter "diskmgmt.msc," and navigate to Disk Management. Here, you can locate any unallocated space at the end of the disk. This space can be used to create new partitions or allocate it to existing ones using a free partition tool.
Solid-state drives (SSDs) offer numerous advantages over traditional hard disk drives (HDDs) including faster speeds, lighter weight, quieter operation, cooler temperatures, and lower power consumption, making them a preferred choice for Windows OS installations.
To ensure a successful and comprehensive cloning process when upgrading to a larger disk, it is recommended to employ professional SSD cloning software, which provides advanced features and avoids the limitations associated with simple sector-by-sector cloning.
Choose A Right SSD: Top SSDs Comparison
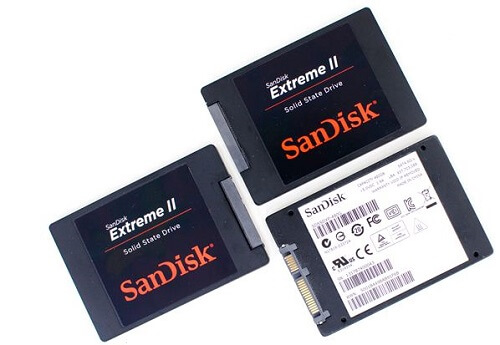
It is important to consider SSD's performance before cloning boot SSD to larger SSD. Following is a comparison chat of most popular SSDs.
| SSD Model | Capacity | Speed | Reliability | Endurance | Power Efficiency | Data Security |
| Samsung 970 EVO Plus | 250GB, 500GB, 1TB, 2TB, 4TB | Read up to 3,500MB/s, Write up to 3,300MB/s | High | Up to 1,200TBW | Low power consumption | Hardware encryption support |
| WD Blue 3D NAND | 250GB, 500GB, 1TB, 2TB, 4TB | Read up to 560MB/s, Write up to 530MB/s | High | Up to 600TBW | Energy-efficient | No hardware encryption |
| Crucial MX500 | 250GB, 500GB, 1TB, 2TB | Read up to 560MB/s, Write up to 510MB/s | High | Up to 700TBW | Power-efficient | Hardware encryption support |
| Kingston A2000 | 250GB, 500GB, 1TB, 2TB | Read up to 2,200MB/s, Write up to 2,000MB/s | Medium | Up to 600TBW | Energy-efficient | No hardware encryption |
| SanDisk Extreme Pro | 250GB, 500GB, 1TB, 2TB | Read up to 3,400MB/s, Write up to 2,800MB/s | High | Up to 600TBW | Power-efficient | No hardware encryption |
It is generally recommended to have a higher capacity SSD, such as 250GB or higher, for cloning SSD. This allows for sufficient space for the operating system, applications, and future updates, while also providing room for user files and data storage.
As you consider SSD upgrading, the importance of efficient data migration and seamless transition cannot be overstated. In the next part, we will introduce advanced cloning software, designed to simplify the cloning process and provide you with a seamless experience during the upgrade to a larger SSD.
Best SSD Cloning Software for Windows 11/10 - Qiling Disk Master
To ensure a smooth and hassle-free process, the use of reliable cloning software becomes crucial. With Qiling Disk Master Professional, you can easily clone your existing drive to a larger SSD, preserving all your data, settings, and applications.
💛 Beginner-friendly interface. It makes the cloning process simple and accessible. You can easily navigate through the software and initiate the cloning process without much effort or confusion.
💛 Intelligent cloning. Intelligent enough to clone only the used space on the source disk to the target SSD, optimizing storage utilization and preventing unnecessary data duplication.
💛 Boot disk cloning. Clone Windows SSD to larger SSD. The cloned SSD retains its bootability, ensuring a seamless transition without any issues or additional steps required to make the new SSD bootable.
💛 MBR/GPT disk cloning support. Clone disks between MBR and GPT partition styles, which ensures compatibility and enables a smooth cloning process regardless of the partition style used.
💛 4K partition alignment. Aligns partitions on the target SSD properly, optimizing performance and maximizing the potential of your SSD.
💛 VSS technology. The cloning process operates seamlessly in the background, allowing users to continue using their computer without interruption, i.e. hot clone.
💛 Widely compatible. All mentioned popular SSDs are supported. Compatible with NVMe and M.2 interface. Work smoothly on latest Windows 11.
These features collectively make Qiling Disk Master Professional a reliable and efficient solution for cloning hard drive, providing an effortless and seamless experience for users looking to upgrade SSD to larger SSD.
How to Safely Clone System Disk to Larger SSD Step by Step
1. Preparation
- Connect the target SSD to your computer properly, and make sure it can be detected.
- Please note the target SSD will be overwritten, so backup important files in advance.
2. Clone SSD to SSD with Qiling Disk Master
Below will be a step-by-step guide on how to clone smaller SSD to bigger SSD on Windows 10.
Step 1. Install and run Qiling Disk Master Professional on your computer.
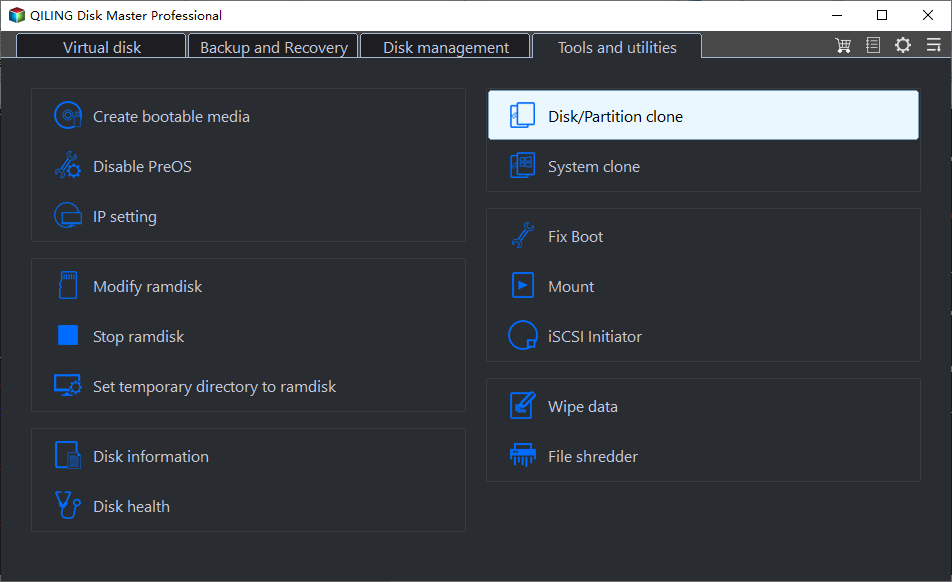
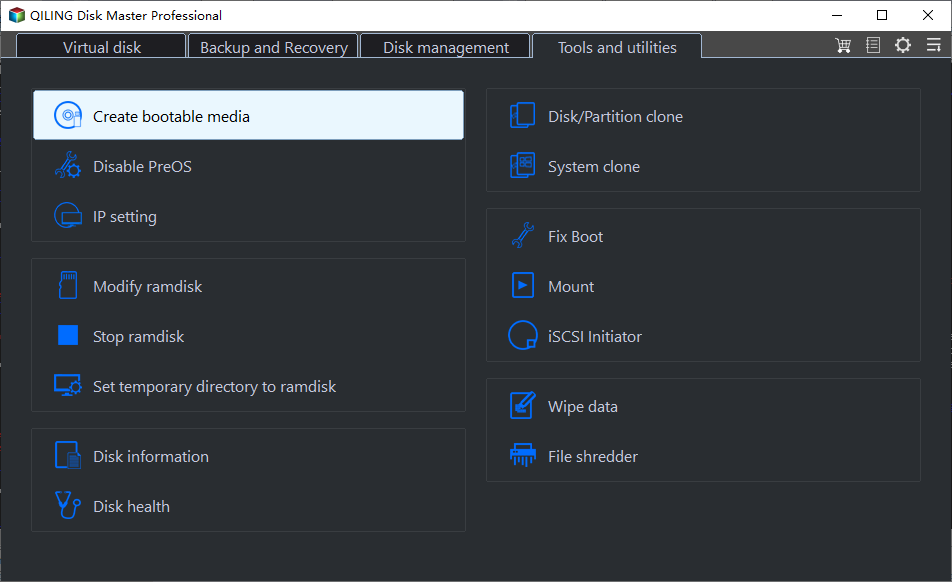
Step 2. Select “Disk Clone” under Tools tab.
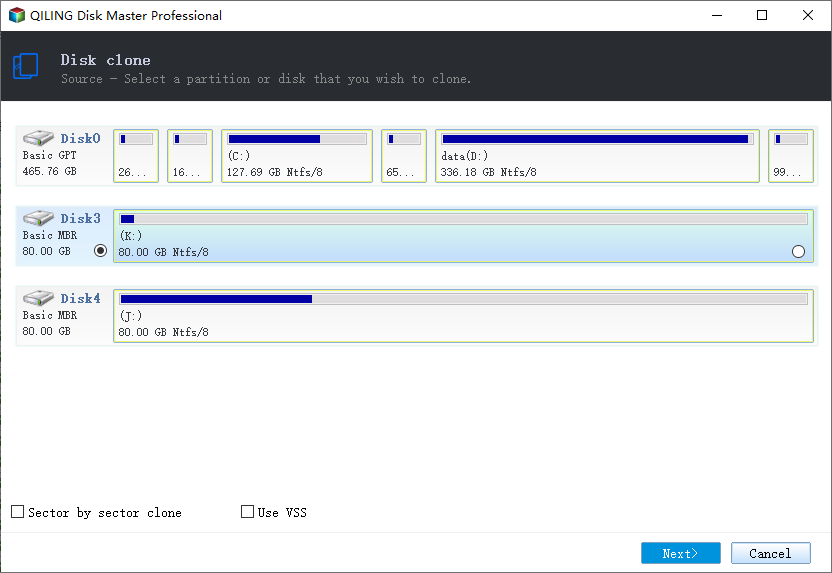
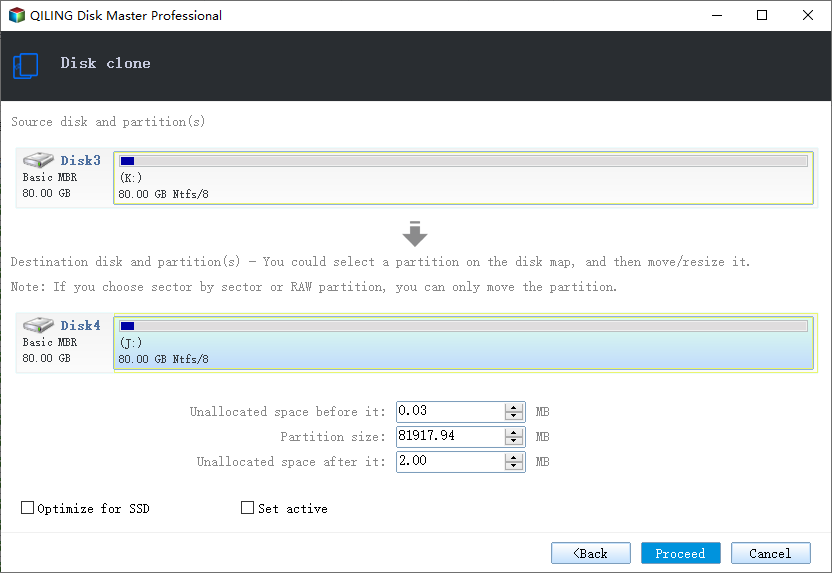
Step 3. Click on the smaller SSD to select it as the source disk, and click on "Next".
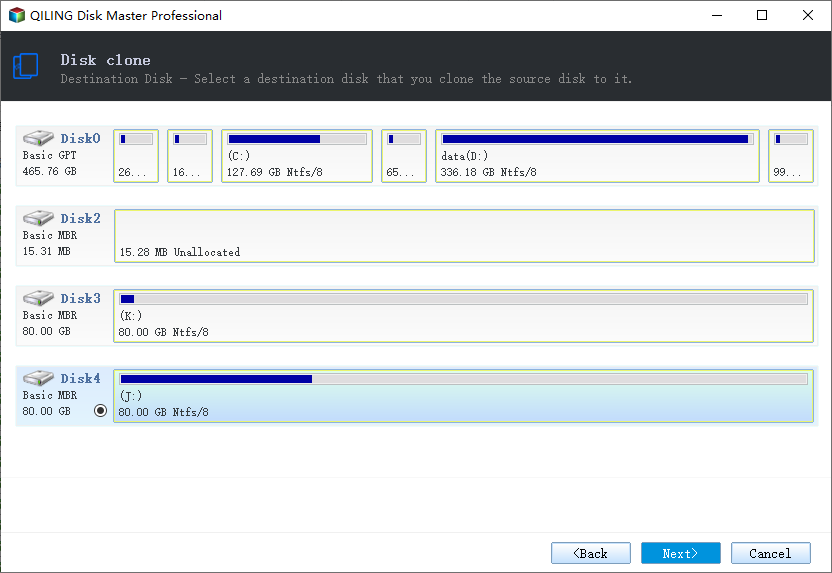
Step 4. Select on the larger SSD to set it as the destination disk, and click “Next”.
Step 5. Enable "Optimize for SSD" to SSD Alignmen for optimal performance, then click "Proceed" to initiate the SSD cloning process.
Step 6. Once the cloning is finished, shut down your computer and disconnect the original SSD. Connect the newly cloned SSD to your computer and ensure it's properly recognized.
Finally, test the functionality of the cloned SSD and verify that all data and settings have been successfully transferred. If you encounter issues with booting the cloned system disk, please visit cloned SSD won't boot for additional support and assistance.
- ★New feature
- Qiling Disk Master continuously enhances and optimizes its software, introducing a new feature called "Create Portable Version." This feature enables you to generate a portable version of the software, providing convenience for disk cloning, file backup and restoration, and file synchronization across multiple computers without the need for installation.
Important: Tips on SSD Cloning
Here are some important precautions to keep in mind during the SSD cloning process:
- Choose a compatible SSD: Ensure the larger SSD you select is compatible with your system, considering factors like interface and form factor.
- Assess your storage needs: Evaluate your data requirements and estimate the necessary capacity for your new SSD. Consider current and future storage needs to ensure sufficient space for data, applications, and growth.
- Organize and clean up data: Before cloning, declutter your existing SSD by removing unnecessary files and organizing data. This will optimize storage usage and improve overall system performance.
- Take a backup: Prioritize data backup before cloning. Create a reliable backup of critical files and folders using a trusted backup solution to safeguard against any unforeseen data loss during the cloning process.
- Post-cloning adjustments: After cloning, update system drivers, adjust partition sizes if needed, and verify the boot settings in the BIOS. These steps ensure a seamless transition and proper functioning of the cloned SSD.
Conclusion
The process of cloning an SSD to a larger SSD in Windows 11/10 can be made simple and efficient with the right software. Choosing the right SSD is also important for future using.
Qiling Disk Master Professional is a reliable SSD cloning solution that offers practical features. Above method also suits clone M.2 SSD to larger M.2 SSD. Download to explore more.
Related Articles
- [Get the Answer!] Can I Safely Clone an HDD to an SSHD?
Description: Have you been stuck by a question like - (Easiest Way) How to Clone 2.5 SSD to M.2 with Best SSD Cloning Software
Do you know how to clone 2.5 SSD to M.2? If you don't, you are coming to the right page. This article will tell you the difference between a 2.5 SSD and M.2 SSD and offer a solution for cloning an M.2 SSD from the 2.5 SSD. After reading this article, cloning 2.5 SSD to M.2 SSD will be a breeze. - How to Clone Your Desktop Computer | Easiest Method
Cloning a desktop computer can be useful while upgrading your drives from HDD to SSD or when you are changing your desktop computer. Read the article to learn more. - How to Clone Hard Drive Using Command Prompt for Windows 11/10/8/7
Do you know how to clone hard drive using command prompt? If you don't know, you are at the right place. This article will tell you two practical ways to clone a hard drive via a command prompt and offer an easier way to clone a hard drive instead of using a command prompt.

