How to Use Paragon Drive Copy to Migrate Windows 11/10/8/7
Quick Navigation:
- Overview of Paragon Drive Copy
- Stepwise guide to migrate OS using Paragon Drive Copy
- Super alternative to run Paragon disk clone
- To sum up
Overview of Paragon Drive Copy
Paragon Drive Copy is a powerful tool that enables users to migrate their Windows operating system from Windows 7 onwards, as well as copy entire hard drives or individual partitions, making it a convenient solution for upgrading or replacing hardware.
In addition to its core functionality, Paragon Drive Copy also allows users to exclude specific files or folders when cloning a larger drive to a smaller drive, providing more flexibility and control over the migration process. This feature is particularly useful when dealing with limited storage capacity. Furthermore, the tool enables users to perform partitioning operations, ensuring that disks are properly organized and configured after the volume or partition has been copied. The product's functionality is now integrated into the all-in-one Hard Disk Manager, offering a comprehensive suite of disk management tools. If you're interested in a standalone version of Paragon Drive Copy, you can contact the Support team for more information.
Stepwise guide to migrate OS using Paragon Drive Copy
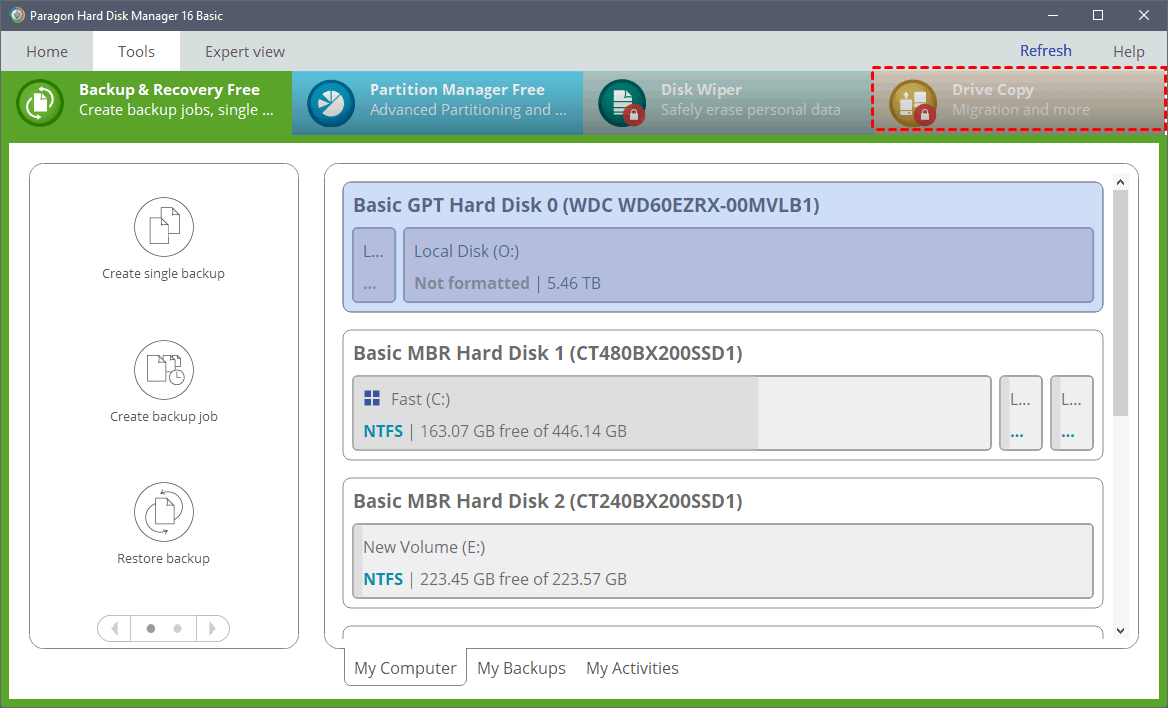
The Drive Copy functionality is currently locked in the Basic version of Hard Disk Manager, as shown in the image above. To access and utilize Paragon Drive Copy, you will need to upgrade to the advanced version of the software. Below, you will find a detailed guide on how to use Paragon Drive Copy:
1. To begin using Paragon Drive Copy, you will need to connect a new disk to your computer. Once the disk is connected, launch Hard Disk Manager and navigate to the Drive Copy scope. From there, you can proceed with the drive copy process.
2. To initiate the drive migration process, select the Tools menu and choose Migrate from the drop-down list. This will open the migration wizard. Click Next on the Welcome page of the wizard to proceed.
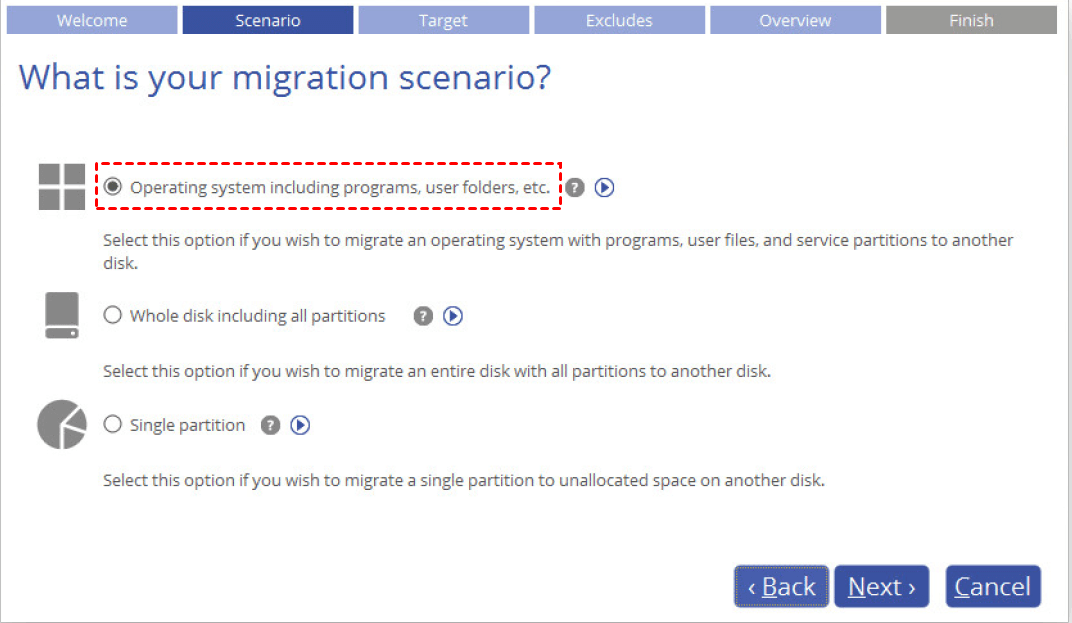
3. Proceed to the next page in the wizard, where you'll select your preferred migration scenario. For a comprehensive transfer, choose Operating system including programs, user folders, etc. If you're looking to clone your entire disk, including all partitions, select Whole disk including all partitions. This might be useful if you're migrating to a new, larger drive or if you want to preserve all data and settings.
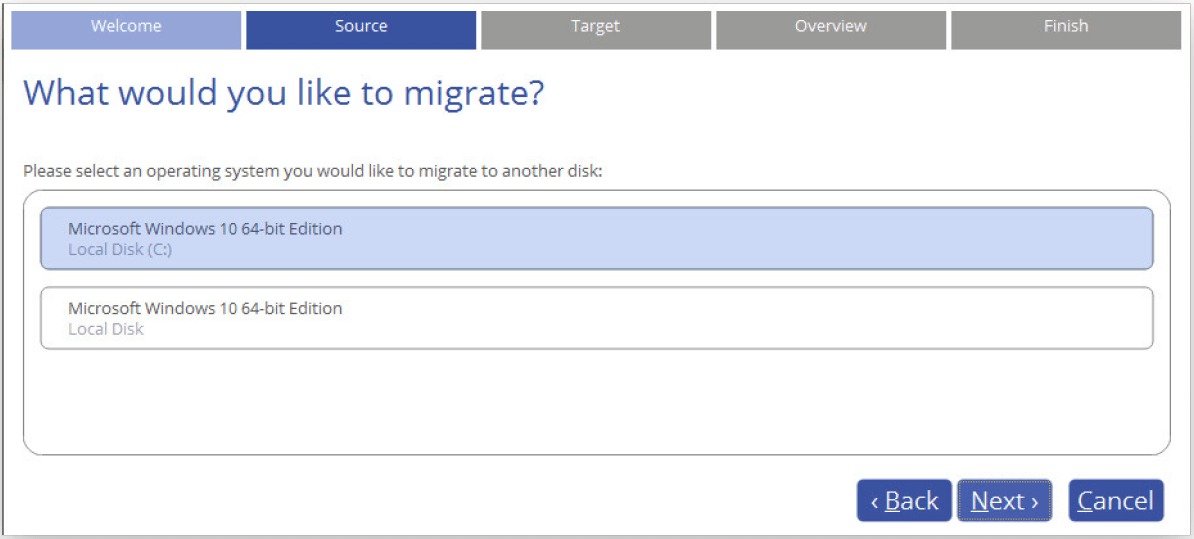
4. The migration process will now begin by scanning your system for supported operating systems. If multiple OSes are detected, you'll need to select the one you want to migrate from the list. Once you've made your selection, click Next to proceed.
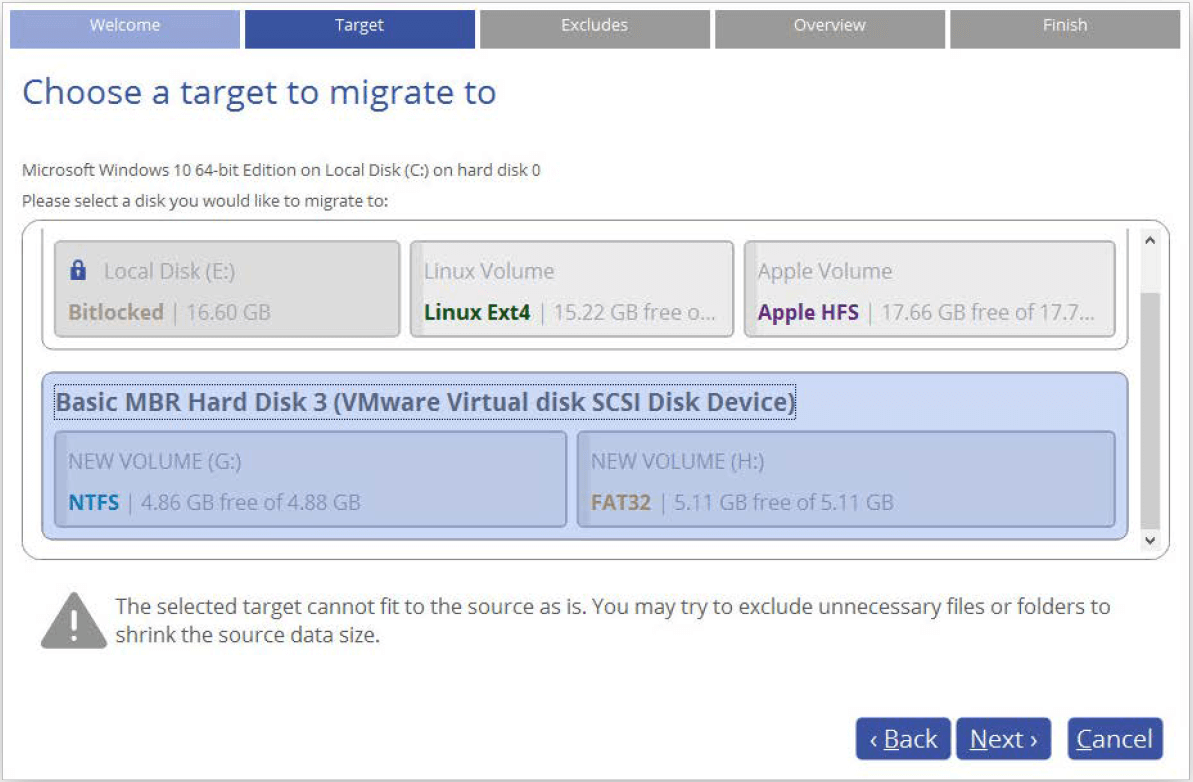
5. The program will now automatically detect the system-related partition(s) for you. Once this is done, you'll need to select a destination disk where the new OS will be installed. After choosing your destination disk, click Next to proceed.
6. If there's existing data on the destination disk, you'll be alerted that all data on the disk will be erased during the migration process. To avoid losing any important files, save them to another location before confirming to proceed.
7. (Optional) If the destination disk is not large enough to hold your OS, you'll be asked to exclude files from the main system partition. To determine exactly how much data needs to be excluded, click Calculate first.
Tip: If the destination disk is the same size or larger than the source, the data space calculation will not be available in the program's interface.
8. Review all parameters of the operation and modify them if necessary by clicking Back to go back to the required steps.
Tips:
● If the destination disk is larger than the source, the wizard will prompt you to expand the resulted partition across all on-disk space. If you don't need that, unmark the corresponding option.
● If the destination disk becomes Bootable GPT after migration, you'll see an option to make the OS bootable on this disk. You can also specify a bootable device at any time through the Boot Corrector.
9. Click Finish to execute the operation. You also have the option to "Perform the operation in the simulation mode" and "Send e-mail notification about results of this operation". Choose according to your needs.
Super alternative to run Paragon disk clone
While Paragon Drive Copy is effective for system migration or disk/partition copy, it requires a purchase and only supports Windows 7 SP1 and later operating systems. Fortunately, you can consider the best Paragon Drive Copy alternative, which is Qiling Disk Master Professional.
- If you're looking to upgrade your computer's storage or migrate your operating system to a faster solid-state drive (SSD), the Disk Clone feature in Paragon Drive Copy can help. It allows you to clone your hard disk drive (HDD) to a larger SSD or clone one SSD to another, making the process easy and efficient.
- If you're looking to copy a specific partition, such as an NTFS partition or an Ext4 partition, without cloning the entire drive, the Partition Clone feature in Paragon Drive Copy can help. It allows you to clone a selected partition to a new location, making it easy to transfer files and data without affecting other partitions on the drive.
- If you're looking to transfer your operating system to another hard drive without reinstalling it, the System Clone feature in Paragon Drive Copy can be a lifesaver. It enables you to clone your entire system, including the operating system, applications, and settings, to a new hard drive, making it easy to upgrade or replace your existing drive without losing any data or settings. This feature is particularly useful for upgrading to a faster or larger hard drive, or for replacing a failing drive.
- It supports both 32-bit and 64-bit version of Windows 11/10/8.1/8/7/Vista/XP.
Take the first step towards a seamless hard drive transfer experience. Download and install Qiling Disk Master on your computer today.
How to copy one hard drive to another via Qiling Disk Master
Before you begin, it's essential to back up any files on the destination drive, as the cloning process will erase all data on the destination. Once you've completed this crucial step, follow these steps to ensure a smooth cloning process:
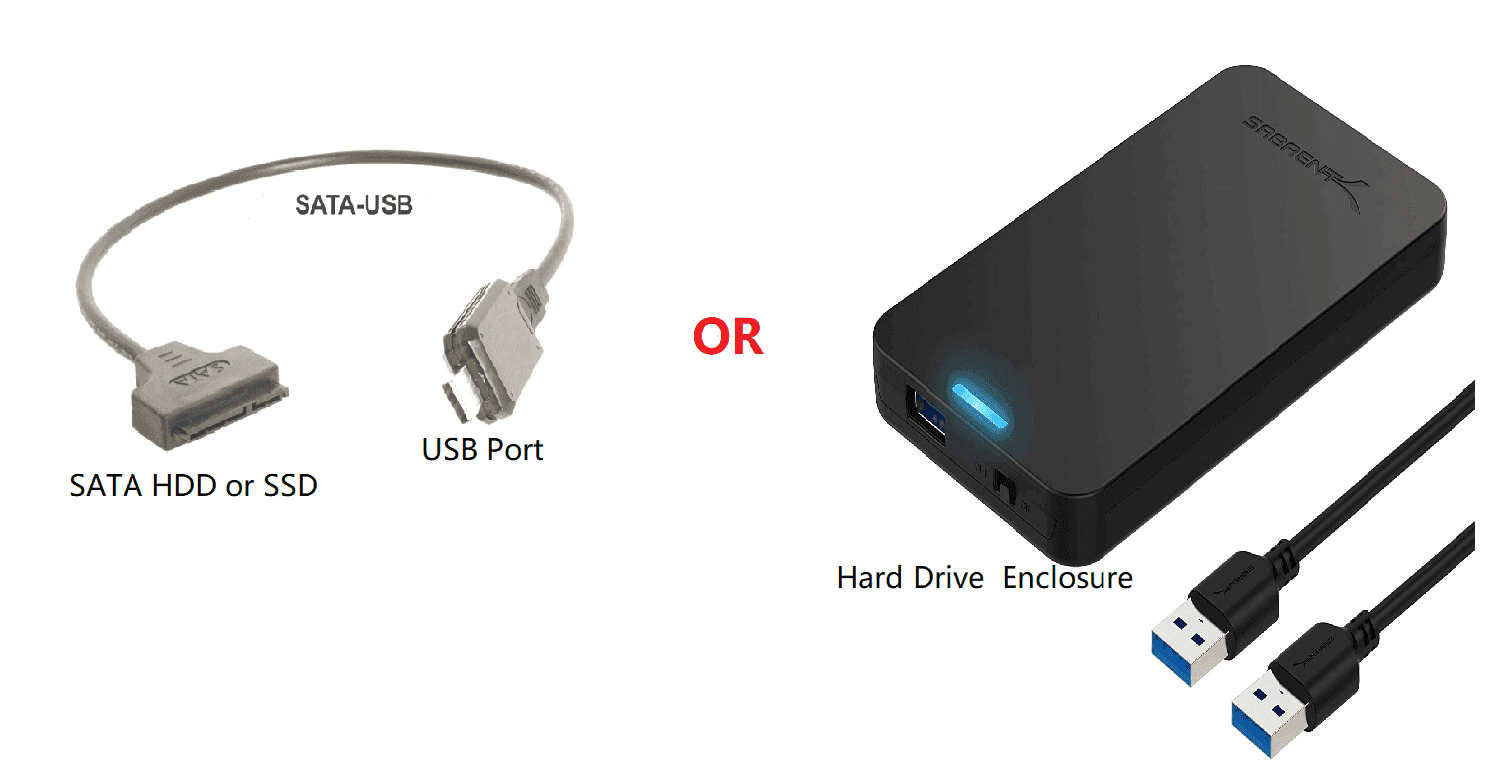
Step 1. Connect the destination drive to your computer and make sure it is detected.
Step 2. Run the best disk cloning software - Qiling Disk Master. Click "Tools and utilities" tab page and select "Disk Clone".
Step 3. To proceed with the disk cloning process using Qiling Disk Master, select the original hard drive on your PC as the source disk. This drive contains the data and operating system that you want to clone.
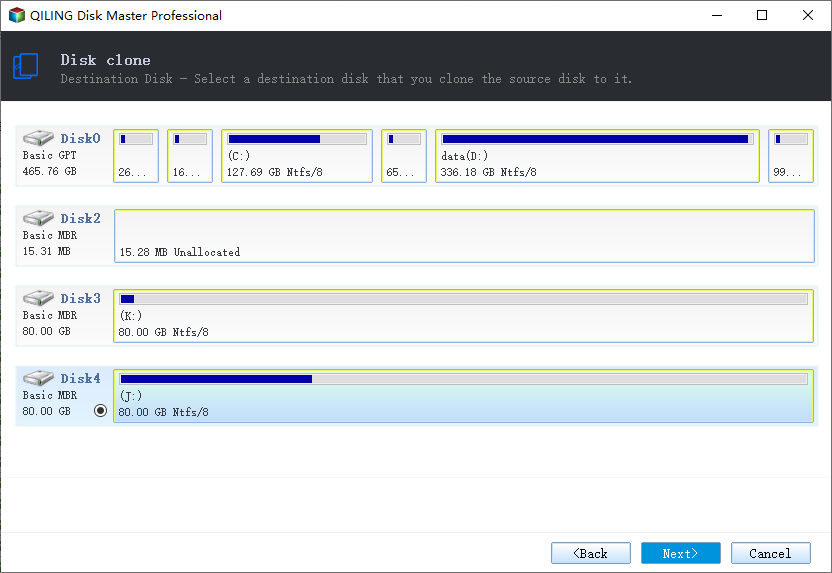
Step 4. To complete the disk cloning process using Qiling Disk Master, select the destination drive you have connected to your PC. This drive will store the cloned data and operating system.
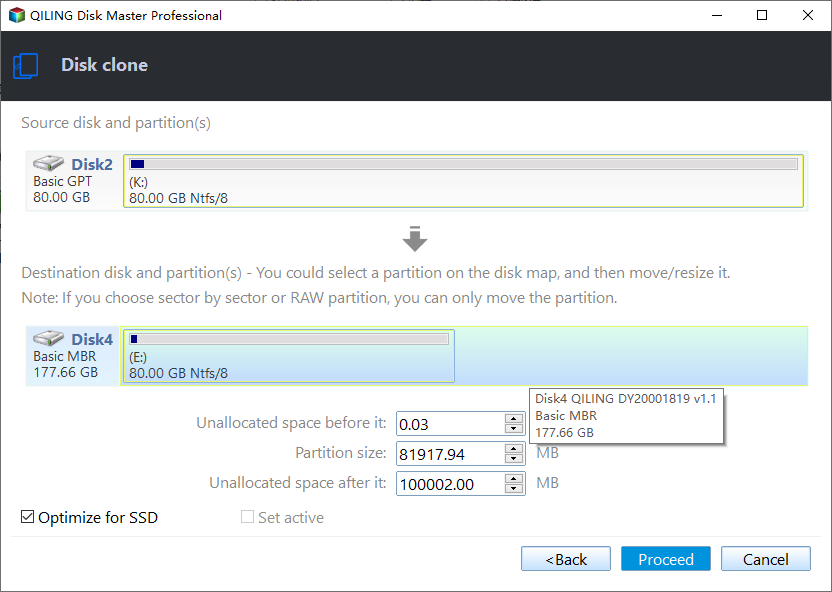
Step 5. Confirm the operation and click "Proceed".
>> Edit Partitions: : In the Qiling Disk Master software, you have the option to resize partitions on the destination disk or not. This is an important decision that will affect the overall performance and functionality of your cloned system.
>> SSD Alignment: : If you're cloning to an SSD (Solid-State Drive), you have the option to optimize the destination disk for SSD performance. This is a crucial setting that can significantly impact the reading and writing speed of your cloned system.
>> Sector by sector clone: : When you choose to clone every sector on the source disk, including those that are not in use, the process will be more time-consuming. This is because the software will copy every single sector, regardless of whether it's being used or not, which can take longer to complete.
Notes:
- When cloning a system disk using Paragon Drive Copy, it's essential to understand the process and the necessary steps to ensure a smooth transition.
- When you need to clone an operating system to a new destination disk, you have several options available. One of the most convenient and efficient methods is to use the System Clone feature in Paragon Drive Copy.
To sum up
Now you know what Paragon Drive Copy is and how to use it exactly. To clone a disk more flexibly, you may choose Qiling Disk Master. Its intuitive interface makes the clone operations pretty simple. What's more, it is embedded with the backup and sync features. You can backup multiple drives at once and �ync local folders to OneDrive, etc. Don't hesitate to give it a try!sync local folders to OneDrive, etc. Don't hesitate to give it a try!
Related Articles
- Quick Workaround to Paragon Migrate OS to SSD Stuck
Do you get annoyed because Paragon Migrate OS to SSD stuck at 0%? Learn a quick workaround to migrate OS to SSD in Windows 11/10/8/7 from this page. - How to Clone PS3/4 Hard Drive to New Larger HDD or SSD?
You will learn how to clone PS3 pr PS4 hard drive to larger drive or SSD with Backup and Restore method, thereby easily enlarging your Sony console's storage. - Clone BitLocker Encrypted Disk Drive in Windows 10/8/7
When your current drive is encrypted with BitLocker, you can use this specialist freeware to clone BitLocker Encrypted disk. 9 concerned FAQs are discussed. - How Do You Mirror a Hard Drive to SSD in Windows 7/8/10?
How to mirror a hard drive to external HDD or SSD easily? Try the best hard drive mirroring software - Qiling Disk Master offered in this article to clone disk easily in Windows 7, 8, 10, 11.
