Why Samsung Data Migration Stuck at 0%, 99%, 100% and How to Fix?
- Samsung Data Migration Stuck at 99 Percent
- Why does Samsung Data Migration fail at 99%, 100%, 0%?
- Quick Fixes for Samsung Data Migration Cloning Stuck
- Better Solution for Samsung Data Migration Software Stuck
- Summary
Samsung Data Migration Stuck at 99 Percent
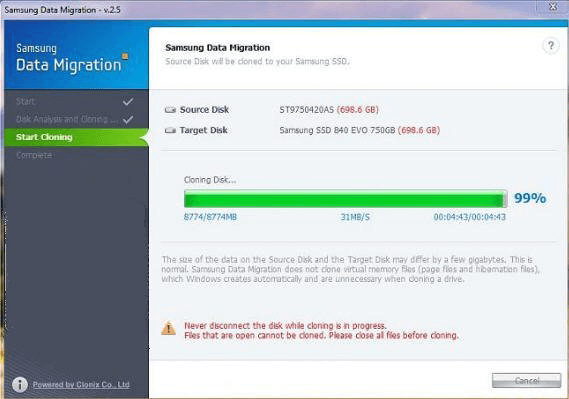
Some users report that they have some troubles with Samsung Data Migration (SDM) software. Here is the thing, when they follow the steps to transfer data from the old hard drive to a new Samsung SSD, mostly 840 EVO or 850 EVO, the Samsung Data Migration 99 problem. The time is ticking and the process stills. Four or five hours pass and no progress is made.
Coincidentally, some other users find the Samsung Data Migration tool stuck at 0 or 100 percent during the cloning process. Leave the cloning process alone overnight, for example, it may repeat endless looping. Some who with bad luck even get Samsung Data Migration install stuck or setup hangs. Why would this happen and what’s the best way to solve it?
Why does Samsung Data Migration fail at 99%, 100%, 0%?
It is hard to tell which specific part leads to the “Samsung Data Migration stuck at 99%”, but there are some common causes for the issue that you can take a look at. Before that, please make sure your SDM is of the latest version.
➩There is something wrong with one of your drives.
Are you experiencing issues with Samsung Data Migration cloning failing during the process? Don't worry; you're not alone. Many users have reported this problem, and there are some common causes that can help you identify the issue.
➩Too much data for destination Samsung SSD.
The perfect size of transferred data is 75% space of the target disk. For example, if you want to transfer to an SSD with 500GB capacity, you might as well keep transferred data less than 375GB (500GB*75%). Then you should delete useless data on the original drive or move some large apps to another place that is neither the original disk nor the target SSD.
➩Transferring large files or partitions to Samsung SSD.
When using Samsung Data Migration to clone data to a new SSD, it's not uncommon for the program to become unresponsive or freeze during the cloning process. There are several reasons why this might happen, and understanding these reasons can help you troubleshoot and resolve the issue.
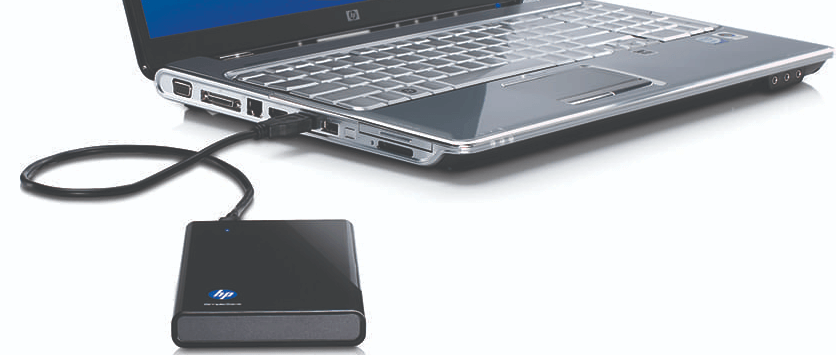
➩It is the problem of the SATA port or SATA-to-USB cable.
If you're experiencing issues connecting your SSD to a computer, there are several troubleshooting steps you can take to resolve the problem.
Quick Fixes for Samsung Data Migration Cloning Stuck
If you're experiencing issues with your SDM (Software Development Management) system, there are several strategies you can try to resolve the problem.
Step 1. Create a full backup of hard drive and save the backup to another drive.
Step 2. Create a bootable USB drive or download an ISO file and burn it to a USB drive.
Step 3. Replace the old hard drive with the new Samsung SSD manually.
Step 4. Boot your computer from the bootable USB device.
Step 5. Connect the storage that contains backup image and do the restoring. Restart is required.
During this process, you'll need: USB drive as bootable device, storage (another USB flash drive or network path) to store backup images, screwdrivers to uninstall the hard drive, and time and patience surely.
If you have installation disc around and has no problem with clean install, things would be easier. Just backup all personal data to another place, switch hard drive with SSD, clean install Windows 7, 8, 10, or 11 on that SSD with your installation disc, apply all updates and patches, create a new partition on SSD, and perform data restoring.
Better Solution for Samsung Data Migration Software Stuck
Transferring data from an old hard drive to a new Samsung SSD without reinstalling can be a daunting task. However, with the right tools, it can be a seamless process. Disk cloning software is a reliable and efficient solution to transfer all data from the old hard drive to the new SSD.
Are you experiencing issues with Samsung Data Migration getting stuck at 99%? Look no further than Qiling Disk Master Standard, a free alternative that can help you clone your hard drive to a Samsung SSD with ease.
Step 1. Connect Samsung SSD to your computer and make sure it can be recognized. If you are using a laptop, you might need a SATA-to-USB cable.
Step 2. Install and run Qiling Disk Master. Click "Clone Disk" in the right menu.
Step 3. Choose a copy method based on your own needs. To copy a large drive to a smaller Samsung SSD, it is advised to choose "Clone Disk Quickly".
Step 4. Choose the destination disk.
Step 5. You're allowed to edit disk partitions now or any time after cloning in the future. A Note about how to boot from cloned drive comes up later. You may want to bear it in mind.
Step 6. After the cloning process, you'll see all partitions have been successfully transferred to the target Samsung SSD. This is a virtual representation of the cloned drive, and it's essential to verify that everything is correct.
Step 7. After cloning the system disk, you'll need to reboot your computer to ensure a successful cloning process.
Tips:
◆ The free standard version of the cloning software has limitations when it comes to cloning system disks.
◆ To get the most out of your Solid-State Drive (SSD), consider enabling the "Optimize SSD Performance" feature. This option can significantly enhance the SSD's reading and writing speed, ultimately prolonging its lifespan.
◆ If you're looking to repurpose an old hard drive as extra storage, consider reformatting it. This process will erase all data on the drive, allowing you to use it as a storage device for your files, photos, and other media.
Summary
If you're experiencing issues with Samsung Data Migration getting stuck at 99, 0, or 100 percent, don't hesitate to seek help. There are easier and more convenient solutions available.
If you're planning to upgrade to Windows 11 but your current hard drive is an MBR disk, you'll need to take a few extra steps. Qiling Disk Master Professional can help you with this process.
Related Articles
- SanDisk Repair Tool to Fix SanDisk Memory SD Card/Pen Drive/USB/SSD
If you're looking for SanDisk SD card repair tool, SanDisk USB repair tool, or SanDisk format tool, I suggest you try the right SanDisk repair tool to fix the memory card, USB drive, Pen drive, HDD, or SSD problems according to the symptoms. - Best Get Data Back Full Version Crack Alternative Free Download in 2022
Download best alternative software to replace Get Data Back full version crack and let the NTFS, FAT, FAT32, exFAT, EXT recovery software to get data back from all drives, USB memory stick and memory card. - Best Hetman Partition Recovery Free Alterantive Software Download
Stop using Hetman Partition Recovery full crack with invalid registration key. It will not help at all to retrieve deleted or lost data from formatted, repartitioned, unreadable and inaccessible hard drives, USB and SD card, etc. Instead, choose a safer and more cost-effective Hetman Partition Recovery alternative software for help. - How Much Does It Cost to Recover Data from a Hard Drive (2022)
How much does it cost to recover data from a hard drive, USB flash drive, or SD card? Do not be scared of data recovery prices. We explain how much data recovery software and manual data recovery service charge for their services. Choose the best data recovery strategy to get back lost data from your hard drive, USB, or SD card with simple steps.


