Samsung Series 9 SSD (NP900x4C) Upgrade - Complete Guide
Quick Navigation:
- About Samsung Series 9
- Best Samsung SSD Upgrade Software - Samsung Data Migration or Qiling Disk Master
- Before You Do Samsung Series 9 SSD Upgrade
- Perform Samsung NP900X4C SSD Upgrade with Secure Boot
- The Epilogue
About Samsung Series 9
Samsung Series 9 is a series of ultra-thin notebook that owns excellent appearance and performance and offers a better experience for Windows users, which tries to contend with Macbook Air.
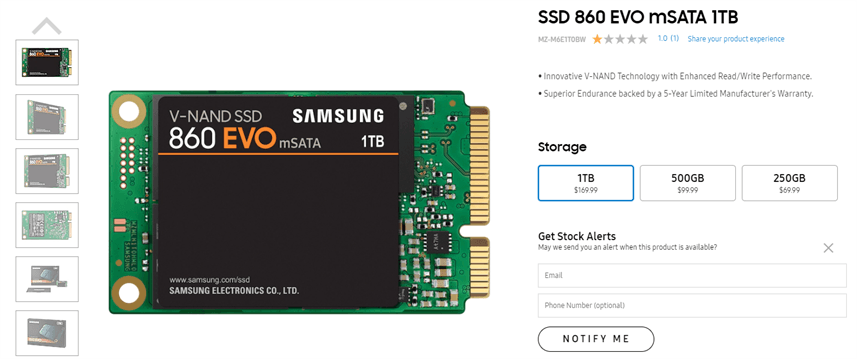
This Ultrabook is configured with a 128GB or 256GB MSATA SSD drive and it usually boots up faster than HDD. Obviously, the hard drive capacity will fill up with data and files. In order to extend hard drive space and speed up the computer, the best solution is performing Samsung series 9 SSD upgrade. Below are example from forum:
“I recently bought a Samsung Series 9 Ultrabook NP900X4C, which has a 128GB MSATA SSD drive. And I want to upgrade SSD to 256GB, and I want to move all the data to the new SSD, but I have never done this before, can anyone give me some advice for the Samsung series 9 SSD upgrade? Any help would be appreciated.”
Best Samsung SSD Upgrade Software - Samsung Data Migration or Qiling Disk Master
Like other manufacturers, Samsung offers users a data migration software called Samsung Data Migration, but it does not preinstall on the computer. Thus, please go to the official site and download Samsung SSD Integrated Installer first. However, there are some limitations and errors while using Samsung Data Migration to do Samsung np900x4c SSD upgrade.
- Samsung Data Migration cloning failed.
- Not responding while cloning.
- Samsung Data Migration cannot change source disk.
- Only support clone system disk, not the data disk.
- Cannot clone dynamic disk, etc.
If you are in any of the above cases, try the best Samsung migration software - Qiling Disk Master Professional. Similar to Samsung Data Migration, it allows you to clone HDD to Samsung SSD and offers more flexible features.
- Copy boot drive to another one with everything transferred, including the Windows system, installed programs, settings, and files, etc. And it takes care of the secure boot from different aspects.
- Support to clone system disk and data disk, whether it is a basic disk (HDD, or SSD), dynamic disk, or RAID disk.
- Optimize the overall performance of the Samsung np900x4c SSD and prolong its lifespan.
- Clone and resize hard drive to make full use of disk space on the destination disk. And you can also convert disk type (MBR or GPT) if the source disk and destination disk owns different.
- Widely used in Windows 11, 10, 8.1, 8, 7, Vista, and XP, including 32-bit and 64-bit.
Before You Do Samsung Series 9 SSD Upgrade
To make the Samsung series 9 SSD replacement successful, please prepare the following:
✍ A new larger mSATA SSD drive. Make sure your new SSD drive is compatible with your notebook, below are worth trying options, if you have problems consult your computer’s manufacturer.
- For a larger Samsung SSD, you can choose Samsung PM 851, Samsung PM 871, etc. For disk capacity, you can use is 256GB or 512GB, depending on how much data you have.
- For other SSD disks, you can choose Crucial X8 portable SSD, Kingston KC600, Transend 230S, etc.
✍ Withdraw tools. Since the Samsung Series 9 laptop has only one hard drive slot, you have to take out the original SSD drive and put the new SSD drive into the slot with some screwdrivers and other tools.
✍ External hard drive. Backup your current SSD drive to the external hard drive. Then, use the external hard drive to restore to new larger mSATA SSD.
✍ mSATA to USB enclosure.
After making these preparations, download the Samsung SSD migration software - Qiling Disk Master Professional to have a try. Note the free trail version only supports demonstration. So if you are sure you want to upgrade to Samsung SSD, please upgrade pro trial to the official version.
(PS: This version is applicable to Windows 11, 10, 8.1, 8, 7, Vista, and XP. For who is running Windows Server 2003, 2008, 2012, 2016, 2019, SBS 2003, 2008, 2011, please try Qiling Disk Master Server.)
Perform Samsung NP900X4C SSD Upgrade with Secure Boot
In fact, there are two ways to perform Samsung series 9 SSD upgrade in the best Samsung data migration software - Qiling Disk Master. Select one of them and follow the steps carefully.
- Way 1: Clone mSATA SSD to larger mSATA SSD with Disk Clone.
- Way 2: Create Disk image of the smaller mSATA SSD and restore to larger mSATA SSD. You need to create a bootable media with Qiling Disk Master if your computer is unbootable or you want to restore image without booting into Windows.
Way 1. Upgrade SSD for Samsung Series 9 with Disk Clone
Step 1. Use the mSATA to USB enclosure to connect the larger mSATA SSD with your Samsung Series 9, such as Samsung NP900X4C SSD, and make it can be detected.
Step 2. Then, launch Qiling Disk Master Professional, and choose Clone > Disk Clone subsequently.
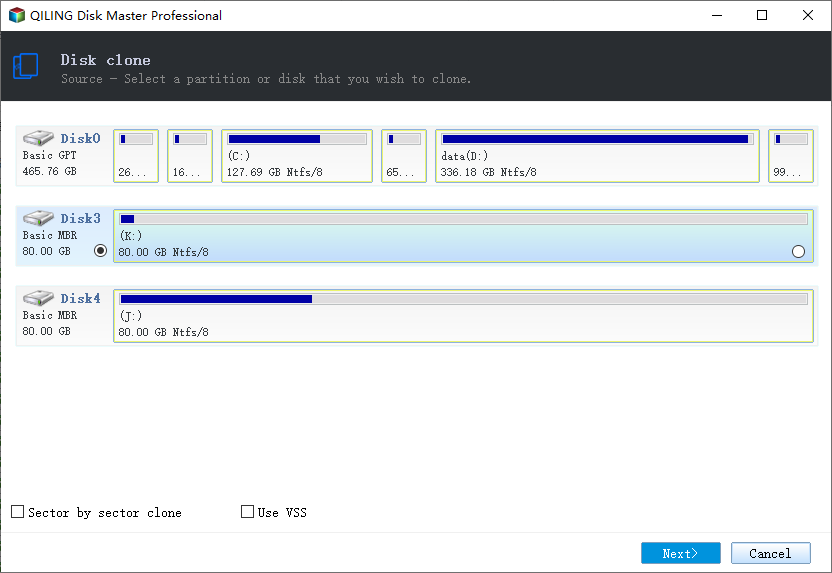
Step 3. Choose the original mSATA SSD as the source disk to clone, and press Next.
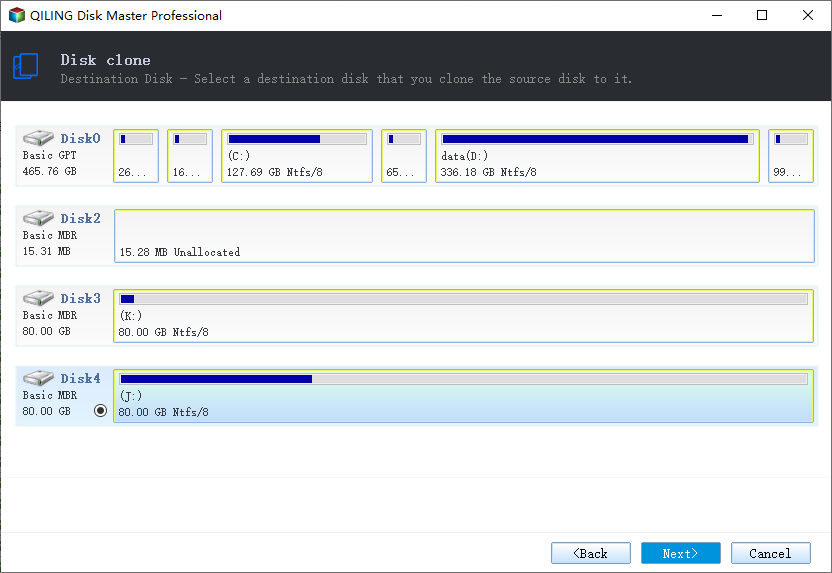
Step 4. Select the larger mSATA SSD as the destination disk, and press Next.
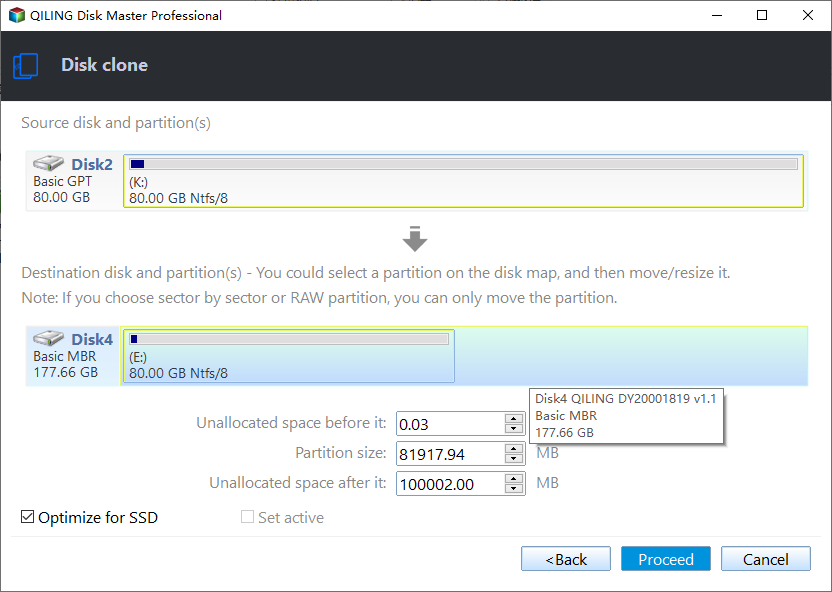
Step 5. Click SSD Alignment to speed up the performance of the SSD and prolong its lifespan. Tick Edit Partitions and Add unused space to all partitions or Adjust partition size manually to make full use of space on the larger mSATA SSD. Then, confirm the cloning task and press Proceed to start the Samsung NP900X4C SSD Upgrade.
After the Samsung Series 9 SSD upgrade finished, you could shut down the computer, replace the original mSATA SSD with the new larger cloned SSD. Then boot from the cloned SSD, that’s all.
Way 2. Upgrade Samsung Series 9 SSD with Backup and Restore
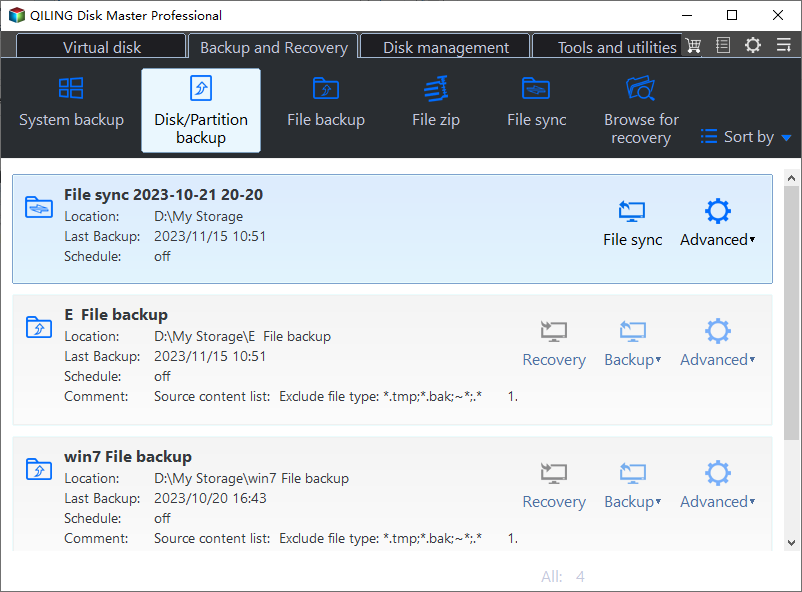
Another way to do Samsung Series 9 SSD replacement is backing up the original SSD drive to an external hard disk, then restoring the image file to the new larger SSD drive. Below are the detailed steps.
Step 1. Backup Samsung Series 9 SSD
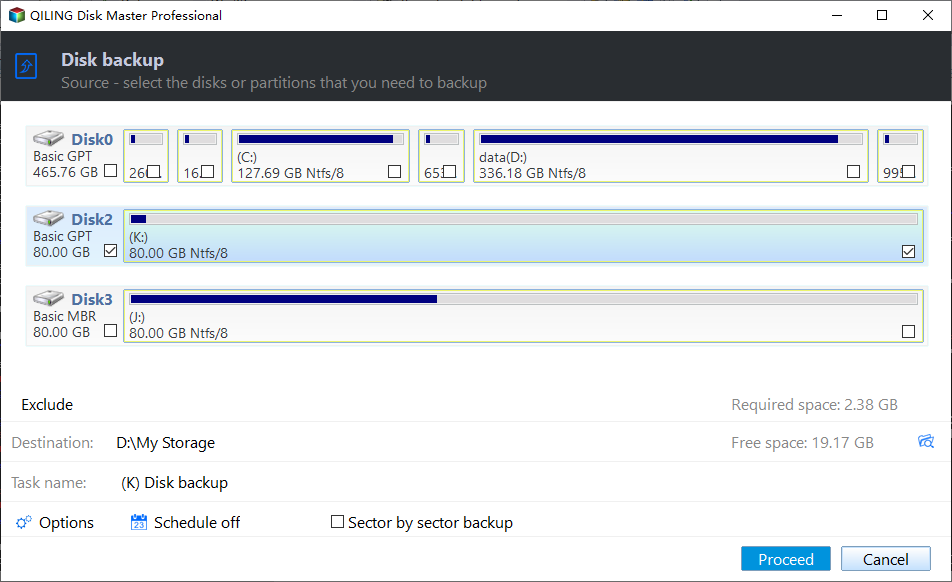
1. Connect the external hard drive via mSATA to the USB enclosure, and ensure it can be recognized. Launch Qiling Disk Master Professional, and select Backup > Disk Backup in turn.
2. Select the original smaller mSATA SSD drive and larger mSATA SSD drive separately. Edit the task name if you want.
3. Press Proceed when you are ready.
Step 2. Replace Samsung Series 9 original SSD with larger SSD
Once you have backed up the smaller SSD drive, shut down the Samsung series 9 laptop. Take out the original SSD drive with withdraw tools and put the new larger SSD drive into the slot.
1. At the beginning, remove the back panel of the laptop.
2. Remove the screws at the top of the smaller mSATASSD disk, gently lift it up from the top using a plastic opening tool and pull away from the drive slot.
3. Gently install the larger mSATA SSD with the opposite operation.
4. After removing old SSD and new SSD, you still need to remove the heat tape from the old SSD and install it on the new SSD. That's it.
Step 3. Restore Disk Image to Larger mSATA SSD Drive
1. connect the external hard drive that contains the disk image file. Then, insert the bootable media created before into the Samsung Series 9 notebook, and boot the computer from it. It will bring up the Qiling Disk Master interface automatically.
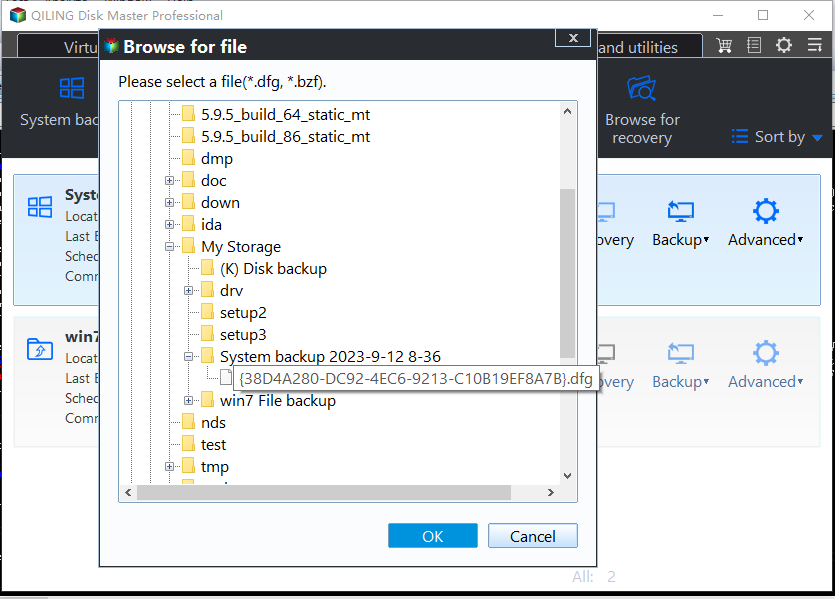
2. Click the Restore tab, and choose Select Task or Select Image file to locate the disk image.
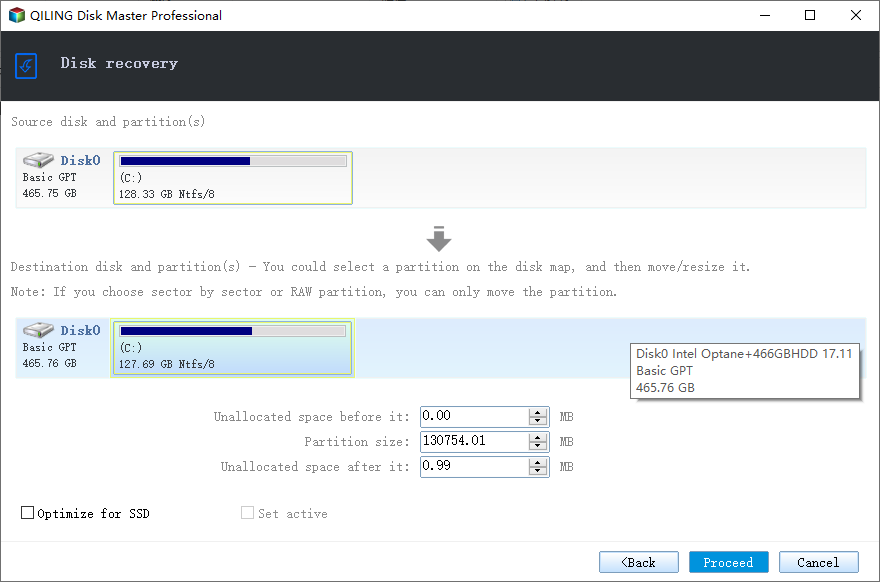
3. Tick Restore the entire disk and click Next.
4. Press Proceed to upgrade SSD to a larger SSD for Samsung Series 9 notebook. Please remember to set the Edit Partitions feature to prevent unallocated space and tick SSD Alignment to boost disk performance.
★ Tip: The Universal Restore feature allows you t restore the disk image from one computer to another with dissimilar hardware installed.
After these operations, restart the computer, set up the larger SSD as the first boot order, then boot up the Samsung Series 9. If all goes well, you have successfully completed the Samsung series 9 SSD upgrade.
Except for the Samsung NP900x4C SSD upgrade, you still can use both methods to upgrade different Samsung SSDs, such as, Samsung NP900x3C SSD upgrade, Samsung NP900x4D SSD upgrade, Samsung NP900X4B SSD upgrade, etc, and other brands of SSDs.
The Epilogue
It’s quite easy to perform Samsung Series 9 SSD upgrade with the help of Qiling Disk Master, and in this software, you have two ways to complete the SSD replacement, namely using Disk Clone and Disk Backup and Restore features. The main difference between them is the migration speed and operational difficulty.
Honestly, the cloning method is easy to operate and helps users replace SSD quickly. While for backup and restore method, it focuses more on continuous data protection, which will backup data and changes on the entire disk regularly. You can enjoy Daily, Weekly, Event triggers, etc schedule backup as well as backup scheme to free up disk space.
Related Articles
- Easiest Samsung Laptop SSD Upgrade Kit - Qiling Disk Master
- Tutorials: Clone Hard Drive to Samsung SSD (Secure Boot) in Windows
- Top Two Ways to Clone Samsung SSD to another SSD without Reinstalling
- How to Corrupt a PDF File so That It Can't Be Opened (Step-by-Step Guide)
How to corrupt a PDF file so that it cannot be opened? This how-to article teaches you how to corrupt a file in two ways by using Notepad and Corrupt a File.Net tool. Meanwhile, if you mistakenly corrupt a wanted PDF, use Stellar PDF file repair tool to fix the corrupted PDF files efficiently. It can restore the text, hyperlinks, graphs, watermark, and digital signatures from corrupted PDF files efficiently.
