Top 3 Free SanDisk SSD Clone Software for Windows 11, 10, 8, 7
Quick Navigation:
- Why do you need SanDisk clone software?
- SanDisk cloning software 1 - Qiling Disk Master Standard
- Example: clone HDD to SanDisk SSD with Qiling Disk Master
- SanDisk cloning software 2 - Qiling Disk Master Standard
- Example: clone smaller SSD to larger SSD
- SanDisk cloning software 3 - Apricorn EZ Gig IV
- Example: clone HDD to SSD
- Comparison
Why do you need SanDisk clone software?
SanDisk SSDs, known for their exceptional performance and seamless compatibility with Windows OS, offer a faster read and write speed compared to traditional HDDs. These solid state drives store data using a small chip, making them a popular choice among users seeking a reliable and efficient storage solution.
Currently, upgrading to a SanDisk SSD often involves replacing an old hard drive with a new one, which can be done by cloning the existing HDD to the SanDisk SSD or by upgrading to a larger SanDisk SSD. In either case, a reliable SanDisk clone software is essential to ensure a smooth and successful cloning process.
While there are numerous disk cloning tools available, many of them come with a price tag. Fortunately, we've curated a list of three free SanDisk cloning software that can help you achieve your cloning goals. Take a look and choose the one that suits your needs best.
SanDisk cloning software 1 - Qiling Disk Master Standard
First up is Qiling Disk Master Standard, a top-notch free SanDisk cloning software for Windows 10/11 that deserves a mention.
|
💾 Cloning Types |
It offers you two types of cloning: Disk Clone and Partition Clone. You can select one according to your requests. |
|
💡 Intelligent Clone |
With the Intelligent Clone feature, you can copy only the used part which makes it possible to clone larger drive to smaller SSD. |
|
👍 Clone Various Disks |
You can clone hard drives of different sizes, interfaces and brands, such as clone HDD to Crucial SSD. |
|
📂 Backup & Restore |
It is not only SanDisk cloning software but also comprehensive backup & restore software. It can help you backup your system, entire hard drive, individual partition, and selected files. |
Example: clone HDD to SanDisk SSD with Qiling Disk Master
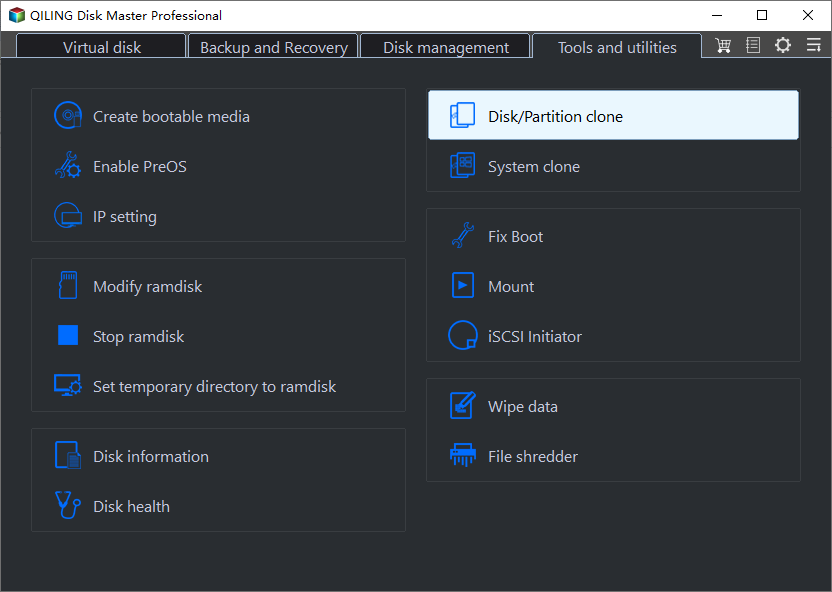
Step 1. To get started, download the free edition of Qiling Disk Master Standard and install it. Once launched, navigate to the Clone section and select the Disk Clone option to clone the entire hard drive to your SanDisk SSD.
💡Note: Note that this version of Qiling Disk Master Standard only supports cloning data disks. If you need to clone a system disk, you'll need to upgrade to the Qiling Disk Master Professional version.
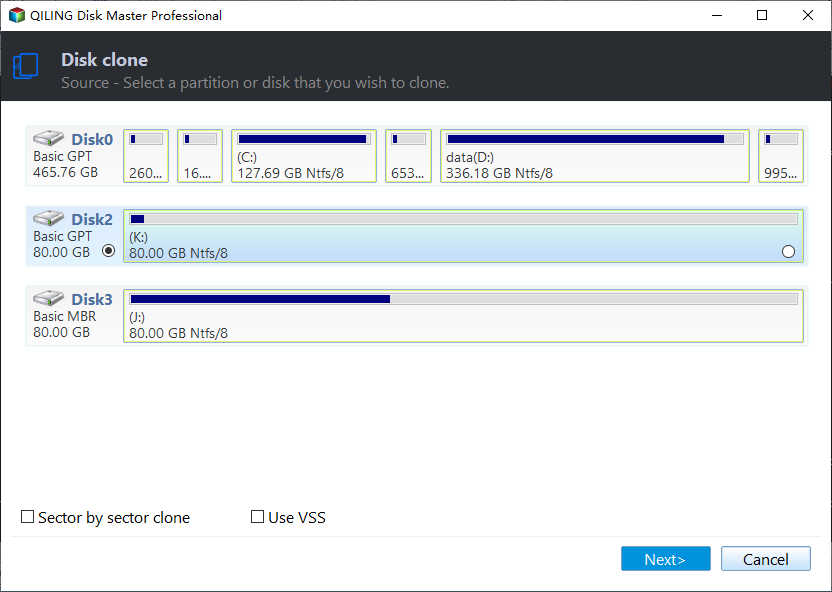
Step 2. Next, you'll need to select the source disk. To do this, follow the guidance provided.
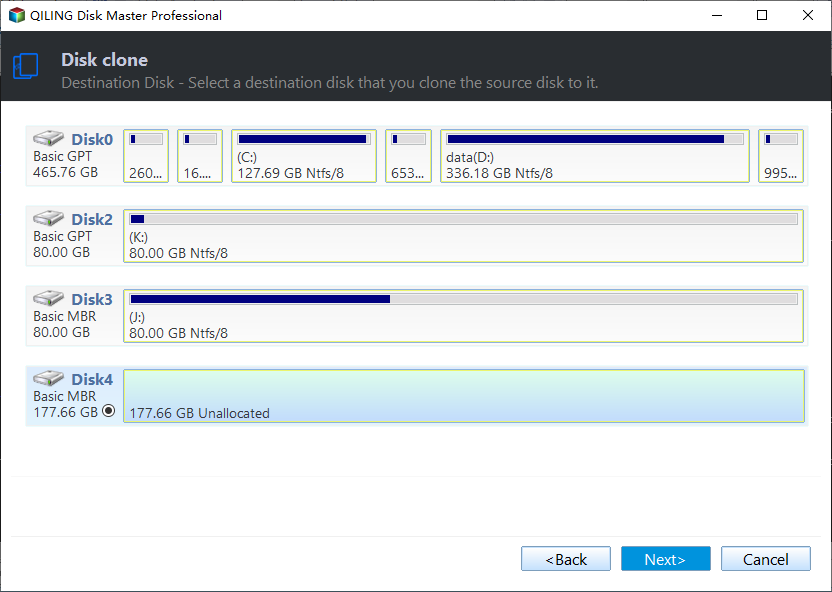
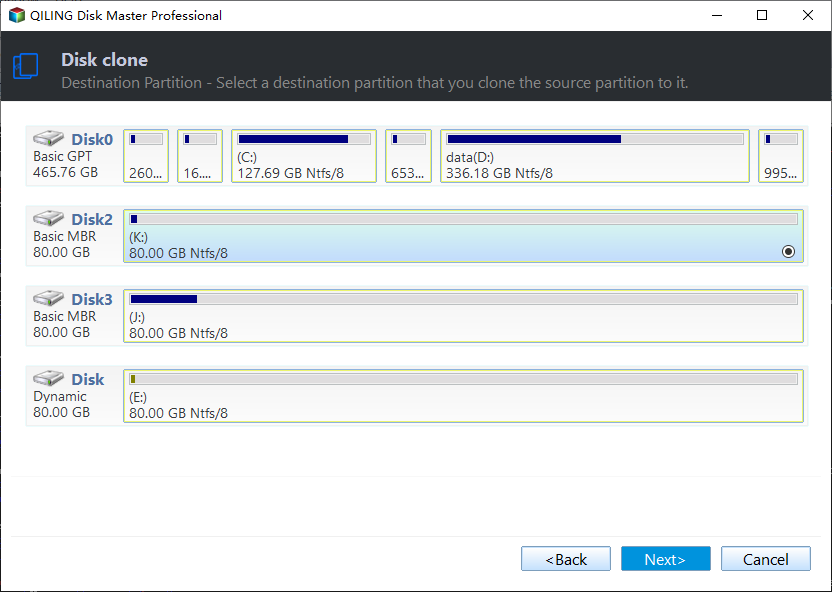
Step 3. Select the SanDisk SSD as the destination disk.
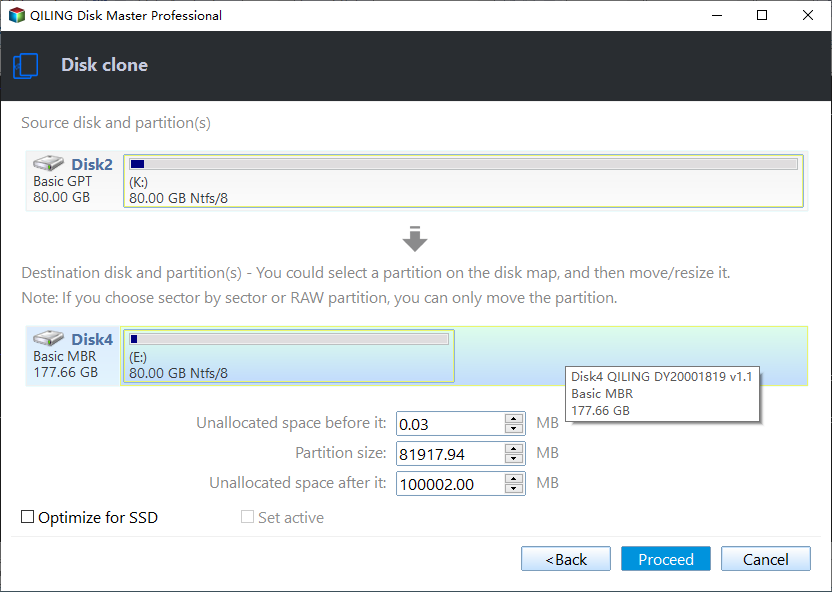
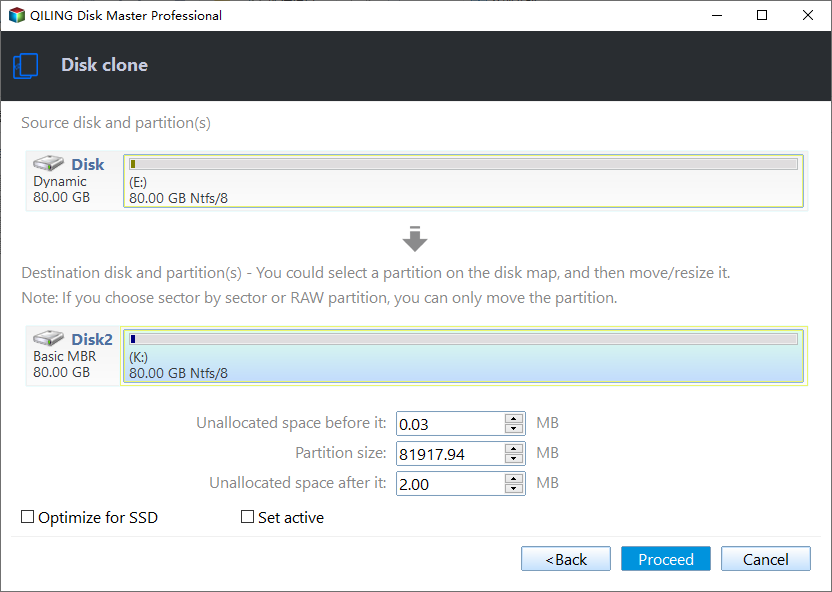
Step 4. After choosing the source and destination disks, confirm the operations. We highly recommend checking the box next to "SSD Alignment" to automatically optimize the SanDisk SSD's performance. Then, click Proceed to initiate the process.
Tips:
✽ You can edit partitions (available in the Professional version) on the destination disk to ensure it's set up for optimal use.
- Copy without resizing partitions: It will not resize the partitions.
- Add unused space to all partitions: Resizing partitions on a target disk requires allocating unallocated space to each partition accurately, a process that can be time-consuming and error-prone if not done correctly.
- Manually adjust partition size: One of the key benefits of resizing partitions on a destination disk is the flexibility to extend unallocated space to any partition as needed. This allows for a tailored disk layout that meets the specific needs of your system, ensuring each partition has the necessary space to operate efficiently.
- Convert the destination disk from MBR (GPT) to GPT (MBR): A major benefit of resizing partitions on a destination disk is the ability to synchronize the partition style with that of the source disk. This consistency eliminates potential compatibility problems and streamlines the process of working with the disk.
✽ To clone every byte from your HDD to your SSD, simply select the option to perform a "Sector by sector clone". However, please ensure that your SanDisk SSD is at least as large as your source disk before proceeding.
✽ After cloning your system disk to the SanDisk SSD, you'll need to either replace the old disk with the SSD or adjust the BIOS settings to boot from the SSD instead of the old disk. This will ensure a successful boot from the SSD.
✽ In addition to its functionality as a SanDisk cloning software, this tool also serves as an M.2 SSD cloner, allowing you to clone an M.2 SSD to another M.2 SSD, migrate Windows 10 to an M.2 SSD, and more.
SanDisk cloning software 2 - Qiling Disk Master Standard
Qiling Disk Master Standard is a free and user-friendly hard drive partition manager and SanDisk SSD clone software. This tool enables users to perform SanDisk SSD cloning, allowing you to clone an entire hard drive to another or simply migrate your operating system to an SSD or HDD. Download this free software to learn how to clone an SSD to another SSD drive.
Example: clone smaller SSD to larger SSD
Step 1. To begin, install and launch the Qiling Disk Master Standard tool. From the left-hand menu, select the Disk Copy Wizard option under All Tools.
Step 2. Next, within the pop-up window, choose the desired SSD clone method. You can select either Copy Disk Quickly or Sector-by-sector Copy, depending on your specific needs and preferences.
Step 3. To proceed, select the smaller SSD as the source disk and the larger SSD as the target disk. In the subsequent window, make sure to check the option to Optimize the performance of SSD, which will automatically align the SSD partition for improved performance.
Step 4. Next, edit the partitions on the target SSD. Choose one of them based on your specific needs and requirements.
Step 5. Click Proceed to execute pending operations.
SanDisk cloning software 3 - Apricorn EZ Gig IV
The last software we'll introduce is EZ Gig IV, a cloning tool commonly used for upgrading HDD to SSD and creating bootable CDs. However, to utilize EZ Gig effectively, consider pairing it with one of Apricorn's latest products, such as Drivewire, EZ Upgrade, Velocity Solo, or SATA Wire, SATA Wire 3.0. If you don't, EZ Gig may not function as intended.
Example: clone HDD to SSD
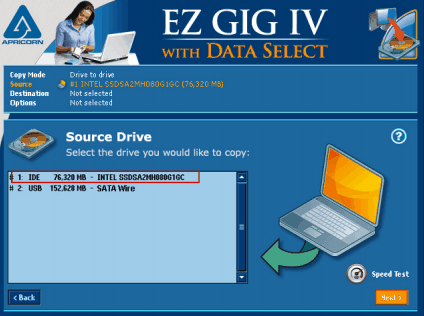
Step 1. First, connect the SanDisk SSD to your computer. Ensure it's detected by the cloning software, as the new SSD won't be visible in Windows Explorer, but the cloning software will recognize it. Next, launch the EZ Gig IV software. You can complete the process in three straightforward steps. Begin by selecting the source disk.
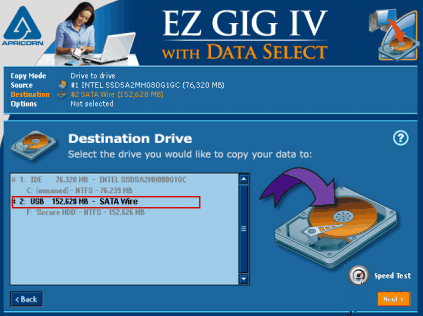
Step 2. Then, select the destination disk.
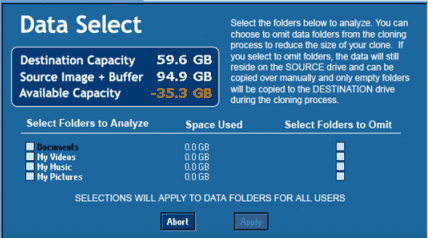
Step 3. You can use the Data Select tool to deselect specific files or folders from being cloned, allowing you to clone from a larger HDD to a smaller SSD. Once you've made your selection, click the Proceed button to initiate the cloning process.
Comparison
Each of the three SanDisk SSD clone software tools has its own benefits. Notably, all three can facilitate the process of cloning a SanDisk SSD to a larger one, as well as cloning an HDD to a SanDisk SSD.
If you're also looking for a backup tool for your PC, Qiling Disk Master is a good option, as it's also a comprehensive backup tool. If you need to manage and partition your hard drive, Qiling Disk Master Standard is a suitable choice. Alternatively, if you're using one of Apricorn's latest products, you may want to try EZ Gig IV.
Related Articles
- Samsung Data Migration MBR to GPT Cloning (2 Ways Included)
- Migrate Windows 7/8/10 OS to SanDisk SSD
- The Best SanDisk SSD Data Migration Free Software
- Create Image of SSD Drive with Free SSD Image Software
Be aware of how to create an image of SSD can prevent data loss when your SSD fails. Qiling Disk Master can be the best tool for your manipulation.

